Every Ugadi morning in our home began with the scent of jasmine flowers, fresh mango leaves adorning the doorway, and the rhythmic clang of steel tumblers as everyone hurried through the morning pooja rituals. Amidst all this, one quiet dish always sat on the kitchen counter, waiting to be mixed Kosambari.
I remember my grandmother preparing it with her graceful calm while the rest of us were caught up in festive chaos. The yellow moong dal would be soaked early in the morning, perfectly timed to soften by lunch. She’d peel crisp cucumbers, grate snowy coconut, and chop tiny green chilies that looked so innocent but packed quite the punch.
When she finally mixed everything together the tender lentils, crunchy cucumber, and coconut it wasn’t just a salad; it was a tradition in a bowl. And when the tempering hit the mixture, the mustard seeds crackled like firecrackers and the aroma filled the kitchen, signaling the start of the festive meal.
Even today, one bite of that cool, lightly seasoned salad takes me back to those temple lunches on banana leaves where Kosambari sat beside Payasam, Puliyogare, and Sagu balancing every spicy, rich flavor with its quiet simplicity.
Rinse the moong dal 2–3 times until the water runs clear. Soak it in a cup of water for about 1–2 hours, until the lentils turn slightly soft but retain their shape. Drain completely using a sieve and keep aside. (Tip: Don’t over-soak the lentils should have a bite, not become mushy.)
2. Prepare the Salad Base
In a large mixing bowl, combine the soaked dal, chopped cucumber, grated coconut, green chilies, lemon juice, and salt. Mix everything gently with a spoon until well combined. Add freshly chopped coriander for that bright, herbal touch.
3. Make the Tempering (Optional but Traditional)
In a small pan, heat ghee (or oil). Add mustard seeds and let them splutter. Then add hing and curry leaves, and fry for a few seconds until aromatic. Pour this sizzling tempering over the salad mixture.
The moment it touches the bowl, you’ll hear a soft hiss that’s when you know the magic is happening. Stir lightly to coat everything evenly.
4. Chill and Serve
Kosambari tastes best slightly chilled or at room temperature. Let it rest for 10–15 minutes before serving, so the flavors from the tempering, lemon, and coconut meld beautifully.
Serve it in a small bowl or banana leaf cup (donne) alongside your festive meals or enjoy it solo as a light, protein-rich snack.
Expert Tips for Authentic Flavor
Soaking Time: The ideal texture of the moong dal is soft yet firm. Soak for about 1–2 hours not more. Over-soaking makes it mushy and ruins the crunch.
Fresh Ingredients Matter: Always use fresh coconut and tender cucumbers. The combination gives the salad its signature lightness and fragrance.
Temple-Style Version: Skip the onions or garlic entirely. Use ghee instead of oil for the tempering to capture the satvik temple flavor.
For a Twist: You can add grated carrot, finely chopped raw mango (for tanginess), or pomegranate seeds (for sweetness and color).
Serving Tip: Kosambari is best served immediately after mixing. If making ahead, keep the soaked dal and chopped veggies separate and mix just before serving.
Pairing Suggestion: Serve it alongside South Indian festive dishes like Puliyogare, Chitranna, or Bisi Bele Bath for a complete Karnataka-style thali.
Closing Note
Every family has that one recipe that feels like sunshine in a bowl for me, Kosambari is exactly that. It’s humble, refreshing, and quietly nourishing. In a world where food often feels complicated, this simple salad reminds us that true comfort lies in simplicity in the rhythm of soaking lentils, the crunch of cucumber, and the scent of tempering drifting through a festive home.
When I make Kosambari today, I still serve it the way my grandmother did in a small steel bowl, with a drizzle of ghee and a smile that says, “Eat slow, this is how traditions taste.” 💛
For Bengalis, Durga Puja is as much about feasting as it is about devotion. I can still picture myself as a child, sitting eagerly on the floor with a banana leaf spread out in front of me. Volunteers at the local pandal would come around with buckets of bhog (community feast), generously serving ladlefuls of khichuri (rice-lentil porridge), Labra, tomato chutney, and payesh (sweet rice pudding) onto our leaves. The air would be thick with the mouthwatering aroma of ghee, spices, and incense. One bite of that warm, mildly spiced Labra mixed with the ghee-soaked khichuri, and I felt the true spirit of Puja come alive in my mouth.
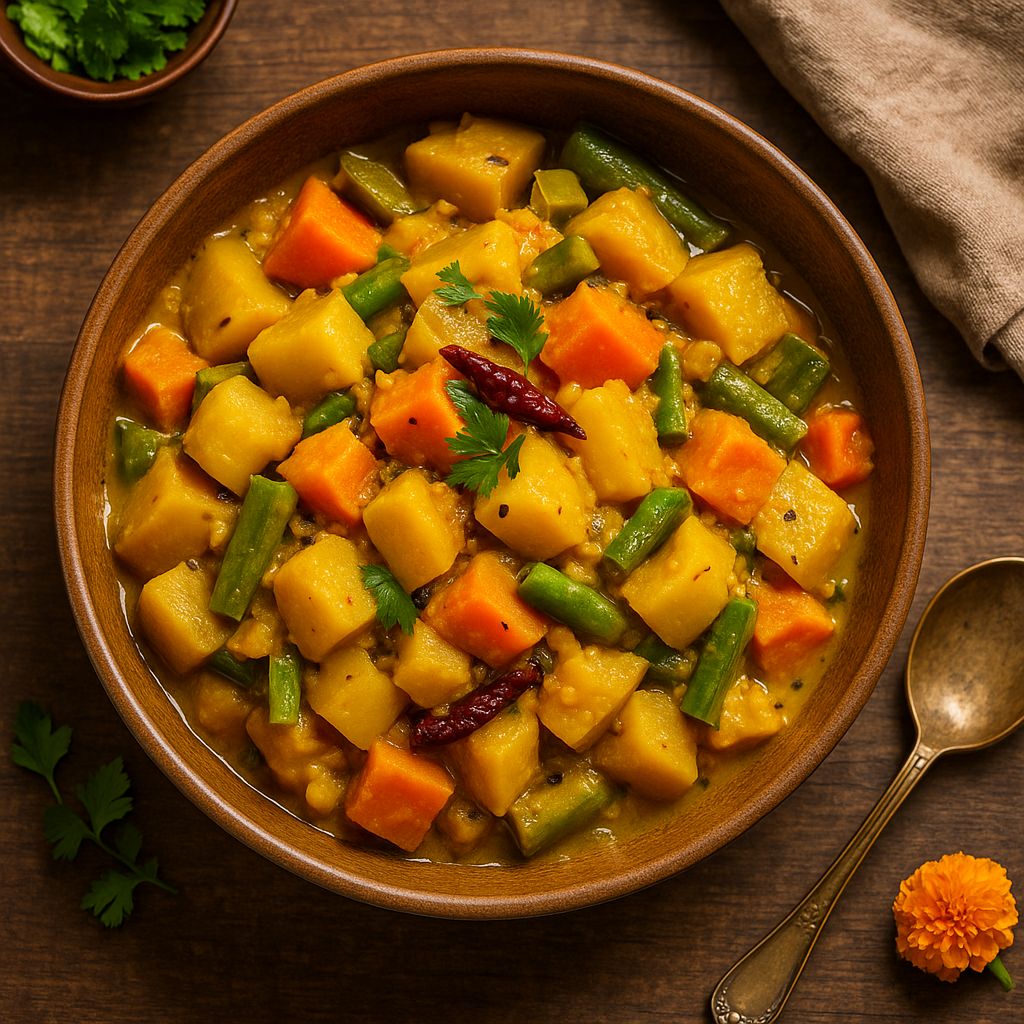
Labra – or bhoger labra as we often call it when it’s prepared for puja – is more than just a mixed vegetable curry; it’s an emotion. The term bhog denotes food offered to the gods, and accordingly this dish is prepared without any onion or garlic. Yet despite being a satvik (pure veg) preparation, Labra bursts with flavor. Ma always said the secret was in using the freshest seasonal vegetables and the magical tempering of panch phoron (Bengali five-spice mix) in mustard oil. She would toss in whatever veggies were on hand – pumpkin for sweetness, eggplant for creaminess, a few potatoes or sweet potatoes for heartiness, plus sometimes radish or green beans – making sure to include that trio of pumpkin, eggplant, and potato that defines a good Labra. As the vegetables slowly simmered together, they released their own juices and melded into a harmonious medley of textures and tastes.
I recall how the whole house would come alive with the sound and smell of Labra cooking. The panch phoron seeds would sputter in hot mustard oil, releasing an inviting aroma that drew everyone to the kitchen. Towards the end, Ma would drizzle a spoonful of ghee into the pot for a divine finishing touch. Sometimes she also added a pinch of homemade bhaja masala – a dry-roasted spice blend – right at the end to elevate the fragrance. The result was a hearty, homestyle curry where the vegetables were soft, slightly mushy, and soaked in spices, each bite tasting like comfort and tradition.
1 tablespoon ghee, for finishing (optional but recommended)
—
Instructions:
1. Prep the veggies: Wash, peel, and cut all the vegetables into similar bite-sized pieces. Try to keep the pumpkin, potato (or sweet potato), eggplant, radish, etc., in slightly larger than bite-size chunks so they don’t disintegrate completely while cooking.
2. Temper the spices: In a heavy-bottomed pot or kadhai, heat the mustard oil over medium heat until it’s hot (you’ll see a slight smoke). Add the panch phoron and the dried red chilies. Let them sizzle for a few seconds until the seeds start to crackle and release their aroma. Sprinkle in the pinch of asafoetida (hing) as the spices crackle. This tempering will be very fragrant – be careful not to burn the spices, just toast them until aromatic.
3. Cook hardy vegetables first: Immediately add the diced pumpkin, potato, and radish (if using) to the pot. Stir the vegetables so they get coated in the spiced oil. Add the grated ginger, turmeric powder, red chili powder (if using), salt, and sugar. Mix well. Cover the pan and cook on low heat for about 8–10 minutes, stirring occasionally. You don’t need to add water at this stage – the veggies will begin to release their own moisture and steam in their juices. (Cooking covered on low heat helps the tougher veggies start to soften without burning. If things start sticking, you can sprinkle a tablespoon of water, but usually it’s not necessary.)
4. Add remaining vegetables: Once the pumpkin and potato are partially tender, add the eggplant and green beans to the pot. Give everything a good stir to combine. If the mixture looks very dry, add a splash of water (a few tablespoons at most). Cover again and continue to cook on low heat for another 5–7 minutes. The softer vegetables like eggplant will cook down fast. Stir occasionally. Cook until all the vegetables are soft and cooked through. The goal is for the veggies to be very tender and slightly melded together in a moist curry — they should release juices and almost mash together, creating that classic semi-stewy consistency of Labra.
5. Finish with spices and ghee: Remove the lid and check that the hardest veggies (pumpkin, potato, radish) are fork-tender. By now, you’ll notice the vegetables have released water and there’s a nice soft medley; it shouldn’t be watery, just a thick mixture. Lower the heat. Sprinkle the bhaja masala over the cooked vegetables and add the ghee. Gently fold (stir) the curry to mix in the bhaja masala and ghee, being careful not to mash the veggies too much. Let it cook for another 1 minute on low heat as the finishing spices infuse the dish. Turn off the heat. Taste and adjust salt or sugar if needed.
6. Serve: Labra is best served hot. Traditionally, it’s served as part of Durga Puja bhog with khichuri (Bengali rice-lentil khichdi). Serve a generous scoop of Labra alongside steaming khichuri for an authentic experience. It also goes well with plain steamed rice or even roti. Enjoy the medley of soft vegetables and warm spices, and get ready for a bite of nostalgia!
Tips:
Vegetable Choices: Use an assortment of seasonal vegetables for Labra. Traditionally, pumpkin, eggplant, and potato/sweet potato are must-haves for the perfect balance of sweetness, creaminess, and substance. Apart from these, you can add others like radish, green beans, carrots, or even a handful of spinach – whatever is fresh and available. The key is a mix of textures and flavors, but make sure to include that classic pumpkin-eggplant-potato trio for authenticity.
No Onion & Garlic: Remember that Labra is a satvik dish meant for holy offerings, so it contains no onion or garlic. Don’t be tempted to add them – the dish is designed to be flavorful without them. The combination of ginger, asafoetida, and whole spices provides plenty of depth, proving that you can have a delicious curry without any onion-garlic at all.
Panch Phoron Magic: Panch phoron is the heart of Bengali veggie dishes. If you don’t have this five-spice mix on hand, you can make it by combining equal parts of cumin seeds, black mustard seeds, fenugreek seeds, fennel seeds, and nigella seeds (kalonji). Keep a jar of this mix – when you temper these five spices in hot oil, their blended aroma is what gives Labra its signature Bengali character.
Bhaja Masala (Roasted Spice Mix): For an authentic touch, finish the Labra with a pinch of bhaja masala. To prepare bhaja masala at home, dry roast about 1 teaspoon cumin seeds, 1 teaspoon coriander seeds, 1/2 teaspoon fennel seeds, a bay leaf, and 1 dry red chili on low heat until aromatic. Let them cool, then grind into a fine powder. This fragrant roasted spice powder is a secret weapon in many Bengali recipes. Sprinkling a bit on your Labra at the end (or on individual servings) will add a warm, smoky depth of flavor that truly elevates the dish. You can make a small batch and store it in an airtight container for your next Bengali cooking adventure.
Slow Cooking = Best Flavor: Cook the Labra low and slow. Keep the heat low and the pot covered so the vegetables cook in their own steam. There’s usually no need to add water, as the veggies release enough moisture while cooking. This slow cooking concentrates the flavors and yields that soft, almost stew-like consistency that Labra is known for. If you do need to add a little water to prevent sticking, add just a splash. Also, stir gently from time to time – you want the veggies to soften and mingle, but not turn completely to mush. Labra has a rustic look, with soft pieces of pumpkin and potato that have partially broken down, coating the other veggies in a thick gravy.
Oil & Flavor: Mustard oil is traditionally used for its pungent, robust flavor that really defines Labra. If you have mustard oil, do use it (just remember to heat it to smoking point to remove the raw smell before cooking). If you don’t, you can substitute with any neutral vegetable oil for cooking the spices. However, finishing with a bit of ghee is highly recommended – that last drizzle of ghee adds a rich aroma and brings all the flavors together beautifully. Your kitchen will smell heavenly!
❤️ Closing Note:
This humble Labra isn’t just a curry — it’s a ladle of nostalgia from my childhood. Every time I cook it, I’m transported back to those Puja days, sitting with family and friends and savoring the bhog on banana leaves. It’s amazing how a simple mix of vegetables can carry the warmth of tradition and togetherness in each bite. I hope this recipe brings a bit of that festive magic and comfort into your home. Give it a try during your next celebration (or whenever you crave a hearty veggie dish), and maybe you’ll create some cherished memories of your own. Happy cooking and Subho Durga Puja! 🙏
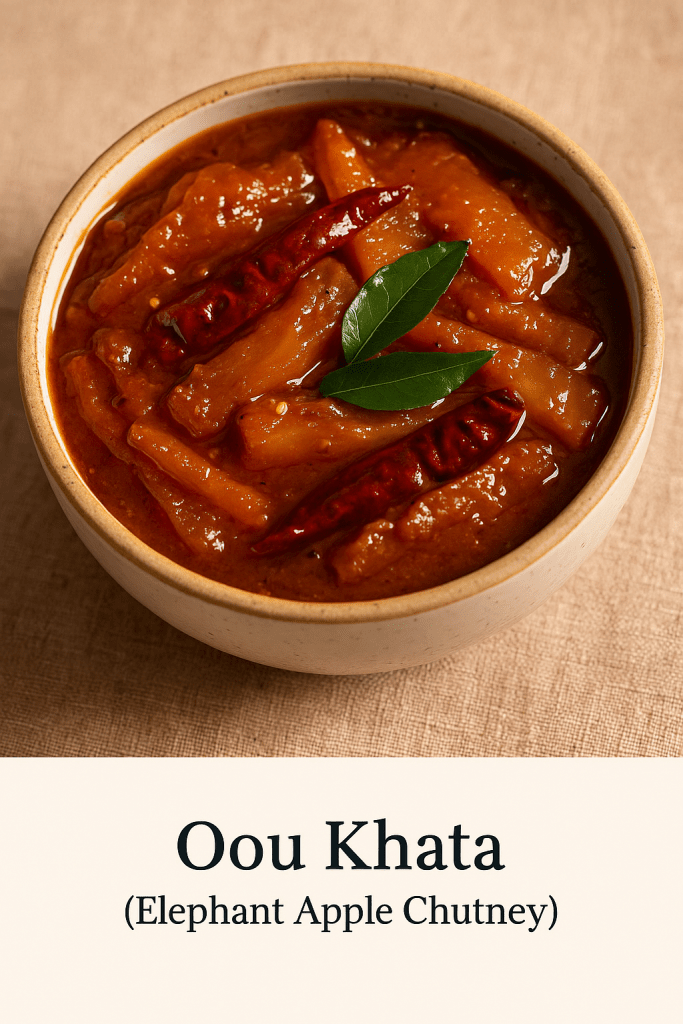
I still remember the monsoon afternoons at Grandma’s house in Odisha, with the sky dark and rain drumming on the tin roof. My cousins and I would dash into her courtyard, where the wild Oou (elephant apple) tree towered overhead. Fresh green fruits would tumble down after a big storm, and Grandma would scoop us up in a gleeful rush. The sour, tangy aroma of those fruit instantly brightened the air. She’d peel the prickly skin, grind mustard and cumin seeds on her heavy stone mortar, and stir up a bubbling pan of chutney that smelled of turmeric, mustard oil and jaggery. One bite of her homemade Oou Khata – hot steamed rice, dalma and a spoonful of that sweet-and-sour pickle – could chase all winter blues away. Those tastes and smells are pure comfort to me, a rain-soaked hug in a bowl.
I’ve learned that this Elephant Apple chutney is more than just a delicious snack; it’s a seasonal ritual. In Odisha, Oou is legendary for its sharp sourness, so cooks always add a good amount of jaggery (or sugar) to balance it. In fact, one Odisha food blog explains: *“Elephant apple (Ouu) is a sour fruit, so sugar or jaggery is added to it while cooking to get a sweet-n-sour taste.”*. We always made this khata (sour chutney) around the end of the rains – just as another blogger notes, *“Elephant Apple Chutney (Ouu Khatta) is a typical recipe of Odisha prepared in every household mostly in post monsoon season.”*. And just like at Grandma’s home, it was often cooked simply without any onion or garlic, especially during festival days. Those traditions made each spoonful of Oou Khata taste like home – a little sour, a little sweet, and completely heartwarming.
Ingredients
Oou (Elephant apple): 1 large (about 250g) – peel off the skin and cut into 1–2″ pieces
Jaggery (gur) or brown sugar: ⅓ cup, grated (add more or less to taste)
Oil: 1 tablespoon (mustard oil for authentic flavor, or any neutral cooking oil)
Salt: to taste (about ½–1 teaspoon)
Water: as needed (for boiling and simmering)
Optional: A small piece of ginger (mashed) or a teaspoon of ginger-garlic paste – skip if avoiding onion/garlic.
Instructions
1. Grind the spices. In a small bowl or mortar, combine the mustard seeds, cumin seeds, and 1 dry red chili. Grind or blend into a smooth paste, adding a little water if needed. (This fragrant paste is called “besa” in Odia.) Set aside.
2. Prep the elephant apple. Pull away any green outer petals and peel off the thick skin of the oou. Chop the peeled fruit into long strips or bite-size pieces (about 1–2″). Gently crush each piece with the back of a spoon or pestle – this releases more flavor as it cooks.
3. Boil the fruit. Place the chopped elephant apple in a saucepan with about 2 cups water, ¼ teaspoon turmeric and a pinch of salt. Bring to a boil, then lower heat and simmer for 5–10 minutes, until the oou pieces are just tender. Drain and reserve the cooked fruit (you can also use a pressure cooker for 1–2 whistles).
4. Tempering (tadka). Heat oil in a pan over medium heat. Add the panch phoron and remaining whole dry chilies; let them sizzle and pop. Add the curry leaves (if using) and fry briefly – you’ll smell their nutty aroma.
5. Sauté the fruit. Add the boiled elephant apple pieces to the hot pan. Stir and fry for 2–3 minutes so the pieces get lightly coated in the oil and spices.
6. Add the paste. Stir in the mustard–cumin paste you made, along with turmeric and salt. Mix well and cook for another minute to remove any raw flavor. The mixture will smell sharp and mustardy.
7. Simmer with jaggery. Pour in about ½ cup of water (or more if you like a thinner chutney) and bring to a gentle simmer. Cover and cook on medium-low for 8–10 minutes. The gravy will thicken slightly.
8. Sweeten the chutney. Add the grated jaggery (or sugar) and a pinch of chili powder if you want extra heat. Stir until the jaggery melts and blends into the sauce. Taste and adjust seasoning – add a little more salt or jaggery as needed. Remove from heat when you have a glossy, sweet-and-sour chutney coating the fruit.
9. Serve warm. Spoon the Oou Khata into a bowl and let it cool slightly. It’s traditionally served at room temperature. I like to garnish with a few fresh coriander leaves just before serving.
Tips & Variations
Sweetener swap: Jaggery gives the most authentic taste, but you can use brown sugar or even regular sugar in a pinch. (Add it gradually; you want the chutney tangy, not cloyingly sweet.)
More tang: If your elephant apples aren’t very sour, you can squeeze in a teaspoon of lemon or tamarind juice for extra zing.
Oil choice: Mustard oil lends a rustic pungency to Oou Khata. If you don’t have it, any neutral oil is fine. (A tiny drizzle of sesame oil at the end also adds a nice touch.)
Onion/garlic option: For a non-fasting version, you could sauté a chopped onion or a little minced garlic along with the tempering spices. This gives extra depth but is completely optional – the recipe is delicious even without them.
Spice variation: Swap panch phoron for a simple tempering of mustard and cumin seeds alone. You can also add a pinch of asafoetida (hing) in the oil if you skip the curry leaves – it mimics that savory aroma.
Make ahead: Like many chutneys, this tastes even better the next day. Store leftovers in the fridge (in a sealed jar) for up to 2–3 days – the flavors will mellow and blend as it sits.
Each time you stir a spoonful of this chutney into your rice and dal, I promise you’ll be transported back to my grandmother’s kitchen, rain pattering on the roof and kids laughing on the porch. Oou Khata is humble and homely – just like the memories it’s tied to. I hope this recipe brings a little of that old Odisha warmth into your home. Whenever you make it, do enjoy it with some hot chhena dalma or plain dal and steaming rice. Happy cooking and जय ଓଡ଼ିଶା (Jai Odisha)!