Lunch & Dinner

Authentic Punjabi Sarson Da Saag & Makki Ki Roti: Traditional Winter Recipe

In a Punjabi home, winter doesn’t arrive with the first frost; it arrives with the first bunch of Sarson (mustard greens) on the kitchen counter. I remember my mother spending hours in the morning fog, meticulously cleaning the greens leaf by leaf. She called it the “Season’s Meditation.”
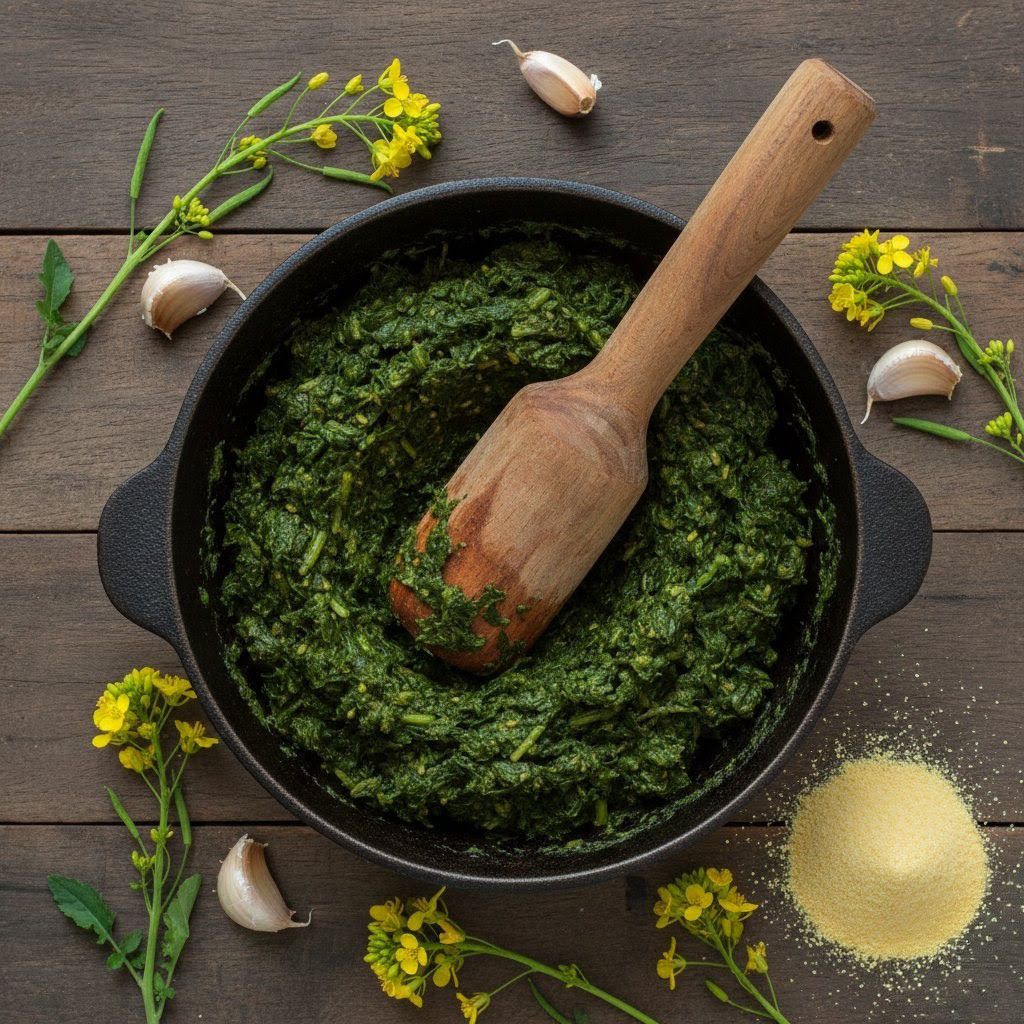
While the world now uses high-speed blenders, she remained loyal to her Ghotna the heavy wooden masher. She believed that a blender “killed the soul” of the greens, whereas the manual mash preserved the coarse, creamy texture that defines a true saag. To her, Makki Ki Roti (cornmeal flatbread) was the essential partner, a “Parasocial Companion” that required the warmth of her palms to hold its shape. Watching her hand-pat the gluten-free dough into perfect circles was a masterclass in “Quiet Luxury” it was slow, it was technical, and it was deeply honest.
Today, at The Pinch of Masala, we are documenting this winter ritual for a 2026 audience that craves “Ingredient Integrity” and the rugged health benefits of “Fibremaxxing”.

The barrier to a perfect saag is often a bitter taste or a watery texture. To master this Punjabi masterpiece, follow my mother’s three non-negotiable rules:
The “Trinity of Greens” Ratio: In 2026, we prioritize balance. My mother used a strict 2:1:1 ratio 2 parts Sarson (mustard) for pungency, 1 part Palak (spinach) for creaminess, and 1 part Bathua (chenopodium) for an earthy depth. This prevents the mustard from becoming overwhelmingly bitter.
The “Allan” Binder: This is the ultimate “Digital Anthropologist” secret. Once the greens are mashed, you must add Makki ka Atta (maize flour) while the saag is simmering. This flour acts as a “binder” (traditionally called Allan), absorbing excess moisture and transforming a loose mash into a velvety, cohesive gravy.
The Hot Water Knead: Makki ka atta is notoriously brittle. To make soft rotis that don’t crack at the edges, you must use boiling hot water to knead the dough. The heat partially gelatinizes the starch, making the dough pliable enough to shape by hand.

Prep time: 30 mins | Cook time: 60 mins | Servings: 4
Diet: Vegetarian, Gluten-Free (Roti) | Cuisine: Punjabi Heritage

Ingredients:

For the Saag:

1 kg Sarson (Mustard Greens): Cleaned, stems included (peel the tough outer skin of thick stems).

250g Palak (Spinach) & 250g Bathua (Chenopodium): Cleaned and sorted.

The Aromatics: 2-inch Ginger (grated), 10 cloves Garlic (crushed), 4-5 Green Chillies (chopped).

The Allan: 3 tbsp Makki ka Atta (Maize Flour).

The Tadka: 3 tbsp Ghee, 2 Dry Red Chillies, 1 Onion (finely chopped), 1 Tomato (optional).

The Finish: A huge dollop of white butter (Makhan).

For the Makki Ki Roti:

2 cups Makki ka Atta: Fine ground yellow cornmeal.

½ cup Radish (Mooli): Grated (for moisture and flavor).

1 tsp Ajwain (Carom seeds): For digestion.

Liquid: Boiling hot water as needed.

Instructions:

The Boil: Add all the greens, ginger, half the garlic, and green chillies to a pressure cooker with 1 cup water and salt. Cook for 2 whistles, then simmer on low for 20 minutes.

The Ghotna Ritual: Once cooked, drain the excess water (save it!). Use a wooden masher (ghotna) or a stick blender (on pulse mode) to mash the greens into a coarse, thick paste. Do not make a smooth puree.

Thicken: Return to the heat. Slowly sprinkle in the 3 tbsp of cornmeal (Allan) while stirring constantly to avoid lumps. Simmer for 10 minutes until the saag looks creamy and glossy.

The Tadka: Heat ghee in a pan. Add dry chillies, remaining garlic, and onions. Sauté until deep golden brown. Add tomatoes and spices. Pour this into the saag and mix well.

The Roti Dough: Mix cornmeal, salt, ajwain, and grated radish. Gradually add boiling water and mix with a spoon. When cool enough to touch, knead vigorously with the heel of your hand for 8 minutes until smooth.

Shape & Roast: Take a ball of dough. Hand-pat it between your palms or roll between two parchment sheets. Roast on a medium-hot tawa with ghee until both sides have golden-brown blisters.

Serve: Serve the saag piping hot, topped with white butter and a piece of jaggery (gud) on the side, with the crispy rotis.

The Saag Water: In the 2026 “Use-Up” economy, we value every nutrient. Never throw away the water drained from the boiled greens! It is packed with iron and minerals. Use this “Green Gold” to knead your Makki ki Roti dough instead of plain water—it adds a subtle earthy flavor and ensures no vitamins are wasted.

Lunch & Dinner

Authentic Black Chana Masala: Traditional Kala Chana Recipe

In our home, Sunday nights had a specific, earthy rhythm. While the world outside prepared for the work week, my mother was busy in the kitchen, preparing what she called “the fuel for the soul.” I remember the sound of the pressure cooker whistle a sharp contrast to the quiet evening signaling that the Black Chana (Kala Chana) was nearly ready.
She treated these small, dark legumes with a level of respect usually reserved for expensive meats. “The darker the grain, the deeper the strength,” she would say. She believed that black chickpeas were a “Parasocial Companion” that looked after our health when we were too busy to notice. My mother taught me that a royal Kala Chana Masala wasn’t just a side dish; it was a nutrient-dense masterpiece that bridged the gap between ancient Ayurvedic wisdom and the practical needs of a modern family.
Today, at The Pinch of Masala, we are moving away from the thin, watery curries of the past and returning to the “Quiet Luxury” of a thick, tea-infused masala a method designed for a world that craves both “Technical Excellence” and “Fibremaxxing”.

The barrier to a perfect black chana dish is often the texture getting them soft enough to melt on the palate while keeping them distinct and firm. To master the “Mahogany Masala,” follow my mother’s three non-negotiable rules:
The “Black Tea” Infusion: This is the ultimate “Digital Anthropologist” secret. To achieve that dark, rich mahogany color found in the best street-side Dhabas, my mother would drop a simple tea bag or a muslin cloth filled with tea leaves into the pressure cooker. The tannins in the tea don’t just add color; they provide a complex, smoky depth that highlights the earthy flavor of the chana.
The “Double Soak” Ritual: In 2026, we prioritize “Ingredient Integrity”. Most people soak chana for 2-3 hours; my mother insisted on a full 8-hour soak, followed by a thorough rinse. This reduces phytic acid, making the legumes much easier to digest and preventing the bloating often associated with high-fiber meals.
The “Mash-and-Melt” Thickener: To create a thick, velvety gravy without using cream or cashew paste, my mother would take a half-cup of the boiled chickpeas, mash them into a smooth paste, and stir them back into the simmering masala. This creates a natural, starchy body that allows the gravy to hug the whole chickpeas perfectly.

Prep time: 10 mins | Soaking: 8 hours | Cook time: 45 mins | Servings: 4
Diet: Vegan, Gluten-Free, High-Protein | Cuisine: Punjabi Heritage

Ingredients:

1 cup Kala Chana (Black Chickpeas): Picked and washed.

The Infusion: 1 Black Tea bag or 1 tsp tea leaves in a cloth.

The Masala Base: 2 Large Onions (finely chopped), 3 Medium Tomatoes (pureed), and 1.5 tbsp Ginger-Garlic paste.

Fat: 3 tbsp Ghee or Mustard Oil (for that authentic Dhaba kick).

The Bloom: 1 tsp Cumin seeds, 1 Bay leaf, 2 Green Cardamoms, and 1 stick Cinnamon.

Powder Spices: 1 tsp Red Chili powder, ½ tsp Turmeric, 1 tsp Coriander powder, and 1 tsp Aamchur (Dry Mango Powder) for the essential tang.

The Finish: 1 tsp Kasuri Methi and fresh Cilantro.

Instructions:

1. The Pressure: Add soaked chana, the tea bag, salt, and 3 cups of water to a cooker. Pressure cook for 5-6 whistles until the chana is soft enough to mash between your fingers. Remove the tea bag.

2. The Tempering: Heat oil in a heavy pan. Add the whole spices and let them sizzle until the aroma fills the room.

3. The Slow Bhuna: Add onions and sauté on medium-low for 10 minutes until deep golden brown. Stir in the ginger-garlic paste and cook until the raw smell disappears.

4. The Union: Add tomato puree and all dry spices. Cook until the oil begins to leave the sides of the masala.

5. The Secret Bind: Add the mashed chickpeas (Step 3 of Secrets) and the whole boiled chickpeas along with their dark cooking water.

6. The Simmer: Cover and cook on low heat for 10-15 minutes. The gravy will thicken into a rich, dark velvet consistency.

7. Serve: Turn off the heat. Sprinkle Kasuri Methi and cilantro. Serve hot with steamed Jeera Rice or puffy Pooris.

The Chana Stock: In the 2026 “Use-Up” economy, we value “Concentrated Nutrition”. Never throw away the dark water left after boiling the chickpeas! If you have extra, use it as a base for a Vegetable Soup or to knead your Chapati dough. It is packed with minerals and adds an incredible earthy flavor to anything it touches.

Lunch & Dinner

Authentic Maharashtrian Bharli Karela: Traditional Stuffed Bitter Gourd Recipe

In many households, the mention of Karela (Bitter Gourd) sends children running from the dining table. But in our home, it was a dish of anticipation. I remember my mother treating these bumpy, emerald-green vegetables with the care of a master artisan. To her, bitterness wasn’t a flaw to be removed it was a character to be balanced.
She didn’t believe in deep-frying the life out of the vegetable. Instead, she performed a morning ritual of “Zesting and Salting.” She taught me that the secret to a royal Bharli Karli (Maharashtrian Stuffed Karela) lay in the “Quiet Luxury” of the stuffing: a smoky, nutty blend of fire-grilled dry coconut and roasted peanuts. This dish is a “Parasocial Companion” on our table, a testament to my mother’s ability to transform the most challenging ingredients into a masterpiece of Indian heritage cooking.

Today, at The Pinch of Masala, we are documenting her time-tested “No-Bitterness” technique for a 2026 audience that values technical excellence and sustainable, whole-plant eating.

The barrier to enjoying Karela is always the acrid juice. To ensure your stuffed gourd is savory, tangy, and sweet rather than sharp, follow my mother’s three non-negotiable rules:

The “Thumb-Snap” Selection: In 2026, we prioritize “Ingredient Integrity”. My mother only used small, dark green bitter gourds with thin skin. If you can snap the tail end with your thumb easily, it is fresh and tender; if it’s fibrous, it will never soften correctly.

The “Salt & Steam” Purgatory: This is the ultimate “Digital Anthropologist” secret. Most people boil Karela, which turns it mushy. My mother would rub the slit gourds with salt and turmeric and let them sit for 30 minutes to sweat out the bitter enzymes. She then steamed them in an Idli steamer for 10 minutes before stuffing. This locks in the nutrients while softening the texture perfectly.
The Thread Knot: To prevent the precious stuffing from falling out during the “Bhuna” (sautéing) phase, you must tie each gourd with a clean cotton thread. It’s a manual ritual that ensures every bite is packed with spice.

Prep time: 20 mins | Marination/Steaming: 40 mins | Cook time: 15 mins | Servings: 4
Diet: Vegan, Gluten-Free | Cuisine: Maharashtrian Heritage

Ingredients:

10–12 Small Bitter Gourds: Peeled (reserve peels) and slit vertically.

The Stuffing (Grind coarsely):

. 1 cup Peanuts (roasted and skinned)
. ½ cup Dry Coconut (Khopra)—ideally grilled over an open flame until smoky
. 10 Garlic cloves (dry roasted)
. 2 tsp Kala Masala (or Garam Masala)
. 1 tbsp Jaggery (Gudh) and 1 tbsp Tamarind pulp.

Fat: 3 tbsp Peanut oil (for authentic flavor).

The Bloom: 1 tsp Cumin seeds, ½ tsp Turmeric, and a pinch of Hing (Asafoetida).

The Finish: Freshly chopped Cilantro.
Instructions:

The Prep: Scrape the bumpy skin of the Karelas using a peeler. Do not throw the peels away. Make a vertical slit, remove the hard seeds, and rub the inside and outside with salt and turmeric.

The Steam: Let the salted gourds rest for 30 minutes, then rinse under running water to remove the bitter juice. Steam for 10–15 minutes until fork-tender but firm.

The Masala: Blend the peanuts, grilled coconut, and garlic into a coarse powder. Stir in the tamarind, jaggery, spices, and the reserved peels (the “Use-Up” secret).

The Stuffing: Pack the masala tightly into each steamed gourd. Tie them securely with a clean white cotton thread.

The Shallow Fry: Heat oil in a heavy, flat-bottomed pan. Arrange the gourds in a single layer. Cover and cook on low-medium heat for 8–10 minutes, turning once, until the skin is blistered and golden-brown.

The Final Bhuna: If you have leftover stuffing, add it to the pan in the last 2 minutes to crisp up.

Serve: Remember to remove the threads before serving! Enjoy hot with soft Phulkas or Varan-Bhaat (Dal Rice).

The “Karela Bhor” Stir-fry: In the 2026 “Use-Up” economy, we value every scrap. If you chose not to put the scraped peels (the bhor) in the stuffing, sauté them separately with chopped onions and extra fennel seeds. This creates a concentrated, crunchy side-dish that is a favorite among diabetic-friendly diets and fiber-seekers.

Lunch & Dinner

Authentic Konkani Prawn Masala: Traditional Kolambi Recipe

In our family, the arrival of fresh prawns wasn’t just a grocery delivery; it was a coastal ritual. I remember my mother heading to the Mumbai jetties as the trawlers docked, her eyes scanning for the translucent shimmer that signaled a “just-caught” catch. She didn’t just buy ingredients; she hand-selected them with the precision of a curator.
Cleaning the prawns was her meditation. She taught me that the effort you put into the prep is what earns the flavor of the dish. “A tired prawn cannot be hidden behind a loud spice,” she would say. My mother viewed her Kolambi Masala (Prawn Masala) as a “Parasocial Companion” on our Sunday table a dish that whispered stories of the red-soiled kitchens of the Konkan and the salty air of the Arabian Sea .
Today, at The Pinch of Masala, we are documenting her method of “Minimalist Precision.” We are moving away from oily restaurant versions and returning to the “Quiet Luxury” of a thick, spice-coated dry-fry that lets the sweetness of the prawns take the lead.


The secret to prawns that are succulent and tender rather than tough and rubbery lies in my mother’s two non-negotiable rules:
The “Opacity” Rule: The biggest mistake in home cooking is over-boiling. Prawns cook in minutes. My mother would add them only at the final stage, simmering them for just 2–3 minutes until they turned opaque. The residual heat of the thick masala is enough to finish them.
The Shallot Foundation: While most recipes use large red onions, my mother insisted on a handful of shallots (chote pyaaz). When ground into a coarse paste with ginger and garlic, they provide a deep, jammy sweetness that offsets the sharp heat of the chili.

Prep time: 20 mins | Cook time: 20 mins | Servings: 4
Diet: Pescatarian, Gluten-Free | Cuisine: Konkani Heritage

Ingredients:

500g Fresh Prawns: Cleaned and deveined. (Leave the tails on for that authentic “Digital Anthropologist” look).

The Masala Base: 1 cup shallots (finely chopped), 1.5 cups tomatoes (finely chopped), 1 tbsp ginger-garlic paste.

The Spice Trinity: 1.5 tbsp Kashmiri red chili powder (for color), ½ tsp turmeric, 1 tsp garam masala.

The Sour Agent: 2 slices of Kokum (or 1 tbsp tamarind extract).

Fat: 2 tbsp Coconut oil (essential for coastal authenticity).

The Finish: 10–12 Fresh curry leaves and a handful of chopped coriander.

Instructions:
The Marinate: Toss the prawns with turmeric and a pinch of salt. Set aside for 15 minutes.

The Tempering: Heat coconut oil in a wide-bottomed pan. Add cumin seeds and let the curry leaves splutter.

The Sauté: Add the shallots and onions. Sauté patiently until they turn deep golden brown. This caramelization is the base of your flavor.

The Bhuna: Add the ginger-garlic paste and tomatoes. Cook until the tomatoes melt and the oil begins to separate from the sides.

The Spice Bloom: Stir in the red chili powder and garam masala. Add a splash of water to prevent the spices from burning. Add the kokum slices.

The Prawn Union: Slide in the marinated prawns. Toss them well to ensure they are fully coated in the thick masala.

The Simmer: Cover and cook for 3–5 minutes max. As soon as the prawns curl into a ‘C’ shape and turn opaque, turn off the heat.

Serve: Garnish with fresh coriander and serve hot with Bhakri or steamed rice.


The Shell Stock: In the 2026 “Use-Up” economy, we value every scrap. Do not discard the prawn shells! Wash them and boil them with ginger scraps and coriander stems for 15 minutes. Strain this liquid and use it as a “Seafood Stock” for your next Veg Pulao. It adds a concentrated oceanic umami that plain water cannot match.

Lunch & Dinner

Baingan Bharta: My Mother’s Smoky Winter Ritual of Fire and Soul

In our home, the arrival of winter wasn’t marked by a calendar, but by the scent of charred eggplant skin wafting from the kitchen. I remember my mother standing over the gas stove, her face glowing in the blue flame as she patiently rotated a large, purple globe of brinjal. She called it the “Smoky Soul” of the season.
“You cannot rush the fire,” she would say, explaining that an oven or a microwave could never replicate the deep, primordial aroma of skin meeting an open flame. My mother was a self-taught scientist of flavor; she knew that the char wasn’t just burnt skin it was a signature of authenticity. She viewed this dish as a “Parasocial Companion,” a reliable bridge to her own childhood that she was now documenting for me.
Today, at The Pinch of Masala, we are reclaiming the art of the “Slow Roast.” In a world of 2026 “Quiet Luxury” and “Simplicity with Purpose,” this recipe stands as a testament to the idea that the most profound flavors are often the most technical to achieve.

To ensure your Baingan Bharta has that unmistakable “Dhaba-style” depth without becoming a soggy mess, you must follow my mother’s two non-negotiable rules:
The “Aromatic Infusion” Slit: Most people mash the garlic separately. My mother would make deep gashes in the raw eggplant and tuck whole garlic cloves inside before roasting. As the eggplant chars, the garlic steams in the vegetable’s own juices, softening into a sweet, buttery paste that infuses the entire pulp with flavor.
The “Texture over Mash” Philosophy: In 2026, we value “Ingredient Integrity”. My mother never processed her vegetables into a paste. She insisted on roughly chopping the roasted eggplant and onions to maintain a rustic “hash” texture rather than a smooth puree. This provides a better “mouthfeel” and honors the “Fiber Revolution” by keeping the vegetable structures intact.

Prep time: 15 mins | Cook time: 30 mins | Servings: 4
Diet: Vegan, Gluten-Free | Cuisine: North Indian Heritage

Ingredients:
1 Large Eggplant (Bharta Baingan): Choose one that is light in weight; heavy ones are full of bitter seeds.
4-6 Cloves of Garlic: To be tucked into the eggplant.
2 Green Chillies: Slit.

The Masala Base: 2 Large Onions (roughly chopped), 3 Medium Tomatoes (roughly chopped), and 1 inch Ginger (grated).

Fat: 2 tbsp Mustard Oil (essential for that authentic “Heritage” zing).

Spices: 1 tsp Cumin seeds (Jeera), ½ tsp Turmeric, 1 tsp Kashmiri Red Chili powder, and ½ tsp Garam Masala.

The Finish: A handful of fresh Coriander and a squeeze of Lemon juice.
Instructions:

The Roasting Ritual: Wash and dry the eggplant. Make 3–4 deep slits and insert the garlic cloves. Brush the skin lightly with mustard oil to prevent it from drying out too fast.

Fire Roast: Place the eggplant directly over an open gas flame. Rotate every 2 minutes for about 15–20 minutes until the skin is completely charred and black, and the flesh is very soft.

The Sweat: Remove from heat and place in a covered bowl for 5 minutes. The steam will help loosen the skin for easier peeling.

The Mash: Peel off the charred skin and discard the stem. Mash the eggplant and the roasted garlic with a fork leave it slightly chunky.

The Bhuna Base: Heat mustard oil in a pan until it smokes. Add cumin seeds. Once they sizzle, add the onions and green chillies. Sauté until the onions turn a deep golden brown.

The Red Union: Add the ginger, tomatoes, turmeric, and chili powder. Cook until the tomatoes break down and you see oil separating from the sides.

The Final Mix: Add the mashed eggplant. Stir well and cook uncovered for 5–8 minutes to let the flavors meld.

Serve: Season with salt, garam masala, and lemon juice. Garnish with plenty of fresh coriander.

The Liquid Gold: When you peel the roasted eggplant, you will see flavorful juices pooling on the plate. In the 2026 “Use-Up” economy, we value every drop. Pour those smoky juices back into the pan with the eggplant mash. It holds the most concentrated essence of the fire-roasting process and adds a depth of flavor that no spice can match.

Lunch & Dinner

Bhindi Bhaja: My Mother’s Ritual of the Eternal Crunch

In our family, the hierarchy of vegetables was clear: the Bhindi (Okra) was the temperamental queen of the kitchen. While the recipe was passed down through generations, it was my mother who mastered the chemistry of it. To her, a slimy bhindi was a sign of a distracted mind.
I remember her sitting in the winter sun, inspecting each green “ladyfinger” with the focus of a jeweler. “If it doesn’t snap at the tip, it’s too old for the pan,” she would say. She taught me that the secret to a royal Bhindi Bhaja wasn’t in the number of spices, but in the silence of the preparation. You had to respect the okra’s hatred of moisture and its need for space. This dish is a “Parasocial Companion” on our table a crisp, reliable comfort that has defined our family lunches for decades.
Today, at The Pinch of Masala, we are moving away from oily, heavy-handed stir-frys and returning to the “Quiet Luxury” of my mother’s “Bone-Dry” technique a method designed for a world that values technical excellence and ingredient integrity.

The most common grievance with Bhindi is the “slime” a natural mucilage that intensifies when it touches water. To achieve my mother’s “Eternal Crunch,” you must win the Moisture War:
The “Bone-Dry” Rule: Never cut okra while it is wet. My mother would wash the whole pods the night before and leave them on a clean cloth to air-dry overnight. If you are in a hurry, you must wipe each individual pod with a paper towel until it is completely dry before your knife touches it.
The “Last Grain” Salting: In 2026, we value “Technical Simplicity”. Salt draws out moisture instantly. My mother never added salt until the bhindi was 90% cooked and crisp. Adding it earlier creates a “steam bath” inside the pan, turning your fry into a soggy mash.

Prep time: 15 mins | Cook time: 15 mins | Servings: 3–4
Diet: Vegan, Gluten-Free | Cuisine: Indian Heritage

Ingredients:
500g Fresh Okra (Bhindi): Tender, thin, and blemish-free.
The Aromatics: 1 Medium Onion (sliced thin), 2 Green Chillies (slit), and 3 Garlic cloves (crushed).
The Sour Agent: 1 tsp Amchur (Dry Mango Powder) or a squeeze of Lemon   this chemically cuts any remaining sliminess.
Fat: 3 tbsp Mustard Oil (for that authentic “Heritage” pungent kick).
Spices: 1 tsp Cumin seeds (Jeera), ½ tsp Turmeric, and ½ tsp Red Chili powder.
The Secret Texture: 1 tbsp Roasted Peanut Powder (optional, for a Maharashtrian twist).
Instructions:
The Preparation: Wash, dry, and slice the bhindi into ¼-inch rounds. Ensure your chopping board and knife are also bone-dry.
The Tempering: Heat oil in a wide, heavy pan (not a deep kadhai) until it smokes. Add cumin seeds and let them sizzle.
The Sauté: Add the sliced onions and chillies. Sauté until they are translucent but not brown.
The Open Sear: Add the okra. Crank the heat to high for 2 minutes to “sear” the exterior. Do not cover the pan. Covering traps steam, which creates slime.
The Slow Crisp: Lower the heat to medium. Stir only 2 or 3 times total. Over-stirring breaks the pods and releases more mucilage.
The Seasoning: Once the okra is dark green and the edges look slightly charred/crisp, add the turmeric, chili powder, and the souring agent (Amchur).
The Final Grain: Add salt in the last 60 seconds of cooking. Toss one last time and turn off the heat.
Serve: Serve immediately with hot Phulkas or Dal-Rice.

The Pakora Choora: In the 2026 “Use-Up” economy, we value concentrated flavor scraps. My mother never threw away the tiny, crunchy, spice-laden bits of onion and okra that settled at the bottom of the pan. Save this “choora” in a small jar; it makes a fantastic, zero-waste topping for Poha or Khichdi the next morning.

Lunch & Dinner

Dhaba-Style Egg Masala: My Mother’s Golden Spice Ritual

In our family, the humblest of ingredients often received the most royal treatment. I remember my mother standing by the stove on Sunday nights, transforming simple boiled eggs into a “Dhaba-style” masterpiece. She called it her “Anda Masala ritual,” and she believed that an egg was only as good as the texture of its skin.
She never simply dropped a boiled egg into a gravy. To her, that was unfinished work. “The egg must earn its place in the masala,” she would say, as she carefully fried them until they developed a crinkly, golden-blistered exterior. My mother viewed this dish as a “Parasocial Companion” a sturdy, dependable meal that bridged the gap between rustic street food and the warmth of a home kitchen.
Today, at The Pinch of Masala, we are reclaiming the patience of the “Slow Bhuna.” We are moving away from watery, pale curries and returning to the “Quiet Luxury” of a thick, caramelized onion-tomato base that hugs the eggs like a velvet cloak.

The secret to an egg masala that tastes like it came from a highway Dhaba, yet feels refined, lies in my mother’s two non-negotiable rules:
The “Blister and Prick” Rule: Before frying, you must prick the boiled eggs with a fork or make tiny slits with a knife. This is the ultimate “Digital Anthropologist” secret. It serves two purposes: it prevents the eggs from bursting in the hot oil and, more importantly, it allows the spicy gravy to penetrate deep into the yolk, ensuring every bite is seasoned.
The “Slow Bhuna” Foundation: In 2026, we value “Ingredient Integrity”. My mother never rushed the onions. She would sauté them on a low flame for at least 8 to 10 minutes until they reached a deep, jammy translucent pink. This caramelization provides the natural sweetness that balances the sharp heat of the ginger and garlic.

Prep time: 15 mins | Cook time: 30 mins | Servings: 4
Diet: Vegetarian-Friendly (Egg-based), Gluten-Free | Cuisine: North Indian Dhaba

Ingredients:
6 Large Eggs: Hard-boiled and shelled.
The Aromatics: 2 Large Onions (finely chopped), 1 inch Ginger (crushed), 4 Garlic cloves (crushed), and 2 Green Chillies (slit).
The Base: 1 cup Tomato Puree (freshly blended).
Fat: 2 tbsp Ghee or Oil (Mustard oil adds an authentic pungent kick).
Whole Spices (The Bloom): 1 tsp Cumin seeds, 1 Bay leaf, 2 Green Cardamoms, and 1 stick Cinnamon.
Powder Spices: 1 tsp Kashmiri Red Chili powder (for that vibrant Dhaba red), ½ tsp Turmeric, 1 tsp Coriander powder, and ½ tsp Garam Masala.
The Finish: 1 tsp Kasuri Methi (crushed between palms) and a handful of fresh Coriander leaves.
Instructions:
The Prep: Prick the boiled eggs multiple times with a fork.
The Blister: Heat 1 tbsp oil in a pan. Add a pinch of turmeric and chili powder. Sauté the eggs until they are golden-brown and the skin looks slightly blistered. Remove and set aside.
The Bloom: In the same pan, add the remaining oil/ghee. Add the whole spices and let them sizzle until fragrant.
The Onions: Add the onions and sauté patiently on medium-low heat until they turn a deep golden brown. Add the ginger, garlic, and green chillies; sauté for another 2 minutes until the “raw” smell disappears.
The Bhuna: Pour in the tomato puree and salt. Add the turmeric, red chili, and coriander powders. Cook uncovered until the oil begins to separate from the sides of the masala.
The Union: Add 1 cup of warm water to adjust the gravy consistency. Bring to a boil, then slide in the blistered eggs.
The Simmer: Cover and simmer on low heat for 5 minutes to let the flavors meld.
Final Touch: Sprinkle garam masala, Kasuri Methi, and fresh coriander. Stir gently so as not to break the eggs. Serve hot with buttery Naan or Jeera Rice.

Leftover Masala Stir-Fry: In the 2026 “Use-Up” economy, we value concentrated flavor bases. If you have extra gravy left after the eggs are gone, do not discard it! Toss in some boiled potato cubes or chickpeas the next day. The matured flavors of the egg-infused masala will create an instant “Zero-Waste” side dish that tastes even better than the original meal.

Lunch & Dinner

The Sunday Dum Ritual: My Mother’s Signature Chicken Biryani

In our family, Sunday mornings had a specific scent: a heady mix of warming cloves, charred onions, and the earthy perfume of aged Basmati rice. While the recipe traces back to the royal Mughlai kitchens, it was my mother who turned the Chicken Biryani into a weekly ceremony of precision. She didn’t just cook; she performed an act of “Dum” the art of trapping steam and soul inside a single pot.
I remember her standing by the sink, rinsing the rice with a gentleness reserved for something fragile. “Treat the rice like pearls,” she would say. “If you break the grain now, you break the heart of the dish”. My mother believed that a biryani was a “Parasocial Companion” on the table a dish that communicated love through the layers of spice and the tenderness of the meat.
Today, at The Pinch of Masala, we are moving away from the “instant pressure cooker” versions that turn rice into mash. We are returning to the “Quiet Luxury” of slow-reduced masalas and “Ingredient Integrity,” using the technical methods my mother perfected for a world that craves authenticity.

The secret to a biryani where the rice stands long and distinct, and the chicken is “melt-in-the-mouth” soft, lies in my mother’s two non-negotiable rules:
The “90% Rice” Rule: Most home cooks over-boil their rice. My mother insisted that the rice must be parboiled in water flavored with whole spices until it is exactly 90% cooked it should still have a “bite” when pressed between your fingers. The remaining 10% happens during the “Dum” phase, where the rice absorbs the steam from the chicken gravy below.
The “Waterless” Gravy: This is the ultimate “Digital Anthropologist” secret. My mother never added extra water to the chicken marinade. She relied on the natural juices released by the chicken and the yogurt to create a thick, concentrated masala. This prevents the biryani from becoming watery and ensures every grain of rice is coated in pure flavor.

Prep time: 30 mins | Cook time: 60 mins | Servings: 6
Diet: Halal, Gluten-Free | Cuisine: Mughlai Heritage

Ingredients:
The Rice: 2½ cups Aged Extra Long Grain Basmati Rice (soaked for 30 mins).
The Chicken: 1 kg Bone-in chicken pieces (thighs and drumsticks are best for juiciness).
The Marinade: 1 cup fresh Yogurt (Dahi), 1 tbsp Ginger-Garlic paste, 1 tbsp Kashmiri Red Chili powder, ½ tsp Turmeric, 1 tsp Biryani Masala, and a handful of fresh Mint and Cilantro.
The Aromatics: 2 large Onions (sliced and fried into golden Birista), 4 Green cardamoms, 6 Cloves, 1 stick Cinnamon, and 1 Star anise.
The Finish: 2 tbsp Ghee, a pinch of Saffron soaked in ¼ cup warm milk, and 2 boiled eggs (optional).
Instructions:
Marinate: Combine the chicken with all marinade ingredients. Let it rest in the fridge for at least 1 hour (ideally overnight) to ensure the spices penetrate the bone.
The Whole Spices: In a large pot, boil water with whole spices and salt. Add the soaked rice and cook until 90% done. Drain and set aside.
The Base: In a heavy-bottomed pot, heat ghee. Add the marinated chicken and half of the fried onions. Sauté on medium heat for 8-10 minutes until the chicken is firm.
The Layering: Spread the parboiled rice evenly over the chicken. Top with the remaining fried onions, saffron-infused milk, fresh mint, and a drizzle of ghee.
The Dum: Seal the pot tightly with aluminum foil or a dough rim and place the lid on top. Cook on the lowest heat possible for 20-25 minutes.
The Silence: Turn off the heat and let the pot sit undisturbed for 10 minutes. This allows the juices to settle and the rice to firm up.
Serve: Fluff the rice gently from the sides using a flat spoon and serve with a side of cold Raita.

The Bone Stock: In the 2026 “Use-Up” economy, we value every scrap. If you are using boneless chicken for your biryani, do not throw away the bones! Boil them with coriander stems and ginger scraps to create a quick stock. Use this stock instead of plain water when boiling your rice to infuse it with a 10x deeper savory flavor.

starters

Mixed Vegetable Soup: My Mother’s Winter Medicine

In the winter months, our kitchen didn’t just smell like food; it smelled like protection. While the tradition of a warm bowl began with my grandmother, it was my mother who turned the Mixed Vegetable Soup into a ritual of healing. To her, a soup wasn’t just a liquid meal; it was a way to “document the season” in a single pot.
I remember her standing at the wooden counter, her knife-work precise and rhythmic. She believed that the way you chopped a vegetable determined its soul in the broth. “If the carrots are bigger than the beans,” she would say, “the soup has no harmony.” My mother viewed her soup as a “Parasocial Companion” a warm, reliable presence that comforted us during winter colds and rainy nights .
Today, at The Pinch of Masala, we are stepping away from the “novel-length menus” of the modern era and returning to the “Quiet Luxury” of simple, technical, and honest cooking . This is my mother’s medicine, refined for a world that needs intention and longevity .

The most common mistake in home-style soups is a flat, watery flavor. To achieve a “Restaurant Style” depth at home, you must follow my mother’s two non-negotiable rules:
The High-Heat Bloom: Most people boil their vegetables in water immediately. My mother insisted on sautéing the aromatics ginger, garlic, and spring onion whites and then the chopped veggies on a high flame for 2–3 minutes. This “sear” brings out the natural sugars and creates a smoky aroma that serves as the flavor base.
The Starch Integrity: In 2026, we are seeing a move toward “real food sources” rather than “powders and potions” . Instead of using cornstarch or artificial thickeners, my mother would often blend a single boiled potato into a smooth paste and stir it back into the pot. This creates a silky, hearty consistency while remaining 100% natural.

Prep time: 15 mins | Cook time: 25 mins | Servings: 4
Diet: Vegan, Gluten-Free | Cuisine: Indian Homestyle

Ingredients:
The Medley (1.5 to 2 cups): Finely chopped carrots, french beans, cabbage, and sweet corn.
The Aromatics: 1 tbsp garlic (minced), ½ tbsp ginger (minced), and 2 sprigs of spring onion whites.
The Liquid: 3 cups of Scrap Stock (see below) or water.
The Seasoning: ½ tsp black pepper powder, salt to taste, and a pinch of sugar (to balance the acidity).
The Finish: 1 tsp vinegar or lemon juice and a handful of fresh coriander.
Instructions:
The Chop: Rinse all vegetables under running water and chop them into uniform, small pieces. Uniformity ensures even cooking and prevents some veggies from turning mushy while others remain raw.
The Wok Sear: Heat 1 tbsp oil or butter in a heavy pot. Sauté the ginger, garlic, and spring onion whites for 1 minute until fragrant but not browned.
The Flavor Bloom: Add the rest of the chopped vegetables. Crank the heat to high and fry for 2–3 minutes. This brings out the deep, earthy aroma.
The Simmer: Pour in the stock or water. Bring to a rolling boil, then lower the flame. Cover and cook for 10–12 minutes until the veggies are tender but still have a slight “bite”.
The Natural Bind: If you prefer a thicker soup, stir in your blended potato paste (or a cornstarch slurry) and cook until it turns glossy and thick.
The Polish: Add salt, sugar, and crushed black pepper. Turn off the heat and stir in the vinegar or lemon juice.
Serve: Ladle into warm bowls and garnish with coriander. Serve bubbling hot, perhaps with a side of toasted croutons.

The Scrap Stock: In the 2026 “Use-Up” economy, we never cook with plain water. Collect your onion skins, carrot ends, and celery stalks throughout the week. Boil them in water for 20 minutes with a bay leaf to create a homemade vegetable stock. This “zero-cost” liquid adds an enzymatic complexity that transforms a simple soup into a gourmet experience.

Snacks

Heritage Palak Pakora: My Mother’s Rainy Afternoon Ritual

In our family, the first scent of a monsoon rain didn’t come from the earth; it came from the kitchen. I remember my mother reaching for a large bunch of fresh palak the moment the clouds turned charcoal. To her, Palak Pakora wasn’t just a snack; it was a sensory response to the weather.
She believed that spinach had a “memory” of the rain, and frying it was the only way to lock that freshness in. I can still see her standing by the stove, her bangles clinking as she hand-tossed the leaves in a golden mantle of chickpea flour. “Never use a spoon to mix,” she would tell me. “Your fingers need to feel if the leaves are happy.” She taught me that the secret to a perfect pakora lay in the “Quiet Luxury” of a batter that whispered rather than screamed thin enough to see the green, but thick enough to crunch.
Today, at The Pinch of Masala, we are honoring her ritual by avoiding the heavy, doughy fritters of street stalls. We are returning to the “Whole Leaf” heritage style that celebrates the “Ingredient Integrity” of the spinach itself.

The most common grievance with Palak Pakora is that they turn soft and soggy within minutes. To achieve my mother’s “Eternal Crunch,” you must master the Moisture War:
The “No-Water” Rule: This is the ultimate “Digital Anthropologist” secret. Do not add water to your batter. My mother would salt the shredded spinach and let it sit for 5 minutes. The salt creates a hypertonic environment, drawing out the natural juices of the leaves. You then add the besan (gram flour) directly to these juices. This ensures the batter is made of 100% spinach essence, making it impossible for the pakoras to turn soggy.
The Rice Flour Catalyst: In 2026, we value “Technical Excellence”. Adding exactly two tablespoons of rice flour acts as a moisture-wicking agent, creating a glass-like crunch on the exterior that protects the tender “Fibremaxxing” leaves inside.

Prep time: 10 mins | Cook time: 15 mins | Servings: 4
Diet: Vegan, Gluten-Free | Cuisine: North Indian Street Food

Ingredients:
250g Fresh Palak (Spinach): Roughly chopped into wide ribbons.
1 cup Besan (Gram Flour): Sifted for a smooth texture.
2 tbsp Rice Flour: For the signature “Heritage Crunch.”
The Aromatics: 1 Large Onion (thinly sliced), 1 inch Ginger (grated), 2 Green Chillies (chopped).
Spices: 1 tsp Cumin seeds (Jeera), ½ tsp Turmeric, 1 tsp Carom seeds (Ajwain essential for digestion), and Salt to taste.
Fat: Oil for deep frying (Cold-pressed Peanut or Mustard oil is preferred for authenticity).
Instructions:
The Salt Ritual: Place the spinach and sliced onions in a large bowl. Sprinkle with salt and ajwain. Massage the leaves gently with your fingers and let them rest for 5–8 minutes until they look “sweaty.”
The Dry Mix: Add the ginger, chillies, and dry spices.
The Coating: Sift in the besan and rice flour. Mix with your hands. The moisture from the spinach will begin to form a thick, sticky paste that coats the leaves. Do not add water.
The Temperature Test: Heat oil in a heavy-bottomed kadhai. Drop a tiny bit of batter; if it rises immediately with a sizzle, the oil is ready.
The Drop: Take a small, irregular clump of the mixture and drop it into the oil. Do not shape them into perfect balls; the craggy edges are where the crunch lives!
The Gold Standard: Fry on medium heat for 3–4 minutes, turning once, until they are a deep, sun-kissed golden brown.
Serve: Drain on a paper towel and serve immediately with tangy Tamarind Chutney or a steaming glass of Masala Chai.

The “Pakora Choora” (Leftover Crumbs): In the 2026 “Use-Up” economy, nothing is wasted. My mother never threw away the tiny crispy bits of batter left at the bottom of the pan (the choora). Save these in an airtight jar. They make the perfect “zero-waste” topping for your morning Poha or a bowl of Dal, adding a concentrated hit of spice and texture.