Introduction In Odisha, the kitchen is more than a place to cook; it is a time machine. One whiff of mustard oil heating to its smoking point and I am transported back to the sprawling courtyards of central Odisha. I remember my grandmother (Aai) overseeing the summer ritual of making Ambula raw mangoes combined with rock salt and chili flakes, left to mature under the sun for a week until they turned dark and intensely sour. Machha Besara (Fish in Mustard Gravy) is the dish that honors that effort. It is bold, tangy, and unapologetic. Unlike Bengali fish curries which are often sweeter, the Odia Besara is defined by its sharp, pungent kick and the earthy depth that only stone-ground mustard can provide. Today, we are documenting this heirloom technique. We are stepping away from the mild and returning to the “Quiet Luxury” of a perfectly balanced, sharp mustard broth.[1] The “Digital Anthropologist” Technical Secret: The Bitterness Rule The most common mistake when making Besara is a bitter gravy. To ensure your curry is aromatic and not acrid, you must respect the mustard: The Blend: Always grind mustard seeds with green chilies and a bit of salt. The chili prevents the mustard from oxidizing and turning bitter. The Pulse: Use short pulses with minimal water until you get a coarse paste. Over-grinding in a high-speed blender generates heat, which releases the bitter enzymes. The Mellowing: Once the paste is added to the water, it must be cooked on low heat for at least 15 minutes to allow the sharp, raw smell to mellow into a savory aroma. The Recipe Card Prep time: 20 mins | Cook time: 30 mins | Servings: 4 Cuisine: Odia Heritage | Key Tool: Heavy-bottomed Kadhai
Ingredients: 500g Rohu or Catla Fish: Fresh-cut steaks, washed and patted dry. The Mustard Paste (Grind together): 2 tbsp Black Mustard seeds (soaked for 15 mins). 1 tbsp Yellow Mustard seeds (for a milder balance). 5-6 cloves of Garlic. 2-3 Green Chillies. The Aromatics: 1 tsp Pancha Phutana (Odia 5-spice mix), 1 medium Tomato (chopped), 2 Green Chillies (slit). The Soul: 2 pieces of Ambula (dried salted mango). Substitute: 1 tsp Amchur or a small ball of Tamarind. Spices & Fat: 4 tbsp Mustard Oil (essential!), ½ tsp Turmeric, ½ tsp Red Chili Powder, Salt to taste. Instructions: Marinate & Fry: Rub the fish with salt and turmeric. Heat mustard oil in a pan until it reaches the smoking point, then cool it slightly. Fry the fish pieces until they are a deep golden color on both sides. Set aside. The Tempering: In the same oil, add the Pancha Phutana. Once it splutters, add the chopped tomatoes and green chilies. Sauté until the tomatoes turn mushy. The Gravy Base: Add the prepared mustard paste, turmeric, and chili powder. Add 1.5 cups of water immediately. Do not fry the mustard paste directly in oil, as this will make it bitter. The Simmer: Cover and cook the gravy on low heat for 15 minutes. This is the most important step for the flavor to develop. The Finish: Add the fried fish and the Ambula. Simmer on low for another 10 minutes so the fish absorbs the tang of the mango. Serve: Garnish with fresh coriander. Serve hot with plain steamed rice the only proper accompaniment for Besara.
The “Pinch of Thrift” Tip (Zero Waste) Repurposed Paste: If you find you have ground more mustard paste than needed, do not discard it. In the 2026 “Use-Up” economy, we value concentrated flavor bases.[2] Use the leftover paste to make “Besara Aloo Stir-fry” the next day. Simply toss boiled potato cubes in the paste with a splash of mustard oil for a quick, pungent side dish.
Every Odia kitchen has its treasure trove of memories, and Sajana Macha (drumstick fish curry) is one of them. In late winter – when the air turns a little crisp and the sunlight softens – roadside sajana trees bear young pods. I remember my grandmother returning from the market with a bundle of fresh drumsticks, their green skins still dewy. In those days, we knew spring was coming when those slender pods piled up in the kitchen. For Odisha’s coastal families, this dish is woven into our identity. As one Odia writer notes of the classic Macha Besara (mustard fish curry), *“it is not just a curry, it is a memory, a ritual, a symbol of home”*. For us, adding drumsticks makes it even more special.
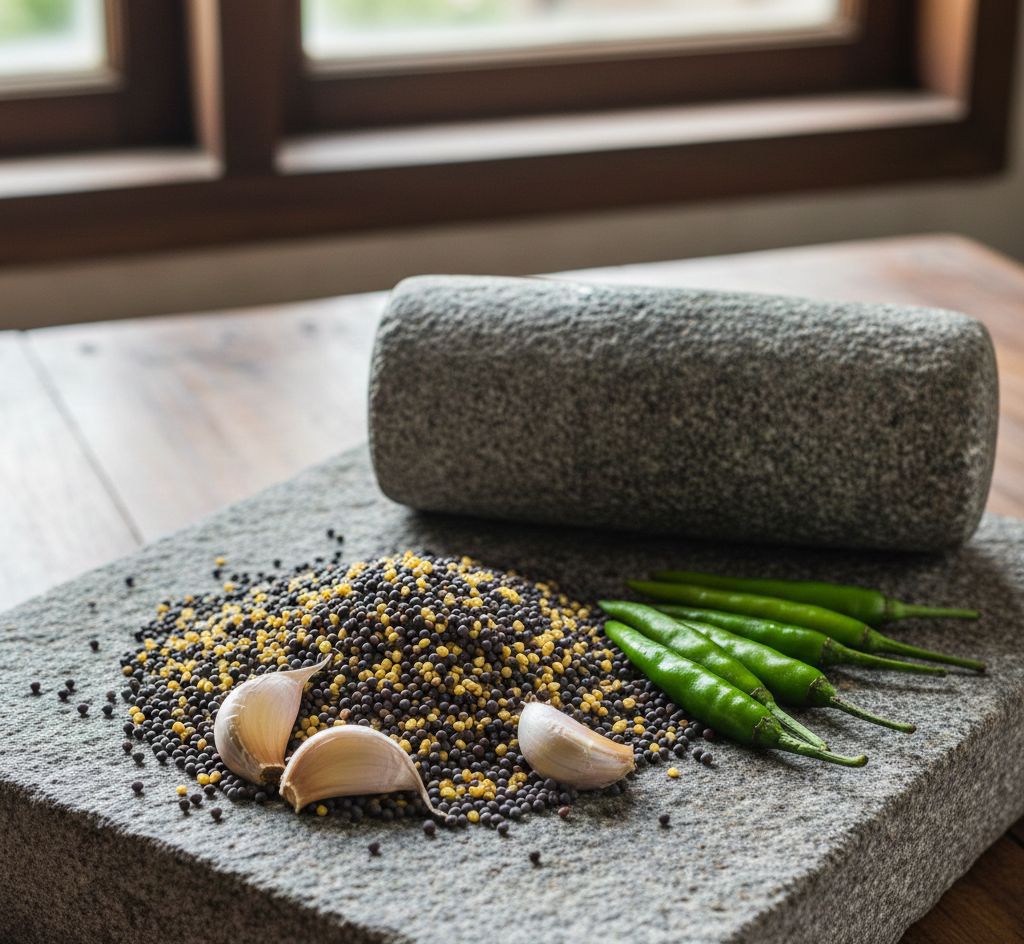
Sajana Macha is simple and pure. There’s no onion-tomato base here – just clean, bold flavors of mustard oil, turmeric, chilies and the freshness of river fish (typically rohu or catla). I still see my elders in my mind, grinding yellow mustard on a silbatta (grinding stone) while the raw scent of those seeds fills the kitchen. That pungent aroma was the promise of something hearty to come. In fact, *“Sorisa bata (mustard paste)…[is] the soul of Odisha”*, and it forms the heart of this curry. We marinate the fish just with salt, turmeric and a dash of mustard oil, then fold in a fresh paste of soaked mustard, cumin, garlic and green chilies. The drumstick pieces (cut 3–4 inches long) simmer slowly in this golden gravy, yielding their sweet, earthy taste to the fish. A final drizzle of raw mustard oil and a slit green chili on top brings back that heady homemade fragrance, taking us right back to that grandmother’s kitchen.
Ingredients
For the Fish Marinade: 6–8 pieces rohu or catla (cleaned fish), 1 tsp turmeric, 1 tsp salt, 1 tbsp mustard oil.
For the Mustard Paste (Sorisa Bata): 3–4 tbsp mustard seeds (yellow or black; yellow is milder), 1 tsp cumin seeds, 4–6 garlic cloves, 2–3 green chilies, a pinch of salt, water (just enough to grind into a paste).
For the Curry: 8–10 drumstick pods (sliced), 1–2 green chilies (slit), ½ tsp turmeric, salt to taste, 2–3 tbsp mustard oil, warm water as needed. (Optional: 1 raw banana cut into chunks, 1–2 dried ambula (sun-dried mango) pieces or a pinch of tamarind for tang).
For Tempering: ½ tsp mustard seeds, ½ tsp cumin seeds, 1–2 dried red chilies.
These ingredients are the rustic staples of an Odia kitchen. Notice there are no garam masalas or heavy spice powders – just turmeric, chilies, and the bold flavors of mustard and mustard oil. This simplicity is by design, reflecting the temple-influenced, satvik spirit of coastal Odisha.
Step-by-Step Recipe
1. Marinate the Fish. In a bowl, rub the fish pieces with turmeric, salt, and a spoon of mustard oil. Set aside for 10–15 minutes. This not only seasons the fish, it also tightens the flesh and removes any raw smell.
2. Prepare the Mustard Paste (Sorisa Bata). Soak the mustard and cumin seeds in a little water for about 10 minutes (this tames their bitterness). Drain, then grind them with garlic, green chilies, and a pinch of salt. Add just enough water to make a thick, smooth paste. (Tip: The paste should be thick – too much water will dilute its punch. If it tastes overly sharp, blend in a teaspoon of yogurt or jaggery to mellow it.)
3. Lightly Fry the Fish. Heat 2 tbsp mustard oil in a heavy pan until it’s shimmering. Lower the heat and add the marinated fish. Fry on each side just until the fish is pale-golden (do not brown it hard or it will overcook later). Remove and set the fish aside on a plate.
4. Temper and Sauté Drumsticks. In the same pan with the remaining oil, add the mustard and cumin seeds along with the dried red chilies. Let them sizzle. Then add the drumstick pieces, the slit green chilies, turmeric and salt. Stir to coat the drumsticks in oil and spices. Pour in about 1 to 1½ cups warm water, cover, and let it cook for 5–7 minutes until the drumsticks are about 70% tender.
5. Finish with Mustard Paste. Lower the flame completely. Add the mustard-garlic-chili paste to the drumsticks and gently mix. Add more warm water if needed to get a gravy of pourable consistency. Let everything simmer gently for 2–3 minutes (avoid boiling vigorously, or the mustard can turn bitter).
6. (Optional) Add Sambal or Tamarind. If using ambula (sun-dried mango) or tamarind water for tanginess, add 1–2 pieces of ambula (or 1 tsp tamarind paste) now. Cover and cook for a few more minutes until the drumsticks are fully tender.
7. Add the Fish and Finish. Gently nestle the fried fish pieces into the gravy. Simmer for 3–4 minutes just until the fish is cooked through and the flavors meld. Taste and adjust salt. Turn off the heat and drizzle 1 teaspoon of raw mustard oil on top (this final step wakes up the aroma). You may garnish with a slit green chili or a sprig of coriander (coriander is optional – many traditional cooks actually skip it to keep the curry “pure”).
Now the Sajana Macha is done – a steamy pot of yellow mustard gravy studded with tender fish and drumstick, flavored only with earthy spices and oil. The gravy should be thick enough to coat the ingredients, spicy from the chilies but balanced by the sweet notes of drumstick and a hint of sour if you used ambula.
Cooking Tips
Use fresh drumsticks. Older drumsticks become fibrous and lose fragrance. Choose young pods (3–4″ long) and cut them into chunks at an angle so they cook more evenly. Do not overcook them; drumsticks are done when the flesh inside yields and the pods start to split.
Soak and grind mustard properly. Soaking the seeds softens their mustard-oil yield and prevents bitterness. Always grind the paste with very little water – it should remain thick. If it comes out too pungent, a spoon of yogurt or jaggery can smooth it out.
Heat the oil well. Mustard oil should be hot but not smoking. Lower the flame when adding fish or spices, to avoid burning. Only mustard oil should be used – it gives the curry its signature flavor.
Simmer gently. After adding the mustard paste, keep the flame very low. A gentle simmer allows the flavors to marry without turning the mustard grainy.
Finish with raw oil and chili. A final drizzle of raw mustard oil (and a fresh green chili) just before serving releases that household aroma you remember from childhood. This simple touch makes the curry taste truly Odia.
Variations
Though the basic method stays the same, Odia cooks personalize this curry in many ways. A couple of peeled raw bananas or chunks of tender pumpkin can be added along with the drumsticks to bulk up the curry, especially if serving a crowd. For tang, many include 1–2 dried ambula (sun-dried mango) pieces or a teaspoon of tamarind along with the mustard paste. Some even toss in a handful of chopped tomatoes or a potato. You can adjust green chilies to your heat preference: more chilies make it fiery, fewer make it milder. But the soul of Sajana Macha always remains the same – bold mustard flavors, just a bit of turmeric, and the unmistakable taste of drumstick and fresh fish.
Serving Suggestions
A traditional Odia meal with Sajana Macha (fish & drumstick curry) served on a banana leaf with rice and sides. Serve Sajana Macha hot, ladled generously over steamed rice. In a classic Odisha thali, this curry would be accompanied by a simple saga bhaja (sauteed greens such as spinach or pumpkin leaves) and badi chura – crushed, fried lentil dumplings mixed with onion, garlic, chili and mustard oil. (Badi chura is an Oriya staple: sun-dried black gram dumplings crumbled with aromatics.) A dollop of cool yogurt or a side of alu bhaja (spiced potato) also go well. In short, make it a complete Odia spread: rice, Sajana Macha, a leafy fry (saga bhaja), and crunchy badi chura on the side.
This humble yet hearty meal is more than just comfort food – it’s a taste of Odia heritage. Generations of village families have relished Sajana Macha with their hands, praising its blend of earthy spices and tender fish. As one food writer beautifully put it about our beloved mustard fish curry, *“it is heritage. It is home. It is Odisha.”* In every spoonful of Sajana Macha, we celebrate that tradition.
Wrapped in fresh green turmeric leaves, Enduri Pitha is a beloved Odia delicacy steeped in culture and nostalgia. Every Odia family recalls chilly winter mornings when elders rose before dawn to prepare this pitha for festivals like Prathamastami (the celebration of the firstborn child) and other winter pujas. On Prathamastami, the eldest child is blessed with new clothes and prayers, and *“the main delicacy of the day is Enduri Pitha”*. The soft fermented rice-and-urad-dal cakes are filled with a sweet coconut–jaggery mixture, then steam-cooked inside turmeric leaves. When the spicy leaves are unwrapped, the heavenly aroma (often described as *“transporting you to an ethereal world”*) fills the kitchen. For many, each Enduri Pitha carries memories of grandparents chanting morning prayers, the kitchen lush with earthy turmeric fragrance, and a sense of devotion and togetherness that marks the festival.
Turmeric (haldi) is considered holy in Odisha’s customs: its leaves are believed to purify and bless food. The use of fresh turmeric leaves not only imparts aroma and a healthful touch (even giving Enduri Pitha a mild laxative effect), but also symbolizes purity and a spiritual link to nature. Traditionally, these rice cakes were offered as Mahaprasad (sacred food) to Lord Jagannath in Puri, making them a blessed feast. This post walks you through a step-by-step recipe for Enduri Pitha – from the fermented batter and coconut–jaggery stuffing to the sacred steaming process – along with tips, variations, and the cultural magic behind this dish.
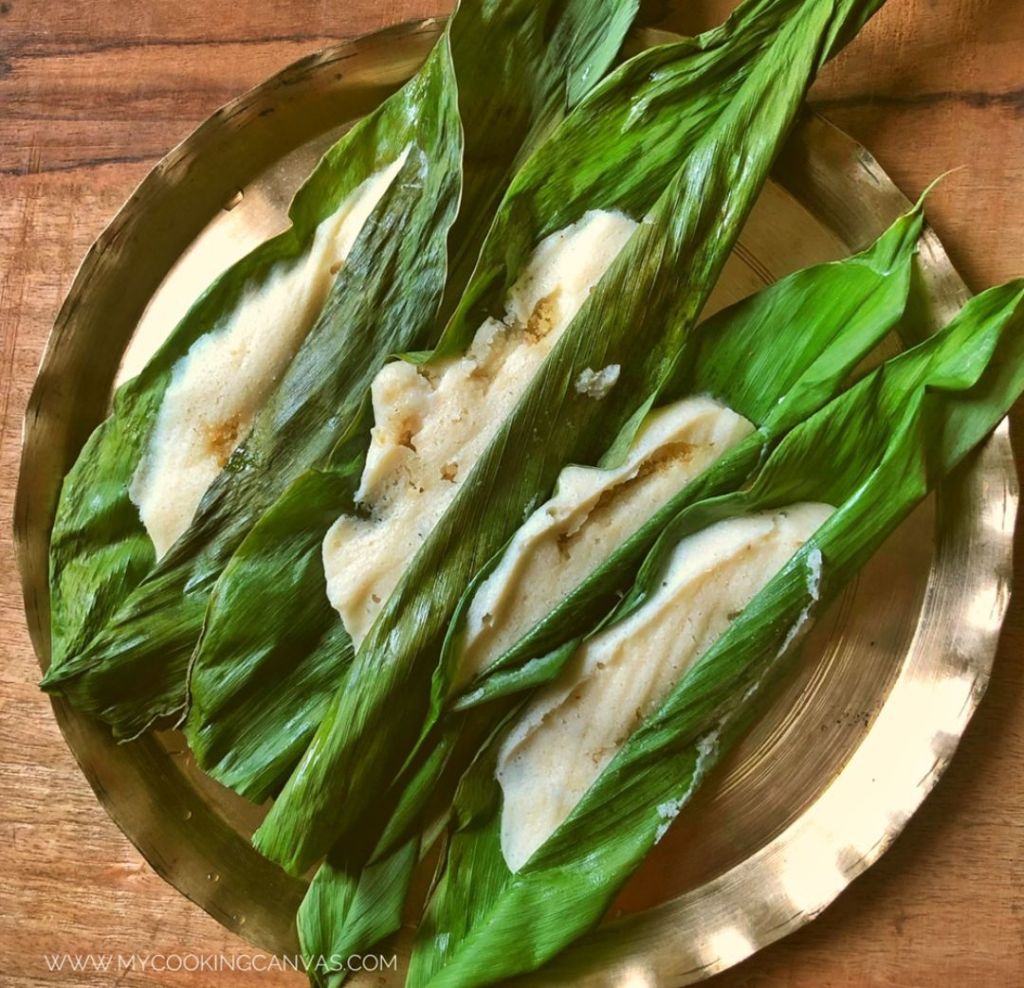
Enduri Pitha: Soft steamed cakes of rice-urad batter with sweet coconut–jaggery filling, wrapped in glossy green turmeric leaves.
Ingredients
To make about 10–12 Enduri Pithas, you’ll need:
Rice and Urad Dal: ~1 cup raw rice and ½ cup split urad dal (black gram). (You can soak them together or separately.)
Turmeric Leaves: 10–12 fresh green turmeric leaves (haldi patra). These are the envelopes that infuse fragrance. (If unavailable, large banana leaves may be substituted, though the unique aroma is then missing.)
Coconut-Jaggery Filling: 1 cup grated fresh coconut, 100–150 g jaggery (or dark jaggery/sugar to taste), and 4–6 green cardamom pods, crushed. (Some cooks also add 100 g crumbled chhena [fresh cottage cheese] and a few peppercorns to the filling for extra richness and spice.)
Seasoning: A pinch of salt for the batter; a small knob of ghee or oil to grease the leaves (optional).
Optional: A few whole black peppercorns for the stuffing (traditional).
To Steam: Water and a steamer (or large pot with a steaming setup).
These simple ingredients come together to showcase Odisha’s agrarian heritage – rice, lentils, coconut, and jaggery, wrapped in a symbol of the earth (the turmeric leaf).
Method: Step-by-Step Recipe
1. Soak and Grind Batter: Wash the rice and urad dal well. Soak them together (or separately) in enough water for at least 4–6 hours, or overnight. Drain the water and grind the dal into a fine smooth paste (adding a little water as needed). Next, add the soaked rice and grind again, leaving the rice batter slightly coarse (this is traditional). The final consistency should be similar to dosa batter – neither too thin nor too stiff.
2. Ferment the Batter: Transfer the batter to a bowl, stir in a pinch of salt, and cover. Let it ferment in a warm place for 5–8 hours (or overnight). In warm weather, fermentation happens faster (5–6 hours); in cooler climates, you might ferment longer or use a warm oven to help. Fermentation gives the pitha a light tang and fluffiness reminiscent of idli. When done, the batter will have risen slightly and feel a bit airy.
3. Make the Filling: While the batter ferments, prepare the sweet stuffing. In a pan over medium heat, melt the jaggery with a splash of water and bring it to a boil. Add the grated coconut and (if using) crumbled chhena, stirring constantly. Cook until the mixture starts to thicken and the coconut pieces look lightly toasted. Stir in cardamom powder and coarsely crushed peppercorns for warmth. Once the filling is moist but no longer runny, remove from heat and let it cool. The cooled stuffing should hold together slightly but still be soft.
4. Prepare the Turmeric Leaves: Wash each turmeric leaf and pat it dry. If the leaves are large, you can cut them into roughly equal strips. Lightly grease each leaf with a bit of ghee or oil – this prevents sticking and adds shine. Place a greased leaf on a flat surface (shiny side down, veins up). Using a ladle or spoon, pour a small oval of the fermented batter onto the lower half of the leaf, spreading it gently to about 1/4″ thickness (leaving room to fold).
Preparing Enduri Pitha: A spoonful of fermented rice–dal batter is spread on a greased turmeric leaf (on a brass plate) and topped with the sweet coconut–jaggery filling.
5. Stuff and Fold: Quickly place about 1–2 tablespoons of the coconut–jaggery mixture along the center of the batter oval. Fold the leaf lengthwise to encase the stuffing (like closing a book). You can simply fold the leaf over itself, or for extra security tie each bundle with a short kitchen thread. Tradition varies: in many Odia homes the folded pithas are tied or tucked so they stay closed while steaming. Repeat this with remaining batter, filling, and leaves.
6. Steam the Pithas: Arrange the folded pithas in a steamer basket or in an idli steamer tray. (If you don’t have an idli stand, you can improvise: line a wide pot with a clean cotton cloth stretched over the rim, place the pithas on the cloth, and fold the cloth to cover them.) Steam over boiling water for 10–15 minutes on high heat, or until the pithas look set and a toothpick inserted into the rice layer comes out clean. The turmeric leaf will darken and stick slightly to the rice, but it can be easily peeled off after cooking.
7. Cool and Serve: Remove the pithas from the steamer and let them sit a few minutes. To serve, gently peel back the turmeric leaf from each pitha – the hot pitha should slide out in one piece. Serve these warm or at room temperature. The steamed cake will be soft and fluffy; the filling melts in your mouth. They are traditionally eaten directly (no accompaniments needed), often on banana leaves or brass plates for an authentic touch.
Tips & Variations
Leaf Alternatives: If fresh turmeric leaves are scarce (they can be seasonal), use large banana (plantain) leaves as a substitute. The pitha will still steam beautifully, but it will lack the special turmeric aroma. You might also reuse each turmeric leaf 2–3 times before it withers, taking care to wash and pat it dry between uses.
Grease the Leaves: Rubbing a little ghee on the leaves before adding batter prevents sticking and adds a rich flavor. This tip keeps your pithas intact when unwrapping.
Stuffing Variations: The classic filling is coconut and jaggery, flavored with cardamom (and sometimes a hint of black pepper). For a twist, some cooks add chhena (cottage cheese) to make the filling even richer. You could also mix in toasted nuts or raisins for texture. Conversely, you can omit chhena for a purely coconut version as shown here. Just keep the proportions roughly 1:1 coconut to jaggery so the mixture isn’t too sweet or greasy.
Batter Consistency: Aim for a pourable but thick batter, similar to a traditional idli/dosa batter. It should be spreadable on the leaf. If it ferments too much and becomes very airy, gently fold it to deflate some bubbles. If it’s too thick, add a tablespoon of water.
Steaming Setup: If you have an Idli steamer, you can place the wrapped pithas in the idli molds (they may need to be folded slightly to fit). Otherwise, a pot method works: stretch a clean muslin cloth over a deep pot, secure it, and lay the pithas on top, covering with a lid. Either way, ensure there’s sufficient water below to boil for 10–15 minutes. The goal is gentle steam, not boiling the bottom of the leaves.
Make Ahead: You can prepare the batter and stuffing a day ahead (refrigerating the cooked stuffing). On the festival morning, assemble and steam. Steamed pithas keep well at room temperature for a day (in cold weather) or 1–2 days refrigerated. Warm slightly before serving if needed.
Cultural & Spiritual Significance
Enduri Pitha is more than food – it’s a ritual of devotion and family bonding. In Odisha, special dishes on festivals are offerings to God, and steamed dishes like this are considered pure (sattvic). The bright turmeric leaves symbolize the earth and purity, while the slow steaming method (with no oil or harsh ingredients) reflects sattvik cooking that nourishes both body and soul. As one writer observes, a mother’s careful preparation of these pithas is almost “like artwork in progress” – a gesture of love and reverence passed down through generations.
During Prathamastami, every step carries meaning: the maternal aunt sends turmeric leaves and jaggery as blessings, elders perform prayers and aarti for the firstborn, and Enduri Pitha is offered not only to God but also to the child. In many homes, a dollop of pitha is first placed on an idol or plate of Goddess Durga before being shared by the family. Eating Enduri Pitha, then, is both a treat and a prayer – wishing health and longevity for the child. The humble, natural ingredients (rice, dal, coconut, jaggery) used in this Maharabadi feast connect the family to the land and the rhythms of Odia tradition.
As the elders say in Odisha, these 13 festivals a year (one more than the months) are threads that weave families together. When the kitchen fills with the sweet-spicy steam of Enduri Pitha, it reminds us of those ties. Each unwrapped pitha carries the warmth of home, the blessings of ancestors, and the taste of devotion.
Whether you’re celebrating Prathamastami or simply craving a fragrant winter snack, this Enduri Pitha recipe brings a piece of Odia heritage to your table. Enjoy each bite with gratitude and share it with loved ones – after all, in Odia culture, food is love, faith, and family all wrapped up in one leaf.
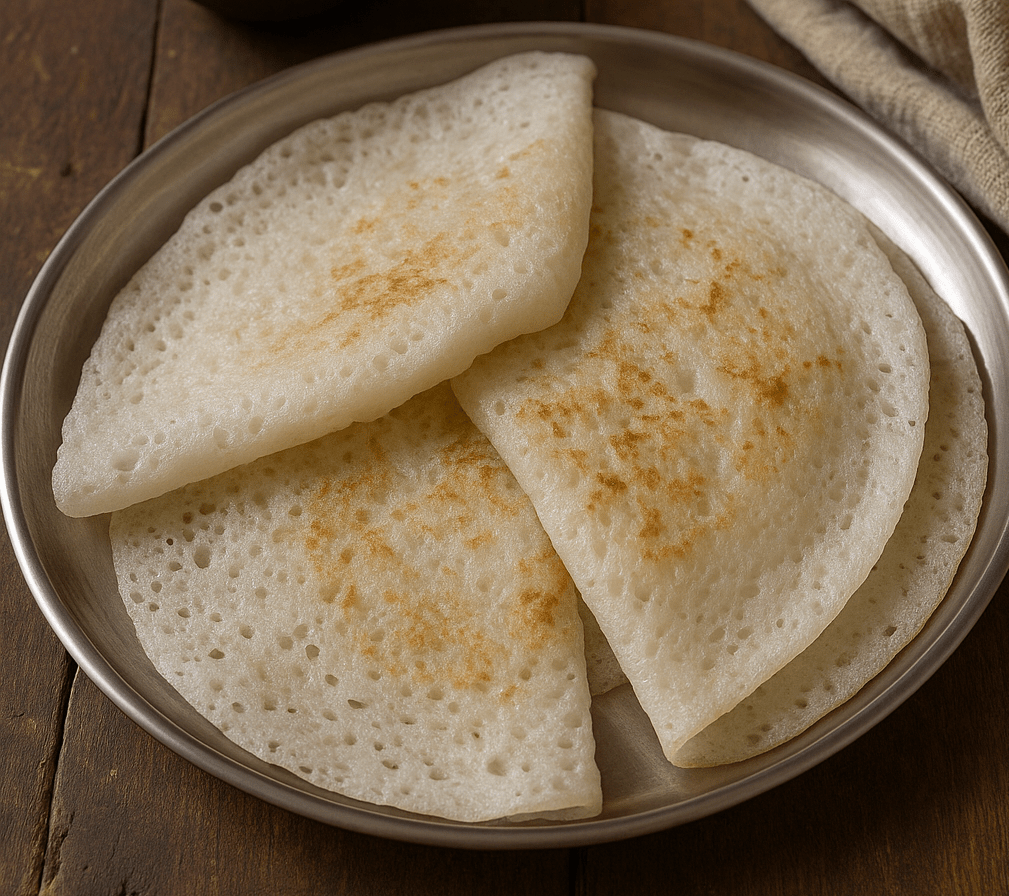
Chakuli Pitha (Odia: ଚକୁଳି ପିଠା) is a flat fermented rice-and-urad-dal pancake that epitomizes the taste of Odisha. This humble pancake is beloved across generations, and on festival mornings its aroma is as comforting and revered as a prayer. In my family home, the first hiss of chakuli on the tawa at dawn meant a celebration was underway – a joyful signal to the village that the women had rested and the day of feasting had begun.
On special occasions like Raja Parba or Pana Sankranti, chakuli pitha is as sacred as any offering. It is customary to offer these tender cakes to Goddess Lakshmi on Manabasa Gurubar, weaving devotion into each bite. The gentle sourness from overnight fermentation feels both grounding and auspicious, linking us to our ancestors and the rice fields that sustain us. Every warm plate of chakuli served in our home carries these loving memories – golden discs that taste of tradition and togetherness.
Chakuli Pitha Recipe
Ingredients:
2 cups parboiled rice (aruarua chaula)
1 cup whole white urad dal (biri dal)
½ tsp salt (or to taste)
Water, for soaking and grinding
Ghee or mustard oil (for cooking)
Steps:
1. Soak & Grind: Rinse the rice and urad dal. Soak them separately in water for 4–6 hours. Drain and grind each to a smooth batter (you can add a little water). Mix the two batters together, add salt, and whisk well until smooth.
2. Ferment: Cover the batter and let it ferment in a warm place for 8–12 hours (overnight is ideal). The batter will rise and develop a light sour aroma – a sign it’s ready.
3. Cook Chakuli: Heat a cast-iron tawa or heavy skillet on medium heat. Grease it lightly with ghee or mustard oil (traditional choices). Pour a ladleful of batter onto the hot tawa and gently spread it into a circle about 5–6 inches wide. Cover and cook for 2–3 minutes. Bubbles will form and edges will lift. Carefully flip (or fold) and cook another minute. The chakuli should be golden and spongy. Repeat with remaining batter.
4. Keep Warm: Stack the hot chakuli on a plate. If you like, smear a little ghee on top so they stay moist and flavorful.
Tips for Perfect Chakuli
Batter Consistency: The batter should pour smoothly but be slightly thicker than dosa batter. Too runny and it won’t hold shape; too stiff and it won’t ferment evenly. A good test is that it coats the ladle and falls slowly. Aim for a pourable, yet thick, consistency.
Fermentation: Warmth is key. Let the batter rest in a mildly warm corner of the kitchen. The ideal is around 25–30°C. In cooler climates, place the covered batter inside a turned-off oven with only the light on – the gentle heat will encourage fermentation. You’ll know it’s properly fermented when it smells slightly tangy.
Cooking: Preheat the skillet well so the chakuli cooks through. After pouring the batter, always cover with a lid; the steam cooks the top while the bottom crisps. Use just a teaspoon of ghee or mustard oil for each pitha to get the characteristic aroma. Avoid flipping back and forth – one flip (or none, if you prefer folding) is usually enough.
Serving Warm: Serve chakuli immediately while they’re soft. Cold chakulis tend to firm up, so keep them wrapped in a clean cloth or covered plate until serving.
Variations: Sweet and Savory Twists
Families across Odisha enjoy creative twists on chakuli. A popular sweet version is Budha (or Burha) Chakuli – literally the “grown-up” pancake – which is richer and thicker. For Budha Chakuli, a spoonful of jaggery (molasses) and grated coconut (and even mashed banana) is mixed into the fermented batter. The result is a dessert-like pancake often reserved for special days. I still remember my grandmother mashing ripe banana and stirring in coconut, turning our morning chakuli into a sweet festival treat.
In contrast, Saru Chakuli is made paper-thin, almost like a dosa. It’s spread very thin on the tawa and fried until crisp; perfect for those who love a lighter texture. Beyond these, you can simply enjoy plain chakuli pitha with spiced fillings or toppings: try folding a hot chakuli around freshly grated sweet coconut or pouring warm jaggery syrup (pani guda) over it for an instant dessert. Even a dollop of curd or coconut chutney provides a delightful contrast to the chakuli’s tang. These variations showcase the versatility of chakuli – from a simple breakfast pancake to a stuffed festival delicacy.
Serving Suggestions
Chakuli Pitha is always served hot. In Odisha, it’s common to present a stack of steaming chakulis alongside simple accompaniments. For a traditional experience, drizzle a little warm ghee on top and accompany the pitha with jaggery or sugar – the sweetness complementing its tang. Spicy sides are equally loved: we often serve chakuli with aloo dum (a potato curry) or guguni (a spiced chickpea curry). A bowl of coconut chutney, dal, or even plain yogurt also pairs nicely. In every case, the soft fermented pancake acts as a perfect vehicle for these flavors, turning humble ingredients into a hearty festival breakfast.
Every bite of chakuli pitha is a journey back to those simple, joyous mornings – a reminder that food can be an offering, a celebration, and a memory all at once. By following this traditional recipe and honoring the small rituals around it, you bring a bit of Odia devotion and nostalgia into your own kitchen. Enjoy cooking and savoring this timeless festival pancake!
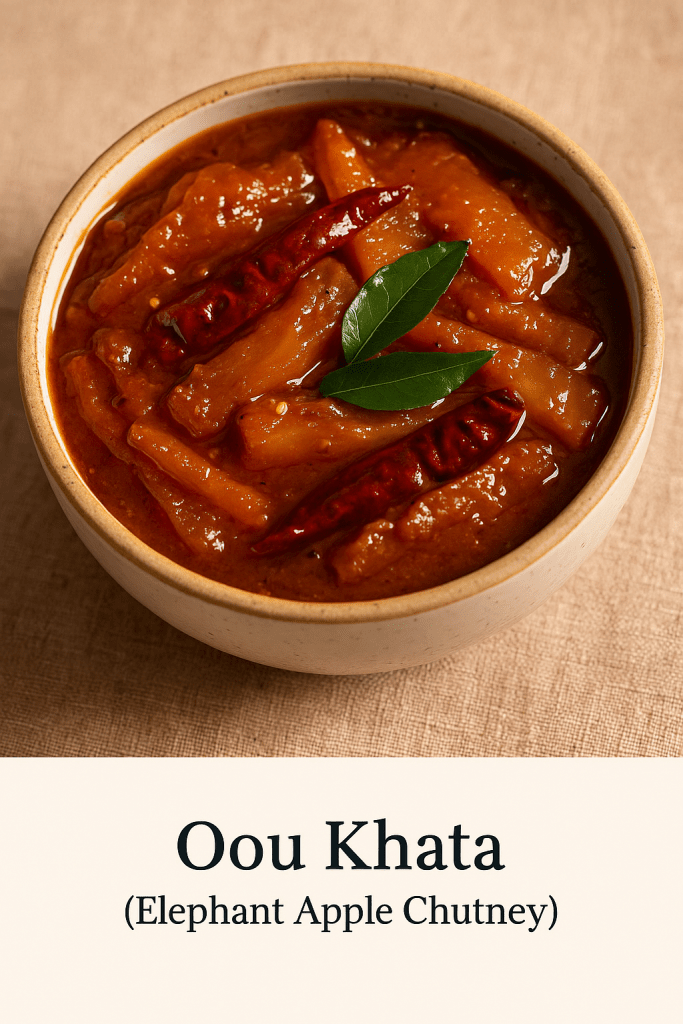
I still remember the monsoon afternoons at Grandma’s house in Odisha, with the sky dark and rain drumming on the tin roof. My cousins and I would dash into her courtyard, where the wild Oou (elephant apple) tree towered overhead. Fresh green fruits would tumble down after a big storm, and Grandma would scoop us up in a gleeful rush. The sour, tangy aroma of those fruit instantly brightened the air. She’d peel the prickly skin, grind mustard and cumin seeds on her heavy stone mortar, and stir up a bubbling pan of chutney that smelled of turmeric, mustard oil and jaggery. One bite of her homemade Oou Khata – hot steamed rice, dalma and a spoonful of that sweet-and-sour pickle – could chase all winter blues away. Those tastes and smells are pure comfort to me, a rain-soaked hug in a bowl.
I’ve learned that this Elephant Apple chutney is more than just a delicious snack; it’s a seasonal ritual. In Odisha, Oou is legendary for its sharp sourness, so cooks always add a good amount of jaggery (or sugar) to balance it. In fact, one Odisha food blog explains: *“Elephant apple (Ouu) is a sour fruit, so sugar or jaggery is added to it while cooking to get a sweet-n-sour taste.”*. We always made this khata (sour chutney) around the end of the rains – just as another blogger notes, *“Elephant Apple Chutney (Ouu Khatta) is a typical recipe of Odisha prepared in every household mostly in post monsoon season.”*. And just like at Grandma’s home, it was often cooked simply without any onion or garlic, especially during festival days. Those traditions made each spoonful of Oou Khata taste like home – a little sour, a little sweet, and completely heartwarming.
Ingredients
Oou (Elephant apple): 1 large (about 250g) – peel off the skin and cut into 1–2″ pieces
Jaggery (gur) or brown sugar: ⅓ cup, grated (add more or less to taste)
Oil: 1 tablespoon (mustard oil for authentic flavor, or any neutral cooking oil)
Salt: to taste (about ½–1 teaspoon)
Water: as needed (for boiling and simmering)
Optional: A small piece of ginger (mashed) or a teaspoon of ginger-garlic paste – skip if avoiding onion/garlic.
Instructions
1. Grind the spices. In a small bowl or mortar, combine the mustard seeds, cumin seeds, and 1 dry red chili. Grind or blend into a smooth paste, adding a little water if needed. (This fragrant paste is called “besa” in Odia.) Set aside.
2. Prep the elephant apple. Pull away any green outer petals and peel off the thick skin of the oou. Chop the peeled fruit into long strips or bite-size pieces (about 1–2″). Gently crush each piece with the back of a spoon or pestle – this releases more flavor as it cooks.
3. Boil the fruit. Place the chopped elephant apple in a saucepan with about 2 cups water, ¼ teaspoon turmeric and a pinch of salt. Bring to a boil, then lower heat and simmer for 5–10 minutes, until the oou pieces are just tender. Drain and reserve the cooked fruit (you can also use a pressure cooker for 1–2 whistles).
4. Tempering (tadka). Heat oil in a pan over medium heat. Add the panch phoron and remaining whole dry chilies; let them sizzle and pop. Add the curry leaves (if using) and fry briefly – you’ll smell their nutty aroma.
5. Sauté the fruit. Add the boiled elephant apple pieces to the hot pan. Stir and fry for 2–3 minutes so the pieces get lightly coated in the oil and spices.
6. Add the paste. Stir in the mustard–cumin paste you made, along with turmeric and salt. Mix well and cook for another minute to remove any raw flavor. The mixture will smell sharp and mustardy.
7. Simmer with jaggery. Pour in about ½ cup of water (or more if you like a thinner chutney) and bring to a gentle simmer. Cover and cook on medium-low for 8–10 minutes. The gravy will thicken slightly.
8. Sweeten the chutney. Add the grated jaggery (or sugar) and a pinch of chili powder if you want extra heat. Stir until the jaggery melts and blends into the sauce. Taste and adjust seasoning – add a little more salt or jaggery as needed. Remove from heat when you have a glossy, sweet-and-sour chutney coating the fruit.
9. Serve warm. Spoon the Oou Khata into a bowl and let it cool slightly. It’s traditionally served at room temperature. I like to garnish with a few fresh coriander leaves just before serving.
Tips & Variations
Sweetener swap: Jaggery gives the most authentic taste, but you can use brown sugar or even regular sugar in a pinch. (Add it gradually; you want the chutney tangy, not cloyingly sweet.)
More tang: If your elephant apples aren’t very sour, you can squeeze in a teaspoon of lemon or tamarind juice for extra zing.
Oil choice: Mustard oil lends a rustic pungency to Oou Khata. If you don’t have it, any neutral oil is fine. (A tiny drizzle of sesame oil at the end also adds a nice touch.)
Onion/garlic option: For a non-fasting version, you could sauté a chopped onion or a little minced garlic along with the tempering spices. This gives extra depth but is completely optional – the recipe is delicious even without them.
Spice variation: Swap panch phoron for a simple tempering of mustard and cumin seeds alone. You can also add a pinch of asafoetida (hing) in the oil if you skip the curry leaves – it mimics that savory aroma.
Make ahead: Like many chutneys, this tastes even better the next day. Store leftovers in the fridge (in a sealed jar) for up to 2–3 days – the flavors will mellow and blend as it sits.
Each time you stir a spoonful of this chutney into your rice and dal, I promise you’ll be transported back to my grandmother’s kitchen, rain pattering on the roof and kids laughing on the porch. Oou Khata is humble and homely – just like the memories it’s tied to. I hope this recipe brings a little of that old Odisha warmth into your home. Whenever you make it, do enjoy it with some hot chhena dalma or plain dal and steaming rice. Happy cooking and जय ଓଡ଼ିଶା (Jai Odisha)!
In every Odia household, Kanika is more than a dish — it’s a celebration, a sacred offering, and a sweet memory rolled into fragrant grains of rice. I remember every Rath Yatra and festive Sunday, my mother would prepare Kanika in a brass handi with generous spoonfuls of ghee, and as the aroma filled the house, we’d know the bhog plate was almost ready.
Kanika is a traditional sweet rice dish from Odisha, flavored with ghee, jaggery, and spices. It’s part of the famous Chappan Bhog offered to Lord Jagannath in Puri and is often paired with dalma, saga, or khatta. Unlike kheer, Kanika is dry, rich, and lightly spiced — often served in temple rituals or made at home during pujas and celebrations.
Ingredients (Serves 3–4)
1 cup arua chaula (raw rice or basmati rice)
¾ cup grated jaggery (adjust to sweetness)
2 tbsp desi ghee
2 tbsp grated coconut (optional)
2 tbsp cashews and raisins
1–2 small bay leaves
2–3 cloves
2–3 green cardamoms
A small piece of cinnamon
A pinch of salt
2 cups water
Step-by-Step Preparation
1. Wash & soak rice
Wash the rice and soak it in water for 20–30 minutes. Drain and set aside.
2. Prepare jaggery syrup
In a small pan, dissolve jaggery in 2 cups warm water. Strain to remove impurities and keep aside.
3. Temper the ghee
In a thick-bottomed kadhai, heat ghee. Add bay leaves, cloves, cardamoms, and cinnamon. Let them splutter and release aroma.
4. Add dry fruits
Toss in cashews and raisins. Fry till golden. Add grated coconut if using.
5. Cook the rice
Add drained rice and stir gently to coat with ghee and spices. Sauté for 2–3 minutes.
6. Add jaggery water
Pour in the strained jaggery water and add a pinch of salt (to enhance sweetness). Bring to a gentle boil.
7. Simmer and cook
Cover and cook on low heat until the rice absorbs all the liquid and turns soft and aromatic. Do not stir too much — let it steam gently.
8. Rest and fluff
Turn off heat. Let it sit covered for 5 minutes. Fluff with a fork. Serve warm.
Tips for Perfect Kanika
Use arua chaula (raw rice) or aged basmati for fragrance.
Do not overcook the rice — each grain should be soft but separate.
A little salt actually balances the sweetness and brings out flavor.
For temple-style feel, use brass utensils and no onions or garlic.
Serving Suggestions
Serve with dalma, khatta, or simple mixed veg curry
Add it to a festive bhog thali with saga, chutney, and pakhala
Enjoy as a warm sweet snack with just a spoon of ghee on top
Why I Love It
I love Kanika because it smells like tradition. It brings back memories of temple bells, copper thalis, and the rustle of tulsi leaves on a summer afternoon. It’s sweet, but not overly so — soft, spiced, and rich with ghee. On puja days or whenever my heart needs a little comforting, I make a small pot of Kanika, and suddenly, everything feels sacred again.