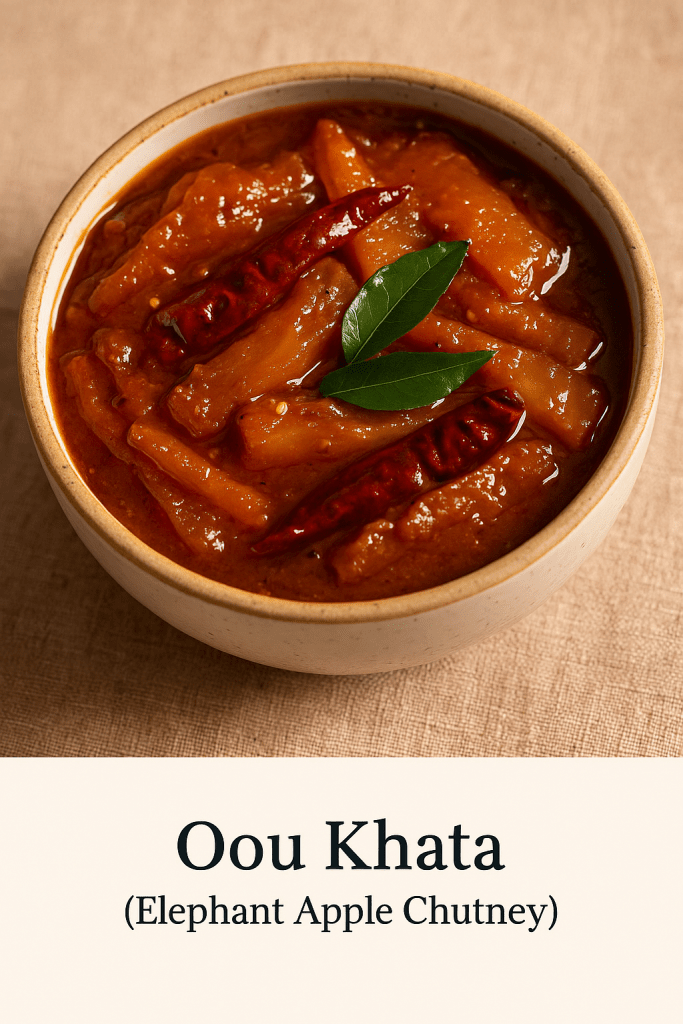
I still remember the monsoon afternoons at Grandma’s house in Odisha, with the sky dark and rain drumming on the tin roof. My cousins and I would dash into her courtyard, where the wild Oou (elephant apple) tree towered overhead. Fresh green fruits would tumble down after a big storm, and Grandma would scoop us up in a gleeful rush. The sour, tangy aroma of those fruit instantly brightened the air. She’d peel the prickly skin, grind mustard and cumin seeds on her heavy stone mortar, and stir up a bubbling pan of chutney that smelled of turmeric, mustard oil and jaggery. One bite of her homemade Oou Khata – hot steamed rice, dalma and a spoonful of that sweet-and-sour pickle – could chase all winter blues away. Those tastes and smells are pure comfort to me, a rain-soaked hug in a bowl.
I’ve learned that this Elephant Apple chutney is more than just a delicious snack; it’s a seasonal ritual. In Odisha, Oou is legendary for its sharp sourness, so cooks always add a good amount of jaggery (or sugar) to balance it. In fact, one Odisha food blog explains: *“Elephant apple (Ouu) is a sour fruit, so sugar or jaggery is added to it while cooking to get a sweet-n-sour taste.”*. We always made this khata (sour chutney) around the end of the rains – just as another blogger notes, *“Elephant Apple Chutney (Ouu Khatta) is a typical recipe of Odisha prepared in every household mostly in post monsoon season.”*. And just like at Grandma’s home, it was often cooked simply without any onion or garlic, especially during festival days. Those traditions made each spoonful of Oou Khata taste like home – a little sour, a little sweet, and completely heartwarming.
Ingredients
Oou (Elephant apple): 1 large (about 250g) – peel off the skin and cut into 1–2″ pieces
Jaggery (gur) or brown sugar: ⅓ cup, grated (add more or less to taste)
Oil: 1 tablespoon (mustard oil for authentic flavor, or any neutral cooking oil)
Salt: to taste (about ½–1 teaspoon)
Water: as needed (for boiling and simmering)
Optional: A small piece of ginger (mashed) or a teaspoon of ginger-garlic paste – skip if avoiding onion/garlic.
Instructions
1. Grind the spices. In a small bowl or mortar, combine the mustard seeds, cumin seeds, and 1 dry red chili. Grind or blend into a smooth paste, adding a little water if needed. (This fragrant paste is called “besa” in Odia.) Set aside.
2. Prep the elephant apple. Pull away any green outer petals and peel off the thick skin of the oou. Chop the peeled fruit into long strips or bite-size pieces (about 1–2″). Gently crush each piece with the back of a spoon or pestle – this releases more flavor as it cooks.
3. Boil the fruit. Place the chopped elephant apple in a saucepan with about 2 cups water, ¼ teaspoon turmeric and a pinch of salt. Bring to a boil, then lower heat and simmer for 5–10 minutes, until the oou pieces are just tender. Drain and reserve the cooked fruit (you can also use a pressure cooker for 1–2 whistles).
4. Tempering (tadka). Heat oil in a pan over medium heat. Add the panch phoron and remaining whole dry chilies; let them sizzle and pop. Add the curry leaves (if using) and fry briefly – you’ll smell their nutty aroma.
5. Sauté the fruit. Add the boiled elephant apple pieces to the hot pan. Stir and fry for 2–3 minutes so the pieces get lightly coated in the oil and spices.
6. Add the paste. Stir in the mustard–cumin paste you made, along with turmeric and salt. Mix well and cook for another minute to remove any raw flavor. The mixture will smell sharp and mustardy.
7. Simmer with jaggery. Pour in about ½ cup of water (or more if you like a thinner chutney) and bring to a gentle simmer. Cover and cook on medium-low for 8–10 minutes. The gravy will thicken slightly.
8. Sweeten the chutney. Add the grated jaggery (or sugar) and a pinch of chili powder if you want extra heat. Stir until the jaggery melts and blends into the sauce. Taste and adjust seasoning – add a little more salt or jaggery as needed. Remove from heat when you have a glossy, sweet-and-sour chutney coating the fruit.
9. Serve warm. Spoon the Oou Khata into a bowl and let it cool slightly. It’s traditionally served at room temperature. I like to garnish with a few fresh coriander leaves just before serving.
Tips & Variations
Sweetener swap: Jaggery gives the most authentic taste, but you can use brown sugar or even regular sugar in a pinch. (Add it gradually; you want the chutney tangy, not cloyingly sweet.)
More tang: If your elephant apples aren’t very sour, you can squeeze in a teaspoon of lemon or tamarind juice for extra zing.
Oil choice: Mustard oil lends a rustic pungency to Oou Khata. If you don’t have it, any neutral oil is fine. (A tiny drizzle of sesame oil at the end also adds a nice touch.)
Onion/garlic option: For a non-fasting version, you could sauté a chopped onion or a little minced garlic along with the tempering spices. This gives extra depth but is completely optional – the recipe is delicious even without them.
Spice variation: Swap panch phoron for a simple tempering of mustard and cumin seeds alone. You can also add a pinch of asafoetida (hing) in the oil if you skip the curry leaves – it mimics that savory aroma.
Make ahead: Like many chutneys, this tastes even better the next day. Store leftovers in the fridge (in a sealed jar) for up to 2–3 days – the flavors will mellow and blend as it sits.
Each time you stir a spoonful of this chutney into your rice and dal, I promise you’ll be transported back to my grandmother’s kitchen, rain pattering on the roof and kids laughing on the porch. Oou Khata is humble and homely – just like the memories it’s tied to. I hope this recipe brings a little of that old Odisha warmth into your home. Whenever you make it, do enjoy it with some hot chhena dalma or plain dal and steaming rice. Happy cooking and जय ଓଡ଼ିଶା (Jai Odisha)!
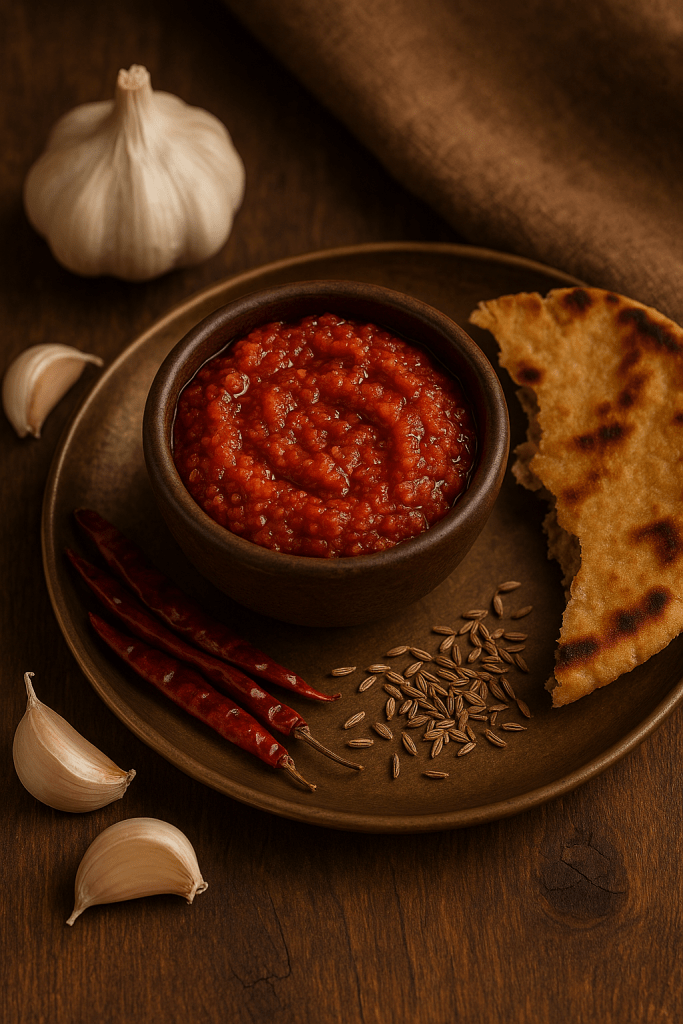
In Maharashtrian kitchens, a dry garlic chutney (lasun chutney) is the secret sprinkling that elevates the iconic vada pav and even complements simple meals like dal-rice. Up north, Rajasthani households swear by a spicy lehsun ki chutney as an essential part of their traditional thali, especially alongside the famed dal-baati-churma. This chutney – whether made dry or wet – carries a rustic charm and explosive garlic kick. It’s the same cherished condiment that grandma would pound on a silbatta (grinding stone) while regaling stories, its aroma filling the courtyard. Often, a spoonful of this chutney is all it takes to make a simple meal memorable, be it a jowar bhakri with thecha in Maharashtra or a dal-baati feast in Rajasthan. Below, discover how to make Lehsun Chutney two ways – the dry crumbly version and the saucy wet version – both guaranteed to add that traditional “pinch of masala” to your plate.
Ingredients
Garlic cloves: 15–20, peeled (about 1 large bulb)
Dried red chilies: 5–6, or 2 teaspoons red chili powder (adjust to taste)
Cumin seeds (jeera): 1 teaspoon
Salt: 1 teaspoon, or to taste
Oil: 2 tablespoons (use mustard oil for authentic flavor, or any cooking oil)
Water: 2–4 tablespoons (for grinding, in wet chutney version)
Optional: A pinch of asafoetida (hing) and ½ teaspoon mustard seeds (for tempering in wet chutney); 2 tablespoons roasted peanuts or dry coconut (for variation in dry chutney, see Tips).
> Yield: These quantities make roughly 1 small bowl of chutney (about 1 cup wet chutney or 1/2 cup dry powder). Feel free to scale up for larger batches.
1. Roast the Garlic: Heat 1 teaspoon of oil in a pan on low flame. Add the peeled garlic cloves and sauté for 2–3 minutes, stirring often, until they turn light golden and lose their raw sharpness. (You’ll smell the garlic aroma—be careful not to burn them.) Remove the roasted garlic and let it cool on a plate.
2. Roast Chilies & Spices: In the same pan, add the dried red chilies (break off the stems for less bitterness) and cumin seeds. Dry roast them for 1–2 minutes until the chilies puff slightly and the cumin is aromatic. Keep the heat low to avoid scorching. Once fragrant, transfer them to the plate to cool. (If using red chili powder instead of whole chilies, skip roasting it; you will add the powder during grinding.)
3. Grind to Chutney Powder: Add the cooled garlic, roasted chilies, and cumin into a mixer or spice grinder. Add salt. Pulse the mixture in short bursts to grind it into a coarse powder. Avoid grinding too fine – the texture should be slightly grainy, not a smooth dust, for the best traditional mouthfeel. (If using chili powder, add it now and pulse again to combine.) You may need to scrape the sides of the grinder jar between pulses. Tip: If the mixture is too dry to grind, you can add a tablespoon of roasted peanut or dry coconut which helps it bind and adds flavor.
4. Storage: Let the dry garlic chutney cool completely, then store it in a clean, dry airtight container. This chutney powder keeps well for 2–3 weeks refrigerated, thanks to its low moisture content. In fact, you can even freeze it for 2 months without loss of flavor. (At room temperature, it stays good for 1 week in a cool, dry place.) Each time, use a dry spoon to serve to maintain its shelf life.
Method 2: Rajasthani Wet Garlic Chutney (Lehsun ki Chutney)
1. Blend into Paste: In a blender jar, combine the peeled garlic cloves, dried red chilies (or you can use 2 tsp red chili powder for convenience), cumin seeds, and salt. Add about 3–4 tablespoons of water and blend everything into a smooth paste. The consistency should be pourable but thick. (For a more rustic texture, grind in pulses to make a coarse paste instead of a super-smooth puree.)
2. Heat the Oil: In a small kadhai or saucepan, heat 2 tablespoons of oil over medium heat. Traditionally, robust mustard oil is used in Rajasthan for this chutney to impart a bold flavor. If using mustard oil, heat it until it just starts to smoke, then reduce the flame (this step mellows its pungency). Otherwise, any vegetable oil (like peanut or sunflower oil) works fine.
3. (Optional Tadka) If desired, add ½ teaspoon of mustard seeds to the hot oil and let them crackle. Also add a pinch of asafoetida (hing) for an extra layer of aroma. This tempering step is optional but adds authentic flavor.
4. Cook the Garlic Paste: Carefully pour the ground garlic-chili paste into the hot oil. It should sizzle. Stir well to mix with the oil. Cook the chutney on medium-low heat for about 5–6 minutes, stirring frequently. As it cooks, the raw smell of garlic will gradually disappear and the chutney will thicken. You’ll notice the color turning a deeper red and the oil starting to release from the sides. (Be cautious of splatters; you can partially cover the pan with a lid, leaving a vent for steam.)
5. Adjust Consistency & Spice: If the chutney appears too thick or is sticking to the pan while cooking, add a tablespoon of water at a time to loosen it and continue cooking. If it’s too thin, keep simmering until it reaches a spreadable paste consistency. Taste and adjust salt if needed. You can also add an extra ½ teaspoon of red chili powder at this stage if you realize you want it spicier (cook a minute more after adding).
6. Cool and Store: Turn off the heat and let the wet lehsun chutney cool to room temperature. Transfer it to a glass jar or container. A layer of oil may float on top – this is good for preservation. This chutney will keep for up to 1-2 weeks in the refrigerator. The oil acts as a natural preservative, but always use a clean dry spoon when scooping it out. You can also freeze portions if you want to store it longer, though fresh is always best.
Now your garlic chutney is ready! Enjoy it in whichever form you like – dry powder or spicy paste – with your favorite meals.
Tips and Tricks
Adjusting Spice: This chutney is meant to be spicy and garlicky. For a milder heat, reduce the number of red chilies or use Kashmiri red chilies/chili powder, which impart a bright color but are lower in heat. Removing the seeds from the chilies before grinding can also tone down the spice. If you accidentally make it too hot, you can mellow it by mixing in a bit of jaggery (for wet chutney) or extra coconut/peanut (for dry chutney). And if you love heat, feel free to throw in an extra chili! Remember, you can always adjust the chili quantity according to your spice tolerance.
Use Fresh Garlic: The quality of garlic makes a big difference. Use fresh, firm garlic pods that are juicy and white. Avoid using old, sprouting, or dried-out garlic, as they have a harsher, less vibrant flavor. Fresh garlic will give your chutney a robust, authentic taste. If the garlic has green shoots, split the cloves and remove the germ to prevent any bitter taste.
Texture Matters: The appeal of traditional lehsun chutney is often in its texture. The dry Maharashtrian version should be coarsely ground – you want little bits of garlicky goodness and chili that you can actually bite into, not a fine dust. For the wet version, a slightly grainy texture (instead of a completely silky paste) gives a lovely rustic feel and bold flavor bursts. Of course, if you prefer a smoother chutney (for example, to spread in sandwiches), you can grind it to your desired consistency – it’s all up to preference.
Shelf Life & Storage: Thanks to its ingredients, this chutney keeps quite well. The dry garlic chutney (with all ingredients roasted and no water added) has a longer shelf life – store it in an airtight jar in the fridge and it can last several weeks, up to 2-3 weeks easily, without losing flavor. For even longer keeping, you can freeze the dry chutney; it stays good for a couple of months. The wet chutney should be refrigerated and used within about 1 to 2 weeks for optimal taste. A thin layer of oil on top will help preserve it. Always use clean, dry utensils to avoid introducing moisture or bacteria, which can spoil the chutney faster. If you see any mold or off smell, it’s time to make a new batch.
Flavor Variations: Every region (and family) has its own twist on garlic chutney. In Maharashtra, many add a handful of roasted peanuts, sesame seeds, or desiccated coconut while grinding the dry chutney to add nuttiness and tone down the heat. This is often called lasun khobra (coconut) chutney and is slightly less pungent, with a richer texture. You can experiment by adding 2 tablespoons of any of these to your dry chutney. In Rajasthan, some families add a splash of lemon juice or a chopped tomato to the wet garlic chutney for tanginess – if you do this, cook the tomato with the garlic paste and note that the shelf life will reduce (tomato-based garlic chutney stays fresh about a week). A pinch of sugar can also be added to the wet chutney to balance the heat if you like. Feel free to adjust and improvise the recipe to suit your taste – that’s how traditional recipes evolve in each kitchen!
Serving Suggestions
Garlic chutney is a 万能 (all-purpose) condiment that can jazz up almost any meal. Here are some classic ways to enjoy it:
Rotis, Parathas & Bhakri: Scoop or spread the wet lehsun chutney alongside your daily breads. It makes a simple roti or paratha fiery and exciting, especially with a dollop of ghee. Maharashtrian jowar bhakri (millet flatbread) often goes from plain to phenomenal with a dry garlic chutney on the side – simply sprinkle some chutney powder on a bite of bhakri, add a few drops of oil or ghee on top, and relish the rustic flavor explosion! This chutney also pairs wonderfully with stuffed parathas (like aloo paratha) to add extra zing.
Vada Pav & Indian Burgers: Dry garlic chutney is famously the heart of vada pav, Mumbai’s beloved street food. Sprinkle a generous pinch of the dry lasun chutney inside a vada pav (between the pav bun and the potato vada) along with green chili and tamarind chutneys – it’s the secret that makes the vada pav so irresistible. You can similarly use it in other desi burgers or wraps. For instance, sprinkle it inside a samosa pav or batata bhaji pav (potato fritter sandwich) to elevate their taste.
Dal-Baati-Churma Thali: No Rajasthani dal-baati-churma platter is complete without a spicy garlic chutney on the side. Traditionally, a small katori of lehsun chutney is served to add heat to the rich dal and ghee-drenched baati. The combination of the sweet churma, the savory lentil dal, and the sharp kick of lasun chutney is a balance of flavors that defines Rajasthani cuisine. Next time you serve dal-baati, put out a bowl of this chutney and watch everyone liven up their plates!
Snacks & Starters: Use this chutney as a bold dipping sauce or side for various snacks. It’s fantastic with pakoras (fritters), samosas, kachoris, and chakli. A tiny bit on the side of your plate will allow you to dab your aloo tikki or dhokla in it for an added punch. In Maharashtra, dry garlic chutney is even sprinkled over misal pav (a spicy curry) to up the heat. You can also serve wet garlic chutney with idli and dosa as a change from the usual coconut chutney – South Indian cuisine has its own version of garlic chutney that’s quite similar!
Rice and Curries: Don’t underestimate how versatile this chutney is. A spoonful of dry garlic chutney mixed into hot rice with a drizzle of ghee makes for a quick garlic rice that pairs well with plain yogurt or dal. You can also sprinkle the dry chutney on curd rice or on a simple dal and rice bowl to add texture and spice. Some people even stir a bit of the wet chutney into soups, curries or sabzis (vegetable dishes) to enhance the garlic flavor – for example, mixing a teaspoon into your curry base or tempering can give a lovely garlicky kick. Similarly, blend a bit of wet garlic chutney with yogurt to make a spicy garlic raita that goes well with biryani or pulao.
Sandwiches & Chaats: Spread the wet garlic chutney thinly on bread to add an Indian twist to your sandwiches – it works great in a grilled toastie with cheese, or in wraps and frankies (try it with a potato or paneer filling!). In Mumbai, aside from vada pav, a touch of lasun chutney sometimes finds its way into bhel puri or sevpuri (chaat snacks) for extra heat. Even alongside pani puri, you can mix a pinch of dry garlic chutney in the filling for an unexpected punch.
No matter how you serve it, be ready for that robust garlic and red chili hit! A small amount of lehsun chutney goes a long way in brightening up your palate. Enjoy experimenting – you’ll soon find yourself sprinkling or dolloping this chutney on just about everything. 😊
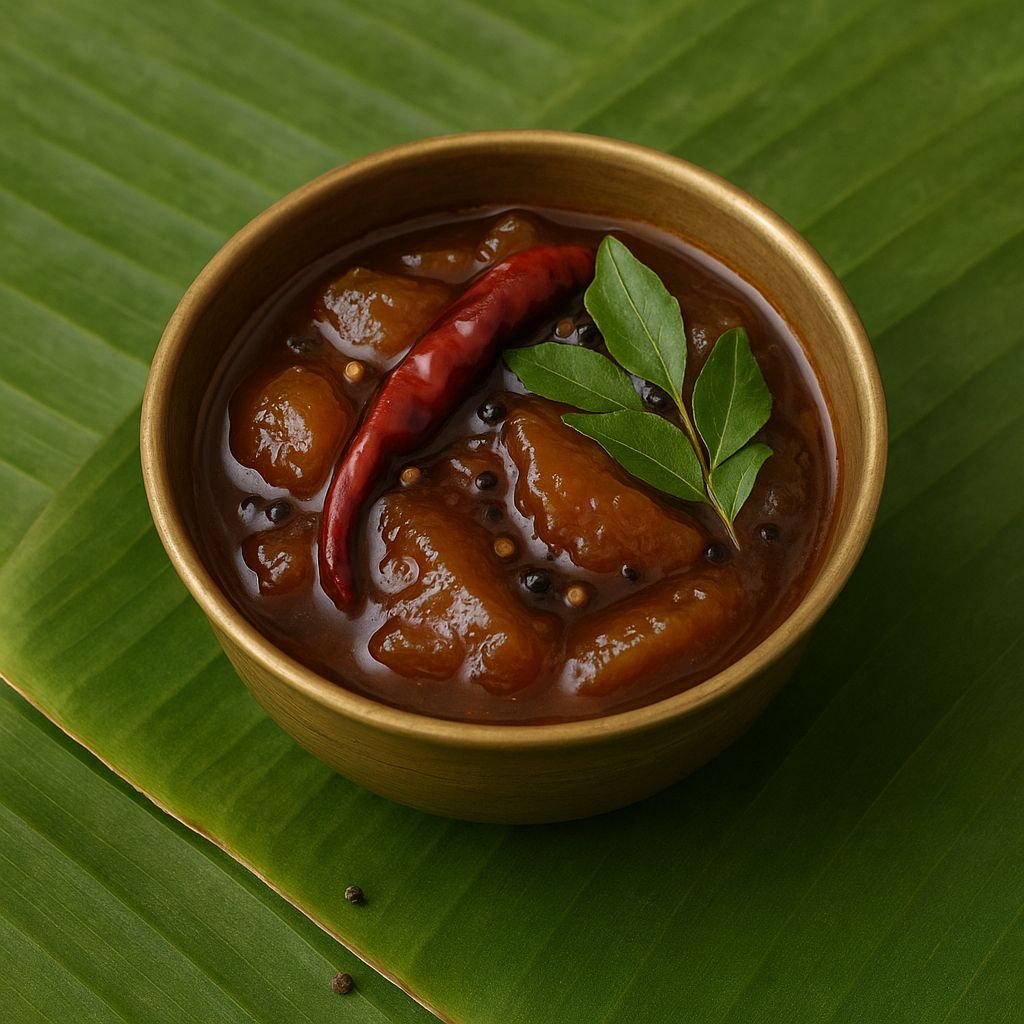
In Odisha, no festive meal or comforting lunch thali is complete without a touch of khatta. And the one that always stole my heart was Mitha Ambula Khatta.
Made from sun-dried mango slices soaked in water, slow-cooked with jaggery, tempered with mustard seeds and red chili—it’s more than a dish. It’s the taste of lazy summer afternoons, the smell of grandmother’s kitchen, and a reminder that even the smallest things on your plate can leave the deepest impression.
Ingredients:
2–3 pieces dry ambula (sun-dried mango)
3–4 tbsp jaggery (adjust to taste)
½ tsp turmeric
¼ tsp red chili powder
1 cup water
Salt to taste
For Tempering:
1 tsp mustard seeds
1 dry red chili
1 tsp oil (preferably mustard oil)
A pinch of hing (optional)
5–6 curry leaves (optional)
Steps to Make Mitha Ambula Khatta:
1. Soak the Ambula
Soak ambula in 1 cup warm water for 15–20 mins until soft.
2. Simmer with Spices & Jaggery
Add turmeric, chili powder, and salt to the ambula-soaked water.
Simmer for 5–7 mins on low heat.
Add jaggery and continue cooking until it slightly thickens into a chutney-like consistency.
3. Temper It
Heat mustard oil, add mustard seeds, red chili, and optional hing or curry leaves.
Once spluttered, pour over the ambula mix and stir well.
Serving Suggestions:
Best served with dalma and rice, boiled vegetables, or even pakhala
Tastes great warm or chilled
Why I Love It
Mitha Ambula Khatta brings balance to a meal — it’s not the star of the show, but the one flavor you remember long after the meal is over. Sweet, tangy, and nostalgic.
In many Odia homes, especially during festivals, weddings, or Sunday feasts, you’d find one sweet-tangy dish on the banana leaf that always stood out—Sapuri Khatta.
For me, it’s not just a dish. It’s a memory of watching my mother dice ripe pineapples, sneaking pieces from the bowl when she wasn’t looking. She’d cook it slow, with jaggery and mustard seeds, until the air turned golden-sweet.
It was never a main dish. It was a little something on the side. But it always stole the show.
Ingredients:
1 cup ripe pineapple (finely chopped)
½ cup grated jaggery (adjust to taste)
¼ tsp turmeric
½ tsp red chili powder
Salt to taste
½ tsp roasted cumin powder
1 cup water
For Tempering:
1 tsp mustard seeds
1 dry red chili
5–6 curry leaves (optional)
1 tsp mustard oil or ghee
Steps to Make Sapuri Khatta:
1. Cook the Pineapple
In a pan, add pineapple, turmeric, salt, chili powder, and water.
Cook on medium flame until the pineapple softens (7–8 minutes).
2. Add Jaggery
Stir in jaggery and let it simmer till it thickens slightly and becomes syrupy.
Add roasted cumin powder.
3. Temper It
In a small pan, heat mustard oil or ghee.
Add mustard seeds, red chili, and curry leaves.
Once it splutters, pour over the khatta and mix well.
Serving Suggestions:
Best served warm or at room temp with dalma, bhata, and a spoon of ghee
Also pairs beautifully with pakhala or even as a side with roti
Why I Love It
Sapuri Khatta is sweet like stories, sharp like memories. It reminds me of summer afternoons, of copper-bottomed kadais, and of how simple food can stay in your heart for decades.
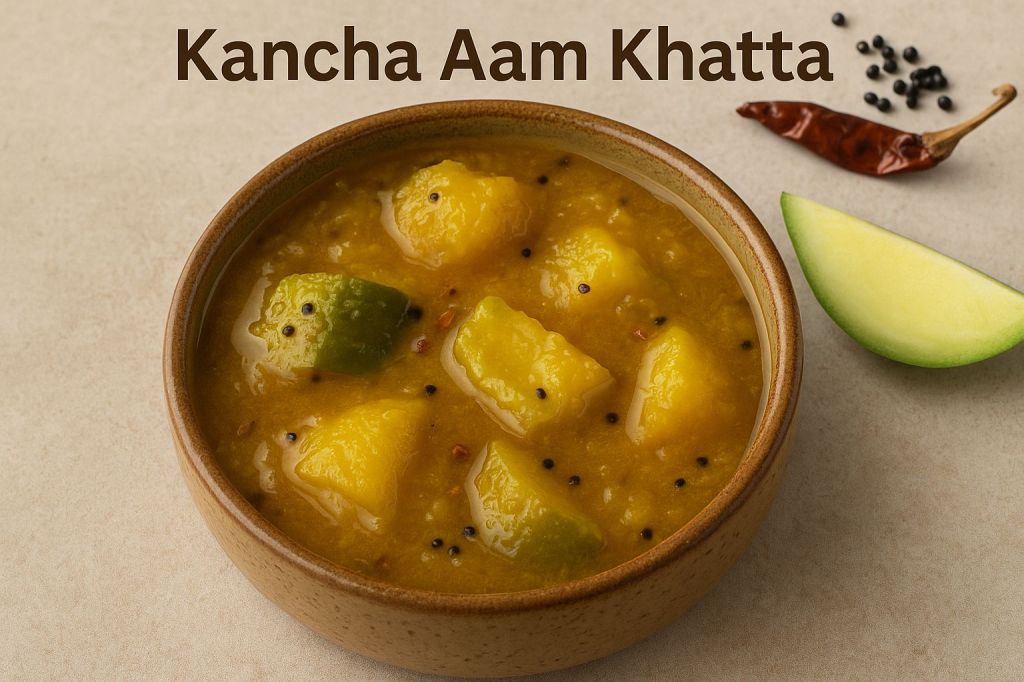
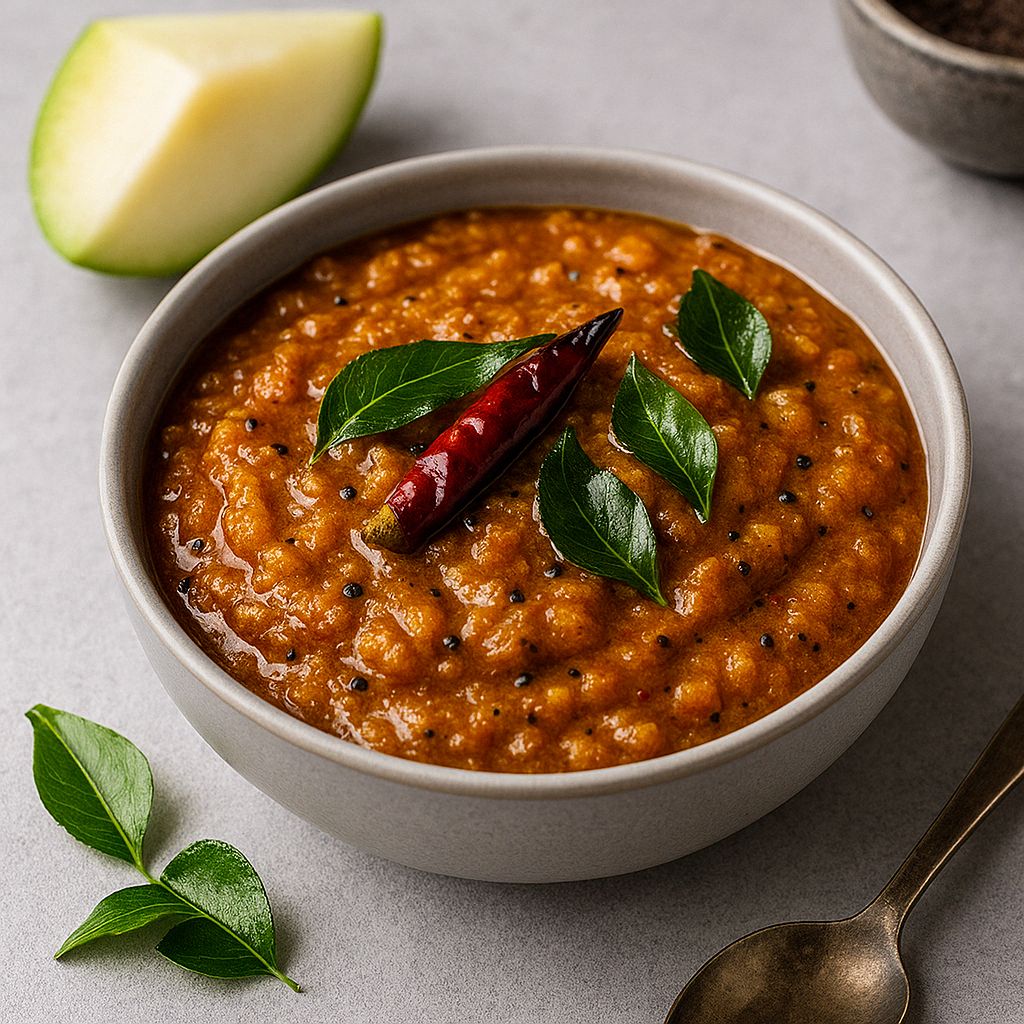
When raw mangoes start to flood the markets in Odisha, there’s only one thing on my mind—Kancha Aam Khatta. This humble dish carries the flavour of summer, childhood, and banana leaf lunches. Sweet, sour, slightly spicy, and often eaten chilled, it’s a dish that balances heat—both from the food and the sun.
In my village home, it was always made in batches, cooled in earthen pots, and served as a must-have side with dalma, fish curry, or pakhala.
Ingredients:
1–2 raw mangoes (preferably green, firm)
½ cup jaggery (or adjust to taste)
¼ tsp turmeric
½ tsp red chili powder
Salt to taste
1 cup water
For Tempering:
1 tsp mustard seeds
1 dry red chili
1 tsp oil (preferably mustard oil)
Optional: a pinch of roasted cumin powder at the end
Steps:
1. Prep the Mangoes
Peel and cut raw mangoes into medium chunks (with seed if soft).
Boil mango pieces with turmeric, salt, and water until soft.
2. Sweeten It
Add jaggery and red chili powder to the boiled mango.
Stir well and simmer until the sauce thickens slightly.
3. Temper It
In a separate pan, heat oil.
Add mustard seeds and red chili. Let splutter.
Pour over the mango mixture.
4. Final Touch
Optional: Add a pinch of roasted cumin powder before serving.
Serve warm or chilled.
Serving Suggestions:
With dalma and rice
As a side with pakhala
With dry sabzi or fried fish to balance spice
Why I Love It
Kancha Aam Khatta is more than a chutney—it’s a childhood memory, a seasonal ritual, and a burst of balance on the plate. It brings relief in heat and harmony on the tongue.
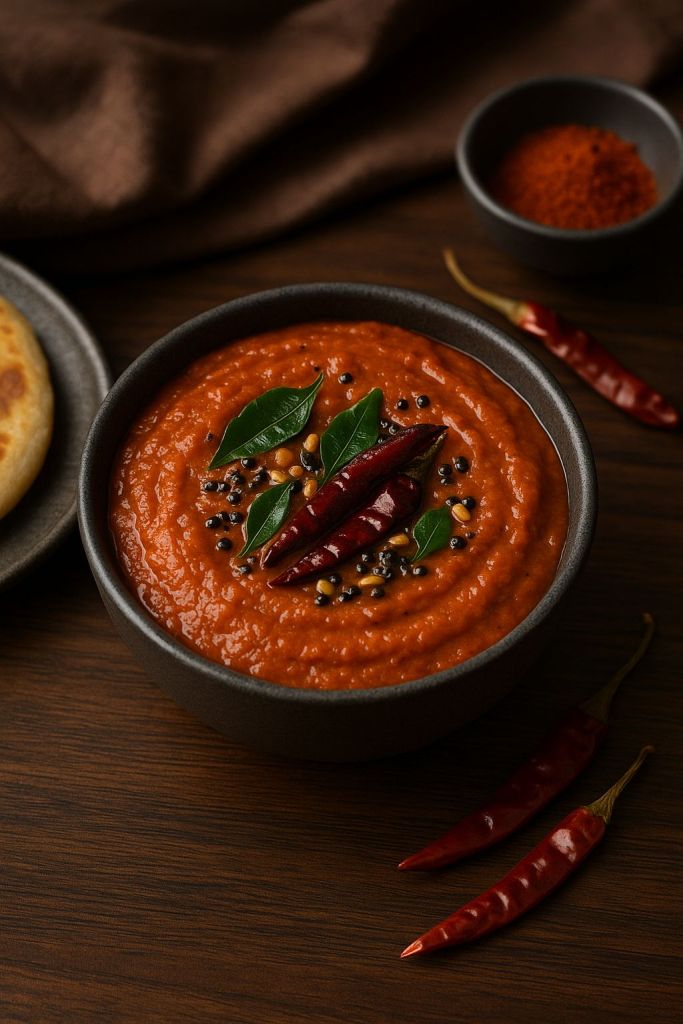
Tomato Chutney is a simple yet bold Indian side dish made with ripe tomatoes, garlic, chilies, and a flavorful tempering. Whether you enjoy it South Indian-style with idli/dosa or as a North Indian-style side with paratha, this chutney is vibrant, punchy, and full of warmth.
Make it once and you’ll always want a jar in your fridge!
Ingredients (Serves 3–4)
2 large ripe tomatoes, chopped
2–3 dry red chilies (adjust to spice)
3–4 garlic cloves
½ inch ginger (optional)
1 small onion (optional for sweetness)
1 tsp tamarind paste or 1 tsp lemon juice
Salt to taste
1 tbsp oil
For Tempering:
1 tsp mustard seeds
½ tsp urad dal (optional)
A pinch of hing
1–2 dry red chilies
Few curry leaves
How to Make Tomato Chutney (Step-by-Step)
1. Sauté Base
Heat oil in a pan. Add red chilies, garlic, (onion if using), and tomatoes.
Sauté on medium flame for 5–6 mins till tomatoes are soft and pulpy.
Add tamarind and salt. Cool slightly.
2. Blend Smooth
Transfer mixture to a blender and grind to a smooth paste. Add a splash of water if needed.
3. Temper the Chutney
In the same pan, heat 1 tsp oil.
Add mustard seeds, urad dal, hing, red chilies, and curry leaves. Let splutter.
Pour the blended chutney into the pan. Mix well and simmer for 2 minutes.
Serving Suggestions
Serve with idli, dosa, uttapam, or vada
Also pairs beautifully with roti or rice
Use as a spread for sandwiches or wraps
Tips for Flavorful Chutney
Use ripe, red tomatoes for best flavor
Sauté well to remove raw smell and deepen taste
Add jaggery for a sweet-tangy twist
Refrigerates well for 3–4 days
Variations
Add roasted chana dal or coconut for a creamy version
Use green chilies and coriander for a green chutney base
No Indian meal is truly complete without that little spoonful of chutney on the side — tangy, spicy, sweet, or all three at once! Whether it’s summer-fresh raw mango chutney or a crunchy twist like peanut chutney, these recipes are quick, flavorful, and the perfect way to level up your thali, snacks, or even sandwiches.
Here are some of the most loved chutney recipes from The Pinch of Masala you can whip up in under 15 minutes!
🥭 1. Raw Mango Chutney – Tangy Summer Favorite
Grated raw mango sautéed with jaggery, chili, and hing — a classic summer must-have that balances heat and sweetness. Read Recipe »
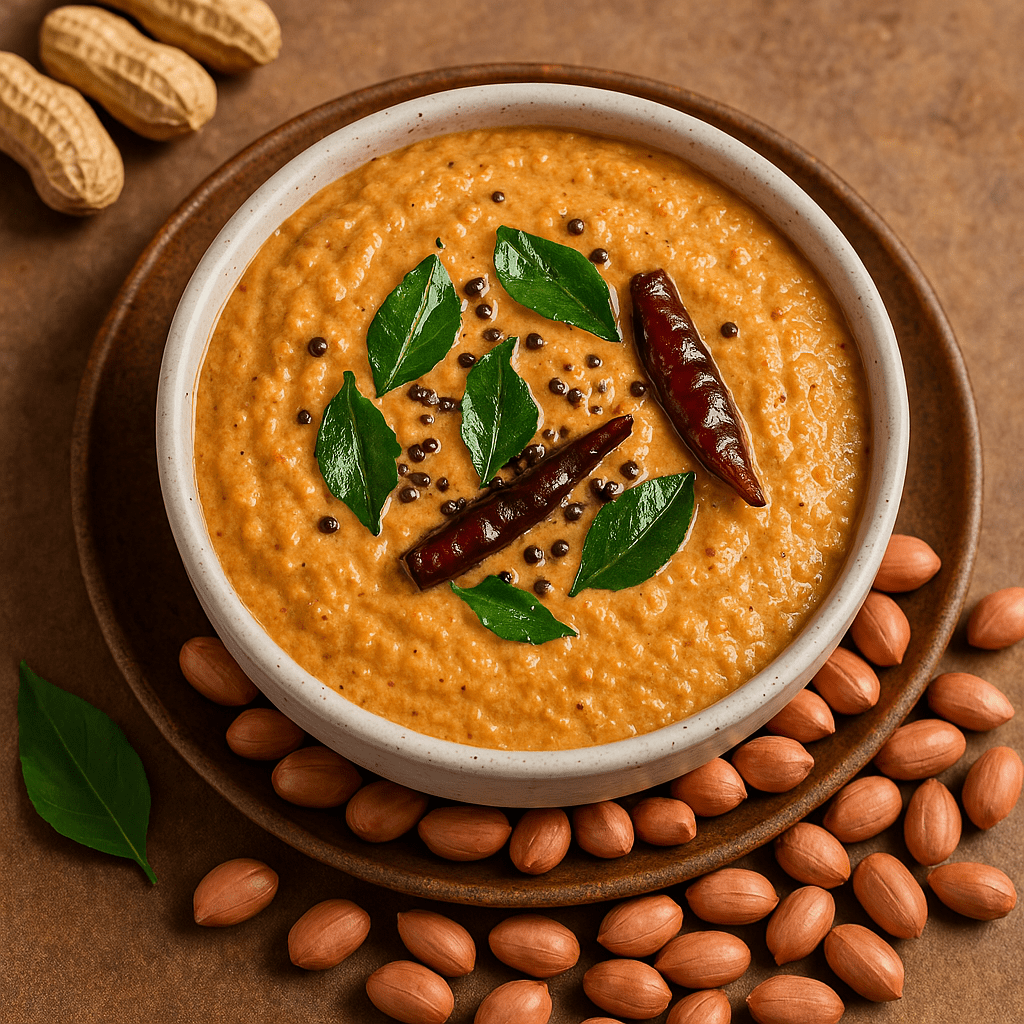
🥜 2. Peanut Chutney – Creamy & Spicy South Indian Staple
Roasted peanuts blended with garlic, chilies, and tempered with curry leaves — best served with idli, dosa, or even as a dip. Read Recipe »
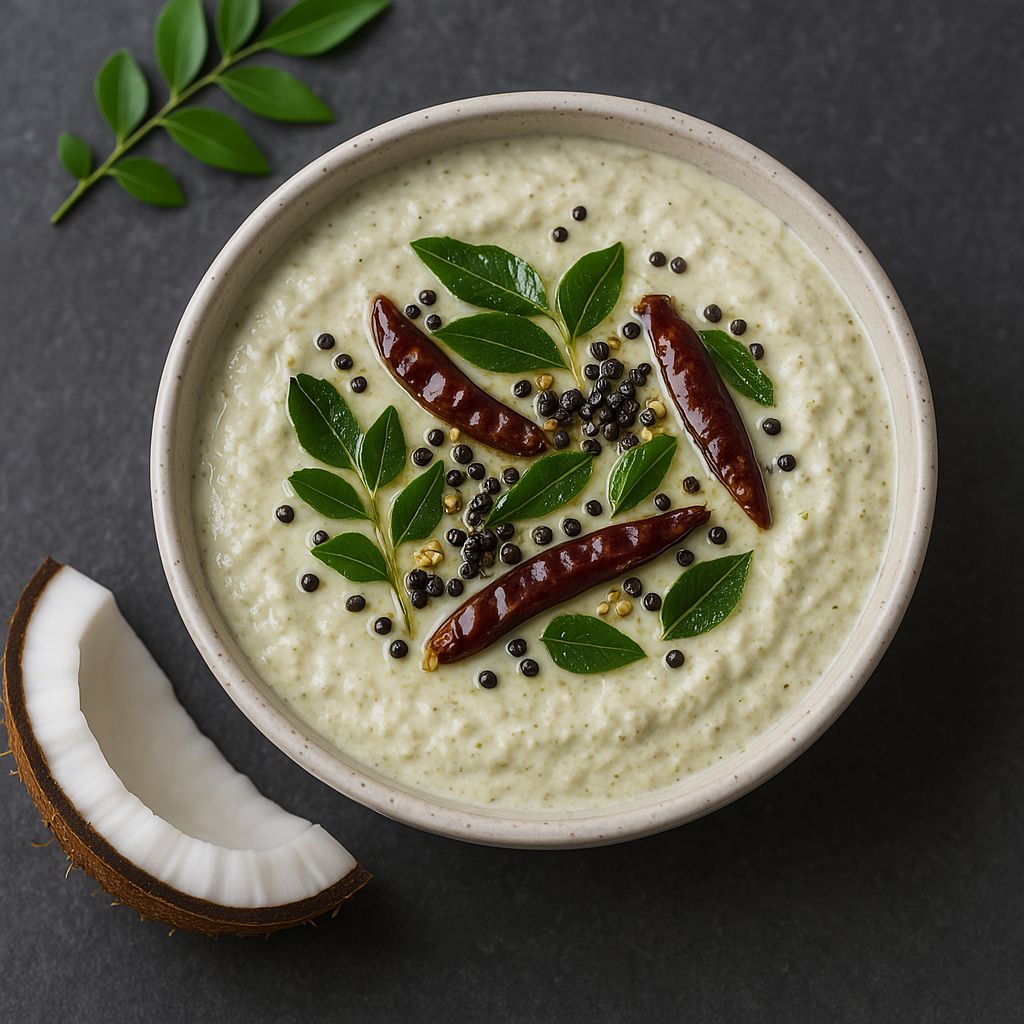
Fresh coconut blended with green chili and tempered in mustard seeds and urad dal — the ultimate companion to your South Indian breakfast. Read Recipe »
Sweet, sour, spicy — this Raw Mango Chutney hits all the notes in one spoon. It’s that side dish you reach for again and again, whether it’s paired with rice, roti, or even as a spread on toast.
With just a few ingredients and 10 minutes, it turns a boring plate into something exciting!
🛒 What You’ll Need (Makes 1 small bowl):
1 cup raw mango, peeled & grated (or finely chopped)
2 tbsp jaggery (adjust to taste)
1–2 green chilies, slit or chopped
1 tsp mustard seeds
½ tsp jeera
A pinch of hing
½ tsp red chili powder
Salt to taste
1 tbsp mustard oil (or regular oil)
Few curry leaves (optional)
🍲 How to Make It – Tangy, Quick & Tantalizing
1. Cook the Mango
In a small pan, heat oil. Add mustard seeds, cumin, hing, and curry leaves. Let them crackle.
Add grated mango, green chilies, and a pinch of salt. Cook for 3–4 minutes till mango softens.
2. Add Jaggery & Spices
Add jaggery and red chili powder. Stir well and cook on low till everything melts and blends. It should turn slightly sticky and glossy.
3. Cool & Serve
Let it cool completely before storing. Keeps well in the fridge for up to a week.
❤️ Why Raw Mango Chutney Is a Must-Try
Quick to make with pantry staples
Perfect balance of tang, heat, and sweetness
Pairs with rice, paratha, or even dal-chawal
Because summer isn’t complete without raw mango magic