Fastival Food

Labra | Bengali Bhog Special Mixed Veg

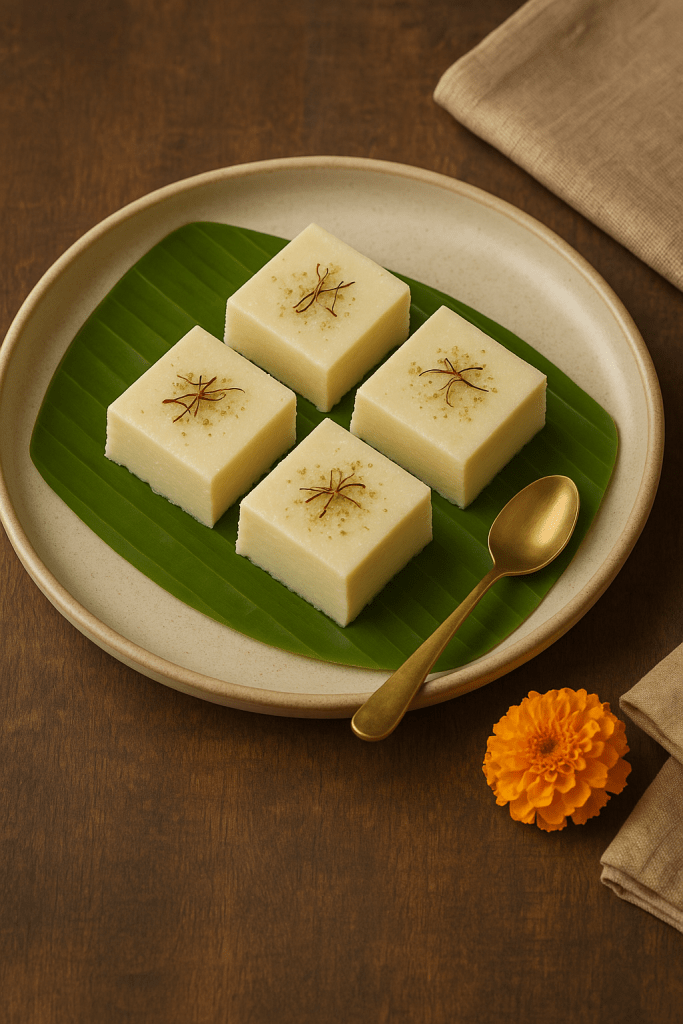
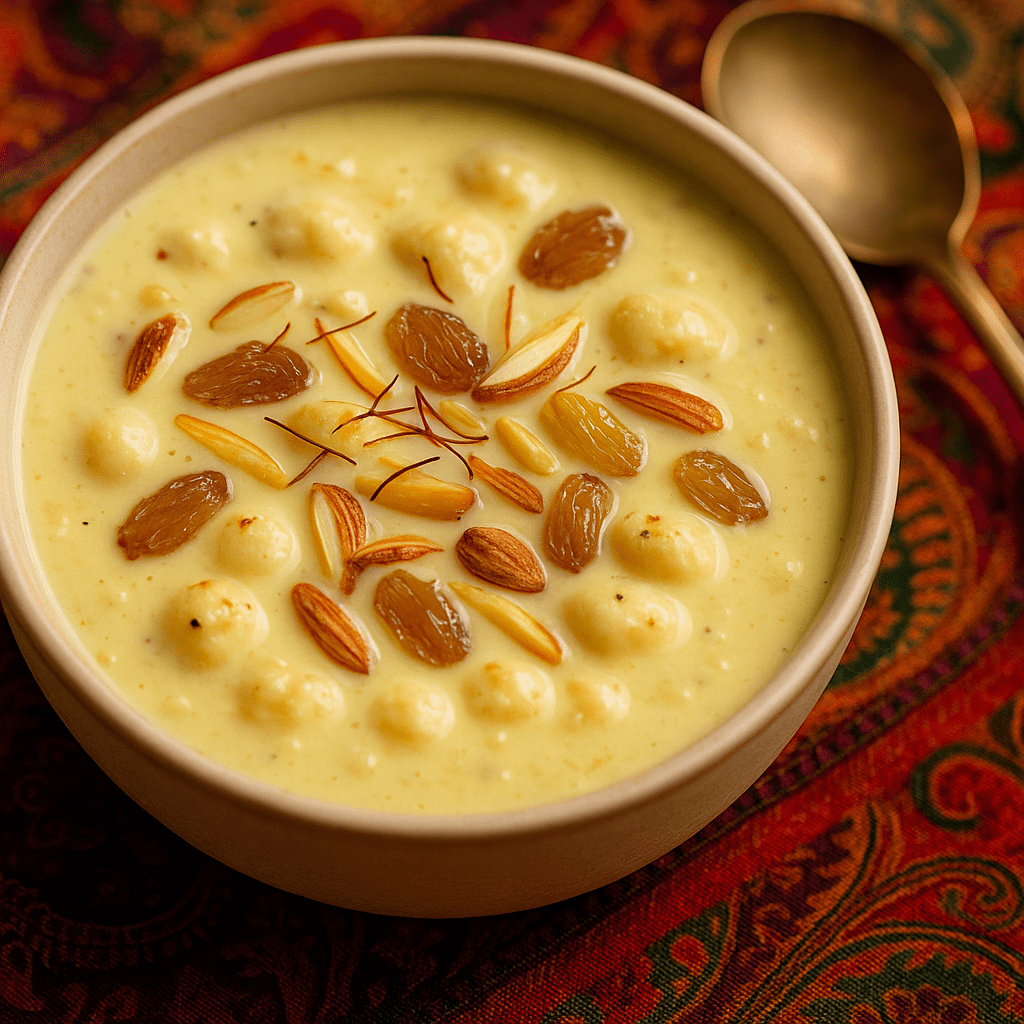
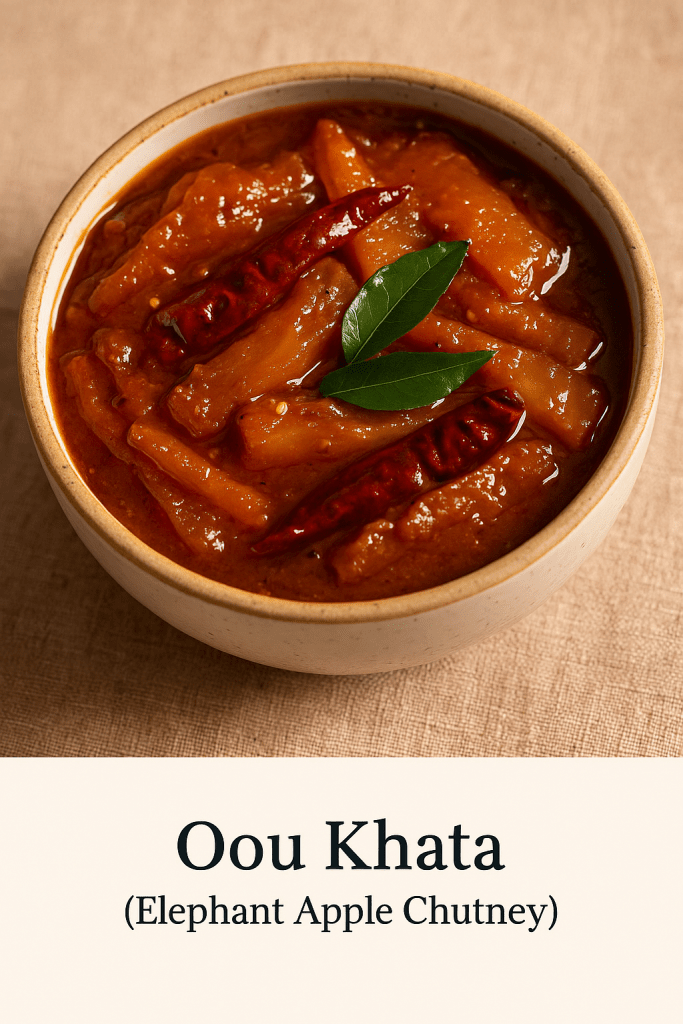
For Bengalis, Durga Puja is as much about feasting as it is about devotion. I can still picture myself as a child, sitting eagerly on the floor with a banana leaf spread out in front of me. Volunteers at the local pandal would come around with buckets of bhog (community feast), generously serving ladlefuls of khichuri (rice-lentil porridge), Labra, tomato chutney, and payesh (sweet rice pudding) onto our leaves. The air would be thick with the mouthwatering aroma of ghee, spices, and incense. One bite of that warm, mildly spiced Labra mixed with the ghee-soaked khichuri, and I felt the true spirit of Puja come alive in my mouth.

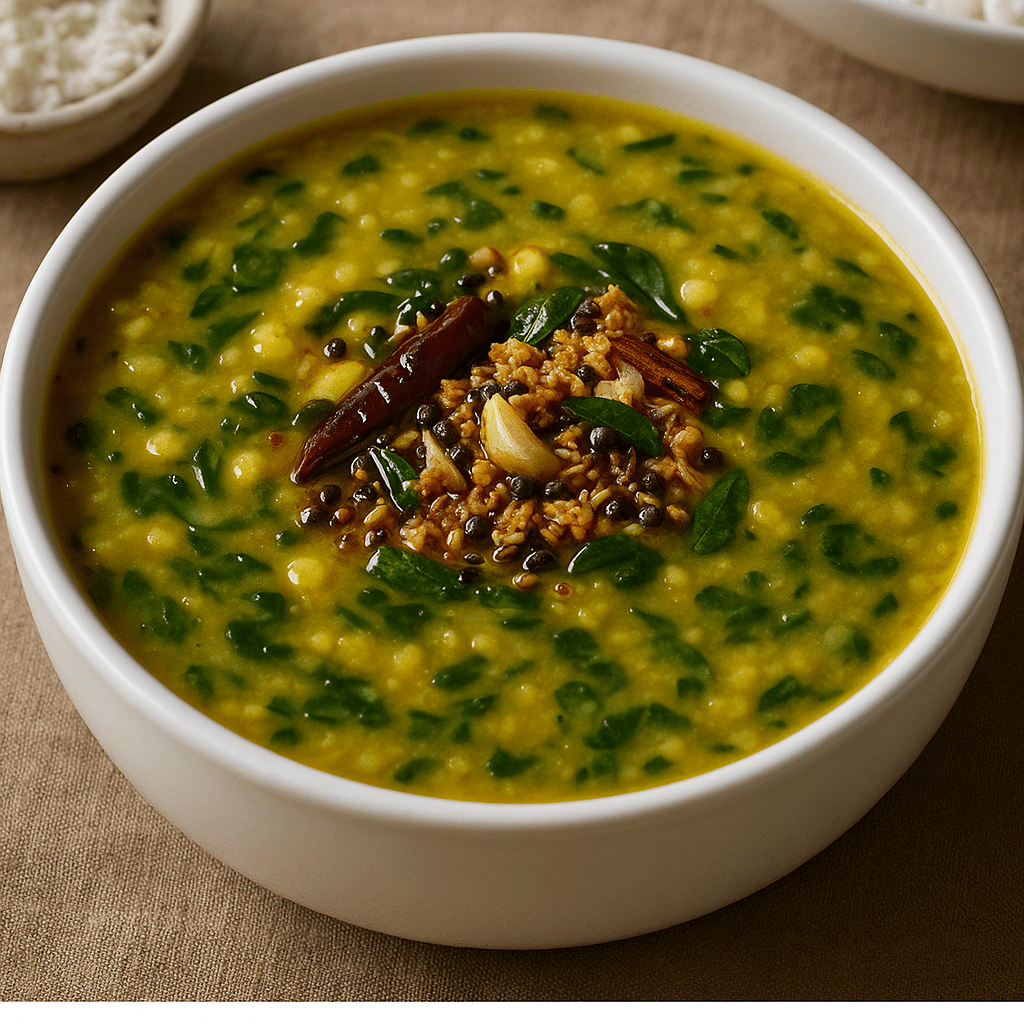
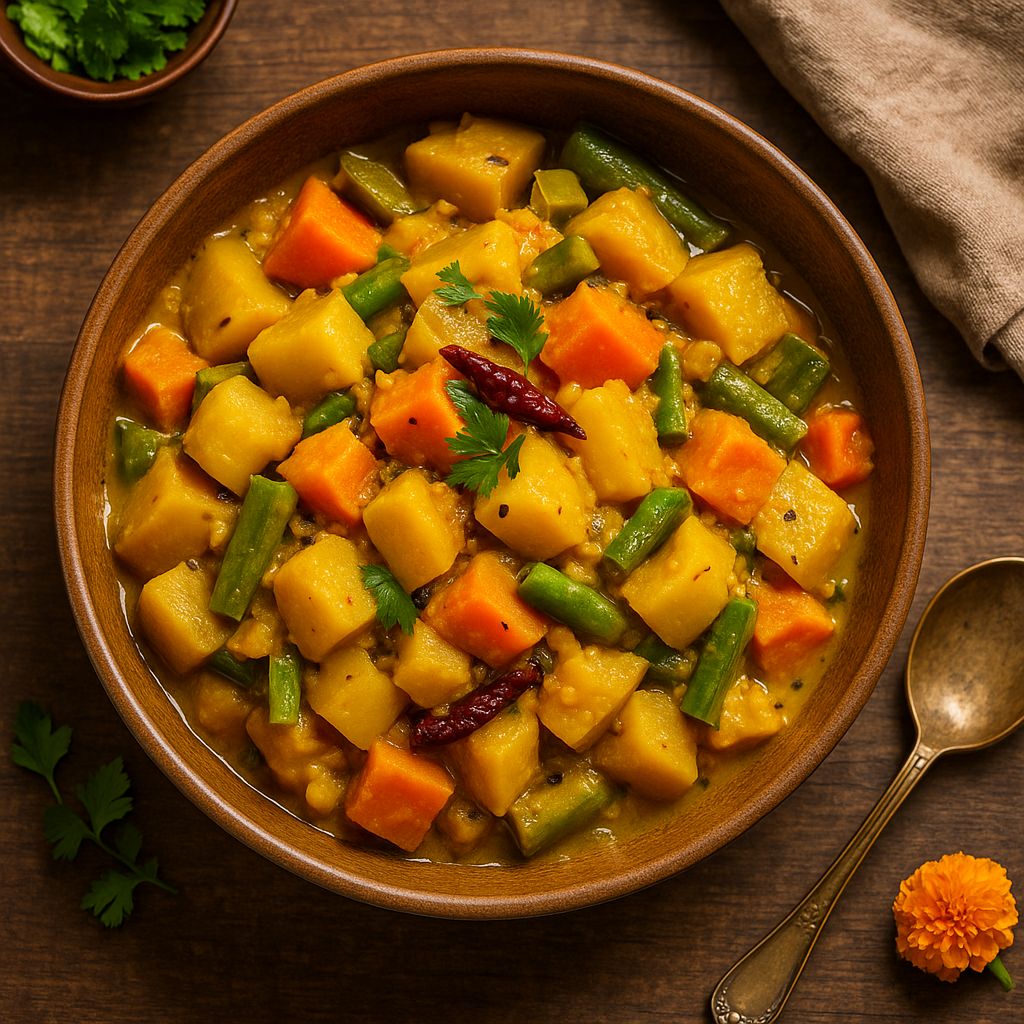
Labra – or bhoger labra as we often call it when it’s prepared for puja – is more than just a mixed vegetable curry; it’s an emotion. The term bhog denotes food offered to the gods, and accordingly this dish is prepared without any onion or garlic. Yet despite being a satvik (pure veg) preparation, Labra bursts with flavor. Ma always said the secret was in using the freshest seasonal vegetables and the magical tempering of panch phoron (Bengali five-spice mix) in mustard oil. She would toss in whatever veggies were on hand – pumpkin for sweetness, eggplant for creaminess, a few potatoes or sweet potatoes for heartiness, plus sometimes radish or green beans – making sure to include that trio of pumpkin, eggplant, and potato that defines a good Labra. As the vegetables slowly simmered together, they released their own juices and melded into a harmonious medley of textures and tastes.

I recall how the whole house would come alive with the sound and smell of Labra cooking. The panch phoron seeds would sputter in hot mustard oil, releasing an inviting aroma that drew everyone to the kitchen. Towards the end, Ma would drizzle a spoonful of ghee into the pot for a divine finishing touch. Sometimes she also added a pinch of homemade bhaja masala – a dry-roasted spice blend – right at the end to elevate the fragrance. The result was a hearty, homestyle curry where the vegetables were soft, slightly mushy, and soaked in spices, each bite tasting like comfort and tradition.

Recipe: Labra (Bengali Bhog Special Mixed Veg)

Servings: 4
Prep Time: 15 minutes
Cook Time: 30 minutes

Ingredients:

2 cups pumpkin (red pumpkin/kabocha), peeled and cubed

1 medium potato (or sweet potato), peeled and cubed

1 small eggplant, cut into chunks

1 cup green beans, cut into 2-inch pieces

1 small radish, peeled and cubed (optional)

2 tablespoons mustard oil (or vegetable oil)

1 teaspoon panch phoron (Bengali five-spice mix)

A pinch of asafoetida (hing)

2 dried red chilies

1 teaspoon grated ginger

1/2 teaspoon turmeric powder

1/2 teaspoon red chili powder (optional, to taste)

1/2 teaspoon sugar (optional, for balance)

Salt to taste

1 teaspoon bhaja masala (Bengali roasted spice mix), optional (for finishing)

1 tablespoon ghee, for finishing (optional but recommended)


Instructions:

1. Prep the veggies: Wash, peel, and cut all the vegetables into similar bite-sized pieces. Try to keep the pumpkin, potato (or sweet potato), eggplant, radish, etc., in slightly larger than bite-size chunks so they don’t disintegrate completely while cooking.


2. Temper the spices: In a heavy-bottomed pot or kadhai, heat the mustard oil over medium heat until it’s hot (you’ll see a slight smoke). Add the panch phoron and the dried red chilies. Let them sizzle for a few seconds until the seeds start to crackle and release their aroma. Sprinkle in the pinch of asafoetida (hing) as the spices crackle. This tempering will be very fragrant – be careful not to burn the spices, just toast them until aromatic.


3. Cook hardy vegetables first: Immediately add the diced pumpkin, potato, and radish (if using) to the pot. Stir the vegetables so they get coated in the spiced oil. Add the grated ginger, turmeric powder, red chili powder (if using), salt, and sugar. Mix well. Cover the pan and cook on low heat for about 8–10 minutes, stirring occasionally. You don’t need to add water at this stage – the veggies will begin to release their own moisture and steam in their juices. (Cooking covered on low heat helps the tougher veggies start to soften without burning. If things start sticking, you can sprinkle a tablespoon of water, but usually it’s not necessary.)


4. Add remaining vegetables: Once the pumpkin and potato are partially tender, add the eggplant and green beans to the pot. Give everything a good stir to combine. If the mixture looks very dry, add a splash of water (a few tablespoons at most). Cover again and continue to cook on low heat for another 5–7 minutes. The softer vegetables like eggplant will cook down fast. Stir occasionally. Cook until all the vegetables are soft and cooked through. The goal is for the veggies to be very tender and slightly melded together in a moist curry — they should release juices and almost mash together, creating that classic semi-stewy consistency of Labra.


5. Finish with spices and ghee: Remove the lid and check that the hardest veggies (pumpkin, potato, radish) are fork-tender. By now, you’ll notice the vegetables have released water and there’s a nice soft medley; it shouldn’t be watery, just a thick mixture. Lower the heat. Sprinkle the bhaja masala over the cooked vegetables and add the ghee. Gently fold (stir) the curry to mix in the bhaja masala and ghee, being careful not to mash the veggies too much. Let it cook for another 1 minute on low heat as the finishing spices infuse the dish. Turn off the heat. Taste and adjust salt or sugar if needed.


6. Serve: Labra is best served hot. Traditionally, it’s served as part of Durga Puja bhog with khichuri (Bengali rice-lentil khichdi). Serve a generous scoop of Labra alongside steaming khichuri for an authentic experience. It also goes well with plain steamed rice or even roti. Enjoy the medley of soft vegetables and warm spices, and get ready for a bite of nostalgia!


Tips:

Vegetable Choices: Use an assortment of seasonal vegetables for Labra. Traditionally, pumpkin, eggplant, and potato/sweet potato are must-haves for the perfect balance of sweetness, creaminess, and substance. Apart from these, you can add others like radish, green beans, carrots, or even a handful of spinach – whatever is fresh and available. The key is a mix of textures and flavors, but make sure to include that classic pumpkin-eggplant-potato trio for authenticity.

No Onion & Garlic: Remember that Labra is a satvik dish meant for holy offerings, so it contains no onion or garlic. Don’t be tempted to add them – the dish is designed to be flavorful without them. The combination of ginger, asafoetida, and whole spices provides plenty of depth, proving that you can have a delicious curry without any onion-garlic at all.

Panch Phoron Magic: Panch phoron is the heart of Bengali veggie dishes. If you don’t have this five-spice mix on hand, you can make it by combining equal parts of cumin seeds, black mustard seeds, fenugreek seeds, fennel seeds, and nigella seeds (kalonji). Keep a jar of this mix – when you temper these five spices in hot oil, their blended aroma is what gives Labra its signature Bengali character.

Bhaja Masala (Roasted Spice Mix): For an authentic touch, finish the Labra with a pinch of bhaja masala. To prepare bhaja masala at home, dry roast about 1 teaspoon cumin seeds, 1 teaspoon coriander seeds, 1/2 teaspoon fennel seeds, a bay leaf, and 1 dry red chili on low heat until aromatic. Let them cool, then grind into a fine powder. This fragrant roasted spice powder is a secret weapon in many Bengali recipes. Sprinkling a bit on your Labra at the end (or on individual servings) will add a warm, smoky depth of flavor that truly elevates the dish. You can make a small batch and store it in an airtight container for your next Bengali cooking adventure.

Slow Cooking = Best Flavor: Cook the Labra low and slow. Keep the heat low and the pot covered so the vegetables cook in their own steam. There’s usually no need to add water, as the veggies release enough moisture while cooking. This slow cooking concentrates the flavors and yields that soft, almost stew-like consistency that Labra is known for. If you do need to add a little water to prevent sticking, add just a splash. Also, stir gently from time to time – you want the veggies to soften and mingle, but not turn completely to mush. Labra has a rustic look, with soft pieces of pumpkin and potato that have partially broken down, coating the other veggies in a thick gravy.

Oil & Flavor: Mustard oil is traditionally used for its pungent, robust flavor that really defines Labra. If you have mustard oil, do use it (just remember to heat it to smoking point to remove the raw smell before cooking). If you don’t, you can substitute with any neutral vegetable oil for cooking the spices. However, finishing with a bit of ghee is highly recommended – that last drizzle of ghee adds a rich aroma and brings all the flavors together beautifully. Your kitchen will smell heavenly!


❤️ Closing Note:

This humble Labra isn’t just a curry — it’s a ladle of nostalgia from my childhood. Every time I cook it, I’m transported back to those Puja days, sitting with family and friends and savoring the bhog on banana leaves. It’s amazing how a simple mix of vegetables can carry the warmth of tradition and togetherness in each bite. I hope this recipe brings a bit of that festive magic and comfort into your home. Give it a try during your next celebration (or whenever you crave a hearty veggie dish), and maybe you’ll create some cherished memories of your own. Happy cooking and Subho Durga Puja! 🙏

Dessert

Kharwas – A Rare Delicacy Steeped in Tradition

Memories of Kharwas
I remember the first time I tasted kharwas. I was seven, spending summer at my grandmother’s farm in Maharashtra. One misty dawn, Aaji (grandma) gently woke me with excitement — the neighbor’s cow had calved, and that meant one thing: kharwas for everyone. In our village, whenever a calf was born, the excess colostrum (first milk) was shared among neighbors so that every household could make this cherished pudding. That first milk, so thick and golden, would be mixed with regular milk, grated jaggery, and fragrant spices like cardamom (and sometimes a pinch of pepper) before being steamed until it set into a tender custard. I watched in awe as Aaji stirred the viscous kharvas doodh (colostrum) with jaggery and cardamom, poured it into a steel tiffin, and placed it in our big idli steamer. The kitchen soon filled with the sweet, earthy aroma of caramelized jaggery and spice.

When she finally opened the lid, there it was – a gently jiggling pudding with a light saffron hue. She cut it into squares and slipped a piece onto my plate. The first spoonful was pure magic: creamy and delicately sweet, with the warmth of cardamom. It melted in my mouth, yet had a subtle, cheese-like firmness that was utterly new to me. Kharwas isn’t an everyday sweet – it’s made only on special days like this, when nature provides that rare first milk. It’s not just a dessert; it’s a celebration. In Maharashtrian culture, this simple steamed pudding symbolizes gratitude for new life and the sharing of abundance. To me, that taste of kharwas will forever be intertwined with the laughter of family before sunrise and my grandmother’s loving hands. It’s more than a sweet – it’s a memory, a ritual, a bowl of tradition passed down with love.

Recipe: Kharwas (Colostrum Milk Pudding)

Servings: 4
Prep Time: 10 minutes
Cook Time: 30 minutes

Ingredients (Serves 4)

2 cups colostrum milk (first-day milk after calving)

1 cup whole milk (use if colostrum is very thick; omit for later-day colostrum)

3/4 cup jaggery, grated or crumbled (traditional sweetener, or use sugar)

1/2 teaspoon cardamom powder (for aroma)

1 pinch nutmeg powder or black pepper powder (optional, traditional touch)

A few saffron strands (optional, for a richer color and aroma)


Instructions

1. Mix the Milk Base: In a large bowl, pour the colostrum milk. If using first-day colostrum (which is very thick and rich), stir in the regular whole milk to dilute it slightly. Add the grated jaggery to the milk and mix well. Keep stirring until the jaggery dissolves completely (you can also warm the milk gently to help the jaggery melt). Once dissolved, add the cardamom powder and mix. (If any impurities from the jaggery remain, you can strain the mixture through a sieve.)


2. Prepare Steaming Dish: Grease a deep stainless steel plate or bowl (or lidded container) with a few drops of ghee or oil. This will help the pudding release easily after cooking. Pour the sweetened milk mixture into the prepared dish. If using saffron, sprinkle the strands on top. Also sprinkle the tiny pinch of nutmeg or black pepper powder on the mixture for subtle flavor (optional).


3. Cover: Cover the dish with a lid or aluminum foil. This is important to prevent any water droplets from the steam from falling into the pudding and ruining its smooth texture.


4. Steam Cook: Prepare your steamer setup – you can use an idli steamer, pressure cooker (without whistle), or any large pot. Add about 2 inches of water to the steamer and bring it to a simmer. Place the covered dish on a trivet or stand inside the steamer. Close the lid. Steam on medium heat for about 25–30 minutes. Avoid high heat, as vigorous boiling can cause water to splash into the pudding. After about 25 minutes, carefully open and insert a toothpick or knife into the center of the pudding; if it comes out clean, the kharwas is set. If not, steam for another 5–10 minutes and check again.


5. Cool and Set: Once the pudding is cooked and has a slight jiggle but is firm to touch, turn off the heat. Remove the dish from the steamer using tongs (be careful, it’s hot). Let it cool to room temperature. As it cools, the pudding will firm up further. For the best texture, once cooled, refrigerate the kharwas for at least 2 hours (cover it while refrigerating). Chilling helps it set into a nice sliceable custard.


6. Serve: When fully set and chilled, run a knife around the edges of the pudding to loosen it. Invert it onto a plate (or you can even serve directly from the bowl). Cut the kharwas into squares or wedges. Serve chilled for the classic feel – the cool, silky texture is unbelievably comforting. You can also enjoy it slightly warm if you prefer, but traditionally it’s served cold, often as a treat after meals.


Tips

Colostrum Milk: Colostrum is the nutrient-rich first milk produced by a cow or buffalo after giving birth. If you are lucky enough to have first-day colostrum (which is very thick), dilute it with some normal milk (even up to a 1:6 ratio of colostrum to milk) so that the pudding sets with a tender texture. Colostrum from the second or third day is thinner; you can often use it without dilution.

Sweetener Choices: Authentic kharwas is made with jaggery, which lends a gentle caramel flavor and a light beige hue to the pudding. If you don’t have jaggery, you can use sugar or sweetened condensed milk, but jaggery truly gives that rustic, traditional taste. (Using jaggery also makes the pudding a tad healthier and more earthy in flavor.) Remember to dissolve and strain jaggery if it’s impure.

Steaming Tips: Always cover the container of the milk mixture before steaming to avoid water droplets entering. Steam on medium heat; a high rolling boil can cause water to seep in or the milk to overflow. If using a pressure cooker, do not put the weight/whistle on – just steam it like you would idlis. Typically, 25–30 minutes of steaming is sufficient for a medium bowl; a larger quantity might take a bit longer.

No Colostrum? Instant Kharwas: Can’t find colostrum milk? You can still enjoy a similar pudding. Mix 1 cup full-fat milk, 1 cup thick yogurt (curd), 1/2–1 cup sweetened condensed milk, and 2 teaspoons of custard powder (or corn flour). Whisk until smooth (no lumps) and steam this mixture just like above. This yields a soft, blancmange-like milk pudding that’s remarkably close to true kharwas. It’s an ingenious substitute for those of us who crave kharwas without access to colostrum.

Flavor Variations: Traditional kharwas is often simply flavored with cardamom (and occasionally a touch of nutmeg). For a Goan twist, some people place a piece of turmeric leaf while steaming or add a pinch of turmeric for a lovely aroma and yellow tint – this is called “posu” in Konkani. You can also infuse a few strands of saffron in warm milk and add to the mix for a richer fragrance. Garnishing the finished pudding with chopped pistachios or almonds can add a pleasant crunch to the silky pudding, though purists usually enjoy it plain.


Every time I make kharwas, I’m transported back to that early morning in my Aaji’s kitchen – the softness of her cotton sari against my cheek as we peered into the steamer, the dew on the air, and the irresistible scent of sweet milk filling the courtyard. In a world where desserts often come from bakeries or boxes, this humble, home-steamed pudding feels like a hug from the past. It’s amazing how one simple dessert can hold a lifetime of memories and tradition. I hope this recipe brings a bit of that farmhouse warmth into your home. Serve it to your loved ones and share the story – because kharwas isn’t just about indulging a sweet tooth, it’s about savoring a piece of our heritage with each creamy, cardamom-kissed bite. Happy cooking! ❤️

Dessert

Makhana Kheer | Navratri Special Foxnut Pudding


I can still remember the gentle clink of the pot as my mother stirred a simmering makhana kheer on a Navratri evening. The kitchen would fill with the sweet aroma of milk thickening with roasted foxnuts, sugar, and a pinch of saffron. As a child, waiting all day during the fast, that first creamy spoonful of kheer at sunset felt nothing short of divine. Even now, the moment I begin to roast makhanas in ghee, I am transported back to those festive nights – the idols adorned in bright clothes, the air filled with prayers, and our family gathered eagerly for the sacred treat after a long day of fasting.

For those unfamiliar, makhana kheer is essentially a traditional Indian pudding made by slow-cooking puffed lotus seeds (also known as makhana or foxnuts) in milk, and sweetening it with sugar. My mother always adds a touch of cardamom and a few strands of saffron, which turn the kheer a beautiful golden hue and infuse it with a delicate aroma. We garnish it generously with nuts – golden almonds and cashews – and plump raisins, which not only elevate the flavor but also add a celebratory crunch and chew in each bite. This creamy dessert isn’t just delicious; it’s a bowl of memories and comfort. Traditionally prepared during Hindu fasting days and festivals, especially Navratri, makhana kheer has a special place in our home rituals. It’s both nourishing and auspicious, a dish that links generations and marks the sweet end of a day of devotion.

When I make makhana kheer now, I do it just like my mother and grandmother did. I roast the foxnuts in a spoonful of ghee until they’re crisp, let them luxuriate in simmering milk until soft, and sweeten the pudding to taste. The process is soothing in itself – the slow stirring, the fragrant steam, the anticipation of a treat. By the time it’s ready, the kheer is rich and velvety, the makhanas have absorbed the sweet milk, and the kitchen feels cozy and filled with love. If you’re looking for a dessert that’s easy to make yet deeply soulful, this Navratri-special makhana kheer might just become a beloved tradition in your family too.

Ingredients

2 tablespoons ghee (clarified butter)

2 cups makhana (foxnuts / popped lotus seeds)

4 cups whole milk (full-fat for best results)

1/4 cup sugar (adjust to taste)

1/2 teaspoon ground cardamom (or 4 green cardamom pods, crushed)

A pinch of saffron strands (about 8–10 strands)

2 tablespoons almonds, slivered (plus extra for garnish)

2 tablespoons cashews, halved (optional, or use instead of almonds)

2 tablespoons raisins (golden raisins preferred)


Instructions

1. Roast the Makhana: In a heavy-bottomed pan, heat the ghee on low flame. Add the makhanas (foxnuts) and roast them in the ghee, stirring continuously. Sauté for about 3–5 minutes until the makhanas turn light golden and crispy. (You’ll hear a slight crunch when you bite one.) Remove the roasted makhanas from the pan and set aside.


2. Toast Nuts & Raisins: In the same pan with remaining ghee, add the slivered almonds and cashews. Roast for 1–2 minutes until they turn golden brown. Add the raisins last and stir for just a few seconds – they will plump up quickly (be careful not to burn them). Remove the toasted nuts and raisins and keep them aside for later.


3. Boil the Milk: In a deep saucepan (or you can use the same pan if large enough), pour in the milk and bring it to a gentle boil over medium heat. Stir occasionally to prevent the milk from scorching at the bottom. Add the saffron strands to the milk as it heats, allowing their color and flavor to steep into the milk.


4. Combine Milk and Makhana: Once the milk comes to a boil, reduce the heat to low. Add the roasted makhanas to the milk. (For a creamier kheer, you can roughly crush or grind half of the roasted makhanas before adding, while keeping the rest whole – this helps thicken the pudding.) Stir everything together.


5. Simmer to Thicken: Let the makhanas simmer in the milk on low heat for about 10–15 minutes. Stir frequently, scraping the sides and bottom of the pan to mix in any thickened milk solids (this makes the kheer richer). The milk will reduce and thicken slightly, and the makhanas will soften as they absorb the sweet saffron-infused milk.


6. Sweeten and Spice: Once the milk has reduced to a creamy consistency (roughly about 3/4 of the original volume), add the sugar. Stir well so it dissolves completely. Next, sprinkle in the ground cardamom. The kitchen should now be filled with the lovely aroma of cardamom and saffron! Let the kheer simmer for another 2–3 minutes after adding sugar and cardamom, so all the flavors meld.


7. Finish with Nuts & Raisins: Turn off the heat. Add most of the toasted almonds, cashews, and raisins into the kheer, saving a few for garnish. Give a final stir. The makhana kheer at this point should be creamy with a pudding-like consistency. (It will thicken further as it cools, which is normal.)


8. Serve: Pour the kheer into serving bowls. Garnish each bowl with the reserved toasted nuts and raisins. Don’t forget to add a couple of saffron strands on top of each as a final festive touch. You can serve makhana kheer warm, which is especially comforting after a fast, or chilled if you prefer it cold and thick. Enjoy the kheer as a rich prasad (offering) during Navratri, or as a dessert to celebrate any special occasion.


Tips

Roast Thoroughly: Always roast the makhanas in ghee until they are crunchy before adding to the milk. This step enhances their nutty flavor and ensures they don’t turn soggy too quickly. Properly roasted foxnuts will absorb the milk nicely while still retaining a good bite.

Grind for Thickness: For an extra creamy texture, grind or powder a portion of the roasted makhanas and then add it to the milk. This ground makhana acts as a natural thickener, giving the kheer a luxurious, rabri-like consistency. (Many families take this approach to make the kheer richer, while still leaving some makhanas whole for texture.)

Stir and Scrape: While simmering the kheer, stir it often and scrape the sides of the pan. This helps reincorporate the thickened milk solids (malai) back into the pudding, making it richer. It also prevents the milk at the bottom from scorching – a little patience here goes a long way in achieving that perfect creamy texture.

Adjust Sweetness and Flavor: Sweeten the kheer to your taste. Sugar can be increased or reduced as per preference. You can even use jaggery for a deeper flavor – just remember to add it after turning off the heat to prevent curdling. Likewise, adjust spices to your liking: a pinch of nutmeg or a few drops of rose water can be added for variation, but cardamom and saffron are the classic choices that give makhana kheer its signature festive aroma.

Serving and Storage: Makhana kheer will thicken as it cools. If it becomes too thick, you can stir in a few tablespoons of warm milk to loosen it to desired consistency before serving. This dessert tastes wonderful warm (when it’s smooth and creamy) and equally delightful chilled (when it sets into a thicker pudding). If you chill it, the makhanas will continue to soften; some people love that custard-like result! Keep any leftovers refrigerated, and finish within 1-2 days for best taste.

Fasting-Friendly Variations: This recipe is naturally gluten-free and perfect for Navratri fasts. For a vegan version, swap the dairy milk with almond milk or coconut milk and use coconut oil instead of ghee – the kheer will still be deliciously creamy (though the flavor will differ slightly). You can also experiment with sweeteners like dates or honey if you avoid refined sugar during fasts.


*(Warm kitchen lights cast a soft glow on a bowl of creamy makhana kheer, garnished with saffron strands, almonds, and raisins, resting atop a colorful festive cloth – a picture of comfort and celebration.)*

As I scoop into my own bowl of makhana kheer now, I’m filled with the same warmth and contentment that I felt years ago during those Navratri nights. This Navratri-special dessert is more than just a recipe – it’s a thread connecting me to my heritage, my family, and countless celebrations where this kheer made the moment sweeter. I hope you’ll invite this traditional foxnut pudding into your home and create beautiful memories around it. May each creamy, blissful bite remind you of the joy of tradition and the love that goes into our food. Happy Navratri and happy cooking! 🌼✨

chutney

Oou Khata (Elephant Apple Chutney)


I still remember the monsoon afternoons at Grandma’s house in Odisha, with the sky dark and rain drumming on the tin roof. My cousins and I would dash into her courtyard, where the wild Oou (elephant apple) tree towered overhead. Fresh green fruits would tumble down after a big storm, and Grandma would scoop us up in a gleeful rush. The sour, tangy aroma of those fruit instantly brightened the air. She’d peel the prickly skin, grind mustard and cumin seeds on her heavy stone mortar, and stir up a bubbling pan of chutney that smelled of turmeric, mustard oil and jaggery. One bite of her homemade Oou Khata – hot steamed rice, dalma and a spoonful of that sweet-and-sour pickle – could chase all winter blues away. Those tastes and smells are pure comfort to me, a rain-soaked hug in a bowl.

I’ve learned that this Elephant Apple chutney is more than just a delicious snack; it’s a seasonal ritual. In Odisha, Oou is legendary for its sharp sourness, so cooks always add a good amount of jaggery (or sugar) to balance it. In fact, one Odisha food blog explains: *“Elephant apple (Ouu) is a sour fruit, so sugar or jaggery is added to it while cooking to get a sweet-n-sour taste.”*.  We always made this khata (sour chutney) around the end of the rains – just as another blogger notes, *“Elephant Apple Chutney (Ouu Khatta) is a typical recipe of Odisha prepared in every household mostly in post monsoon season.”*.  And just like at Grandma’s home, it was often cooked simply without any onion or garlic, especially during festival days. Those traditions made each spoonful of Oou Khata taste like home – a little sour, a little sweet, and completely heartwarming.

Ingredients

Oou (Elephant apple): 1 large (about 250g) – peel off the skin and cut into 1–2″ pieces

Mustard seeds: 1 teaspoon (mustard “rai”)

Cumin seeds: 1 teaspoon (jeera)

Dry red chilies: 2–3 (adjust for heat)

Turmeric powder: ½ teaspoon

Panch phoron: ½–1 teaspoon (optional Bengali five-spice mix: mustard, cumin, fennel, nigella, fenugreek)

Curry leaves: 5–6 leaves (optional, for aroma)

Jaggery (gur) or brown sugar: ⅓ cup, grated (add more or less to taste)

Oil: 1 tablespoon (mustard oil for authentic flavor, or any neutral cooking oil)

Salt: to taste (about ½–1 teaspoon)

Water: as needed (for boiling and simmering)

Optional: A small piece of ginger (mashed) or a teaspoon of ginger-garlic paste – skip if avoiding onion/garlic.


Instructions

1. Grind the spices. In a small bowl or mortar, combine the mustard seeds, cumin seeds, and 1 dry red chili. Grind or blend into a smooth paste, adding a little water if needed. (This fragrant paste is called “besa” in Odia.) Set aside.


2. Prep the elephant apple. Pull away any green outer petals and peel off the thick skin of the oou. Chop the peeled fruit into long strips or bite-size pieces (about 1–2″). Gently crush each piece with the back of a spoon or pestle – this releases more flavor as it cooks.


3. Boil the fruit. Place the chopped elephant apple in a saucepan with about 2 cups water, ¼ teaspoon turmeric and a pinch of salt. Bring to a boil, then lower heat and simmer for 5–10 minutes, until the oou pieces are just tender. Drain and reserve the cooked fruit (you can also use a pressure cooker for 1–2 whistles).


4. Tempering (tadka). Heat oil in a pan over medium heat. Add the panch phoron and remaining whole dry chilies; let them sizzle and pop. Add the curry leaves (if using) and fry briefly – you’ll smell their nutty aroma.


5. Sauté the fruit. Add the boiled elephant apple pieces to the hot pan. Stir and fry for 2–3 minutes so the pieces get lightly coated in the oil and spices.


6. Add the paste. Stir in the mustard–cumin paste you made, along with turmeric and salt. Mix well and cook for another minute to remove any raw flavor. The mixture will smell sharp and mustardy.


7. Simmer with jaggery. Pour in about ½ cup of water (or more if you like a thinner chutney) and bring to a gentle simmer. Cover and cook on medium-low for 8–10 minutes. The gravy will thicken slightly.


8. Sweeten the chutney. Add the grated jaggery (or sugar) and a pinch of chili powder if you want extra heat. Stir until the jaggery melts and blends into the sauce. Taste and adjust seasoning – add a little more salt or jaggery as needed. Remove from heat when you have a glossy, sweet-and-sour chutney coating the fruit.


9. Serve warm. Spoon the Oou Khata into a bowl and let it cool slightly. It’s traditionally served at room temperature. I like to garnish with a few fresh coriander leaves just before serving.


Tips & Variations

Sweetener swap: Jaggery gives the most authentic taste, but you can use brown sugar or even regular sugar in a pinch. (Add it gradually; you want the chutney tangy, not cloyingly sweet.)

More tang: If your elephant apples aren’t very sour, you can squeeze in a teaspoon of lemon or tamarind juice for extra zing.

Oil choice: Mustard oil lends a rustic pungency to Oou Khata. If you don’t have it, any neutral oil is fine. (A tiny drizzle of sesame oil at the end also adds a nice touch.)

Onion/garlic option: For a non-fasting version, you could sauté a chopped onion or a little minced garlic along with the tempering spices. This gives extra depth but is completely optional – the recipe is delicious even without them.

Spice variation: Swap panch phoron for a simple tempering of mustard and cumin seeds alone. You can also add a pinch of asafoetida (hing) in the oil if you skip the curry leaves – it mimics that savory aroma.

Make ahead: Like many chutneys, this tastes even better the next day. Store leftovers in the fridge (in a sealed jar) for up to 2–3 days – the flavors will mellow and blend as it sits.


Each time you stir a spoonful of this chutney into your rice and dal, I promise you’ll be transported back to my grandmother’s kitchen, rain pattering on the roof and kids laughing on the porch. Oou Khata is humble and homely – just like the memories it’s tied to. I hope this recipe brings a little of that old Odisha warmth into your home. Whenever you make it, do enjoy it with some hot chhena dalma or plain dal and steaming rice. Happy cooking and जय ଓଡ଼ିଶା (Jai Odisha)!

Dessert

Eggless No-Bake Gulab Jamun Cheesecake

Gulab jamun is a beloved sweet throughout India and beyond, and creative chefs have been fusing this iconic dessert with Western-style treats. The Eggless No-Bake Gulab Jamun Cheesecake is one such indulgent fusion: a rich, creamy cake flavored with rose, cardamom, and saffron, studded with spongy jamun dumplings. As one food blogger notes, this dessert “perfectly captures the spirit of culinary fusion,” bringing together the best of both worlds in a way that’s “innovative, indulgent, and utterly delicious”. It’s a festive, showstopping dessert that would brighten any celebration, from Diwali to birthdays.

Ingredients

Crust: 1¾ cups (about 200g) crushed digestive biscuits or graham crackers, 4 tablespoons (½ stick) melted butter, ½ teaspoon ground cardamom (optional).

Filling: 16 ounces (450g) full-fat cream cheese (room temperature), 1 can (14 oz/400g) sweetened condensed milk, ¾ cup (180ml) heavy whipping cream (cold), ½ cup (120g) Greek yogurt or sour cream, ¼ cup (30g) powdered sugar, 1–2 teaspoons rose water (or 1 tablespoon rose/gulab jamun syrup), ½ teaspoon ground cardamom, pinch of saffron strands (soaked in 1 tablespoon warm milk), 1 tablespoon cornstarch (or 1 teaspoon gelatin/agar agar powder) dissolved in 2 tablespoons warm milk, 1 tablespoon lemon juice.

Gulab Jamuns: 10–12 ready-made gulab jamuns, well drained. Reserve 8–10 (halved) to gently fold into the filling and set aside a few whole or halved ones for garnish.

Toppings/Garnish (optional): Whole or halved gulab jamuns, chopped pistachios, edible rose petals, saffron threads, whipped cream or cool-whip swirls, and extra rose/gulab jamun syrup for drizzling.


Instructions

1. Prep: Lightly grease an 8-inch (20cm) springform pan and line the bottom with parchment. Drain the gulab jamuns on paper towels. Cut 8–10 gulab jamuns in half. Soak a pinch of saffron in 1 tablespoon of warm milk to bloom. Set these aside, and chill the pan while you make the crust.


2. Make the crust: In a food processor, pulse the biscuits into fine crumbs. Mix in melted butter and cardamom until evenly coated. Press the mixture firmly into the bottom (and ¼–½ inch up the sides, if desired) of the prepared pan. Freeze or refrigerate for 10–15 minutes to set.


3. Whip the cream: In a cold bowl, whip the heavy cream with 2–3 tablespoons powdered sugar to stiff peaks. Set aside – this will lighten the filling.


4. Mix the filling: Beat the softened cream cheese until smooth. Add condensed milk, yogurt (or sour cream), powdered sugar (if using), rose water (or syrup), cardamom, saffron-milk, lemon juice, and the dissolved cornstarch or gelatin. Beat until creamy and lump-free. If using gelatin/agar, stir it in now.


5. Combine cream and jamuns: Gently fold the whipped cream into the cream cheese mixture until fully incorporated. Then fold in the drained halved gulab jamuns, distributing them throughout the batter.


6. Assemble and chill: Pour half the batter into the crust and smooth the top. Arrange the remaining halved gulab jamuns in a single layer over it, then pour in the rest of the batter. Tap the pan on the counter to remove air bubbles. Cover and refrigerate for at least 6 hours (preferably overnight) until fully set. For a quicker set, you may place it in the freezer for 30–60 minutes, then return to the fridge.


7. Finish and serve: When set, run a hot knife around the edges before releasing the springform to get clean slices. To serve, garnish with a dollop of whipped cream and extra gulab jamuns. Sprinkle chopped pistachios, saffron threads, and dried rose petals on top. Drizzle with a little extra gulab jamun/rose syrup if desired. Keep the cheesecake chilled until serving – it is best enjoyed cold.


Tips

Use full-fat, room-temperature cream cheese (and warm the cream/lemon juice slightly) so the filling is smooth. Cold ingredients can lead to lumps or curdling.

Drain the gulab jamuns well (or pat them dry) before adding to the batter to avoid a runny filling. Excess syrup can make the cheesecake too wet.

For a firmer set in a whole cake, you may bloom a sheet of gelatin or 1 teaspoon of powdered gelatin (or agar agar) in warm water and stir it into the batter. Otherwise, the filling will still firm up by refrigeration.

Make sure to chill the cheesecake thoroughly. Allow at least 6–8 hours (or overnight) for the flavors to meld and texture to firm up. You can even make it a day ahead. Keep it covered and refrigerated – it will hold well for 4–5 days.

When cutting, use a hot clean knife: dip the blade in hot water between slices and wipe it clean each time to get neat edges.

Adding whipped cream (or whipped topping) really lightens the texture of the filling, making it fluffy rather than dense. Fold it in gently to avoid deflating the batter.

This no-bake cheesecake is “instant” in the sense that no baking is required. As soon as it’s fully chilled, it’s ready to serve – ideal for any festive occasion.


Toppings & Garnish

A slice of eggless Gulab Jamun Cheesecake adorned with a whole gulab jamun, rose petals, and chopped pistachios – an indulgent fusion dessert perfect for festive occasions.

Each slice of cheesecake can be dressed up as a showstopper. We love garnishing it with a chilled gulab jamun and a swirl of whipped cream on top, then sprinkling chopped pistachios, saffron threads, and dried rose petals for color. A light drizzle of extra rose syrup or warm gulab jamun syrup over the top adds shine and intensifies the exotic aroma. Serve each portion on a festive platter or cake stand to highlight the saffron-speckled filling and golden crust. This decadent dessert pairs beautifully with masala chai or cardamom coffee, making it perfect for Diwali, Eid, or any celebration.

Breakfast, Uncategorized

Quinoa Upma: A Protein-Rich Twist on Traditional South Indian Breakfast

Quinoa Upma blends ancient South Indian culinary traditions with modern superfood nutrition. Upma – a savory porridge typically made from roasted semolina (sooji) – has been a staple breakfast (and anytime meal) across India for centuries. Over time, cooks across regions adapted this simple dish, adding local grains, spices, and vegetables. Today’s health-conscious twist replaces semolina with protein-packed quinoa, a gluten-free “pseudocereal” seed rich in fiber, vitamins and minerals. Quinoa provides about 8 g protein and 5 g fiber per cup of cooked grains, and it contains all nine essential amino acids. By using quinoa, this upma becomes a one-pot vegan, gluten-free breakfast that still carries the familiar fragrance of mustard seeds, curry leaves and spices. In effect, Quinoa Upma honors the comforting spice-tempered flavors of traditional upma while boosting nutrition.

A vibrant bowl of Quinoa Upma with vegetables and cashews, garnished with lime and curry leaves.

Ingredients

1 cup quinoa – rinsed in cold water (removes bitterness).

2 cups water – for cooking (adjust if needed for fluffiness).

2 tablespoons oil (or ghee/coconut oil) – for tempering. Neutral oils like canola or sunflower also work well.

1 teaspoon mustard seeds – for traditional South Indian tempering.

1 teaspoon cumin seeds – adds aroma and flavor.

Pinch of asafoetida (hing) – optional (ensures gluten-free; gives umami).

4–5 curry leaves – fresh or frozen, for authentic flavor.

1 small onion, finely chopped – adds sweetness and texture.

1–2 green chilies, slit or chopped – or to taste (adds heat).

½ teaspoon grated ginger – optional (for warmth and digestion).

1 cup mixed vegetables, finely chopped – carrots, peas, bell peppers, green beans, corn, etc. (mix and match seasonal veggies).

Salt to taste.

Turmeric (optional) – a pinch for color and health benefits.

Handful of cashews or peanuts – optional (adds protein and crunch).

Fresh coriander (cilantro) – chopped, for garnish.

1–2 teaspoons lemon juice – optional, to brighten the flavor when serving.


Instructions

1. Rinse the quinoa: Place the quinoa in a fine-mesh strainer and rinse under cold running water until the water runs clear. This removes the natural saponin coating and any bitterness. Drain well.


2. Heat the tempering: In a deep skillet or saucepan, heat the oil over medium heat. When hot, add the mustard seeds and cumin seeds. Wait for the mustard to crackle and pop (about 30 seconds). Stir in the hing (if using), curry leaves, green chilies and grated ginger, and sauté for a few seconds until fragrant.


3. Sauté onions and vegetables: Add the chopped onion and a pinch of salt, and sauté 2–3 minutes until the onion turns translucent. Toss in the mixed vegetables and cashews (if using) and cook for another 3–4 minutes until the vegetables begin to soften.


4. Add quinoa and seasoning: Add the rinsed quinoa to the pan, stirring to coat it with the spices and oil. Season with salt and turmeric (if using). Stir everything together so the quinoa begins to toast lightly (1–2 minutes).


5. Cook the quinoa: Pour in the 2 cups of water and stir well. Increase heat to bring the mixture to a gentle boil. Then reduce to low heat, cover tightly, and let it simmer for 15–20 minutes (or until quinoa is tender and the water is absorbed). (If needed, check once or twice and add a splash more water to ensure the grains fully cook and stay fluffy.)


6. Steam and fluff: Once the quinoa grains look translucent and have little “tails,” remove the pan from heat. Keep it covered and let it rest for 5 minutes. Finally, uncover and fluff the quinoa upma gently with a fork. Stir in fresh lemon juice (if using) and garnish with chopped coriander. Serve hot.


Notes and Substitutions

Vegetables: Feel free to mix in any seasonal veggies you like. Common additions include shredded carrots, green peas, green beans, diced bell peppers, corn, broccoli or cabbage. For a simpler upma, use just onions, carrots and peas.

Spices: You can adjust the spice profile by adding chopped ginger, a pinch of turmeric, or even a few dried red chilies along with the mustard seeds. A dash of garam masala at the end adds warmth. For extra crunch, toss in roasted peanuts or fried cashews.

Tempering oils: A neutral vegetable oil works well. To deepen the South Indian flavor, you can use coconut oil or add a teaspoon of ghee at the end for aroma.

Grains alternative: While this recipe uses quinoa, you can also make a similar upma with oats, broken wheat (dalia), millets (like sorghum/jowar or foxtail millet), or even rava (semolina) if gluten is not a concern. Each substitute will change cooking time slightly.

Protein boost: Quinoa is already high in protein, but you can stir in tofu cubes or boiled chickpeas for an even heartier meal.

Make it vegan: This recipe is naturally vegan (no dairy). Just ensure your asafoetida is gluten-free if needed.


Tips for Fluffy Quinoa

Rinse well: Always rinse quinoa thoroughly in a fine-mesh strainer to remove the bitter-tasting saponin coating. This ensures a clean taste.

Water ratio: Use about 2 cups of water for every cup of uncooked quinoa. This 1:2 ratio (grain to liquid) reliably cooks quinoa through.

Cooking method: Keep the heat low once boiling and cook covered. Resist the urge to stir too often – just let the quinoa steam quietly. When the grains swell and “tails” appear, it’s done.

Rest before fluffing: After turning off the heat, leave the lid on and let the pan stand for 5 minutes. This steaming step lets any excess water absorb and yields plump, separate grains.

Fluff with fork: Use a fork to gently fluff the quinoa upma before serving, which helps separate any stuck grains. Avoid mashing – you want a light, fluffy texture.

Use hot water (optional): Some cooks use hot water or stock for the cooking liquid to speed up cooking. Just ensure it’s simmering before covering.

Batch cooking: You can prepare quinoa in advance (using the same 1:2 water ratio) and refrigerate it. For day-old quinoa, simply heat it in the pan with the spice tempering and skip the boiling step; cover for a few minutes to warm through.


Serving Suggestions

Quinoa Upma is best enjoyed hot, paired with classic South Indian accompaniments. Try serving it with coconut chutney or a tangy lemon pickle on the side. These condiments complement the upma’s savory, nutty flavors. Other great pairings include tomato-onion chutney, peanut (groundnut) chutney, or plain yogurt. For a complete breakfast spread, you might add a boiled egg or a side of sambar. In South India, a glass of fresh juice or filter coffee/masala chai also goes wonderfully with upma.

No matter how you serve it, this Quinoa Upma makes a warm, comforting, and nourishing start to the day – a modern, healthy twist on an Indian breakfast classic.

Breakfast, Snacks

Ragi Pancakes: Wholesome Finger Millet Breakfast

Why Ragi (Finger Millet)?

Ragi (finger millet) is an ancient whole grain prized for its nutritional value. Like other millets, it’s rich in protein, fiber, and antioxidants, yet naturally gluten-free. Finger millet stands out for its exceptionally high calcium content – higher than any other common cereal – making it a boon for bone and muscle health. Its low glycemic index and abundant fiber also help support steady blood sugar levels. With an earthy, nutty flavor and hearty texture, ragi is a versatile base for both sweet and savory Indian dishes. It’s long been used in South India for porridge, rotis and dosas, and now makes a deliciously nutritious pancake too.

Sweet Ragi Pancakes (Banana & Jaggery)

These sweet ragi pancakes combine mashed banana and jaggery for natural sweetness and moisture. The result is a fluffy, caramel-scented pancake with a hint of nutty whole-grain flavor. They make an indulgently healthy breakfast or snack, especially paired with fresh berries, yogurt, or a drizzle of honey.

Ingredients (Sweet Version)

1 cup ragi flour (finger millet flour)

½ cup whole wheat flour (or oat flour for a gluten-free option)

2 tablespoons jaggery powder (or brown sugar)

2 ripe bananas, mashed

½ teaspoon baking powder

Pinch of salt

1 teaspoon ground cardamom (optional, for warm flavor)

¾–1 cup milk (dairy or plant-based, as needed for batter consistency)

1 teaspoon oil or melted butter (to add to batter)

Additional oil or butter for cooking


Instructions (Sweet Version)

1. Mix wet ingredients: In a bowl, mash the bananas thoroughly. Stir in the jaggery powder until well combined. Pour in the milk and add the oil, whisking until smooth. (Warming the milk slightly can help dissolve the jaggery.)


2. Combine dry ingredients: In a separate bowl, whisk together the ragi flour, whole wheat flour, baking powder, salt, and cardamom. Gradually add the dry mix to the banana-milk mixture, stirring continuously. Mix until you have a thick, pourable batter. If it seems too stiff, add a splash more milk to adjust.


3. Rest the batter: Let the batter rest for 5–10 minutes. Ragi absorbs liquid, so resting helps hydrate the flour and makes the pancakes fluffier.


4. Cook the pancakes: Heat a non-stick skillet or griddle over medium heat and lightly grease it. Pour about 1/4 cup of batter per pancake onto the skillet. Cook for 2–3 minutes, until bubbles form on the surface and the edges look set. Flip carefully and cook the other side for another 1–2 minutes, until golden brown. Repeat with the remaining batter, adding a little oil to the pan as needed.


5. Keep warm: Stack the cooked pancakes on a plate and keep them warm (cover loosely with foil) while you cook the rest.


These sweet ragi pancakes are naturally eggless and use the banana as a binder. You can top them with yogurt, fresh fruit, maple syrup or a smear of peanut or almond butter for extra flavor and protein.

Savory Ragi Pancakes (Veggie & Spice)

Enjoy a savory twist on pancakes by mixing ragi flour with spices and vegetables. This batter is flavored with turmeric, cumin, and ginger, and studded with veggies like carrots and onions for extra color and nutrients. These hearty pancakes are satisfying on their own, or serve them with chutney or yogurt for a wholesome meal.

Ingredients (Savory Version)

1 cup ragi flour

¼ cup semolina (sooji) or rice flour (for a slightly crisp texture)

½ teaspoon salt

½ teaspoon ground cumin

¼ teaspoon turmeric powder

¼ teaspoon red chili powder (optional, for heat)

1 tablespoon ginger-garlic paste (or finely grated ginger and minced garlic)

3/4 cup plain yogurt (curd) (dairy or plant-based; thinned with water if needed)

Water as needed (about ½ cup) to make a thick batter

¼ cup finely chopped onion

¼ cup grated carrot

¼ cup chopped spinach or other greens

2 tablespoons chopped fresh cilantro (optional)

Oil or ghee for cooking


Instructions (Savory Version)

1. Prepare the batter: In a bowl, whisk together the ragi flour, semolina, salt, cumin, turmeric, and chili powder. Stir in the ginger-garlic paste. Add the yogurt and about ½ cup of water, mixing until a thick, smooth batter forms. Add a bit more water if necessary to achieve a pourable consistency (similar to pancake batter).


2. Add vegetables: Fold the chopped onion, grated carrot, spinach, and cilantro into the batter. Stir well to distribute the vegetables evenly. (For extra tenderness, you can let the batter rest 5–10 minutes to soften the veggies.)


3. Cook the pancakes: Heat a lightly oiled skillet over medium heat. Pour a ladleful of batter onto the skillet and gently spread into a small circle (about 4–5 inches across). Cover with a lid and cook for 2–3 minutes, or until the edges start to brown and the top is mostly set. Drizzle a little oil or ghee around the edges. Flip the pancake and cook the other side for another 2 minutes, until golden and cooked through.


4. Repeat: Continue with the remaining batter, adding more oil between pancakes as needed. Serve each pancake hot off the skillet.


These savory ragi pancakes have a light crisp edge and soft interior. They can be made vegetarian and dairy-free by using plant-based yogurt.

Optional Add-ins & Swaps

Eggless: Both versions above are naturally egg-free. The mashed banana (in the sweet pancakes) and yogurt (in the savory pancakes) help bind the batter. You can also stir in 1 tablespoon of ground flaxseed or chia seeds mixed with 3 tablespoons water (let sit 5 min) as an “egg” substitute if you like.

Vegan: Make it fully vegan by using plant-based milk (almond, soy, oat) and replacing butter/ghee with coconut oil or vegetable oil. For the sweet pancakes, maple syrup or extra mashed banana can sweeten in place of honey or dairy honey. For the savory version, use a dairy-free yogurt or thin the batter with water instead of yogurt.

Flour alternatives: Feel free to substitute some or all of the whole wheat flour with almond flour, oat flour, or extra ragi flour (though 100% ragi can be dense, so a mix is usually best). You can also use buckwheat or millet flours in place of wheat for a gluten-free mix.

Extra add-ins: Customize your batter by stirring in extras. In the sweet batter, try adding chopped nuts (almonds, walnuts), seeds (sunflower, chia) or dried fruits (raisins, chopped dates). In the savory batter, add finely diced bell pepper, peas, grated zucchini, or chopped scallions. A sprinkle of sesame seeds or nigella seeds on top while cooking can add texture and flavor.


Serving Suggestions

Sweet pancakes: These taste great with a drizzle of honey or maple syrup, or a dollop of yogurt or nut butter. Top them with fresh fruits like berries or banana slices for a beautiful breakfast stack. A spoonful of jam or fruit compote is also delicious.

Savory pancakes: Serve hot with Indian-style condiments. Coconut-cilantro chutney or spicy tomato chutney make perfect accompaniments. Plain yogurt (or raita) and pickles (achar) also complement the nutty pancakes nicely. A squeeze of fresh lemon juice over the savory pancakes brightens the flavors.


Whether you choose the sweet banana version or the spiced vegetable version, these Ragi Pancakes are a warm, wholesome way to start the day. Packed with whole-grain goodness and flavor, they’re sure to become a favorite healthy breakfast or snack in your home. Enjoy!

Sources: Ragi (finger millet) nutrition facts and health benefits are supported by nutrition research. For example, finger millet has an exceptionally high calcium content and millets are rich in fiber, protein, and antioxidants. These qualities make ragi a nutritious choice for gluten-free diets and blood sugar management. Techniques for vegan substitutions are adapted from expert recipes.

Street Foods

Paneer Tikka Pizza

Our Indian-Italian fusion Paneer Tikka Pizza is a festive, family-friendly twist on classic pizza. It marries the beloved comfort of pizza with vibrant Indian flavors: cubes of tandoori-spiced paneer (Indian cottage cheese) mixed with crunchy bell peppers and onions, all topped with a blanket of melted mozzarella. This vegetarian delight proves pizza can be both homely and adventurous. Indian fusion dishes are all about bringing people together around bold flavors – this pizza is sure to become a party favorite whether you’re celebrating a festival or just making dinner fun for the kids.

Ingredients

Pizza Base: 1 (about 10-inch) round pizza dough (homemade or store-bought).

Paneer Tikka Marinade: 250 grams paneer (Indian cottage cheese), cut into 1-inch cubes; 3 tablespoons thick yogurt (hung curd or Greek yogurt); 1 teaspoon ginger-garlic paste; 1 small onion, finely chopped; 1/2 teaspoon Kashmiri red chili powder (or paprika); 1/2 teaspoon coriander powder; 1/4 teaspoon turmeric; 1/2 teaspoon garam masala (or tandoori masala); 1/4 teaspoon cumin powder; 1/4 teaspoon chaat masala; 1/2 teaspoon salt (or to taste); 1 teaspoon lemon juice.

Toppings: 1 small bell pepper (capsicum), diced; 1/2 small onion, sliced; 1-2 tomatoes, chopped (optional); 1 to 1½ cups shredded mozzarella cheese; 2 tablespoons chopped fresh cilantro (coriander) leaves; oil or melted butter for brushing.

Sauce (optional): 1 cup pizza sauce or plain tomato puree (season with basil and oregano); alternately use 2 tbsp ketchup + 2 tbsp mint-cilantro chutney for a tangy Indian twist.

Baking Aids: 1 tablespoon roasted gram flour (besan) optional (this thickens the marinade and helps it cling to the paneer and veggies).


Marinade & Topping Prep

Make the Tandoori Yogurt Marinade: In a mixing bowl, whisk the thick yogurt until smooth. Stir in the ginger-garlic paste, chili powder, coriander, turmeric, garam masala, cumin, chaat masala, salt, and lemon juice. (If the mix seems runny, add the roasted gram flour – it gives the marinade some body and helps it stick.) Mix thoroughly until creamy; a properly thick marinade should coat the back of a spoon.

Marinate Paneer and Veggies: Add the paneer cubes to the yogurt-spice mix and gently toss to coat every piece. Also add the chopped bell pepper and onions, mixing well so the veggies are slicked with marinade. Cover the bowl and refrigerate for at least 30 minutes (1 hour or even overnight for the best flavor). The longer it marinates, the deeper the tandoori flavor in the cheese and onions.

Prepare Other Toppings: Slice or chop any remaining veggies and have the mozzarella ready. If using a homemade sauce, whisk that up now. Preheat your oven or air fryer so it’s hot by the time you assemble the pizza.


Making the Pizza Dough (for Homemade Base)

Homemade Dough: If you’re making your own crust, combine 3 cups flour (whole wheat or all-purpose) with 2 teaspoons instant yeast, 1/2 teaspoon sugar, and 1/2 teaspoon salt. Gradually add 1 to 1¼ cups warm water and 2 tablespoons olive oil. Knead until smooth and elastic. Let the dough rest in a warm place, covered, until it doubles in size (about 1–2 hours). Punch it down and roll it into a 10-inch round, making the edges slightly thicker. Poke the base all over with a fork to keep it from puffing up.

Store-Bought Base: For convenience, use a ready-made pizza crust, garlic naan, or flatbread of similar size. Simply place it on a baking sheet. Lightly brush the surface (especially the edges) with a bit of oil or butter for a golden finish.


Assembling & Baking

Sauce First: Spread a thin layer of the pizza sauce (or ketchup-chutney blend) evenly over the rolled-out dough, leaving a 1/2-inch border at the edges.

Add the Toppings: Scatter the marinated paneer, peppers, onions and (if using) tomatoes on top of the sauce. Try to distribute them evenly so every slice gets a colorful mix.

Cheese It Up: Generously sprinkle the shredded mozzarella (and any other cheese) over the paneer and veggies. Don’t be shy – the cheese will bubble and meld with the toppings.


Oven Method

Place the pizza on a parchment-lined baking sheet and slide it into a preheated oven (220–250°C, or 425–480°F). Bake for about 12–20 minutes until the crust edges are golden and the cheese is melted and bubbly. (If your crust is very thin – for example, if using naan – you can bake at 175°C (350°F) for just 8–10 minutes.) Rotate the pan midway if your oven has hot spots. For an extra-toasty top, switch to the broil/grill setting for the last 1–2 minutes; watch it closely so it doesn’t burn.

Air Fryer Method

For a quick crisp, cook the pizza in an air fryer. Set the fryer to 325°F (160°C). Place one pizza (or cut it in half if needed) in the basket and cook for about 7–8 minutes, checking after 7 minutes. The pizza is done when the crust looks crisp at the edges and the cheese has fully melted. (There’s no need to preheat most air fryers; just keep an eye so it doesn’t overbake.)

Stovetop (Tawa) Method

A tawa (heavy skillet) can make a great pizza pan on the stove. Heat a large, heavy-bottomed pan on medium-low and brush the surface with a little oil. Lay the rolled-out dough in the pan. Cook the bottom until lightly browned (1–2 minutes), then flip the dough. Quickly spread your sauce and toppings on the now-cooked side, sprinkle the cheese on top, and immediately cover the pan with a lid. Let it cook on low for another 4–6 minutes, until the crust underneath is crisp and the cheese melts. This method mimics a grill with lid, giving you that pizza feel without an oven.

Cheese Melting Tips

Be generous with the cheese for gooey pull! For an extra-bubbly brown finish, finish the pizza under a hot broiler or griller for 1–2 minutes. Keep a close eye so the cheese just gets golden brown spots. You can also brush the crust edges with melted butter or garlic butter right after baking for a restaurant-style shine and flavor boost.

Serving Suggestions

Slice the Paneer Tikka Pizza right away while it’s hot and the cheese is stretchily delicious. Serve each slice with your favorite Indian-style dips. Cooling mint-cilantro chutney or a tangy tamarind-date chutney are classics – a spoonful on the side is heavenly. A simple yogurt raita (cucumber-yogurt salad) also complements the spicy tikka flavors. For drinks, a sweet mango lassi, chilled lemonade or even a cold beer contrast nicely with the spice. This pizza is bold enough to stand on its own, but it loves company – think colorful salads, more chutneys (or ketchup) and festive beverages to round out the meal. Leftovers keep in the fridge for a day or two; to reheat, just crisp them up again on a pan or in the air fryer so the crust stays crunchy.

Enjoy your homemade Paneer Tikka Pizza – it’s a guaranteed crowd-pleaser that brings fun and flavor to any table

Snacks, starters

Tandoori Broccoli Recipe: Spiced Yogurt-Marinated Vegetarian Starter

Tandoori-style marinated broccoli florets are a modern Indian appetizer staple – perfect as a party snack or a fusion starter.  Inspired by classic tandoori kebabs, this recipe uses hung curd (strained yogurt) spiced with chili, cumin, garam masala and ginger-garlic to coat broccoli pieces. After a short rest, the florets are oven-roasted, grilled or air-fried until tender with charred edges, giving them that coveted smoky flavor.  This crunchy, flavorful snack is especially welcome in cooler months when broccoli is in season, and it’s easy to prepare at home as a crowd-pleasing vegetarian bite.

Ingredients

Broccoli: 1 large head (about 300–350 g), cut into bite-sized florets

Hung curd (strained yogurt): ½ cup (makes marinade creamy; can use plain Greek yogurt)

Gram flour (besan): 1 tablespoon (helps the marinade coat the florets and prevents sticking)

Ginger–garlic paste: 1 tablespoon (freshly ground or store-bought)

Turmeric powder: ¼ teaspoon

Kashmiri red chili powder: 1 teaspoon (or paprika for color; adjust spice to taste)

Cumin powder: ½ teaspoon

Garam masala: ½ teaspoon (or tandoori masala powder)

Chaat masala: 1 teaspoon (optional, adds tangy seasoning)

Kasuri methi (dried fenugreek leaves): 1 teaspoon (crushed)

Lemon juice: 1 teaspoon (freshly squeezed)

Oil: 1 tablespoon (neutral oil like vegetable or mustard oil; plus extra for grilling or air-frying)

Salt: to taste (about ½–1 teaspoon)


Optional add-ins: For a richer “malai” version, whisk in 2–3 tablespoons cream or grated cheese into the marinade.

Marinade Preparation and Marinating

1. Prepare the broccoli: Bring a pot of salted water to a boil. Add broccoli florets and blanch for 1–2 minutes, until just bright green. Immediately plunge them into ice water to stop cooking, then drain and pat dry. (This quick blanch keeps broccoli crisp-tender and helps the marinade adhere.)


2. Make the marinade: In a large bowl, whisk together hung curd, besan, ginger–garlic paste, turmeric, chili powder, cumin, garam masala, chaat masala, kasuri methi, lemon juice, 1 tbsp oil, and salt until smooth. Adjust salt and spice to taste. Tip: Roasting the gram flour briefly before mixing (about 1–2 minutes on low heat) gives a nuttier flavor and prevents a raw taste.


3. Coat the broccoli: Add the blanched broccoli to the marinade bowl. Gently toss until each floret is fully coated. Scrape any leftover marinade on the sides.


4. Marinate: Cover and refrigerate for at least 15–20 minutes, ideally 30–45 minutes. (Longer marinating – up to a few hours – deepens the flavor.) The broccoli will absorb the tangy spice mix; the besan helps the marinade cling and crisp up later. If time allows, an hour or more gives a richer taste.


Cooking Methods

After marinating, cook the broccoli by air fryer, oven, or grill. Each method yields charred edges and a smoky hint; choose your equipment:

Air Fryer: Preheat to 180°C (360°F). Arrange marinated florets in a single layer in the basket (work in batches to avoid crowding). Lightly brush with oil. Air-fry for 8–10 minutes, shaking the basket halfway, until edges brown and crisp. The florets should be tender with some charred spots.

Oven: Preheat oven to 218°C (425°F). Line a baking sheet with parchment. Spread marinated broccoli evenly on the sheet. Bake for about 15–20 minutes, then switch to broil (grill) for the last 2–3 minutes to char the tips. Turn once halfway through. (Alternatively, bake at 170°C for 12–15 minutes, then broil 1–2 minutes.) The result is soft inside, crispy outside.

Grill or Grill Pan: Thread broccoli onto soaked skewers or arrange on a hot grill pan. Brush or spray with oil. Grill over medium-high heat, turning occasionally, until each side is golden and charred (about 3–5 minutes per side). You can also use a stovetop “naan grill” or cast-iron griddle: heat it well, drizzle with oil, and cook skewers on direct flame – this adds a lovely tandoori smoke. Tip: If you have a barbecue grill, this is ideal for extra smokiness (preheat to ~200°C).

Stove-Top Tawa (if no oven/grill): Heat a skillet or tawa on medium-high. Add a dash of oil, then place broccoli florets in a single layer. Cook for a few minutes on each side until charred, flipping gently. Covering briefly can steam them through. A splash of water can prevent burning if using the stove.


Always watch closely near the end so they don’t burn. The florets should be fork-tender yet crisp, with charred tips – this is what gives the “tandoori” appeal.

Tips for Smoky Tandoori Flavor

To mimic authentic tandoor smokiness at home, try one of these hacks:

Dhungar (Charcoal Smoke): Wrap a small piece of hot charcoal in foil, place in the bowl with cooked broccoli, and cover for a few minutes. The smoke infuses the florets.

Liquid Smoke or Smoked Spices: A drop of liquid smoke or a pinch of smoked paprika in the marinade can add a subtle char flavor.

Smoked Salt or Paprika: Finishing with smoked sea salt or smoked chili powder boosts the barbecue taste.

Earthen Pot Method: Preheat a small clay pot over flame, pour a teaspoon of ghee in it, and invert over the broccoli (covered) for a minute – an old-school trick for a smoky aroma.

Black Cardamom: Swap green cardamom in the marinade for ½ teaspoon ground black cardamom; it imparts natural smokiness.


Finally, after cooking, squeeze lemon over the broccoli and sprinkle a little chat masala for an extra kick.

Serving Suggestions and Dips

Tandoori broccoli shines with cool, creamy condiments. A mint-cilantro yogurt chutney (mint raita) or a simple yogurt sauce is classic and balances the heat. The tangy mint yogurt chutney, made of mint leaves, coriander, yogurt, and spices, is traditionally served alongside tandoori dishes. Other good pairings:

Yogurt Sauce or Raita: Whisk plain yogurt with chopped cucumber, mint/cilantro, a pinch of salt and chaat masala.

Green Chutney: Mint-coriander chutney (with jalapeño, lime, and yogurt) adds freshness.

Tamarind Chutney: Its sweet-tanginess complements spicy bites.

Onion Salad: Thinly sliced onions and lemon wedges, sprinkled with salt and pepper, add crunch.

Beverages: Serve with a cooling drink – try a sweet mango lassi or a spiced chai to complete the spread.


For a full starter platter, include additional appetizers like paneer or cauliflower tikka. These bites also work well on wraps or sandwiches, paired with coleslaw or pickled veg.

Expert Tips: Cut florets to uniform size for even cooking. Shake the air-fryer basket or turn the skewers for even browning. Don’t skip the marinade resting time – even 15–30 minutes makes a big flavor difference. The besan in the marinade helps everything crisp up beautifully without sticking.

Enjoy this healthy, flavorful appetizer that turns humble broccoli into a show-stopping tandoori broccoli tikka. Your guests will love the charred, spice-coated florets as much as classic paneer or chicken tikka – with the bonus of extra fiber and vitamins!

Lunch & Dinner

Drumstick Leaves Dal (South Indian Moringa Dal)

Drumstick leaves dal is a traditional South Indian dish that brings back memories of homely meals and backyard moringa trees. In many South Indian homes, drumstick (moringa) trees grow in the backyard, and the nutritious leaves are often shared with neighbors and family. I fondly remember sitting with my grandmother, patiently plucking the tiny green leaves from their stems for this dal – a true labor of love that was always worth the effort. Drumstick (moringa) pods are commonly used in sambar, but the leaves are a hidden gem of South Indian cooking, packed with nutrients and a unique earthy flavor. While some families (like mine) didn’t cook with the leaves very often in the past, many others have included them in their diet for generations. This recipe, known as Drumstick Leaves Dal or Moringa Dal (and even Sajana Patra Dal in some regions), is a simple, comforting lentil curry that pairs perfectly with rice or roti.

“A hearty bowl of South Indian Drumstick Leaves Dal (Moringa Dal) — creamy toor dal simmered with fresh moringa leaves, finished with a coconut tempering of mustard, cumin, garlic, and curry leaves. Perfect comfort food with steamed rice.”

Ingredients

Toor Dal (Split Pigeon Peas) – 3/4 cup, rinsed

Drumstick Leaves (Moringa Leaves) – ~2 cups fresh, tightly packed (stems removed)

Onion – 1 small, finely chopped

Tomato – 1 medium, chopped

Green Chilies – 2, slit (adjust to taste)

Turmeric Powder – 1/2 teaspoon

Salt – to taste

Water – ~2 to 2.5 cups (for cooking the dal)


For Tempering (Tadka):

Oil or Ghee – 2 teaspoons (using coconut oil adds authentic flavor)

Mustard Seeds – 1 teaspoon

Cumin Seeds (Jeera) – 1/2 teaspoon

Urad Dal (Split Black Gram) – 1/2 teaspoon (optional, adds crunch)

Dried Red Chili – 1 or 2, broken

Garlic – 3 cloves, sliced or finely chopped

Curry Leaves – 1 sprig (8-10 fresh curry leaves)

Asafoetida (Hing) – a pinch

Fresh Grated Coconut – 3 tablespoons


Step-by-Step Instructions

1. Prep the Drumstick Leaves: Pluck the drumstick leaves from their stems. Discard all thick, woody stems and collect only the tender leaves. Rinse the leaves thoroughly in plenty of water. (Tip: Soak the leaves in a large bowl of water, swish them around, then lift the leaves out, leaving any dirt to settle at the bottom. Repeat this process 2-3 times to ensure they are clean.) Drain and set the clean leaves aside.


2. Cook the Dal with Leaves: In a pressure cooker add the rinsed toor dal, the prepared drumstick leaves, chopped onion, chopped tomato, turmeric powder, green chilies, and about 2 cups of water. Cook for about 3-4 whistles on medium flame (or ~10 minutes) until the dal is soft and mushy. (If using an Instant Pot, pressure cook on high for ~6 minutes with natural pressure release, or if cooking in a pot on the stovetop, simmer until the dal is very soft, adding more water as needed.) Once cooked, let the pressure release naturally. Open the lid and gently mash the dal and leaves with the back of a spoon or ladle. The tomato and onion should have disintegrated, blending into the dal. If the mixture is too thick, add a bit of hot water to reach your desired consistency. Add salt to taste and simmer the dal on low heat while you prepare the tempering.


3. Prepare the Coconut Tempering: In a small pan, heat the oil or ghee over medium flame. Once hot, add the mustard seeds and let them splutter. Then add the cumin seeds and optional urad dal. Fry for a few seconds until the cumin sizzles and the urad dal turns golden. Reduce the heat to low and add the broken dried red chili, curry leaves, and a pinch of asafoetida. Be careful as the curry leaves might crackle. Next, add the sliced garlic. Sauté for a minute or until the garlic turns light golden and its raw smell disappears. Now add the fresh grated coconut to the pan. Stir continuously on low-medium heat, roasting the coconut in the oil. Fry the coconut until it becomes lightly golden and aromatic (this coconut tempering gives a lovely nutty finish to the dish).


4. Combine Tempering with Dal: Once the tempering is ready (the kitchen will smell amazing at this point), carefully pour all these fried spices and coconut along with the oil/ghee into the simmering dal. You should hear a satisfying sizzle as the tempering hits the dal. Immediately cover the pot for a minute to trap all the aromas. Then stir the dal well so the tempered spices and coconut are evenly mixed in. Let the dal simmer for another 1-2 minutes on low heat to let the flavors meld, then turn off the heat.


5. Finish and Serve: Check the consistency of the dal. It should be semi-thick and creamy; if it has thickened too much (drumstick leaves dal tends to thicken as it rests), you can stir in a bit of hot water to loosen it. Taste and adjust salt if needed. Squeeze a little fresh lemon juice at the end if you like a hint of tang (this is optional, but a small amount of acidity can brighten the flavors).


6. Garnish: Before serving, you can garnish the drumstick leaves dal with a sprinkle of freshly chopped coriander leaves or a few more fresh curry leaves. A small dollop of ghee on top of each serving bowl will make it extra aromatic and delicious.


Tips for Cleaning and Preparing Drumstick Leaves

Cleaning drumstick leaves (moringa leaves) is the only part of this recipe that requires a bit of patience. Here are some tips to make it easier:

Destemming: The leaves grow on hardy stems and thin stalks. Hold the end of a stalk with one hand, and use the thumb and forefinger of your other hand to strip the tiny leaves off in a downward motion. Alternatively, pinch off clusters of the leaves. Discard all the tough stems; only the small leaves (and very tiny tender stems attached to clusters of 2-3 leaves) are used for cooking.

Washing: Drumstick leaves can have dust or sand on them. After destemming, place the leaves in a large bowl of clean water. Swirl them gently with your hand. The dirt will settle at the bottom. Lift the leaves out into a colander. Refresh the water and repeat this washing once or twice until the water is clear. This soaking method cleans the leaves thoroughly without bruising them. Finally, drain well. You can also pat them dry on a clean kitchen towel or use a salad spinner to remove excess water if you’re prepping them in advance.

Handling bitterness: Drumstick leaves have a mild, pleasant bitterness. If you are very sensitive to bitter flavors, one trick is to add a tiny piece of jaggery (unrefined cane sugar) or a pinch of sugar while cooking the dal to balance the bitterness. In this recipe, the natural sweetness of coconut and onion usually balances the leaves, but a pinch of jaggery can be added if desired (about 1/2 teaspoon is enough).

Quantity after cleaning: Keep in mind the leaves will reduce in volume after removing stems. For example, ~2 cups of loosely packed leaves (after removing stems) is roughly what you get from a much larger bunch of leaves on the stalk. It’s fine to approximate; a little more or less leaves won’t harm the recipe. You can even throw in a handful of spinach or methi (fenugreek) leaves along with the drumstick leaves if you want to increase the greens.

Storing Leaves: If you’re not using the leaves immediately, wrap them in a newspaper or paper towel and keep them in the refrigerator. Use them within a day or two, as they tend to wilt and turn yellow quickly. Fresh is always best to get the most nutrients and flavor.


Health Benefits of Drumstick Leaves (Moringa)

Drumstick leaves are often called a superfood, and for good reason! These humble greens are a powerhouse of nutrition. They are rich in vitamins (like A and C), minerals (like iron and calcium), protein, and antioxidants. In fact, moringa leaves are said to contain more iron than spinach and more beta-carotene (Vitamin A) than carrots. Traditionally, moringa has been valued in Ayurveda and folk medicine for its health benefits. It’s known to have anti-inflammatory properties and is used to boost immunity and energy levels.

Modern studies and sources note that moringa leaves provide a wide range of nutrients – over 90 nutrients and 46 antioxidants have been identified in the moringa tree. People often consume moringa powder or supplements, but incorporating fresh leaves into recipes like this dal is an easy (and delicious) way to reap the benefits. Moringa is believed to help lower inflammation and even blood sugar levels, and has been used to manage conditions such as anemia, arthritis, high blood pressure, and more. It’s also traditionally given to new mothers, as it is thought to improve lactation (production of breast milk) and provide strength after childbirth.

Do keep in mind that while drumstick leaves are highly nutritious, they are best enjoyed as part of a balanced diet. This drumstick leaves dal is a great example of a healthy dish – it combines the goodness of moringa leaves with protein-rich lentils. Together, they make a nutrient-dense, high-fiber, high-iron meal that’s also low in calories. It’s wholesome food that our ancestors loved, and now the world is catching on to its benefits (moringa is often dubbed the “Miracle Tree” in wellness circles)!

Tip: If you’re new to drumstick leaves, start with a moderate amount the first time to see how you like the taste, since they do have a slight bitter note. Most people find the flavor very mild (less bitter than fenugreek leaves, for example) and the dal itself is mild and comforting in taste.

Serving Suggestions

Drumstick Leaves Dal is typically enjoyed with steamed rice for a satisfying meal. In South India, a dollop of homemade ghee on hot rice topped with this moringa dal is considered the ultimate comfort food. You can serve it with plain white rice or nutrient-rich brown rice; it even pairs well with millets or quinoa for a healthier twist. It’s equally delicious with roti, chapati or other Indian flatbreads – you can scoop up the dal with the bread for a hearty bite.

For a complete meal, consider pairing this drumstick leaves dal with some sides and condiments. A simple stir-fried vegetable (a poriyal or thoran, such as a beans poriyal or carrot thoran) makes a great accompaniment, adding texture and additional veggies to your plate. Crispy papad (appalam) or fryums on the side add a nice crunch and are a classic combo with dal and rice. A tangy pickle (such as mango or lime pickle) or a spoon of coconut chutney can elevate the flavors if you like some tang and spice on the side. You might also include a cooling raita (yogurt-based side) like cucumber raita to balance the meal, especially on a warm day.

This drumstick leaves dal is quite filling on its own, thanks to the fiber from the greens and protein from the lentils, but it’s light on the stomach. It’s a perfect everyday dish for lunch or dinner. In our home, we often enjoy it for a weeknight dinner with rice, and if there are leftovers, it thickens up by next day – you can dilute it with a little water and reheat. Sometimes, we even have a small bowl of this dal as a soup; squeeze a bit of lemon and sip it warm – it’s nourishing and soothing.

Lastly, don’t forget the finishing touch when serving: if you have reserved a teaspoon of that toasted coconut and garlic tempering, drizzle it on top of each serving bowl for an extra burst of aroma. Serve the dal hot. As you spoon it over rice, you’ll notice how the soft lentils and tender moringa leaves blend into a creamy texture. The fragrance of curry leaves and coconut in the tempering is enticing. This is wholesome Indian comfort food at its best – simple, nutritious, and made with love.

Enjoy your Drumstick Leaves Dal with your family, and bask in the satisfaction that you’re serving a meal that is both delicious and packed with health benefits. Happy cooking!

References: Drumstick leaves have been a staple in South Indian diets and are renowned for their nutritional value. Indians have cooked with moringa for generations, appreciating its health benefits long before it gained “superfood” status globally. This recipe is inspired by traditional methods and beloved family recipes, with the addition of coconut tempering that is common in regions like Kerala and Tamil Nadu for extra flavor. The information on health benefits is drawn from nutritional research and traditional knowledge, underlining why incorporating these greens into meals like dal is so worthwhile. Enjoy this South Indian moringa dal, a dish that’s as nourishing as it is delicious!