Getting vegetables into lunchboxes isn’t always easy, especially for picky eaters. When my child began insisting that veggies were “boring,” I knew it was time to get creative. Enter the humble beetroot—bright, colorful, and full of nutrients like iron, fiber, and antioxidants.
One morning, inspired by its vibrant hue, I grated beetroot directly into my regular paratha dough. As I rolled out the dough into a vivid, magenta-colored flatbread, I couldn’t help but smile—this was sure to be a hit! The result? Empty lunchboxes returned home, requests for “the pink paratha,” and a sneaky win for vegetables everywhere!
🌱 Ingredients
1 cup whole wheat flour (atta)
½ cup fresh beetroot, finely grated
½ teaspoon cumin seeds (optional)
¼ teaspoon turmeric powder (optional, for extra nutrition)
Salt, to taste
1 tablespoon oil or ghee (for kneading)
Water, as needed for kneading
Ghee or oil, for roasting parathas
👩🍳 How to Make Beetroot Paratha
Step 1: Prepare the dough
In a bowl, add whole wheat flour, grated beetroot, cumin seeds, turmeric powder, and salt.
Mix well. Beetroot releases moisture, so carefully add water in small amounts to form a soft but non-sticky dough.
Knead in oil or ghee, cover, and let it rest for about 10 minutes.
Step 2: Roll out the parathas
Divide dough into equal-sized balls.
Roll each ball into a circle about 6–7 inches in diameter, dusting with flour as needed.
Step 3: Cook parathas
Heat a tawa or skillet over medium flame.
Place rolled paratha onto the tawa. Cook until bubbles appear, then flip.
Drizzle ghee or oil, cook both sides until lightly browned and crisp at edges.
🥣 Serving Suggestions
Serve warm with fresh yogurt, pickle, or mint-coriander chutney.
Pack with a side of cucumber slices, carrot sticks, or fresh fruits for a balanced, colorful meal.
These parathas stay soft in lunchboxes, making them a fantastic school or office lunch option.
🌟 Why You’ll Love This Recipe
Healthy & Nutritious: Beetroot adds antioxidants, vitamins, and fiber.
Lunchbox-friendly: Remains soft and delicious for hours.
Kid-Approved: Attractive pink color makes it fun and inviting.
Easy & Quick: Simple to prepare during busy weekday mornings.
Dum-style Hyderabadi Vegetable Biryani is more than just a dish—it’s a warm hug from the kitchen. I still remember festive Sundays at my grandma’s house when a sealed handi of biryani would slowly cook on the stove, infusing the whole home with saffron, spices, and the scent of caramelized onions. Biryani was traditionally reserved for celebrations, and as it cooked under a dough-sealed lid, the anticipation built. Every time I lift that lid now, I’m taken back to those childhood moments and smiling faces around the table. The blend of fragrant rice, spiced vegetables, and herbs makes every bite nostalgic and comforting.
Juice of ½ lemon (to help keep rice grains separate)
Salt, to taste
For the Vegetable Marinade
1 cup plain yogurt (dahi)
2 tbsp ginger-garlic paste
2–3 green chilies, finely chopped
1 tsp chili powder
½ tsp turmeric powder
2 tsp garam masala (or biryani masala)
1 tsp coriander powder
Juice of 1–2 lemons
Salt, to taste
¼ cup fried onions (birista)
¼ cup chopped mint leaves
¼ cup chopped cilantro (coriander leaves)
Vegetables (about 1.2–1.5 kg total)
2 potatoes, cut into 1½-inch cubes
1 cup cauliflower florets (gobi)
1 cup carrot, chopped
1 cup green beans or French beans, chopped
1 cup green peas (fresh or frozen)
1 capsicum (bell pepper), cut into strips
(Optional: mushrooms, capsicum – for variation)*
For the Saffron-Milk Layer
10–15 saffron strands (soaked)
¼ cup warm whole milk (to steep saffron)
Few drops of rosewater (optional, for aroma)
2–3 tbsp ghee or melted butter
Method
1. Marinate the Vegetables. In a large bowl, whisk together yogurt, ginger-garlic paste, chopped green chilies, lemon juice, chili powder, turmeric, coriander powder, garam masala, salt, chopped mint, and cilantro. Add the chopped vegetables (potatoes, carrots, beans, peas, cauliflower, bell pepper) and toss to coat them completely. Cover and let the veggies marinate for at least 15–30 minutes (even a quick 15-minute soak lets the spices meld).
2. Cook the Vegetable Masala. Heat 2 tablespoons ghee or oil in a heavy-bottomed pan over medium heat. Sauté sliced onions until golden brown – this caramelization (Maillard reaction) adds sweet, savory depth. Add a bit of salt to help them sweat. Stir in capsicum strips and fry briefly. Now pour in the marinated vegetables along with all the marinade. Stir well and cover the pan. Cook on medium heat for about 10 minutes, until the veggies are almost tender but still hold their shape. This forms your flavorful biryani base.
3. Parboil the Rice. Rinse the basmati rice under cold water until the water runs clear, then soak it for 30–45 minutes. In a large pot, bring water to a boil. Add whole spices (bay leaves, cinnamon, cardamom), a teaspoon of caraway or cumin, and a teaspoon of ghee for fragrance. Squeeze in lemon juice and salt. When the water boils vigorously, drain the soaked rice and add it to the pot. Cook the rice until it’s about 70–80% done – the grains should still have a slight bite. Drain the rice immediately to halt cooking (rice will finish in the dum).
4. Layer the Biryani. Grease the bottom of a heavy pot or handi with a little oil. Arrange a layer of tomato slices on the bottom – this traditional trick prevents sticking and adds moisture. Spread the cooked vegetable masala evenly over the tomatoes. Sprinkle half of the fried onions, mint, and coriander leaves on top of the veggies. Now add the rice in an even layer over the vegetables. Finally, top with the remaining fried onions, mint, and coriander.
5. Infuse with Saffron and Seal. Warm the milk in a small pan and steep the saffron strands in it (grinding the saffron first releases more color). Add a drop of rosewater if using. Gently pour the saffron-infused milk over the top of the rice, letting it seep through in golden rivulets. Drizzle the last bit of melted ghee or butter over everything. Seal the pot tightly with a heavy lid. Traditionally, a dough seal (chapati dough around the rim) locks in steam.
6. Dum Cook. Place the sealed biryani pot on a hot tawa (griddle) or directly on low heat. Cook on a gentle flame for about 20 minutes – this is the “dum” process. You’ll see a little steam trying to escape at the sides when it’s done. Turn off the heat and let the pot rest, unopened, for another 10–15 minutes (the flavors continue to meld, and the rice firms up). Avoid peeking too soon!
7. Serve with Accompaniments. Carefully mix (fluff) the rice and vegetables together just before serving. Serve this fragrant Dum Hyderabadi Vegetable Biryani hot, accompanied by cooling cucumber-mint raita and spicy Mirchi ka Salan (Hyderabadi chili-peanut curry). A simple kachumber salad of chopped cucumber, tomato, and onion (dressed with lemon) or crisp papadums make nice sides too.
Tips for Perfect Biryani
Choose and Prepare the Rice Right: Always use good-quality aged basmati rice – the longer it’s aged, the stronger and more fragrant its aroma. Soak the rice before boiling to keep grains fluffy. Add a splash of lemon juice and a little fat (ghee or oil) to the boiling water; this keeps the grains separate and non-sticky.
Caramelize Onions Thoroughly: Don’t rush the onions. Cook them until they are a deep golden-brown. The natural sugars caramelize, giving the biryani its rich sweetness and depth.
Layer Thoughtfully: Grease the pot and use tomato or potato slices at the base to prevent burning. Alternate layers: veg mix, then herbs/onions, then rice, then garnish. This ensures even flavor distribution and beautiful color marbling.
Seal and Cook on Dum: Seal the pot well with dough or tight foil – trapping the steam is key. Cook on the lowest flame possible to avoid scorching the bottom. A heavy-bottomed pot helps distribute heat gently.
Infuse with Saffron and Herbs: Don’t skip saffron! Soak strands in warm milk (or water) and sprinkle it over the rice for gorgeous color and aroma. A few drops of rosewater or kewra water can also add that authentic floral note.
Let it Rest: Once cooked, let the biryani sit off the heat for a while (still sealed). This resting period (even 10–15 minutes) lets the flavors settle and makes the rice absorb the steam fully. In fact, Hyderabadi biryani often tastes even better a bit later – it’s a true comfort food that evolves as it rests.
Spice Blend: Using freshly ground biryani masala or garam masala makes a difference. Fresh spices have more potency than store-bought powders.
Serving Suggestions
Cooling Raita: A dollop of cucumber-mint raita or boondi raita complements the heat of the biryani. The yogurt and cucumber cool your palate and add a creamy texture.
Mirchi ka Salan: A traditional Hyderabadi side, this spicy chili-and-peanut curry is almost synonymous with biryani. Its tangy, nutty flavor cuts through the rich rice.
Fresh Salad: A simple kachumber of chopped tomato, cucumber, and onion tossed with lemon and a pinch of salt adds freshness.
Pickles & Papad: Indian mango or lime pickle and crisp papadums are easy extras to round out the meal.
Why I Love It
This Dum-Style Veg Biryani holds a piece of my heart. It’s the family favorite on any special occasion or lazy weekend – from festive Eid lunches to relaxing Sunday dinners. I love that it’s a one-pot wonder that brings everyone together; while it’s cooking, the whole house fills with warm, inviting aromas. When I was little, I’d sneak into the kitchen just to catch a whiff of saffron and spices escaping the pot. Sharing the first bite with loved ones – rice steaming on your fork, crisp fried onions melting with every mouthful – feels like a celebration. It’s a humble dish that makes any day feel special, reminding me of home and warmth. Every time I make it, I taste those memories, and it never fails to make me smile.
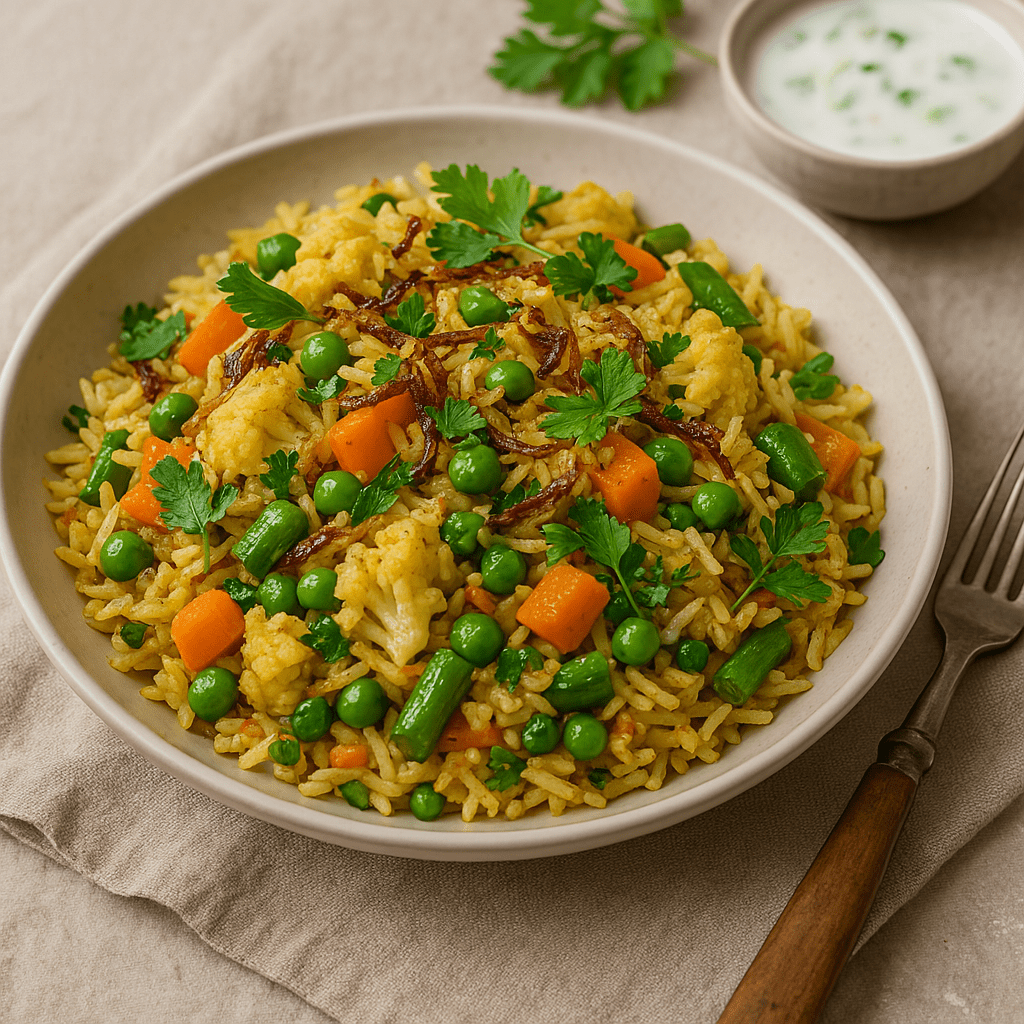
Growing up, Vegetable Biryani meant special days—guests at home, festival afternoons, or birthdays. My mother would begin early, soaking fragrant basmati rice, chopping fresh vegetables, and grinding spices by hand. The kitchen filled with aromas of cardamom, cinnamon, and bay leaves, signaling that something special was simmering on the stove.
Even today, when life gets busy and I need comfort, I make Biryani. It’s more than a dish—it’s a reminder that the best things in life take patience, care, and a generous pinch of spice.
🍲 Recipe: Vegetable Biryani
Serves: 2-3 Prep Time: 15 mins Cook Time: 30 mins
🛒 Ingredients:
For Rice:
1½ cups basmati rice, soaked (20 mins)
2 bay leaves
2-3 cloves
1 cinnamon stick
Salt
For Vegetables & Spices:
1 onion, sliced thinly
1 cup mixed vegetables (carrots, beans, peas, cauliflower, potatoes)
1 tomato, chopped
1 tbsp ginger-garlic paste
1-2 green chilies, slit
½ cup yogurt
1 tsp turmeric powder
1 tsp chili powder
1 tsp garam masala powder
Salt to taste
2 tbsp oil or ghee
Fresh coriander & mint leaves for garnish
Fried onions for garnish (optional)
🔪 Instructions:
Cook Rice: Boil water with bay leaves, cloves, cinnamon, and salt. Add soaked rice and cook until 80% done. Drain and set aside.
Prepare Vegetable Masala: Heat oil/ghee in a pan. Sauté onions until golden. Add ginger-garlic paste, green chilies, vegetables, turmeric, chili powder, garam masala, salt, and tomatoes. Cook till vegetables are tender. Add yogurt and simmer till the mixture thickens.
Layer the Biryani: In a heavy-bottom pot, layer half the vegetable mixture. Spread half the rice over it, garnish with coriander, mint, and fried onions. Repeat layers.
Cook on Dum: Cover with a lid tightly. Cook on low heat for about 15 mins (dum cooking). Turn off heat and let rest for 10 mins.
Serve Warm: Fluff gently and serve with raita or salad.
💡 Biryani Tips:
Always soak the rice—this gives fluffy, separated grains.
Slow cooking (dum) helps flavors develop deeply.
Add saffron-infused milk or rose water for a richer aroma.
❤️ Closing Note:
Biryani is more than just rice and vegetables—it’s layers of love, tradition, and warmth. Try this recipe for your next special day or when you crave comfort in a bowl.