Breakfast

Traditional Akki Rotti (Karnataka Rice Flatbread)


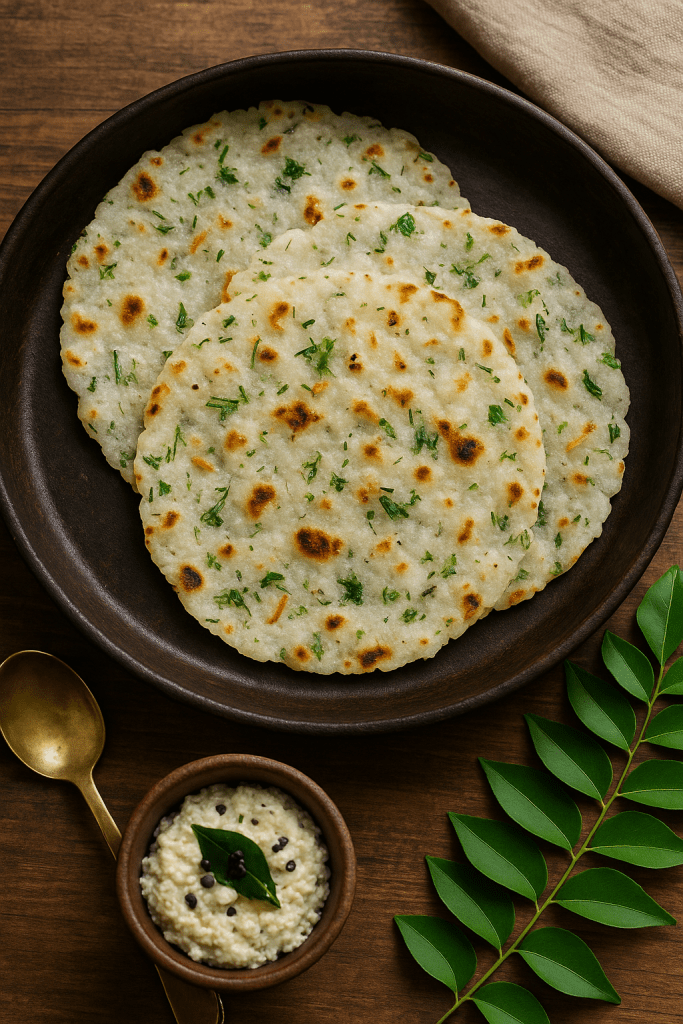
I can still smell the smoky aroma of akki rotti wafting from the clay stove of my childhood home in Karnataka.  In the early morning light, my grandmother would knead rice flour with onions, chili, coconut and herbs, then pat the dough into thin rounds on a greased banana leaf.  The sizzle as each roti hit the hot iron tawa is a sound I’ll never forget. The crispy-edged flatbread, soft and pillowy inside, was our simple but beloved breakfast – eaten hot with a slather of butter or a spoonful of spicy chutney. Even my youngest memory of that rural kitchen is tied up in the taste of those rotis, golden brown and studded with dill and grated carrot.

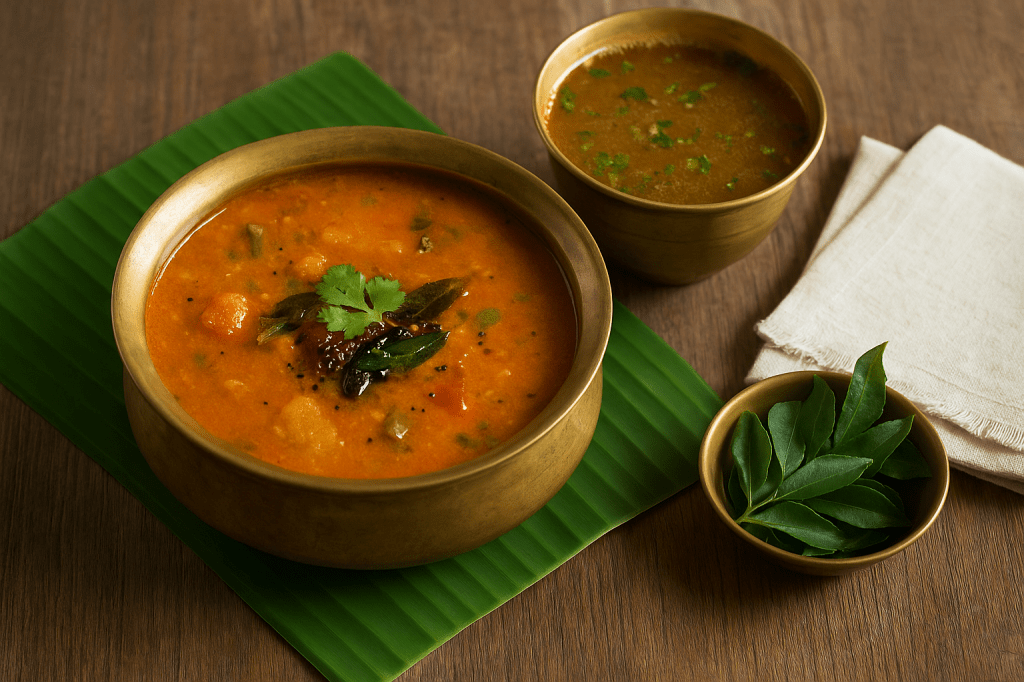
Back then I didn’t know the name, but I would come to learn it’s called akki rotti – literally “rice pancake” in Kannada.  It’s a staple of Karnataka cuisine: a naturally gluten-free flatbread made from rice flour, spices and veggies.  As noted in a popular recipe, “Akki Roti are gluten-free flatbreads… a popular breakfast from Karnataka. Serve them with chutney”.  In other words, this humble roti is vegan, hearty, and perfect with tangy coconut or tomato chutney.  Over the years I’ve learned little tricks – a pinch of cumin for warmth, a handful of fresh coriander or dill for aroma – that make each bite more fragrant. Now I’m excited to share this comforting recipe so you can bring a bit of that village-kitchen nostalgia to your own table.

Servings: 4 akki roti

Prep Time: 10 minutes

Cook Time: 15 minutes

Ingredients:

1 cup rice flour (finely ground)

½ teaspoon cumin seeds, crushed

¼ teaspoon salt (or to taste)

1 small onion, finely chopped

2 green chilies, finely chopped (adjust to taste)

½ small carrot, grated (or grated coconut, optional)

Handful fresh coriander leaves, chopped

1–2 tablespoons dill leaves (sabsige soppu) or curry leaves (optional)

½ teaspoon grated ginger (optional)

Water, as needed to form dough

1–2 tablespoons oil or ghee (for cooking)


Instructions:

1. Mix dry ingredients: In a large bowl, combine the rice flour, crushed cumin, and salt. Add the chopped onion, green chilies, grated carrot (or coconut), coriander (and dill or curry leaves if using). Stir everything together until well mixed.


2. Form the dough: Pour in a little warm water at a time and stir to make a soft dough. It should be moist and sticky (not dry). Knead gently until smooth; the texture will be pliable like a pancake batter. Cover the dough and let it rest for a couple of minutes if it seems too wet.


3. Divide the dough: Divide the dough into 4 equal balls. Flatten each ball slightly on your palm. If you plan to make thicker rotis, you can leave them a bit thicker now and make holes (see Tip).


4. Heat the pan: Heat a heavy flat skillet or tawa over medium heat. Grease it lightly with oil. For each roti: if using a banana leaf or plastic sheet (or parchment), grease it slightly and place one dough ball on it. Moisten your fingers and gently pat and spread the dough into a thin round (about 6–7 inches across). If cracks appear, wet your fingers and smooth them out.


5. Transfer to pan: Carefully lift the leaf or sheet and invert it onto the hot skillet so the uncooked side of the roti faces the pan. Gently peel off the leaf. (If you don’t use a leaf, you can grease the cool pan and press the dough directly on it, then set it on the burner.)


6. Cook first side: Cook on medium heat until the bottom firms up and light brown speckles appear (about 1–2 minutes). Don’t let it burn; adjust heat as needed.


7. Flip and cook second side: Flip the roti. Drizzle a teaspoon of oil or ghee around the edges and on top, then press gently with a spatula. Cook for another minute or so until golden brown and crisp spots form.


8. Finish cooking: Flip once more briefly if needed to brown the other side. Remove when golden. Repeat with remaining dough, using a second pan or waiting for the first pan to cool slightly if needed.


Tips:

Use a very fine, smooth rice flour. Coarse flour can make the roti hard or prone to breaking. If your flour seems gritty, sift or grind it finer. Always keep a little water on hand to moisten your fingers – this prevents the dough from sticking and helps join any cracks as you spread it.

Add veggies and herbs. Feel free to stir in finely chopped veggies for nutrition and color. Traditional additions include grated carrot, chopped onion, and coconut. A few chopped fresh herbs (dill/sabbige, coriander, or mint) or curry leaves really lift the flavor. Even green moong or soaked chana dal can be mixed in for protein (as some home cooks do).

Even cooking: If your roti is a bit thick, poke a few holes with your finger (or a fork) so it cooks through evenly. This lets steam escape and prevents underdone centers.

Oiling: A light drizzle of oil or ghee on each side makes the edges crisp and golden. Don’t over-oil – just enough to coat the surface. Pressing the roti with a flat spatula also helps it cook uniformly.

Serve immediately: Akki roti is best eaten fresh off the pan. These rotis harden as they cool, so enjoy them hot. Serve them with coconut chutney or any spicy South Indian pickle, as is traditional. Leftovers can be reheated or crumbled into a curry for flavor.


❤️ Closing Note: Akki roti isn’t just a recipe – it’s a bite of childhood and tradition. Every time I make it, I’m transported back to those misty Karnataka mornings with my family sitting around and filling our bellies with these warm, rice-flour flatbreads. The simple act of mixing flour with the day’s first rays of sun, patting dough between wet palms, and inhaling that toasty aroma of cooking rice has always felt like a warm hug from home. I hope this easy recipe brings some of that same comfort into your kitchen – whether you grew up in Karnataka or not – and that each crisp, chewy bite reminds you of family, togetherness, and the joy of homemade food. Enjoy your akki roti with loved ones, and maybe share with someone who’d appreciate a little taste of Karnataka nostalgia. Happy cooking and namaskara!

Breakfast, Lunch & Dinner

Udupi-Style Sambar and Rasam


I still remember tagging along to my grandfather’s home in Udupi as a child and inhaling the aroma of sambar and rasam simmering in the kitchen. After morning temple prayers, my grandmother would serve a simple banana-leaf thali: steaming rice topped with our local sambar and rasam, a pat of ghee, and crispy fried peppers. Those humble temple-style dishes – fragrant with coconut, cumin and curry leaves, and completely free of onion or garlic – felt like pure comfort food.  In Udupi cuisine, everything is prepared satvik (pure and vegetarian), so the sambar masala is based on coconut and spices, and the rasam is bright with tomato, tamarind and a touch of jaggery instead of pungent aromatics. These are the dishes I grew up loving, and I’m excited to share my version of Udupi-style Sambar and Rasam with you.

Udupi-Style Sambar

Servings: 4

Prep Time: 15 minutes

Cook Time: 30 minutes

Ingredients

For the Sambar:

1 cup toor dal (split pigeon peas), washed

~2 cups mixed vegetables (e.g. ½ cup chopped pumpkin or squash, 1 drumstick cut into pieces, ½ cup potato, 2 small eggplants), chopped

1 small tomato, chopped

2½–3 cups water

2 tbsp tamarind paste (or a small ball of tamarind, soaked)

½ tsp turmeric powder

½ tsp jaggery (optional, for a hint of sweetness)

Salt to taste


For the Masala Paste:

¼ cup fresh grated coconut (or frozen/thawed)

1 tbsp coriander seeds

1 tsp cumin seeds

1 tsp split urad dal (optional)

1 tsp split chana dal (optional)

2–3 dried red chilies (preferably mild Byadgi or Kashmiri)

½ tsp black peppercorns

½ tsp fenugreek seeds

5–6 fresh curry leaves

1 tbsp coconut or sesame oil (for roasting)

Water, as needed for grinding


For Tempering:

2 tsp coconut or sesame oil

½ tsp mustard seeds

½ tsp cumin seeds

A pinch of asafoetida (hing)

8–10 fresh curry leaves


Instructions

1. Cook the dal: In a pressure cooker or pot, combine the washed toor dal with a pinch of turmeric and 2 cups of water. Cook until very soft (about 3–4 whistles in a pressure cooker). Mash the dal and set aside.


2. Prepare the masala paste: In a small pan, heat 1 tbsp oil over medium heat. Add the coriander seeds, cumin, dals, fenugreek, peppercorns, and dried chilies. Roast, stirring, until aromatic and lightly golden. Add the grated coconut and curry leaves, and roast briefly until the coconut starts to brown. Let cool, then grind this mix to a smooth paste with a little water.


3. Cook vegetables: In a large pot or Dutch oven, heat a tablespoon of oil. Add the turmeric and the chopped vegetables and tomato. Stir for a minute, then pour in 2 cups of water, add salt, and bring to a boil. Reduce heat, cover, and simmer until the vegetables are almost tender (about 10–12 minutes).


4. Add tamarind and dal: Stir in the tamarind paste and jaggery. Once it comes to a boil and the raw tamarind smell disappears, add the mashed toor dal and mix well.


5. Add the spice paste: Pour the ground coconut-spice paste into the simmering pot. Stir and simmer gently for 3–5 minutes so all flavors meld. (The sambar will thicken as it sits – add a little water to adjust consistency as needed.)


6. Tempering: In a small pan, heat the remaining 2 tsp oil. Add mustard seeds; when they splutter, add cumin, a pinch of hing, and the curry leaves. Pour this hot seasoning over the simmering sambar, cover the pot, and let it sit for a minute to infuse. Stir once more and taste; add salt or jaggery if needed.


7. Serve: Garnish with fresh chopped coriander and a dash of lime juice if you like. Serve the sambar hot with rice, idlis, or dosas, and enjoy the mellow coconutty aroma of this Udupi specialty.


Udupi-Style Rasam

Servings: 4

Prep Time: 10 minutes

Cook Time: 20 minutes


Ingredients

Main Ingredients:

2 large ripe tomatoes, chopped

½ cup water (plus more during cooking)

2 cups water (for cooking the rasam)

1 tbsp tamarind paste (or soaked tamarind pulp)

1 tbsp jaggery or brown sugar

½ tsp turmeric powder

2 slit green chilies (adjust to taste)

1/4 cup toor dal (washed, then cooked until very soft)

2 tbsp Udupi-style rasam powder (store-bought or homemade)

Salt to taste


For Garnish:

A few curry leaves

Chopped coriander leaves

(Optional) 1 tsp freshly grated coconut


For Tempering:

1 tbsp coconut oil or ghee

1 tsp mustard seeds

½ tsp cumin seeds

A pinch of asafoetida (hing)


Instructions

1. Cook the dal: Pressure-cook the ¼ cup toor dal with a pinch of turmeric and enough water until very soft. Mash and set aside.


2. Boil tomatoes: In a saucepan, bring 2 cups of water to a boil with the chopped tomatoes, green chilies, turmeric and a little salt. When the tomatoes are very soft, mash them in the pot to release their juices.


3. Add seasonings: Stir in the tamarind paste, jaggery, and the rasam powder. Add the mashed dal and mix well. Add more water to reach your desired soup-like consistency. Bring the mixture to a gentle boil and simmer for 5–7 minutes so the flavors meld.


4. Finishing touches: Turn off heat and add a few curry leaves. (Optionally, stir in the grated coconut for richness.)


5. Tempering: In a small pan, heat the oil or ghee. Add mustard seeds; when they begin to pop, add cumin and a pinch of hing. Pour this fragrant seasoning over the hot rasam. Cover the saucepan and let the aromas infuse for a minute.


6. Serve: Give the rasam a final stir. Garnish with chopped coriander and serve piping hot. Udupi rasam is traditionally slightly sweet-spicy – the jaggery and hing give it that signature warmth. Enjoy it as a soup or ladle it over steamed rice with a drizzle of ghee.


Tips

Use fresh coconut and spices: Roasting the spice mix and freshly grated coconut brings out a nutty richness in the sambar. Don’t skimp on this step – it’s what gives Udupi sambar its deep flavor.

Choose your chilies: Udupi sambar is known for its mild, brick-red color. Using Byadgi or Kashmiri red chilies (with maybe one spicy chili) will give color without too much heat. Adjust the mix if you prefer it hotter or milder.

Balance jaggery and hing: The little bit of jaggery and hing in the rasam might seem odd, but they balance the tamarind’s sourness with sweetness and aroma. Be sure to include at least a pinch of each for authenticity.

Use coconut oil for tempering: Authentic Udupi rasam often uses coconut oil (or ghee) for the final seasoning, as it adds a subtle tropical fragrance.

Adjust consistency: Remember these dishes thicken as they sit. If your sambar or rasam becomes too thick after resting, simply add a little hot water and reheat to loosen it.


Closing Note

These Udupi-style sambar and rasam are a tribute to the simple temple cuisine of coastal Karnataka. The flavors are subtle but soulful – no onions or garlic, just wholesome lentils, fresh coconut, coriander, and traditional masalas. I hope this recipe brings you the same comfort it did for me, whether you’re enjoying a South Indian breakfast of idlis and dosas or a warm bowl over rice. Remember, the slow simmering and tempering are key: be patient as the ingredients meld, and your kitchen will soon be filled with that nostalgic aroma of home. Enjoy these healthy, vegan delights with family and friends, and maybe light a lamp or two – after all, this food was born in the light of temple faith and tradition!