Snacks, Street Foods

Rajasthani Pyaz Kachori (Onion Kachori) – Monsoon Memories in a Crispy Bite

There’s a magic in the Indian monsoon that isn’t just about the rain – it’s about the cravings it brings. I remember as a child in Jaipur, the moment the earthy scent of first rain (petrichor) rose from the hot ground, my father would rush out to grab a batch of Pyaz Kachoris from the local halwai. We’d huddle under our verandah, warm cups of masala chai in hand, and bite into these golden, onion-stuffed kachoris as the raindrops danced around us. The flaky crust would crumble, giving way to a spiced onion filling that was equal parts fiery and comforting, a perfect contrast to the cool, damp weather. To this day, the monsoon and Pyaz Kachori are inseparable in my memories – one bite and I’m transported to those rain-soaked street corners and the joyful chaos of Jaipur’s monsoon evenings.

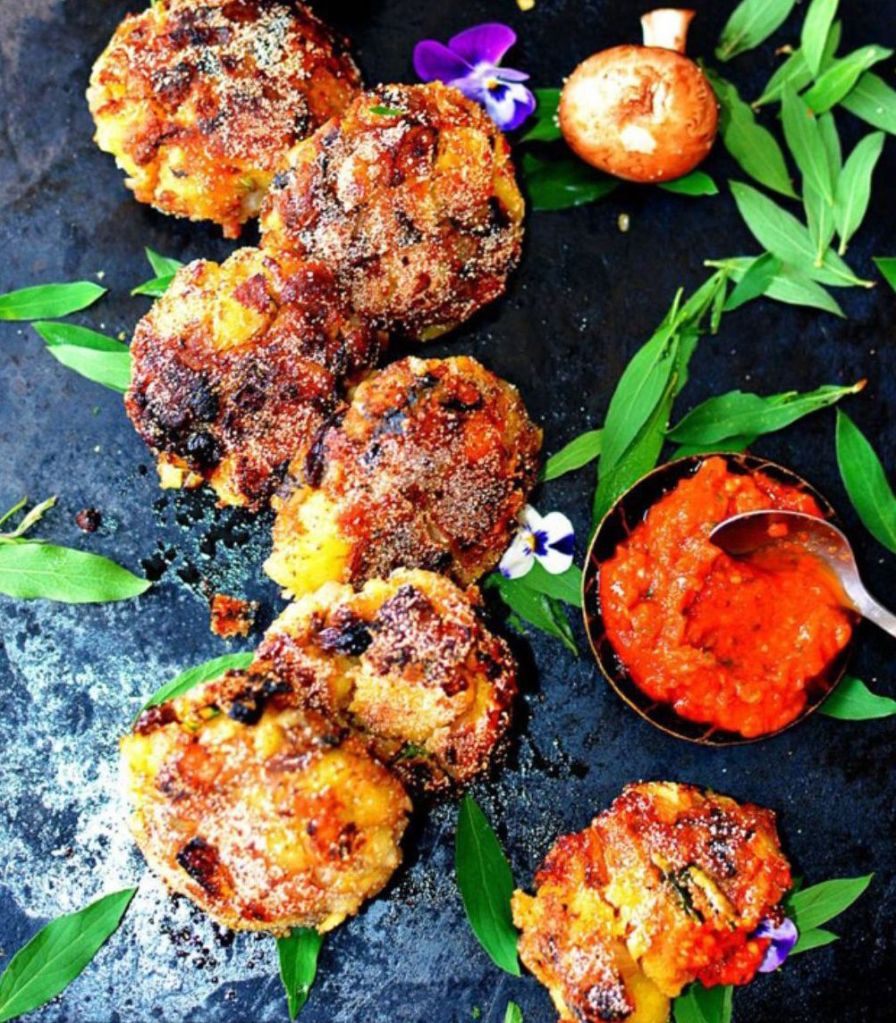
In Rajasthan, Pyaz ki Kachori isn’t just a snack; it’s an institution. Steaming hot kachoris are sold at nearly every sweet shop and namkeen stall, typically enjoyed with a dollop of sweet-sour tamarind chutney that balances the spice. These indulgent treats likely originated in the cities of Jaipur and Jodhpur, and they’re so legendary that people go to great lengths to get their hands on them – there’s even a tale of an Air India pilot detouring a flight to pick up her favorite Jodhpur kachoris!. Biting into an authentic Rajasthani Pyaz Kachori is pure bliss: the pastry is brittle, ghee-rich and flaky, giving way to a belly full of spiced onions (and a touch of potato) laced with fiery green chillies, fennel, and a hint of garlic. It’s the kind of street food that defines a place – mention Jaipur to any foodie, and they’ll likely reminisce about Rawat Misthan Bhandar’s famous Pyaz Kachori or the comfort of devouring one straight out of a roadside stall, rain or shine. This recipe is my attempt to bring those warm, nostalgic flavors into your home kitchen. So, let’s dive into making these crispy, stuffed pastries and create some monsoon memories of your own!

Ingredients

For the Kachori Dough:

2 cups all-purpose flour (maida)

1/4 cup ghee (clarified butter), melted

1/2 teaspoon salt (or to taste)

~1/2 to 3/4 cup water (as needed for kneading)


For the Onion Masala Filling:

2 cups onions, finely chopped (about 2 medium onions)

2 tablespoons oil

1 teaspoon nigella seeds (kalonji)

2 teaspoons fennel seeds (saunf)

2 bay leaves (tejpatta)

1–2 green chillies, finely chopped (adjust to spice preference)

2 tablespoons besan (Bengal gram flour) (helps bind the filling)

2 teaspoons ground coriander (dhania powder)

2 teaspoons red chilli powder (adjust to taste)

1 teaspoon garam masala powder

Salt, to taste

2–3 tablespoons fresh coriander leaves, chopped

Oil for deep frying (enough for a deep pan, about 2–3 cups)


Instructions

1. Prepare the Dough: In a large mixing bowl, combine the flour and salt. Pour in the melted ghee and rub it into the flour with your fingertips until the mixture resembles coarse breadcrumbs (this moyan of ghee is what makes the kachori flaky). Gradually add water, a few tablespoons at a time, and knead to form a semi-soft but firm dough. The dough should be pliable and smoother than puri dough, but not sticky. Knead well for about 4–5 minutes to develop gluten. Cover the dough with a damp cloth and let it rest for 15–20 minutes while you prepare the filling.


2. Make the Onion Filling: Heat 2 tablespoons of oil in a broad pan or kadhai over medium flame. Add the nigella seeds and fennel seeds; let them sizzle for a few seconds. Toss in the bay leaves and the chopped green chillies, stirring for a moment. Now add the finely chopped onions. Sauté the onions on medium heat for about 5 minutes until they soften and turn translucent (avoid browning them). Next, sprinkle in the besan and all the spice powders – coriander, red chilli, garam masala – along with salt. Stir everything together and cook for another 2–3 minutes, stirring continuously, until the besan gets lightly roasted and the spices cook off their raw aroma. The mixture will be fairly dry and aromatic, with the besan absorbing excess moisture from the onions. Turn off the heat, then mix in the fresh coriander leaves. Pick out and discard the bay leaves. Spread the filling on a plate to cool down slightly (warm is okay, just not piping hot) for easier handling.


3. Shape the Kachoris: Give the dough a quick knead after resting, then divide it into 10–12 equal portions (each portion will be about the size of a golf ball). Keep the dough balls covered to prevent drying. Working with one portion at a time, roll or press it out into a small disc roughly 3 inches in diameter. Place 1–2 tablespoons of the cooled onion filling in the center of the disc. Bring the edges of the dough up around the filling, pleating as needed, and pinch them together to seal the filling inside (like a money bag). Pinch off any excess dough at the top to avoid a thick lump. Now gently flatten the filled pouch with your palm. Using a rolling pin, very lightly and carefully roll the filled dough ball into a slightly flatter disc of about 2½ inches, taking care not to puncture it or let the filling spill out. (Tip: You can roll from the sealed side very gently, and if a bit of filling does peek through, patch it with a tiny pinch of flour-dough.) Prepare all kachoris this way, keeping the prepared ones covered with a cloth to avoid drying.


4. Deep-Fry the Kachoris: Heat the oil for deep frying in a heavy-bottomed pan or kadhai on medium-low heat. To test the oil, drop a tiny pinch of dough into it – it should sizzle and rise slowly without turning brown instantly. Slide in 2–3 kachoris at a time (do not overcrowd) into the hot oil. For the best crispy results, fry on a low to medium flame: in the first minute, do not disturb the kachoris. They will sink then gradually float up as they puff. Once they float, gently flip and move them around. Fry patiently, turning occasionally, until each kachori is golden brown, crisp and evenly cooked. This frying process can take about 8–10 minutes per batch on a moderate flame – remember, slow-frying is what yields the signature khasta (flakiness) in kachoris. Do not crank up the heat, as high heat will brown the outside too fast while leaving the inside doughy. When done, the kachoris will be a beautiful golden color and feel light and crisp with no soggy spots. Remove them with a slotted spoon and drain excess oil on paper towels. Repeat for all batches. (If you notice the oil temperature dropping too much between batches, let it heat up again, but never to smoking point.)


5. Enjoy: Serve the Pyaz Kachoris immediately while they’re hot and flaky. If you need to fry them a bit in advance, you can crisp them up in a preheated oven at 180°C (350°F) for 5 minutes before serving. See serving suggestions below for classic accompaniments!


Tips for Frying and Storing

Flaky Kachori Secrets: The key to flaky, khasta kachori is the dough. Be generous with the ghee (or oil) when rubbing it into the flour – this shortening makes the crust wonderfully crisp. Knead the dough until it’s smooth, but don’t make it too soft. A firmer, tight dough (with just enough water) ensures the kachori won’t absorb excess oil during frying. Always let the dough rest under a damp cloth; this relaxes the gluten and makes it easier to shape, preventing the kachori from springing back when rolled.

Frying Temperature & Technique: Frying kachoris is a slow dance. Always fry on medium-low heat for even cooking. Patience will reward you – low heat frying cooks the kachori through and produces an evenly golden, crisp shell with tiny flaky layers. If the oil is too hot, the kachori will puff up and turn dark quickly but remain uncooked (doughy) inside. One trick: once the kachori has floated and started to puff, you can gently press it with the frying spoon or a spatula to help it puff completely. Fry until the bubbling subsides significantly – that’s a sign the moisture has cooked out and the crust is crisp.

Onion Filling Tips: Don’t chop the onions too fine. Slightly larger diced onions are ideal because they retain a bit of texture and won’t release water as quickly as very fine onions. This helps avoid a soggy filling. The spoonful of besan in the filling is a traditional touch – it soaks up moisture from the onions and spices, ensuring the filling is dry enough to stay inside the kachori without bursting out. (Some halwais even use a bit of mashed boiled potato or crushed roasted moong dal for the same purpose of binding the filling.)

Variations: While all-purpose flour yields the most authentic crispy texture, you can replace part of the flour with whole wheat flour (atta) for a slightly healthier spin. Many households might not deep fry snacks often, but this treat is worth the indulgence! If you’re experimenting, you can also try other fillings (like spiced lentils or peas) with this same dough – but then it wouldn’t be the classic Pyaz Kachori we know and love.

Storing & Reheating: Pyaz Kachori is best enjoyed fresh, but you can prepare them in advance. These kachoris keep well for a couple of days at room temperature. Let the fried kachoris cool completely, then store them in an airtight container – this prevents them from turning soggy. To reheat, avoid microwaving (which can make them chewy); instead, warm them up in a preheated oven at 180°C (350°F) for about 5–8 minutes. They’ll crisp up almost as good as freshly fried. (If you need to store the uncooked, filled kachoris, you can refrigerate them separated by parchment, but fry within a day for best results.)
Leftover Idea: If by some miracle you have leftover kachoris, you can turn them into a quick kachori chaat! Lightly crush a warmed kachori in a bowl, top with whisked yogurt, drizzle with tamarind and green chutneys, and sprinkle some sev and chopped onions. This street-food style makeover is absolutely delicious.


Serving Suggestions

Classic Chutney Pairing: The traditional way to relish Pyaz Kachori is with chutneys. Tamarind-Date Chutney (imli ki chutney), which is sweet and tangy, is a must – it complements the spicy, pungent onion filling perfectly. Alongside it, serve a bright Green Chutney made from fresh coriander, mint, green chillies and lime. The duo of sweet tamarind and herbaceous green chutney offers a burst of contrasting flavors that elevate each bite of the kachori. Serve the kachoris on a platter with bowls of these chutneys, or drizzle the chutneys inside the opened kachori for a street-style presentation. You can also add a few fried green chillies on the side for those who love extra heat (bite carefully – they’re hot!).

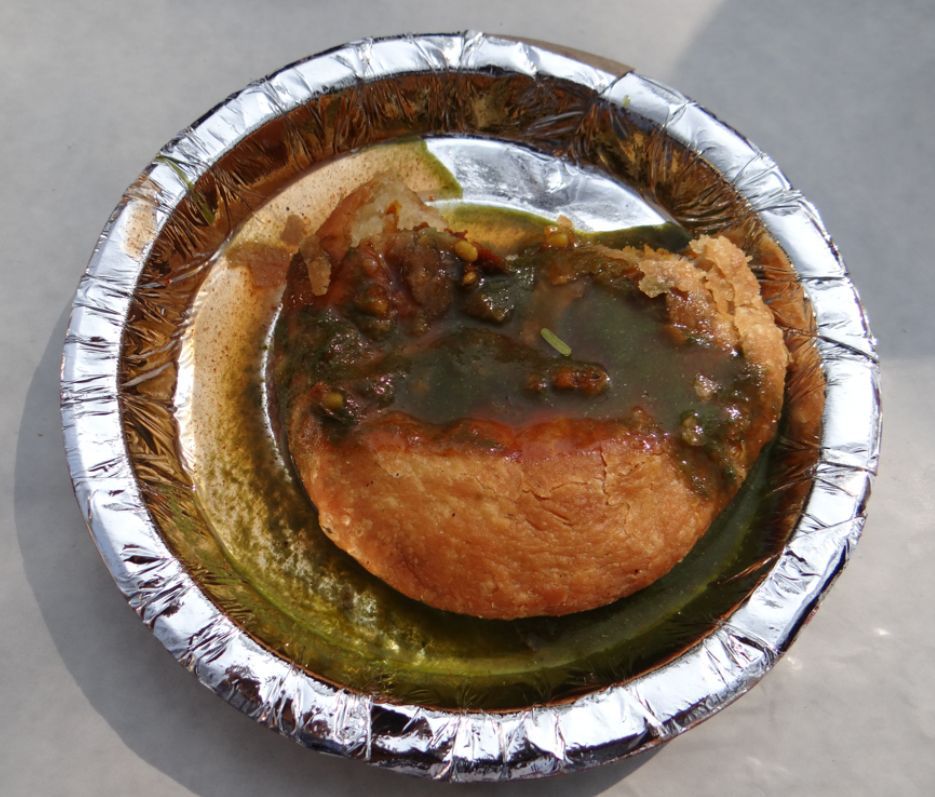
Rajasthani Kadhi (Kadhi Kachori): In some parts of Rajasthan, especially in cities like Ajmer, Pyaz Kachori is famously served with a simple Rajasthani kadhi. This kadhi is a thin, spicy yogurt-based curry (different from the Punjabi kadhi, as it usually has no pakoras and is lighter). To serve, place hot kachoris in small bowls and pour steaming kadhi over them, then top with a drizzle of tamarind and green chutney. Eating kachori soaked in kadhi is a soul-warming experience – the kachori soaks up the savory curry, turning each bite into a soft, flavor-packed dumpling. It’s a lesser-known but delightful way to enjoy this snack as a more filling meal.

Chai Time Delight: No Indian street food story is complete without chai! Serve your Pyaz Kachoris with a pot of hot masala chai on the side. The strong, milky tea cuts through the richness of the kachori and makes for a comforting combination. In fact, many locals swear by kachori with chai as the ultimate rainy day duo. The warmth of the tea and the spice of the kachori filling will surely chase away any chill from the monsoon rain. So, dig in, sip, and enjoy the bliss – as we say in Rajasthan, “Ram ram sa, khaana ho jaye!” (Greetings, let’s eat!).


Enjoy making these Rajasthani Pyaz Kachoris at home! With each crispy bite, you’ll taste the love and legacy of Rajasthan’s street food culture – and if you close your eyes, you might just hear the patter of rain and the chatter of a busy Jaipur market. Happy cooking and happy monsoon! 🌧️✨

Breakfast

Bedmi Poori with Spicy Aloo Sabzi: A Festive North Indian Breakfast

Nostalgic North Indian Breakfast

Bedmi Pooris (crispy urad-dal-stuffed puris) with a bowl of hot Aloo Sabzi – a classic combination that instantly transports many North Indians to festive mornings of their childhood. In the lanes and dhabas of Delhi, Agra and Mathura, this duo is celebrated as a comforting breakfast. In fact, recipe writers note that “Bedmi Puri is a favourite street food of Delhi, Agra, [and] Mathura”, often paired with spicy potato curry. It’s known by many names (Bedai Puri, Bedvi Puri) and hails from Uttar Pradesh—Agra, Mathura and Aligarh in particular. Each crispy, wheat-and-dal puri is filled with a warmly spiced urad-dal mixture, so that every bite is both crunchy and deeply savory. The dish tastes best when paired with spicy, chatpati aloo sabzi – a thin, tangy potato curry that perfectly balances the richness of the puris.

Ingredients

For the Bedmi Poori: Whole wheat flour (atta) – about 2 cups; semolina (sooji) – ~½ cup; a pinch of baking soda; salt to taste; 2–3 tbsp oil or ghee. Stuffing: 1 cup dhuli urad dal (split black gram, soaked 4–5 hours); finely chopped 1–2 green chilies; 1-inch ginger (grated); a few tablespoons chopped cilantro; ¼ tsp each red chili powder, garam masala, amchur (dry mango) powder; a big pinch of asafoetida (hing); salt. (These spices in the dal paste give the stuffing its characteristic tangy, spicy flavor.)

For the Aloo Sabzi: 3–4 medium potatoes (boiled, peeled, roughly crushed); 3–4 ripe tomatoes (pureed) or 2/3 cup canned tomato purée; 2 tbsp oil. Whole spices for tempering: 1 bay leaf, 2–3 cardamom pods, 4–5 cloves, 1 tsp fennel seeds, 1 tsp cumin seeds. Other spices: 1 tsp turmeric, 1–2 tsp red chili powder (adjust to taste), ½–1 tsp coriander powder, salt. Optional: 1 tbsp roasted gram flour (besan) or a pinch of fenugreek (kasuri methi) for extra body. A thumb of ginger (julienned) and a couple of slit green chilies add fresh heat. Fresh cilantro to garnish. (A typical recipe uses a hearty spice mix including bay leaf, cardamom, cloves, fennel, cumin and ginger in the tempering before adding the tomato base.)


Step-by-Step Preparation

1. Soak and grind the dal stuffing: Drain the soaked urad dal. Grind it coarsely with a little water, incorporating the whole spices (fennel, cumin) and green chili. If the paste is too smooth, the puris won’t puff well; too coarse and they may not seal properly. Transfer this dal paste to a bowl. Stir in red chili powder, garam masala, amchur powder, asafoetida and salt, then mix thoroughly. (Nishamadhulika suggests you can also lightly roast this mixed stuffing in a pan for 2–3 minutes for extra aroma.) Set the flavorful dal stuffing aside to cool slightly.


2. Make the dough: In another bowl, combine the wheat flour, semolina, a pinch of baking soda, salt and oil. Mix well so the flour is crumbly. Gradually add water and knead into a smooth, stiff dough (a little firmer than for regular pooris). Knead briefly more once dough comes together. Cover and let it rest 20–30 minutes. (Resting hydrates the semolina and firms the dough; as Nishamadhulika notes, “cover the dough and keep it aside for 20 minutes” before shaping.) The dough should be pliable but not sticky.


3. Stuff and roll the puris: Divide the dough into small golf-ball-sized portions and shape into smooth balls. Also divide the dal stuffing into equal portions (about 15–18, or one per dough ball). Flatten one dough ball in your palm and place a portion of stuffing in the center. Carefully seal the edges, enclosing the dal mixture completely. Gently flatten the stuffed ball. Lightly oil a rolling pin and gently roll each stuffed ball into a round puri about 3–4 inches across (a bit thicker than a regular poori so it doesn’t tear). Dust with flour as needed. Repeat for remaining balls.


4. Fry the Bedmi Pooris: Heat 1–1.5 inches of oil in a heavy kadai or deep pan over medium-high heat. Test the temperature: a small piece of dough should sizzle and puff immediately. Slide one puri into the hot oil and gently press with a slotted spoon to help it puff up into a ball. Fry on medium heat, turning once, until both sides are golden and crisp. (If oil is too cool the pooris will absorb oil and sag; if too hot they brown too fast. Keep it hot enough for a quick puff but moderate the flame to crisp slowly.) Remove the puri and drain on paper towels. Fry the rest similarly. You should end up with puffed, golden Bedmi Pooris that are slightly thicker and crunchier than regular pooris.


5. Cook the spicy Aloo Sabzi: While the pooris fry, prepare the potato curry. Heat oil in a saucepan over medium heat. Add the bay leaf, cardamoms, cloves, fennel and cumin to the oil and let them sizzle briefly. Then add the ginger and slit green chilies; sauté 30 seconds. Pour in the tomato purée and stir. Cook on medium heat until the tomatoes thicken and the oil separates at the edges. Now add turmeric, red chili and coriander powders and roasted besan. Mix well and sauté for a minute. Add about ¾–1 cup water and salt, and bring to a boil. Then toss in the crushed potatoes and stir gently to coat them. Simmer the curry for 3–5 minutes so the potatoes absorb the spices. Finally, add a pinch of garam masala, kasuri methi and chopped cilantro; stir and turn off the heat. The result is a thin, tangy potato curry – Rasedaar Aloo Sabzi – perfect for dipping. (This “thin gravy” style is traditional, so don’t worry if it’s looser than other curries. Dunking the hot puris into it is part of the fun.)


6. Serve hot: Plate the crisp Bedmi Pooris immediately after frying and ladle the hot aloo sabzi into a bowl. Serve them steaming together. Traditionally, a dollop of mint-coriander chutney or a spoonful of sweet yogurt (raita) accompanies them. These puris are best enjoyed fresh – the contrast of the crunchy puri and the piping-hot, spicy potato curry is irresistible. Sprinkle extra cilantro on the sabzi and perhaps offer pickles or a suji halwa on the side to complete the festive spread.


Tips for Success

Oil temperature: Always heat the oil well. It should be hot enough that the puris instantly puff when added. If the oil is lukewarm, the pooris will absorb oil and go limp. As one recipe notes, “oil should be really hot otherwise puri will not puff up.” Press gently on each puri during frying to encourage puffing.

Rest the dough: Don’t skip the resting time. Cover the kneaded dough and let it sit for about 20–30 minutes. This gives the semolina time to absorb moisture and firm up, yielding puffier, crispier pooris.

Season well: The secret to flavorful Bedmi Poori is in the stuffing. Include fragrant spices (asafoetida, red chili, amchur, garam masala, ginger and green chili) in the urad dal paste. Asafoetida (hing) is especially traditional and adds an unmistakable aroma.

Crunch factor: Semolina (suji) in the dough adds crunch. If you prefer extra crispness, you can increase it slightly or add a pinch of crushed fennel or ajwain (carom seeds) to the dough.

Serve promptly: These pooris are best eaten immediately, piping hot. They turn soft if left standing. Pair them with the hot aloo sabzi and condiments right away to enjoy the full “phut phut” crunchy texture.

Accompaniments: Serve the Bedmi Pooris with sides like mint-coriander chutney, sweet yogurt (raita) or pickle. As Nishamadhulika suggests, they traditionally go well with Aloo Masala and Suji Halwa for special occasions. Fresh lemon wedges can also brighten the tangy curry.

Snacks

Mushroom Tikki: A Crispy, Cozy Indian Snack with a Twist of Spice


A Warm, Spicy Tale from The Pinch of Masala Kitchen

It was a rainy Sunday evening, and the pitter-patter on my window made me crave something warm and nostalgic. I remembered the street vendors crafting aloo tikkis on large griddles, the air thick with the scent of sizzling oil and spices. Inspired to recreate that cozy snack moment with a twist, I raided my pantry. There I found a bowl of boiled potatoes and a pack of button mushrooms begging for attention. A spark of creativity (and hunger!) struck – why not combine them? Soon, my kitchen was filled with the aroma of earthy mushrooms sautéed with cumin and ginger, mingling with the comforting warmth of potatoes. The result was mushroom tikki – crispy on the outside, soft and savory on the inside – a delightful fusion of familiarity and surprise. Each bite took me back to childhood chai-time treats, yet felt new and exciting with the rich, meaty flavor of mushrooms. Whether it’s served at a family get-together or enjoyed bundled in a blanket on a monsoon evening, these Mushroom Tikkis bring an instant smile with their hearty, street-food charm and homey goodness.

Ingredients

This Mushroom Tikki is a simple vegetarian recipe using everyday ingredients. It yields about 10–12 medium tikkis.

Potatoes: 4 medium, boiled and mashed (acts as the base)

Mushrooms: 200 grams (about 2 cups) button mushrooms, finely chopped (adds an earthy flavor)

Onion: 1 medium, finely chopped (for sweetness and crunch)

Ginger & Garlic: 1 inch ginger and 4–5 cloves garlic, finely minced (for that aromatic punch)

Green Chilies: 2, finely chopped (adjust to taste for heat)

Spices: 1 tsp cumin powder (jeera), 1 tsp garam masala, 1/2 tsp red chili powder, 1/2 tsp chaat masala (optional, for tangy flavor), 1/4 tsp turmeric powder

Fresh Herbs: 2–3 tbsp coriander leaves (dhaniya), chopped

Binders: 2 tbsp gram flour (besan) or corn flour (helps absorb moisture and bind the mixture)

Salt: to taste

Oil or Ghee: for shallow frying (about 4–5 tbsp as needed)

For Coating (Optional): 1/2 cup breadcrumbs or 1/4 cup semolina (rava/suji) for extra crunch (optional but highly recommended for a crisp exterior)


Step-by-Step Instructions

Follow these steps to create your own plate of hot, crispy mushroom tikkis. The process involves cooking the mushroom masala, mixing it with potatoes, shaping the tikkis, and then frying them to golden perfection.

1. Prep the Base: Ensure your potatoes are boiled until soft. Peel them and mash thoroughly in a large mixing bowl. The mashed potato should be smooth, as it will help hold the tikkis together.


2. Sauté the Mushrooms: Heat 2 tablespoons of oil or ghee in a pan on medium flame. Add the chopped onions and sauté for about 2 minutes until they turn translucent. Stir in the minced ginger and garlic, frying until fragrant (about 30 seconds, be careful not to burn). Now add the finely chopped mushrooms and a pinch of salt. Cook this mixture, stirring often, until the mushrooms release their water and it evaporates. This may take about 5-7 minutes; you want the mushroom-onion mixture (masala) fairly dry. As it cooks, enjoy the mouthwatering aroma of mushrooms and garlic filling your kitchen!


3. Spice it Up: Once the mushroom mixture is dry, add the spices – cumin powder, garam masala, red chili powder, turmeric, and chaat masala (if using). Toss in the chopped green chilies as well. Stir everything together and cook for another 1-2 minutes so the mushrooms soak up the warm spices. You’ll notice the masala turning a rich color and smelling irresistibly good. Turn off the heat. (If the mixture seems too wet at this point, you can mix in a tablespoon of besan or corn flour and cook for a minute to absorb excess moisture.)


4. Combine with Potatoes: Add the cooked spiced mushroom-onion masala into the bowl of mashed potatoes. Sprinkle in the chopped fresh coriander leaves. Also add 2 tablespoons of besan (gram flour) or corn flour at this stage – this will help bind the tikkis. Add salt to taste (remember the mushroom masala has some salt already). Now, using a spoon or your hand, mix everything very well. The goal is a dough-like mixture where mushrooms and potatoes are evenly distributed with spices and herbs. The mixture should be soft but hold its shape when you press it together. (Tip: If it feels too sticky or loose, add a bit more besan or a few breadcrumbs and mix again.)


5. Shape the Tikkis: Time to get your hands dirty (applying a little oil on your palms can prevent sticking). Pinch off a portion of the mixture (roughly the size of a lemon or a ping-pong ball). Roll it between your palms to form a smooth ball, then flatten it gently into a patty about 1/2 to 3/4 inch thick. Repeat this process, lining up the formed tikkis on a plate. You should get roughly 10-12 tikkis from this batch.


6. Coat for Crunch (Optional): For that coveted crispy crust, take each patty and lightly coat it in breadcrumbs or semolina. You can spread the breadcrumbs/semolina on a plate and press each tikki on it to get an even coating. This step adds a delightful crunch when fried. (It’s optional, but highly recommended for extra crunch lovers!)


7. Shallow Fry: Heat a broad skillet or tava on medium heat and add 2-3 tablespoons of oil or ghee. Once the oil is hot (but not smoking), carefully place a few tikkis in the pan. Do not overcrowd – fry in batches if necessary. Let the tikkis cook on the first side for about 4-5 minutes, or until you see the edges becoming golden brown. Resist the urge to flip too early; giving them time ensures they turn crisp and don’t break. Gently flip each tikki using a spatula. Drizzle a little more oil if needed and fry the other side for another 4-5 minutes. Fry until both sides are golden-brown and crispy. The kitchen should now be enveloped in a truly enticing, spicy aroma!


8. Drain and Hold: Once fried, remove the tikkis and place them on a plate lined with paper towels to absorb excess oil. If you have more tikkis to fry, add a bit more oil to the pan as needed and continue with the next batch. Keep the cooked ones warm in a low oven or covered.


(Alternatively: You can air-fry or bake the tikkis for a healthier approach – brush them with oil and cook at 200°C until golden, flipping halfway. They won’t get quite as crisp as pan-frying, but still tasty. For the ultimate crispiness though, shallow frying is best.)

Now your Mushroom Tikkis are ready to serve! They should have a lovely crispy exterior and a soft, flavorful center packed with the goodness of mushrooms and spices. Go ahead and take a bite – you’ll get a hit of that crunchy coating followed by the melt-in-mouth potato and mushroom filling, with pops of chili and ginger. It’s pure comfort and joy in one package.

Serving and Presentation

Golden, crispy Mushroom Tikkis served with a spicy red chutney. Garnish with fresh herbs to make them as delightful to look at as they are to eat!


Presentation is half the pleasure, especially for a blog-worthy dish. Here are some ideas to make your Mushroom Tikkis look as amazing as they taste:

Plating: Arrange the tikkis on a beautiful platter or a rustic wooden board. You can line the plate with parchment or banana leaf for a traditional touch, or use a contrasting dark plate to make the golden tikkis pop (as pictured above). Avoid stacking them too high; a single layer or slight overlap looks most appetizing.

Chutney Pairing: Chutneys bring out the best in any tikki. Serve these with a duo of chutneys for color and flavor contrast – a vibrant green coriander-mint chutney and a tangy tamarind (imli) chutney. The green chutney offers a fresh, spicy kick that complements the savory tikki, while the sweet-sour tamarind adds a delightful zing. For those who prefer simplicity, a side of good old tomato ketchup works too (kids especially love it). Place your chutneys in small bowls or dollop them artistically on the plate next to the tikkis.

Garnish: Add final touches that are visually appealing and flavor-enhancing. Sprinkle a pinch of chaat masala over the tikkis right before serving for an extra burst of tangy spice. Garnish with fresh coriander leaves on top. You can also add thinly sliced rings of red onion and lemon wedges on the side – not only do they add color, but people can squeeze a bit of lemon juice on their tikki if they like that fresh citrus hint. A few pomegranate arils scattered around the plate can add a festive pop of red (great if you’re serving these at a party!).

The Full Experience: To give that authentic Indian street food vibe, serve the tikkis piping hot. If it’s a cozy evening at home, enjoy them with a steaming cup of masala chai. The combination of the spicy, crispy tikki with a sip of strong, milky tea is simply soul-satisfying – the ultimate Indian comfort experience. And if you’re entertaining guests, you can dress up the serving area with some rustic props: think of a small clay diya lamp or a colorful cloth as a backdrop to accentuate the Indian theme.


These Mushroom Tikkis are truly versatile. They shine as a party starter (your guests will be asking for the recipe!), yet they’re humble enough for a casual snack-time indulgence. The addition of mushrooms gives a street food favorite a gourmet twist, packing in extra flavor and nutrition. Even those who usually wrinkle their nose at mushrooms might become instant fans – the mushrooms here are chopped fine and spiced so lovingly that they blend right in, adding juiciness without announcing themselves too boldly. In fact, this is a clever way to get picky eaters to enjoy mushrooms!

So the next time you’re looking for a hearty vegetarian snack with a bit of story and spice, give this Mushroom Tikki a try. It’s a recipe straight from my heart to your kitchen, with a pinch of masala and a whole lot of love. Happy cooking and happy eating!

Street Foods

🍜 Chicken-Egg Hakka Noodles – Indo-Chinese Café Favorite


🍽️ From Street Cart to Home Kitchen

There was a tiny Chinese van parked outside my college campus in the evenings — always buzzing with hungry students, music playing in the background, the chef tossing noodles with rhythm in a giant wok. For just ₹40, you’d get a steaming plate of spicy Chicken-Egg Hakka Noodles, smoky and slick with soy sauce, spiked with pepper, and topped with an extra fried egg if you were lucky.

Years later, I tried recreating that same flavor at home — and after a few experiments with sauces and stir-frying speed, I finally nailed it. This version is full of heat, packed with protein, and perfect for a quick dinner or indulgent weekend lunch.


📝 Ingredients (Serves 2)

Base:

150g Hakka noodles (boiled and tossed in 1 tsp oil)

1 cup shredded cooked chicken (grilled or boiled)

2 eggs, beaten

1 tbsp oil + extra


Vegetables:

1 medium onion, sliced

½ cup capsicum (any color), sliced

½ cup cabbage, shredded

1 small carrot, julienned

2 green chilies, slit

1 tbsp spring onions (for garnish)


Sauces & Seasoning:

1½ tbsp soy sauce

1 tbsp green chili sauce

1 tbsp red chili sauce

1 tsp vinegar

½ tsp crushed black pepper

Salt to taste


🔥 Instructions

1. Scramble the Eggs
Heat ½ tbsp oil in a wok. Add beaten eggs and scramble. Remove and set aside.


2. Stir-Fry Chicken & Veggies
In the same pan, add remaining oil. Stir-fry onions, capsicum, cabbage, carrots, and green chilies on high flame for 2–3 mins (they should stay crunchy). Add the chicken and toss well.


3. Add Sauces
Add soy, chili sauces, vinegar, salt, and pepper. Mix everything quickly over high heat.


4. Combine Noodles
Add the boiled noodles and scrambled eggs. Toss everything quickly using tongs or forks. Ensure the noodles are coated well.


5. Finish & Serve
Garnish with spring onions and serve piping hot. Add an optional fried egg on top for extra richness.


❤️ Why You’ll Love It

Loaded with protein (chicken + egg)

Quick and high-flavor

Café-style taste at home

Perfect for weeknight cravings