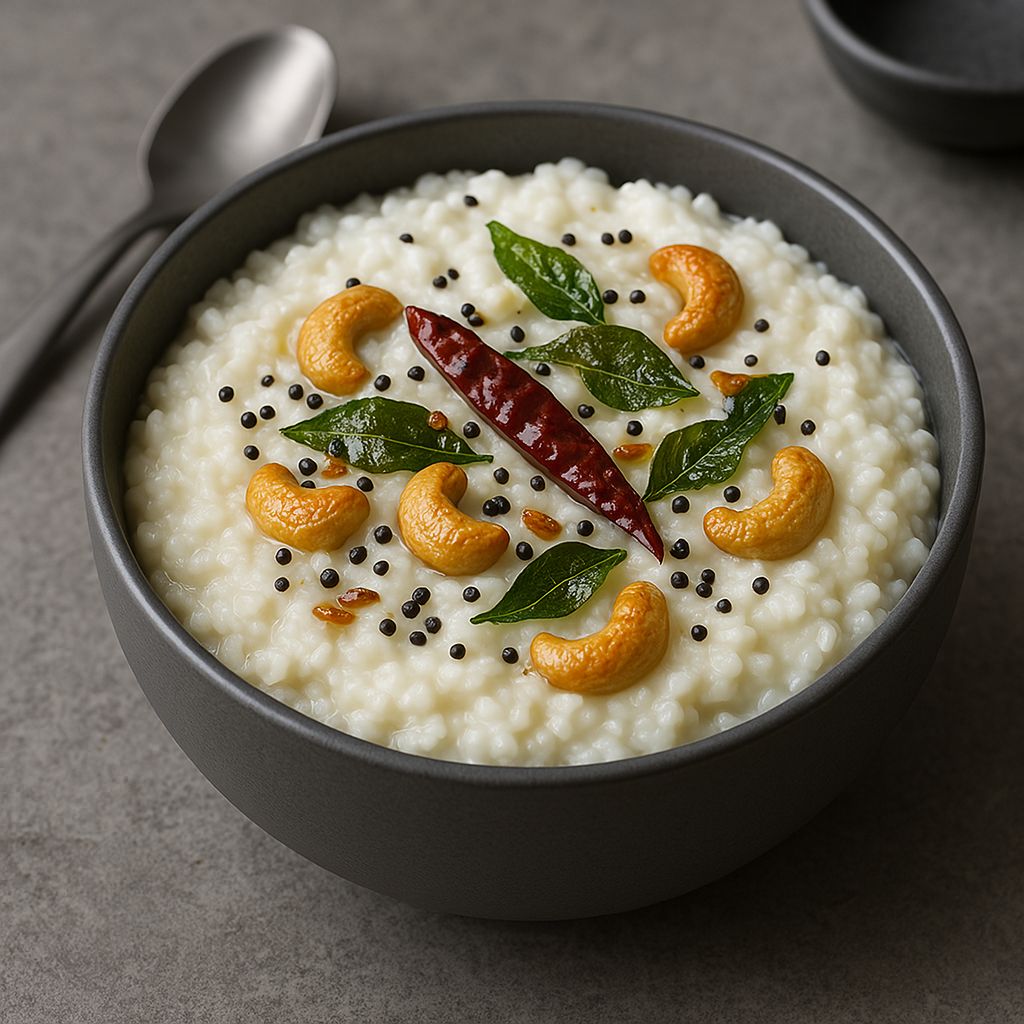
Introduction: There’s nothing like starting the day with a warm, crispy dosa. Lately, I’ve been experimenting with healthier twists on traditional recipes, and that’s how I fell in love with Whole Chana Dosa. This unique South Indian crepe swaps the usual urad dal for whole black chickpeas (kala chana), creating a high-protein, high-fiber batter that yields delicious dosas without any fermentation wait time. The first time I tried it, I was amazed by how crispy and flavorful the dosas turned out, with a nutty aroma from the chickpeas. It reminded me of pesarattu (the Andhra moong dosa) but with an entirely different taste – and it stays tasty even after cooling down, making it great for lunch boxes too!
Using kala chana in a dosa is a game-changer for health-conscious foodies. These black chickpeas are often called a powerhouse of nutrition, packed with plant-based protein and dietary fiber. In fact, 100 grams of kala chana provides roughly 20 g of protein and 12 g of fiber, which help keep you full longer and energized throughout the day. The combination of fiber and low-glycemic carbs in chana means this dosa offers steady, slow-release energy without spiking blood sugar levels. As someone who’s always on the lookout for diabetic-friendly or weight-management recipes, this has quickly become a favorite. Plus, it’s completely vegan and gluten-free, fitting perfectly into a variety of healthy diets.
Another thing I adore about Whole Chana Dosa is the ease of preparation. Unlike traditional dosa batter that needs overnight fermentation, this recipe only requires a bit of planning to soak the ingredients, and then you can blend and cook – no fermentation required. On busy mornings, I simply soak the rice and chana the night before. By breakfast time, the ingredients are ready to be ground into a batter and turned into golden-brown dosas in minutes. It’s instant gratification for dosa lovers! The batter doesn’t need to sit and sour (though you can ferment if you prefer a slight tang), so it’s perfect for those days when you want homemade dosas without the long wait. Despite the shortcut, the dosas come out soft on the inside and crispy on the edges, and my family can’t really tell the difference from regular dosas. In fact, this recipe uses a higher proportion of protein-rich chana to rice, making it a nourishing breakfast choice for both kids and adults.
Now, let’s get into the details of how you can make this Whole Chana Dosa at home. I’ll walk you through the ingredients, step-by-step instructions (with some handy tips), a few fun variations, and how best to serve and enjoy these dosas. Whether you’re a seasoned cook or a beginner, you’ll find this recipe straightforward and rewarding. Let’s get cooking this wholesome, protein-packed dosa!
Ingredients
To make approximately 8–10 Whole Chana Dosas (Black Chickpea Dosas), you will need:
Whole black chickpeas (kala chana) – 1 cup (dried measure).
Raw rice – 1 cup. You can use regular short-grain rice or idli/dosa rice.
Fenugreek seeds (methi) – ½ teaspoon (optional, for flavor and aiding digestion).
Water – for soaking and grinding (around 2 to 3 cups, as needed).
Salt – ~1 teaspoon (or to taste).
Oil – as needed for greasing and roasting the dosas (use any neutral oil or traditional sesame/gingelly oil for authentic flavor).
Optional add-ins (for extra flavor, can be blended into the batter):
Fresh ginger – 1 inch piece.
Green chilies – 1–2, or to taste (for a spicy kick).
Cumin seeds – ½ teaspoon.
A few curry leaves or coriander leaves – for herbal aroma.
A pinch of turmeric – for color and subtle earthiness.
These optional ingredients will give your chana dosa a lovely savory flavor, almost like a spiced adai. You can omit them for a plain version (which will have a mild nutty taste from the chickpeas).
Step-by-Step Instructions
1. Soaking:
In a large bowl, combine the whole kala chana and rice (add the fenugreek seeds here if using). Rinse them thoroughly a couple of times. Pour in enough fresh water to cover the grains and legumes by a few inches. Soak for at least 6–8 hours or overnight. Soaking is crucial – it softens the chickpeas (which are quite hard when dry) and ensures they grind up easily. (Tip: If you’re short on time, use hot water to soak and give at least 4 hours, but overnight is best for smooth grinding.)
2. Grinding the Batter:
After soaking, drain the water and rinse the chana and rice once more. Transfer them to a blender or wet grinder. If you soaked everything together, you can grind together; if you soaked separately for any reason, you can combine them now. Add the optional ginger, chilies, and cumin seeds at this stage for a spiced version. Pour in ¼ to ½ cup of water to help with grinding, and grind the mixture. Stop to scrape down the sides and add more water as needed. Grind to a batter that is mostly smooth – it can be slightly coarse (a bit of graininess can make the dosa crispier), but there should be no whole chana bits. Aim for a consistency similar to regular dosa batter: pourable but not super thin. (If using a smaller mixer, grind in batches to avoid overheating.)
3. No Fermentation Needed:
Once the batter is ready, transfer it to a bowl. At this point, unlike a traditional dosa, you do not need to ferment it. This batter can be used immediately to make dosas – a huge time-saver! Just add salt (about 1 teaspoon or adjust to taste) and mix the batter well. You’ll notice the batter is a light brownish-beige from the black chickpeas. If you prefer, you can let the batter rest for 10–15 minutes while you preheat the pan, but lengthy fermentation isn’t required. (If you do like a hint of sourness, you could let it sit for 4–6 hours in a warm place, or even overnight in the fridge; but this is purely optional.)
4. Preparing the Pan:
Heat a dosa tawa or flat griddle on medium heat. Cast-iron tawas work great for crisp dosas (ensure it’s well seasoned), or you can use a non-stick pan for ease. Once the pan is hot, grease it lightly with a few drops of oil. You can use a half onion or paper towel to spread the oil evenly. The pan should be hot but not smoking – you can test by sprinkling a few drops of water; they should sizzle and evaporate quickly.
5. Spreading the Dosa:
Stir your batter (it tends to thicken a bit on standing; add a tablespoon of water if it has become too thick). Pour a ladleful of batter onto the center of the hot pan. Using the back of the ladle, spread the batter in a spiral motion. Because of the chickpeas, you might find it a tad thicker to spread than a regular dosa batter – that’s okay. You can make it slightly thick like an uttapam or thin like a crepe, as you prefer (thin ones will be crisper, thick ones will be soft). Note: You might not get paper-thin dosas; chana dosas usually can’t be as ultra-thin as plain dosas, but they will still turn out crisp. Aim for a medium-thin circle about 6–8 inches in diameter.
6. Cooking:
Drizzle a little oil (½ tsp to 1 tsp) around the edges of the dosa and a few drops on top. This helps it crisp up and release from the pan. Let the dosa cook on medium heat until the bottom side is golden-brown. You’ll see the edges turning crisp and lifting slightly from the pan. Because this batter has dal (chickpeas) but no urad, it may take a bit longer to cook and achieve that golden color – be patient and avoid high heat (which can burn it). Once the bottom is nicely browned (about 2–3 minutes), gently slide a spatula under the dosa. If you spread it thin, you might not need to flip it. For slightly thicker dosas, or just to ensure even cooking, flip the dosa and cook the other side for another 1 minute until lightly cooked. Roast both sides on a medium flame for the best texture (especially if the dosa is thick or you added onions/herbs on one side). When done, it should be crispy at the edges and cooked through in the middle.
7. Repeat:
Transfer the cooked dosa to a plate. Before making the next one, check if the pan is too hot (reduce heat slightly or splash a bit of water and wipe, if needed, to cool it down so the batter spreads evenly). Stir the batter each time before pouring, as ground chana can settle a bit. Continue spreading and cooking dosas with the remaining batter. You do not need to ferment or wait – just make dosas one after the other. If the batter becomes too thick as it sits, mix in a spoon or two of water. If it’s too thin and not forming shape on the pan, you can mix in a tablespoon of rice flour to thicken it slightly.
8. Serving:
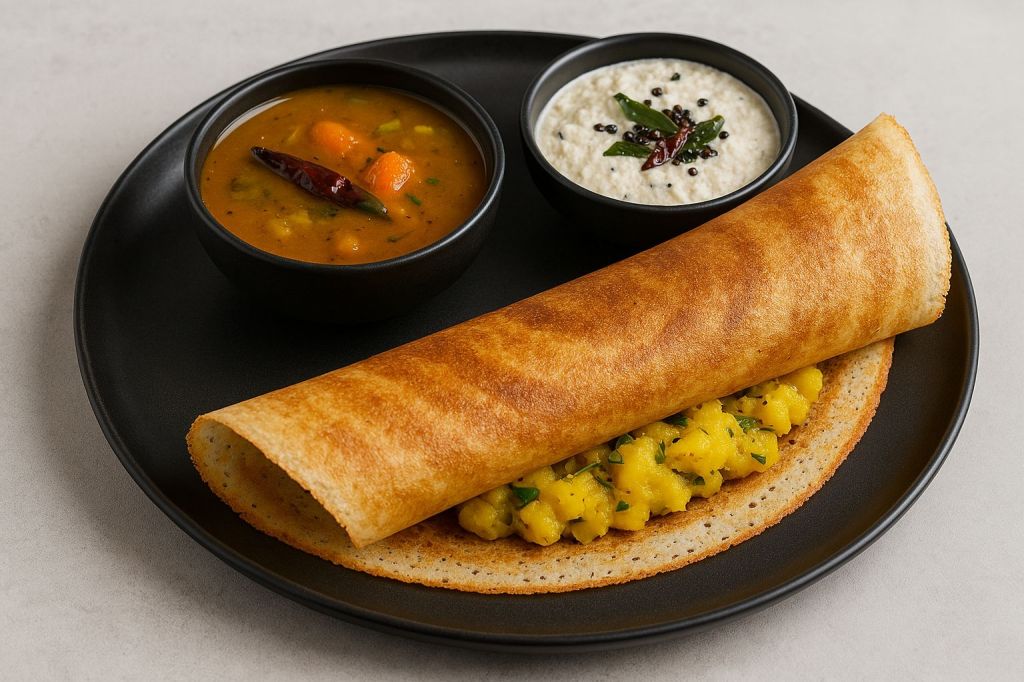
Serve the hot Whole Chana Dosas immediately for the best taste and texture (they’re crisp outside and soft inside when hot). They pair beautifully with chutneys and other sides – see Serving Suggestions below for ideas. Enjoy your healthy, homemade protein-rich dosas!
Optional Variations and Tips
Spice & Herb Variations: As mentioned, you can customize the batter by blending in aromatics. For a spicy kick, grind 1–2 dry red chilies or extra green chilies with the batter (this can turn it into a “adai” style dosa with heat). You can also stir in finely chopped onions, curry leaves, or coriander leaves into the finished batter for extra flavor and texture. A pinch of asafoetida (hing), as used in some traditional recipes, can add a nice depth (especially if you skip onions/garlic). These additions make the dosa even more flavorful and aromatic.
Ratio of Rice to Chana: The recipe above uses 1:1 ratio for simplicity and balance. You can experiment with ratios – some recipes use more chana and less rice for an even higher protein dose. For example, using 1 cup chana with ½ cup rice will still work and yield slightly softer dosas that are super high in chickpea content. If you prefer extra crisp dosas, you can increase the rice portion (e.g., 2 parts rice to 1 part chana, as some do), but keep in mind this reduces the protein percentage. Feel free to find your perfect balance between crispiness and protein richness.
Using Sprouted Chana: If you have time, try sprouting the kala chana before making dosa. Sprouted legumes can be even more nutritious and easier to digest. You would soak the chana, then drain and let them sprout for a day or two. Sprouted chana can be used in the same way to grind the batter – it’s a great way to boost nutrient absorption.
Texture Tips: If your dosas are coming out too thick or chewy, try grinding the batter a bit smoother and thinning it with a little more water. A smooth batter will allow you to spread thinner, resulting in crisper dosas. Conversely, if you want soft, spongy dosas, you can keep the batter slightly thick and even cover the dosa while cooking to trap steam. Remember, chana dosa batter ferments quickly on its own if left out (thanks to naturally occurring bacteria on legumes). If you make the batter ahead and refrigerate it, it might develop a mild fermentation by next day – still tasty, but the fresh batter flavor is best.
No Blender? If you don’t have a powerful blender, you can try using chickpea flour (besan) for an instant version of this dosa (though the taste will differ). Mix 1 cup besan with ¼ cup rice flour, add spices, and water to make a batter. This can be cooked immediately as a quick fix. However, for authentic flavor and nutrition, using whole soaked chana is recommended.
Leftover Batter: You can store any leftover batter in the fridge for a day. It may thicken; just add water to bring it to consistency before use. The batter might acquire slight sour notes as it sits (which some people enjoy). If it smells overly fermented or foamy, add a pinch of baking soda and stir – this will refresh the batter and also make dosas a bit lighter. If the batter became too thin, a tablespoon of rice flour can help thicken it back up.
Serving Suggestions
Whole Chana Dosa is best enjoyed hot off the griddle. Here are some serving ideas to complement its hearty, nutty flavor:
Coconut Chutney: A classic accompaniment for any dosa. The cool, creamy coconut chutney (try it with a hint of ginger or mint) goes wonderfully with the earthy taste of chana dosa. Tip: Ginger chutney (allam chutney) or peanut chutney also make great pairings.
Spicy Tomato or Onion Chutney: Tangy and spicy chutneys (like tomato-onion chutney or red chili chutney) add a nice zing. The sweetness of tomato balances the dosa’s nuttiness.
Sambar: For a more filling meal, serve these dosas with a bowl of hot sambar (South Indian lentil-vegetable stew). The protein in the dosa and the protein in sambar (made from lentils) make it an incredibly satisfying combo.
Dry Chutney Powders (Podi): You can sprinkle molagapodi (spiced lentil powder, aka “gunpowder”) on the dosa and drizzle with a touch of ghee or oil. This turns the chana dosa into a flavorful, spicy treat.
Stuffing Option: Transform your chana dosa into a masala dosa by stuffing it! As suggested by some, you can fill it with a simple potato masala (spiced potato filling) to make a Chana Masala Dosa. The crispy chickpea dosa with soft curried potatoes inside is a match made in heaven. Just remember to make the dosas slightly thicker if adding a moist filling, so they hold up.
Chutney Powder & Jaggery: For kids, sometimes a sprinkle of peanut chutney powder and a tiny bit of jaggery (unrefined cane sugar) on the dosa can be enjoyable – a mix of sweet and savory on the high-protein base.
Don’t forget a cup of hot South Indian filter coffee or masala chai on the side to complete the experience if you’re serving this for breakfast! However you serve it, relish each bite knowing you’re getting a dose of health with deliciousness.
Conclusion & Personal Take
Whole Chana Dosa has become a regular in my home for all the right reasons – it’s healthy, easy, and incredibly tasty. With its crispy edges, soft center, and rich savory flavor, it’s hard to believe this dosa is made with just soaked chickpeas and rice without the typical fermentation. It’s a great way to include the goodness of legumes in your diet in a fun, appetizing form. After learning about how nutritious black chickpeas are – loaded with protein, fiber, and even aiding in appetite control and blood sugar management – I appreciate this dish even more.
I often tell my friends who are looking to add more protein to their vegetarian diet about this recipe. It’s also an excellent option for those who have trouble digesting traditional dosa (which uses urad dal) or want to avoid the fermentation process. Each bite of this dosa feels like comfort food and health food combined. Plus, it’s beginner-friendly – even if you’re new to making dosas, this batter is quite forgiving. My advice is to definitely give Whole Chana Dosa a try. You might be pleasantly surprised, just like I was, at how such a simple ingredient swap can lead to a breakfast that’s both nourishing and delightful. Happy cooking, and enjoy your protein-packed dosa!
References: Nutritional benefits of kala chana (black chickpeas) have been highlighted from reliable sources to emphasize the healthfulness of this recipe. This dosa is inspired by traditional Indian recipes and personal experimentation, combining the wisdom of Indian home cooking with a healthy twist. Enjoy your meal!