Dessert

Adhirasam – The Heritage Sweet of Diwali

A Sweet That Smells Like Diwali Mornings

When I was little, Diwali mornings in our home began long before sunrise. The smell of incense and fried ghee sweets filled the air before the first diya was even lit. Among all the festive treats, one sweet stood apart the deep, caramel aroma of Adhirasam sizzling in ghee.

My grandmother would prepare the jaggery syrup the day before, stirring it patiently until it reached that magical soft ball consistency. She’d say, “You can’t rush Adhirasam it needs your time, your warmth, and your love.”
She would knead the rice flour and syrup into a glossy dough and let it rest overnight, covered with a clean white cloth. That resting period, she said, was what gave the sweet its softness and soul.

The next morning, as ghee heated in her heavy brass kadai, she’d shape the dough into flat discs, press a small hole in the center, and fry them until golden. The moment one came out of the ghee, we’d all wait because she’d always give the first piece to the house temple, and the second to whoever helped grind the rice!

Even today, when I make Adhirasam, that memory comes alive the warm kitchen, the glow of diyas, and the sweet comfort of a recipe that’s older than memory itself.

About This Recipe

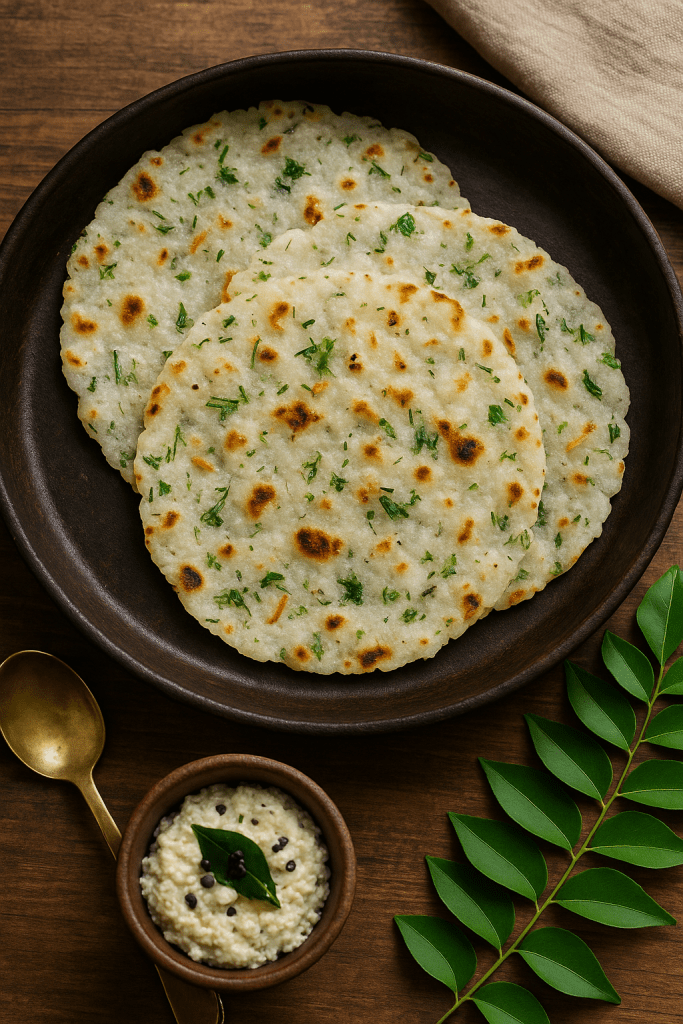
Adhirasam is a heritage sweet from Tamil Nadu and Karnataka, traditionally made during Diwali, Karthigai Deepam, and temple festivals.
It’s made with homemade rice flour, jaggery syrup, and ghee, then deep-fried until golden brown.

The beauty of Adhirasam lies in its texture — crispy on the outside, soft and chewy inside, with a rich flavor of jaggery and cardamom.

It’s said that Adhirasam was offered to Lord Ganesha and Goddess Lakshmi during the Chola period, making it one of South India’s most sacred and ancient sweets.

Recipe Details

Servings: 12–15 pieces
Prep Time: 30 minutes (plus resting time)
Cook Time: 30 minutes
Resting Time: 12–24 hours

Ingredients

1 cup raw rice (preferably sona masoori or similar short grain)

¾ cup jaggery (grated or powdered)

¼ cup water (for syrup)

½ teaspoon cardamom powder

1 tablespoon ghee (for dough)

Oil or ghee (for deep frying)


Optional: A pinch of dry ginger powder (saunth) for aroma, or sesame seeds for texture.


Step-by-Step Instructions

1. Prepare Rice Flour

Wash and soak the rice for 1–2 hours.

Drain and spread it on a clean cloth for about 30 minutes until slightly damp not fully dry.

Grind it to a fine powder in a mixer while still moist.

Sieve the flour and set aside. (This freshly ground flour gives the signature texture.)


2. Make the Jaggery Syrup

In a heavy-bottomed pan, add jaggery and ¼ cup of water.

Heat until the jaggery melts completely.

Strain to remove impurities and pour it back into the pan.

Boil again until it reaches a soft ball consistency when a drop in cold water forms a soft, pliable ball between your fingers.

Turn off the heat.


3. Form the Dough

Immediately add the cardamom powder and 1 tablespoon ghee to the jaggery syrup.

Slowly add the rice flour, stirring continuously with a wooden ladle.

Mix until it forms a thick, sticky dough (like halwa).

Cover it with a cloth and let it rest overnight or at least 8 hours.
(Resting develops the right texture soft inside, crisp outside.)


4. Shape the Adhirasams

After resting, knead the dough gently with greased hands.

Pinch small balls (lemon-sized) and flatten them into discs (about 2–3 inches wide).

Make a small hole in the center with your thumb  this helps them cook evenly.


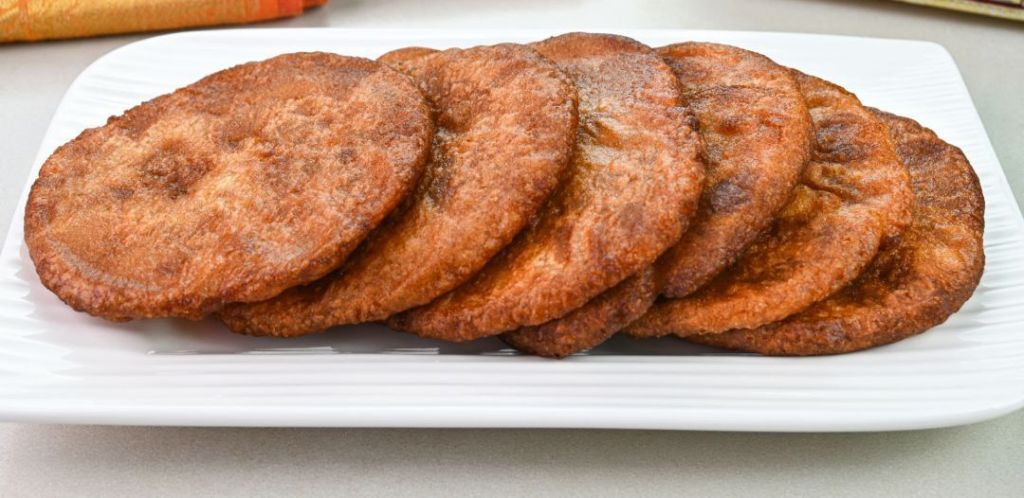
5. Fry the Adhirasams

Heat oil or ghee in a deep pan over medium flame.

Once hot (not smoking), gently slide one Adhirasam at a time.

Fry until golden brown on both sides.

Remove and press between two slotted ladles to remove excess oil.

Cool slightly before serving.


Expert Tips for Authentic Texture

Rice Flour Freshness: Always use freshly ground, slightly moist rice flour store-bought flour won’t give the same chewy texture.

Syrup Consistency: The soft ball stage is key. If overcooked, the dough turns hard; if undercooked, it won’t bind.

Resting Time: Minimum 8 hours, preferably overnight this step transforms the texture.

Oil Temperature: Keep the flame medium-low; frying too hot will burn the outside before the inside cooks.

Pressing Method: Always press fried Adhirasam gently between ladles — this removes excess oil without losing shape.

Storage: Stays fresh for up to a week in an airtight container. The flavor deepens over time.


Serving Ideas

Serve Adhirasam warm, with a drizzle of ghee for a divine festive treat.

Pair with Coconut Burfi and Boondi Laddoo on your Diwali sweet platter.

Offer as prasadam during Lakshmi Pooja or Navratri it’s considered auspicious.


Closing Note

Every time I make Adhirasam, I’m reminded that some recipes aren’t written in books they’re whispered through generations.

It’s not just about rice and jaggery; it’s about patience, devotion, and the love that binds families across time. When the dough rests overnight, it’s as though the sweetness deepens, just like old memories mellowing with warmth.

So this Diwali, try this heirloom recipe in your kitchen. Feel the rhythm of stirring syrup, shaping dough, and watching golden discs puff up in ghee.
Because Adhirasam isn’t just made for festivals it is the festival.

Breakfast

Traditional Akki Rotti (Karnataka Rice Flatbread)


I can still smell the smoky aroma of akki rotti wafting from the clay stove of my childhood home in Karnataka.  In the early morning light, my grandmother would knead rice flour with onions, chili, coconut and herbs, then pat the dough into thin rounds on a greased banana leaf.  The sizzle as each roti hit the hot iron tawa is a sound I’ll never forget. The crispy-edged flatbread, soft and pillowy inside, was our simple but beloved breakfast – eaten hot with a slather of butter or a spoonful of spicy chutney. Even my youngest memory of that rural kitchen is tied up in the taste of those rotis, golden brown and studded with dill and grated carrot.

Back then I didn’t know the name, but I would come to learn it’s called akki rotti – literally “rice pancake” in Kannada.  It’s a staple of Karnataka cuisine: a naturally gluten-free flatbread made from rice flour, spices and veggies.  As noted in a popular recipe, “Akki Roti are gluten-free flatbreads… a popular breakfast from Karnataka. Serve them with chutney”.  In other words, this humble roti is vegan, hearty, and perfect with tangy coconut or tomato chutney.  Over the years I’ve learned little tricks – a pinch of cumin for warmth, a handful of fresh coriander or dill for aroma – that make each bite more fragrant. Now I’m excited to share this comforting recipe so you can bring a bit of that village-kitchen nostalgia to your own table.

Servings: 4 akki roti

Prep Time: 10 minutes

Cook Time: 15 minutes

Ingredients:

1 cup rice flour (finely ground)

½ teaspoon cumin seeds, crushed

¼ teaspoon salt (or to taste)

1 small onion, finely chopped

2 green chilies, finely chopped (adjust to taste)

½ small carrot, grated (or grated coconut, optional)

Handful fresh coriander leaves, chopped

1–2 tablespoons dill leaves (sabsige soppu) or curry leaves (optional)

½ teaspoon grated ginger (optional)

Water, as needed to form dough

1–2 tablespoons oil or ghee (for cooking)


Instructions:

1. Mix dry ingredients: In a large bowl, combine the rice flour, crushed cumin, and salt. Add the chopped onion, green chilies, grated carrot (or coconut), coriander (and dill or curry leaves if using). Stir everything together until well mixed.


2. Form the dough: Pour in a little warm water at a time and stir to make a soft dough. It should be moist and sticky (not dry). Knead gently until smooth; the texture will be pliable like a pancake batter. Cover the dough and let it rest for a couple of minutes if it seems too wet.


3. Divide the dough: Divide the dough into 4 equal balls. Flatten each ball slightly on your palm. If you plan to make thicker rotis, you can leave them a bit thicker now and make holes (see Tip).


4. Heat the pan: Heat a heavy flat skillet or tawa over medium heat. Grease it lightly with oil. For each roti: if using a banana leaf or plastic sheet (or parchment), grease it slightly and place one dough ball on it. Moisten your fingers and gently pat and spread the dough into a thin round (about 6–7 inches across). If cracks appear, wet your fingers and smooth them out.


5. Transfer to pan: Carefully lift the leaf or sheet and invert it onto the hot skillet so the uncooked side of the roti faces the pan. Gently peel off the leaf. (If you don’t use a leaf, you can grease the cool pan and press the dough directly on it, then set it on the burner.)


6. Cook first side: Cook on medium heat until the bottom firms up and light brown speckles appear (about 1–2 minutes). Don’t let it burn; adjust heat as needed.


7. Flip and cook second side: Flip the roti. Drizzle a teaspoon of oil or ghee around the edges and on top, then press gently with a spatula. Cook for another minute or so until golden brown and crisp spots form.


8. Finish cooking: Flip once more briefly if needed to brown the other side. Remove when golden. Repeat with remaining dough, using a second pan or waiting for the first pan to cool slightly if needed.


Tips:

Use a very fine, smooth rice flour. Coarse flour can make the roti hard or prone to breaking. If your flour seems gritty, sift or grind it finer. Always keep a little water on hand to moisten your fingers – this prevents the dough from sticking and helps join any cracks as you spread it.

Add veggies and herbs. Feel free to stir in finely chopped veggies for nutrition and color. Traditional additions include grated carrot, chopped onion, and coconut. A few chopped fresh herbs (dill/sabbige, coriander, or mint) or curry leaves really lift the flavor. Even green moong or soaked chana dal can be mixed in for protein (as some home cooks do).

Even cooking: If your roti is a bit thick, poke a few holes with your finger (or a fork) so it cooks through evenly. This lets steam escape and prevents underdone centers.

Oiling: A light drizzle of oil or ghee on each side makes the edges crisp and golden. Don’t over-oil – just enough to coat the surface. Pressing the roti with a flat spatula also helps it cook uniformly.

Serve immediately: Akki roti is best eaten fresh off the pan. These rotis harden as they cool, so enjoy them hot. Serve them with coconut chutney or any spicy South Indian pickle, as is traditional. Leftovers can be reheated or crumbled into a curry for flavor.


❤️ Closing Note: Akki roti isn’t just a recipe – it’s a bite of childhood and tradition. Every time I make it, I’m transported back to those misty Karnataka mornings with my family sitting around and filling our bellies with these warm, rice-flour flatbreads. The simple act of mixing flour with the day’s first rays of sun, patting dough between wet palms, and inhaling that toasty aroma of cooking rice has always felt like a warm hug from home. I hope this easy recipe brings some of that same comfort into your kitchen – whether you grew up in Karnataka or not – and that each crisp, chewy bite reminds you of family, togetherness, and the joy of homemade food. Enjoy your akki roti with loved ones, and maybe share with someone who’d appreciate a little taste of Karnataka nostalgia. Happy cooking and namaskara!