Introduction
There’s a special kind of warmth in the air when chhole kulcha is on the stove. I remember my mother soaking chickpeas overnight and simmering a pot of chhole on lazy Sunday mornings, the aroma of onions, ginger, and garlic filling our home. This dish is a homestyle spin on the Punjabi classic – tender chickpeas simmered in a thick, mildly spiced onion-tomato masala with notes of bright tomato and warm cumin. Unlike the fiery restaurant versions, this everyday chhole is gentle on heat yet full of flavor, perfect for family lunches or weeknight dinners.
On the side, we have kulchas – soft leavened flatbreads that are the perfect vehicle to scoop up the curry. Kulcha dough traditionally uses all-purpose flour and a leavening (yeast or baking soda), and the breads are cooked in a tandoor (clay oven) or even on a skillet at home. My family often bought plain kulchas from the local bakery and oven-warmed them with a dab of butter until soft and aromatic. The combination of buttery hot kulcha with flavorful chhole is pure comfort on a plate. In North India, such chickpea curries with bread are a staple meal – hearty, nourishing, and made from simple pantry staples. This recipe stays true to that spirit of simplicity. It uses common ingredients you likely have on hand (no hard-to-find spices required) yet yields a deeply satisfying meal.
Pull up a chair as I share our family-style chhole kulcha recipe – complete with a few nostalgic tips, easy shortcuts, and optional sides like tangy pickled onions and mint chutney. It’s a story of comfort cooking, perfect for when you crave something warm, homely, and delicious.
Ingredients
For the Chhole (Chickpea Curry)
Chickpeas (Chana) – 1 cup dried white chickpeas (Kabuli chana), soaked overnight and drained. (Or use 2–3 cups cooked/canned chickpeas for convenience – drain and rinse if canned.)
Onions – 2 medium, finely chopped (for a sweet depth in the gravy).
Tomatoes – 2 large, ripe tomatoes, pureed or finely chopped (provides the tangy, thick base).
Ginger & Garlic – 1-inch ginger and 4–5 cloves garlic, minced or made into paste (aromatics that build flavor).
Green Chili – 1–2, slit (optional, for heat; skip or use less for a mild curry).
Whole Spices (optional) – 1 bay leaf and 1 small cinnamon stick (for subtle warm aroma, optional for everyday cooking).
Ground Spices – 1 teaspoon cumin seeds (jeera), 1 teaspoon coriander powder, ½ teaspoon turmeric powder, 1 teaspoon red chili powder (or Kashmiri chili powder for milder heat and color), 1 teaspoon garam masala (or chole masala if available – a Punjabi chickpea spice blend that’s actually milder than regular garam masala). Adjust chili to taste.
Salt – to taste (about 1½ teaspoons, divided).
Oil or Ghee – 2 tablespoons (for sautéing the masala).
Kasuri Methi – 1 teaspoon dried fenugreek leaves, crushed (optional, add at end for fragrance).
Amchur (Dry Mango Powder) – ½ teaspoon (or juice of ½ lemon, for tangy finish).
Fresh Coriander Leaves – a handful, chopped (for garnish).
For the Kulchas (Flatbread)
(This is a quick no-yeast kulcha dough using pantry staples. Feel free to use store-bought kulchas and see reheating instructions below.)
Flour – 2 cups all-purpose flour (maida). You can swap half with whole wheat flour for a healthier twist (kulchas will be slightly denser).
Leavening – 1 teaspoon baking powder + ¼ teaspoon baking soda (this combo will help the dough rise in place of yeast).
Dairy – ¼ cup plain yogurt (dahi). Yogurt makes kulchas soft and adds a slight tang; it helps ferment the dough quickly. (Use unsweetened yogurt. If avoiding dairy, you can use warm water or a non-dairy yogurt alternative, though yogurt is traditional for soft texture.)
Sugar – 1 teaspoon (feeds the leavening and gives a mild sweetness).
Salt – ½ teaspoon.
Oil – 2 teaspoons (neutral vegetable oil or ghee; adds moisture to the dough).
Warm Water – ~¾ cup (as needed to knead a soft dough).
Toppings (optional) – 1–2 teaspoons nigella seeds (kalonji) or sesame seeds, and/or 2 tablespoons chopped fresh coriander, to press on top of kulchas for a traditional touch.
Butter or Ghee – 2 tablespoons, melted (for brushing hot kulchas).
Step-by-Step Instructions
Preparing the Chhole (Chickpea Curry)
1. Soak and Boil Chickpeas: Rinse the dried chickpeas and soak them in ample water overnight (at least 8 hours). They will double in size. Drain the next day. In a pressure cooker or pot, add the soaked chana with fresh water to cover by a few inches. If using, drop in a bay leaf (and cinnamon stick). Add ½ teaspoon salt and ¼ teaspoon turmeric. Cook until chickpeas are very soft – about 2–3 whistles in a pressure cooker (or ~45–60 minutes simmering in a pot, adding a pinch of baking soda to help soften). The chickpeas should be soft enough to easily mash between fingers. (Tip: If you forgot to soak, you can quick-soak by pouring boiling hot water over the chickpeas and letting them sit for 1–2 hours.) Once cooked, reserve 1 cup of the cooking liquid and drain the rest. (If using canned chickpeas, skip the soaking/boiling – just drain and rinse them. You’ll add them directly to the masala and simmer a bit less.)
2. Make the Masala Base: Heat 2 tablespoons of oil or ghee in a deep pan on medium heat. Add the cumin seeds and let them sizzle for a few seconds. If you reserved a bay leaf from boiling, you can toss it in now for extra aroma. Next, add the finely chopped onions. Sauté the onions for about 5–7 minutes until they turn golden brown. Stir often so they cook evenly. This slow browning of onions forms a flavorful base.
3. Ginger, Garlic & Chilies: Add the minced ginger and garlic to the onions (and green chilies, if using). Sauté for 1–2 minutes until the raw smell disappears. Be careful not to burn the garlic.
4. Tomato and Spices: Stir in the chopped or pureed tomatoes. Cook this mixture for about 5–8 minutes, stirring frequently, until the tomatoes break down into a sauce and you see oil starting to separate from the sides of the pan. This step, called “bhuno”, cooks off raw tomato flavor. Now add the ground spices: coriander powder, the remaining turmeric, red chili powder, and garam masala (or chole masala). Also add 1 teaspoon salt (or to taste). Mix well and cook the masala for another 2–3 minutes. Tip: Frying the spices in the tomato-onion base releases their flavors – patience here is key to a tasty chhole. If the masala gets too dry or starts sticking, sprinkle a tablespoon of water and scrape the pan.
5. Simmer Chickpeas in Masala: Add the boiled chickpeas to the masala and stir to coat them well. Pour in about 1 cup of the reserved cooking liquid (or plain hot water) to reach your desired curry consistency (for a thick gravy, you might not use all the liquid). Mash a few chickpeas with the back of the spoon to thicken the curry. Cover and simmer on low heat for 10–15 minutes, allowing the chickpeas to absorb the flavors. If you used canned chickpeas, simmer for only about 10 minutes since they are already soft. Stir occasionally to prevent sticking. The curry will become beautifully thick and aromatic.
6. Finish and Garnish: Turn off the heat. Crush the kasuri methi between your palms and stir it in (if using). Add the amchur powder and give a final mix (if you don’t have amchur, squeeze in lemon juice to taste for that bright tang). Check seasoning and adjust salt or chili if needed. Let the chhole rest covered for 5 minutes. Just before serving, garnish with lots of fresh coriander leaves. The chickpea curry is now ready – it should be a hearty, mildly spiced gravy clinging to the soft chickpeas, rather than a thin soup.
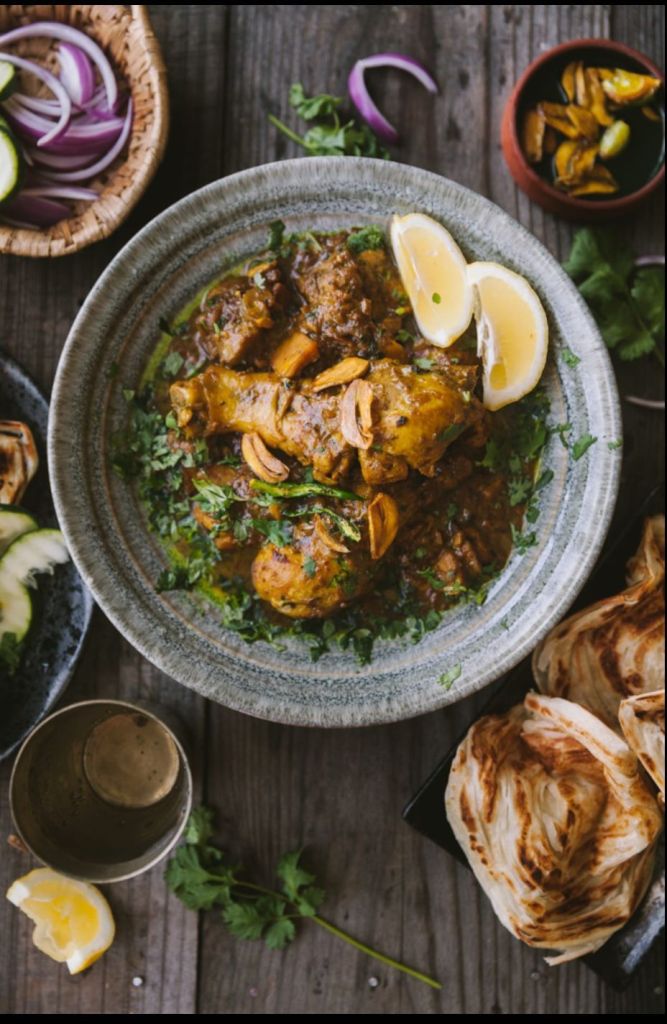
7. Serving: Serve the chhole hot, topped with a few rings of raw onion and a lemon wedge on the side. This homestyle curry is delicious scooped up with warm kulchas. (It also goes well with rice or other breads if you have leftovers.)
Preparing the Kulchas (Flatbread)
Option A: Homemade No-Yeast Kulchas
(If making from scratch, start the dough before you cook the chhole, since the dough needs to rest.)
1. Make the Dough: In a large mixing bowl, combine the dry ingredients – flour, baking powder, baking soda, sugar, and salt. Pour in the yogurt and the 2 teaspoons of oil. Mix slightly. Now gradually add warm water, a few tablespoons at a time, and start kneading. Knead until a soft, smooth dough forms (it will be slightly sticky at first – that’s okay). You may need around ¾ cup water; add just enough for a pliable dough. The yogurt and leavening will react to make the dough light. Knead for about 5 minutes, stretching and folding, until the dough is elastic and not lumpy. Rub a light coat of oil over the dough ball.
2. Rest the Dough: Cover the dough with a damp cloth or plastic wrap and let it rest in a warm place for 2 hours. The dough will rise a bit and become airy (though not as much as a yeast dough). This resting time yields softer kulchas. (If you’re in a hurry, even 30-60 minutes rest will do, but texture improves with longer rest.)
3. Divide and Shape: After resting, punch down the dough to release air. Divide it into equal portions – about 6–8 pieces for medium kulchas. Roll each portion into a smooth ball. Keep the dough balls covered to prevent drying. On a lightly floured surface, take one ball and roll it out with a rolling pin into an oval or circle about ¼-inch thick (not too thin). If the dough springs back, let it rest another 5 minutes. Optional: Sprinkle a pinch of nigella seeds or chopped coriander on the rolled dough and press lightly so they stick (gives that traditional look and flavor).
4. Cook on Stovetop: Heat a tawa or heavy skillet over medium-high flame. Place the rolled kulcha on the hot skillet. Cook for about 30–40 seconds until you see bubbles forming on the surface. Flip the kulcha to the other side and cook for another minute or so, pressing gently with a spatula, until you see golden-brown spots on both sides. You can flip once or twice more as needed. (The kulcha may puff up in places – that’s good!). If you want a more charred finish, you can use tongs to briefly roast the kulcha directly over a gas flame after pan-cooking it, but this step is optional. Remove the kulcha and immediately brush one side with melted butter or ghee. Wrap it in a clean kitchen towel (or foil) to keep warm while you cook the remaining kulchas. Repeat for all dough balls, and serve hot.
5. Alternative – Bake in Oven: For a less hands-on method, you can bake the kulchas. Preheat your oven to 220°C (475°F). Place the rolled out kulchas on a baking sheet lined with parchment. Bake for ~8–10 minutes until they puff up and get light brown on top. (No need to flip in the oven.) Remove from oven, brush with butter, and stack in a towel to keep soft. Oven-baked kulchas won’t char as much, but they will be soft and perfect to accompany chhole.
Option B: Reheating Store-Bought Kulchas
If you have pre-made or store-bought kulchas, preparing them is even easier:
Oven Method: Wrap the kulchas in foil to prevent drying out and place in a preheated 175°C (350°F) oven for about 5–7 minutes. Then unwrap and heat for 1–2 minutes more to get a bit of crispness on the edges. This will make them soft, warm, and almost like freshly made.
Stovetop Method: Heat a tawa or skillet on medium. Lightly sprinkle a few drops of water on the kulcha (this reintroduces moisture). Place on the hot tawa and warm each side for about 1–2 minutes, pressing down gently. This refreshes the bread. Again, finish with a brush of butter. (Avoid microwaving kulchas – it can make them tough or chewy.)
Now your soft, buttery kulchas are ready to serve alongside the chhole. Keep them wrapped or covered until serving to maintain warmth and pliability.
Serving Suggestions (Optional Sides)
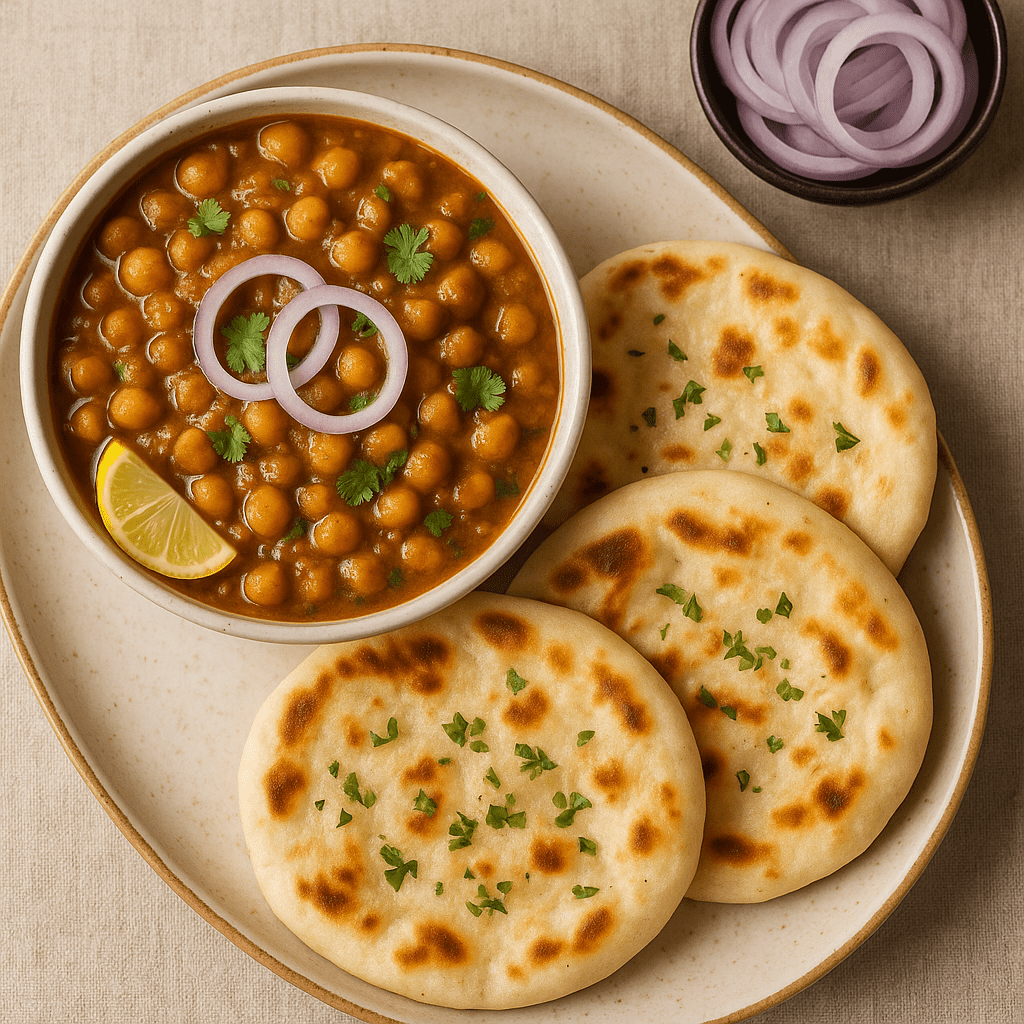
A plate of chhole kulcha is often accompanied by a few simple sides that add extra zing and freshness to the meal:
Pickled Onions (Sirke Wale Pyaaz): These are a classic accompaniment. You can make a quick onion salad by tossing thinly sliced red onions with a dash of lemon juice and a sprinkle of chaat masala. Let them sit for 15–20 minutes. The onions turn lightly pickled and add a crunchy, tangy bite that cuts through the richness of the chickpeas. (For a more intense pickle, soak the onion rings in vinegar, salt, and a pinch of sugar for an hour.) Serve a small bowl of these on the side or simply top your chhole with a few onion slices and a squeeze of lemon.
Mint Coriander Chutney: A vibrant green chutney brings freshness to each bite. Blend a handful of fresh mint leaves, an equal amount of fresh coriander (cilantro) leaves, 1–2 green chilies, a clove of garlic (optional), juice of one lemon, and salt to taste into a smooth paste. This mint-coriander chutney is zingy and herby, and a spoonful of it livens up the chhole. Drizzle some on top of your serving or use it as a dip for the kulcha.
Others: A dollop of plain yogurt or cucumber raita can be served alongside to cool the palate (especially if your chhole ended up spicier than intended). And if you have an Indian pickle like mango pickle, a small piece on the side can provide a spicy-sour kick that pairs wonderfully with the chickpeas.
Feel free to mix and match these sides. The combination of creamy chhole, soft kulcha, crunchy spiced onions, and cool chutney/yogurt creates a symphony of flavors and textures on your plate.
Meal Prep and Leftover Tips
Cooking chhole kulcha can fit into a busy schedule with a little planning, and leftovers are something to celebrate rather than dread! Here are some practical tips:
Make Ahead Chickpeas: You can cook a big batch of chickpeas in advance (either by pressure cooking or boiling) and freeze them in portions. Cooked chickpeas store well in the freezer for up to 3 months – keep them in airtight containers or freezer bags with a bit of their cooking liquid. This way, you have soft chickpeas ready to go for a quick weeknight chhole. (Alternatively, keep a few cans of chickpeas in your pantry for instant cravings.)
Prep in Advance: If you plan to serve this for dinner, you can do a lot beforehand. Soak the chickpeas the night before. You can even boil them earlier in the day and refrigerate (or use an Instant Pot to cook them quickly). The dough for kulcha can also be made earlier in the day – let it slow-rise in the fridge after the initial 2-hour counter rise. When it’s time to cook, the heavy lifting is already done.
Chhole Tastes Better Next Day: Believe it or not, chickpea curries often taste even better the next day! The spices deepen and the flavors meld overnight. So feel free to cook the chhole a day ahead of serving – it will reward you with an even richer taste. This also means leftovers are delightful. Store leftover chhole in the refrigerator for 2 to 3 days in a sealed container. Reheat gently on the stovetop (you may need to add a splash of water as it thickens in the fridge).
Storing Kulchas: Kulchas are best fresh, but you can keep leftovers too. If you made fresh kulchas and have extras, let them cool completely. Then store in an airtight container at room temperature for up to 1 day, or in the fridge for 1–2 days. Place a piece of parchment or a cloth between them to prevent sticking. For longer storage, wrap each kulcha in foil and freeze for up to 3–4 weeks. To reheat, use the skillet or oven methods described above (thaw frozen kulchas for 10 minutes on the counter or just heat from frozen, adding a minute or two extra).
Reinventing Leftovers: If you find yourself with a bowl of leftover chhole and a couple of kulchas the next day, you’re in for a treat. One simple idea is to make chhole toasties or sandwiches – spoon the thickened chhole onto a slice of bread (or inside a slit kulcha), top with some sliced onions and maybe cheese, and grill it into a hot sandwich. The spiced chickpeas make for a satisfying filling. You can also use leftover chhole as a topping for a baked potato or as a protein-rich stuffing for a wrap or dosa (I’ve even spread leftover chana masala inside a dosa for a fusion twist, as some home cooks do!). Get creative: turn it into a quick chaat by adding chopped onions, tomatoes, chutney and sev (crunchy noodles) on top of warmed chhole for a snack. Remember, this dish started as street food too – so those flavors lend themselves to fun street-style snacks with leftovers.
Scaling and Storing: This recipe is easy to scale up for a crowd or to meal-prep for the week. You can double the curry and it will freeze well (freeze just the chhole, not the kulchas). When reheating frozen chhole, do it gently over low heat, stirring occasionally, until it’s bubbling and hot. The kulcha dough can also be doubled; any extra dough can be kept in the fridge for a day (punch it down if it over-rises). Freshly cooked kulchas can be cooled and frozen, as noted.
By following these tips, you’ll find that chhole kulcha isn’t just a one-time meal – it’s two or three different meals in one! From the main dinner to next day’s lunch, it keeps on giving. And with a little prep, it can be a quick comfort food even on a busy evening.
Enjoy this homestyle chhole kulcha, and happy cooking! Each bite – the soft bread, the spiced chickpeas, the zing of onion and mint – tells a story of North Indian kitchens and family dinners. It’s amazing how such simple ingredients from the pantry can come together to create something so heart-warming and satisfying. I hope this recipe brings the same warmth to your home as it does to mine. Serve it up, share with your loved ones, and bask in the delicious nostalgia of this classic meal.