Dessert

Boondi Laddoo – A Sweet Circle of Celebration and Nostalgia

Sweet Memories of Diwali Evenings

If there’s one sweet that embodies the joy, chaos, and warmth of Indian festivals, it’s the Boondi Laddoo.
For me, its story begins in the heart of our family kitchen where laughter mingled with the sound of bubbling sugar syrup and the rhythmic tap-tap of the ladle as tiny golden boondis rained into hot ghee.

Every Diwali, my grandmother would take charge of the sweet-making marathon. The house turned into a miniature sweet factory trays lined with ladoos, besan aroma floating through the air, and me stealing half-made boondis when she wasn’t looking.
When she finally rolled the warm boondis into perfect spheres, her hands worked like art precise, practiced, full of love.

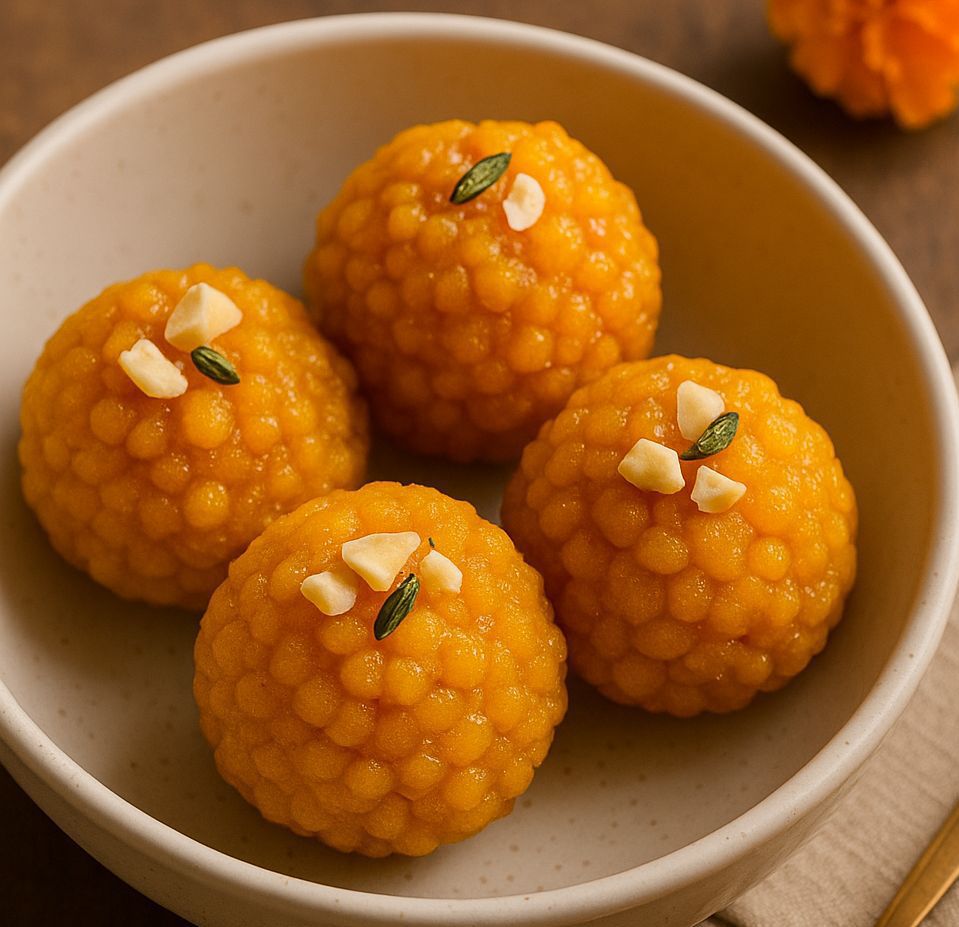
The laddoos glistened like marigold orbs, fragrant with cardamom and saffron, and no store-bought sweet could ever match their warmth. For us, Boondi Laddoo wasn’t just dessert; it was the taste of family, devotion, and celebration.

About This Recipe

Boondi Laddoo (also called Motichoor Ladoo when made with finer boondi) is one of India’s most loved festive sweets.
It’s made by frying tiny gram flour pearls (boondis), soaking them in aromatic sugar syrup, and shaping them into soft, golden laddoos.

Every region adds its twist from the coarse-textured Temple-style Laddoo of South India to the delicate Motichoor version of North India — but the essence remains the same: warmth, sweetness, and tradition in every bite.

Recipe Details

Servings: 12–15 laddoos
Prep Time: 15 minutes
Cook Time: 30 minutes
Setting Time: 20 minutes

Ingredients

For the Boondi

1 cup gram flour (besan), sifted

½ cup water (approx., to make smooth batter)

A pinch of baking soda (optional, for puffier boondi)

Ghee or oil, for deep frying


For the Sugar Syrup

1 cup sugar

½ cup water

3–4 cardamom pods, crushed

5–6 saffron strands (optional, for festive aroma and color)

1 teaspoon lemon juice (to prevent crystallization)


For Flavor and Garnish

1 tablespoon ghee

2 tablespoons chopped cashews and raisins (lightly fried in ghee)

1–2 drops orange or yellow food color (optional, for festive hue)

Step-by-Step Instructions

1. Prepare the Batter

In a large bowl, sift gram flour and add water gradually.
Whisk until you get a smooth, lump-free batter with a flowing consistency neither too thick nor runny.
Add a pinch of baking soda and whisk once more.
(Tip: The consistency should be similar to pancake batter it should fall in droplets when poured through a slotted spoon.)

2. Fry the Boondi

Heat ghee or oil in a deep frying pan over medium heat.
Hold a perforated ladle (boondi jhara) over the pan.
Pour a ladleful of batter over it and gently tap the edge so small droplets fall evenly into the oil.

Fry the boondis for 30–40 seconds, until they puff up slightly but remain soft not crisp.
Remove with another slotted spoon and drain on paper towels.
Repeat for remaining batter.
(Tip: Do not over-fry we need soft boondis so they can absorb the syrup later.)

3. Prepare the Sugar Syrup

In another pan, combine sugar and water.
Boil until you reach a one-thread consistency when a drop pressed between your fingers forms a thin thread.
Add cardamom, saffron, and lemon juice.
Turn off the heat once syrup slightly thickens.

4. Combine Boondi and Syrup

Add the fried boondi directly into the warm syrup.
Mix gently until all boondis are well coated.
Add fried cashews and raisins.
Cover and let the mixture rest for 10–15 minutes so the boondis absorb the syrup.


5. Shape the Laddoos

Once the mixture cools slightly (it should be warm, not hot), grease your palms with ghee.
Take a handful of mixture and gently press it into a round ball.
If the mixture feels too loose, cook it for 2–3 more minutes to thicken before shaping.

Place the laddoos on a plate and allow them to set completely.

Expert Tips for Perfect Laddoos

Consistency of batter: The key to perfect boondi lies in the batter smooth, free-flowing, and lump-free.

Temperature of oil: Medium heat works best. Too hot, and the boondis will become hard; too cold, and they’ll absorb oil.

Syrup stage: One-thread consistency is ideal. Over-thick syrup will make the boondis dry; too thin will make laddoos sticky.

Softness factor: Don’t fry boondis too long soft, porous ones make melt-in-mouth laddoos.

Flavor magic: A pinch of cardamom, ghee-fried cashews, and a few saffron strands bring divine aroma especially when offered as prasad.

Storage: Store laddoos in an airtight box at room temperature for up to a week.

Serving Suggestions

Offer warm Boondi Laddoos as prasad during Diwali, Ganesh Chaturthi, or weddings.

Pair with Coconut Burfi or Rava Ladoo for a perfect festive sweet platter.

Wrap them in decorative foil or paper cups for gifting.

Closing Note

The process of making Boondi Laddoo is like crafting joy slow, rhythmic, and full of meaning.
Each tiny boondi represents a drop of sweetness, and when bound together, they form something whole much like family during festivals.

When I make laddoos now, I remember my grandmother’s voice  “Keep your patience, beta. Syrup listens to love, not hurry.”
And truly, when stirred with love, these humble gram flour pearls turn into golden spheres of happiness.

So this Diwali, light your diyas, let the aroma of cardamom fill your kitchen, and roll a few laddoos with your own hands.
Because some sweetness is best when made  and shared from the heart. ✨

Dessert

Kharwas – A Rare Delicacy Steeped in Tradition

Memories of Kharwas
I remember the first time I tasted kharwas. I was seven, spending summer at my grandmother’s farm in Maharashtra. One misty dawn, Aaji (grandma) gently woke me with excitement — the neighbor’s cow had calved, and that meant one thing: kharwas for everyone. In our village, whenever a calf was born, the excess colostrum (first milk) was shared among neighbors so that every household could make this cherished pudding. That first milk, so thick and golden, would be mixed with regular milk, grated jaggery, and fragrant spices like cardamom (and sometimes a pinch of pepper) before being steamed until it set into a tender custard. I watched in awe as Aaji stirred the viscous kharvas doodh (colostrum) with jaggery and cardamom, poured it into a steel tiffin, and placed it in our big idli steamer. The kitchen soon filled with the sweet, earthy aroma of caramelized jaggery and spice.

When she finally opened the lid, there it was – a gently jiggling pudding with a light saffron hue. She cut it into squares and slipped a piece onto my plate. The first spoonful was pure magic: creamy and delicately sweet, with the warmth of cardamom. It melted in my mouth, yet had a subtle, cheese-like firmness that was utterly new to me. Kharwas isn’t an everyday sweet – it’s made only on special days like this, when nature provides that rare first milk. It’s not just a dessert; it’s a celebration. In Maharashtrian culture, this simple steamed pudding symbolizes gratitude for new life and the sharing of abundance. To me, that taste of kharwas will forever be intertwined with the laughter of family before sunrise and my grandmother’s loving hands. It’s more than a sweet – it’s a memory, a ritual, a bowl of tradition passed down with love.

Recipe: Kharwas (Colostrum Milk Pudding)

Servings: 4
Prep Time: 10 minutes
Cook Time: 30 minutes

Ingredients (Serves 4)

2 cups colostrum milk (first-day milk after calving)

1 cup whole milk (use if colostrum is very thick; omit for later-day colostrum)

3/4 cup jaggery, grated or crumbled (traditional sweetener, or use sugar)

1/2 teaspoon cardamom powder (for aroma)

1 pinch nutmeg powder or black pepper powder (optional, traditional touch)

A few saffron strands (optional, for a richer color and aroma)


Instructions

1. Mix the Milk Base: In a large bowl, pour the colostrum milk. If using first-day colostrum (which is very thick and rich), stir in the regular whole milk to dilute it slightly. Add the grated jaggery to the milk and mix well. Keep stirring until the jaggery dissolves completely (you can also warm the milk gently to help the jaggery melt). Once dissolved, add the cardamom powder and mix. (If any impurities from the jaggery remain, you can strain the mixture through a sieve.)


2. Prepare Steaming Dish: Grease a deep stainless steel plate or bowl (or lidded container) with a few drops of ghee or oil. This will help the pudding release easily after cooking. Pour the sweetened milk mixture into the prepared dish. If using saffron, sprinkle the strands on top. Also sprinkle the tiny pinch of nutmeg or black pepper powder on the mixture for subtle flavor (optional).


3. Cover: Cover the dish with a lid or aluminum foil. This is important to prevent any water droplets from the steam from falling into the pudding and ruining its smooth texture.


4. Steam Cook: Prepare your steamer setup – you can use an idli steamer, pressure cooker (without whistle), or any large pot. Add about 2 inches of water to the steamer and bring it to a simmer. Place the covered dish on a trivet or stand inside the steamer. Close the lid. Steam on medium heat for about 25–30 minutes. Avoid high heat, as vigorous boiling can cause water to splash into the pudding. After about 25 minutes, carefully open and insert a toothpick or knife into the center of the pudding; if it comes out clean, the kharwas is set. If not, steam for another 5–10 minutes and check again.


5. Cool and Set: Once the pudding is cooked and has a slight jiggle but is firm to touch, turn off the heat. Remove the dish from the steamer using tongs (be careful, it’s hot). Let it cool to room temperature. As it cools, the pudding will firm up further. For the best texture, once cooled, refrigerate the kharwas for at least 2 hours (cover it while refrigerating). Chilling helps it set into a nice sliceable custard.


6. Serve: When fully set and chilled, run a knife around the edges of the pudding to loosen it. Invert it onto a plate (or you can even serve directly from the bowl). Cut the kharwas into squares or wedges. Serve chilled for the classic feel – the cool, silky texture is unbelievably comforting. You can also enjoy it slightly warm if you prefer, but traditionally it’s served cold, often as a treat after meals.


Tips

Colostrum Milk: Colostrum is the nutrient-rich first milk produced by a cow or buffalo after giving birth. If you are lucky enough to have first-day colostrum (which is very thick), dilute it with some normal milk (even up to a 1:6 ratio of colostrum to milk) so that the pudding sets with a tender texture. Colostrum from the second or third day is thinner; you can often use it without dilution.

Sweetener Choices: Authentic kharwas is made with jaggery, which lends a gentle caramel flavor and a light beige hue to the pudding. If you don’t have jaggery, you can use sugar or sweetened condensed milk, but jaggery truly gives that rustic, traditional taste. (Using jaggery also makes the pudding a tad healthier and more earthy in flavor.) Remember to dissolve and strain jaggery if it’s impure.

Steaming Tips: Always cover the container of the milk mixture before steaming to avoid water droplets entering. Steam on medium heat; a high rolling boil can cause water to seep in or the milk to overflow. If using a pressure cooker, do not put the weight/whistle on – just steam it like you would idlis. Typically, 25–30 minutes of steaming is sufficient for a medium bowl; a larger quantity might take a bit longer.

No Colostrum? Instant Kharwas: Can’t find colostrum milk? You can still enjoy a similar pudding. Mix 1 cup full-fat milk, 1 cup thick yogurt (curd), 1/2–1 cup sweetened condensed milk, and 2 teaspoons of custard powder (or corn flour). Whisk until smooth (no lumps) and steam this mixture just like above. This yields a soft, blancmange-like milk pudding that’s remarkably close to true kharwas. It’s an ingenious substitute for those of us who crave kharwas without access to colostrum.

Flavor Variations: Traditional kharwas is often simply flavored with cardamom (and occasionally a touch of nutmeg). For a Goan twist, some people place a piece of turmeric leaf while steaming or add a pinch of turmeric for a lovely aroma and yellow tint – this is called “posu” in Konkani. You can also infuse a few strands of saffron in warm milk and add to the mix for a richer fragrance. Garnishing the finished pudding with chopped pistachios or almonds can add a pleasant crunch to the silky pudding, though purists usually enjoy it plain.


Every time I make kharwas, I’m transported back to that early morning in my Aaji’s kitchen – the softness of her cotton sari against my cheek as we peered into the steamer, the dew on the air, and the irresistible scent of sweet milk filling the courtyard. In a world where desserts often come from bakeries or boxes, this humble, home-steamed pudding feels like a hug from the past. It’s amazing how one simple dessert can hold a lifetime of memories and tradition. I hope this recipe brings a bit of that farmhouse warmth into your home. Serve it to your loved ones and share the story – because kharwas isn’t just about indulging a sweet tooth, it’s about savoring a piece of our heritage with each creamy, cardamom-kissed bite. Happy cooking! ❤️

Dessert

Traditional Phirni – Creamy Saffron Rice Pudding

Introduction

Bowl of chilled phirni garnished with pistachios, almonds, and rose petals.
Phirni (also known as firni) is a beloved North Indian dessert—a thick, creamy rice pudding cooked with milk and sugar, delicately flavored with saffron and cardamom. This classic treat is traditionally prepared during joyous celebrations like Diwali and Eid, and no family gathering feels complete without it. I remember my grandmother slow-cooking phirni on the stovetop, filling the house with the sweet aroma of simmering milk and spices, and then pouring it into small clay bowls to set. It’s believed that phirni has its roots in ancient Persia and was brought to India by the Mughal emperors. Over generations, it has become totally ingrained in Indian cuisine – a dessert that evokes nostalgia and warm family memories with every spoonful.

Ingredients

Basmati rice (raw) – ¼ cup (about 50 grams), rinsed and soaked

Whole milk – 1 liter (about 4 cups), full-fat for creaminess

Sugar – ½ cup (100 grams) or adjust to taste

Green cardamom – 4-5 pods, seeds crushed (or ½ teaspoon cardamom powder)

Saffron strands – 10-15 threads, steeped in 2 tablespoons warm milk

Almonds – 2 tablespoons, blanched and sliced (reserve some for garnish)

Pistachios – 2 tablespoons, sliced (for garnish)

Rose water (optional) – 1 teaspoon, for extra fragrance

Rose petals (optional) – a few, for garnish (washed, organic)

Earthen bowls (optional) – traditional clay bowls for setting and serving


Instructions

1. Prepare the Rice: Drain the soaked basmati rice and spread it on a clean cloth or plate to air-dry for 10-15 minutes. Once slightly dry, grind the rice into a coarse powder – aim for a texture like fine semolina (sooji). (You can also skip drying and grind the soaked rice directly to a paste, but a coarse texture is key for authentic phirni.)


2. Heat the Milk: In a heavy-bottomed pot, bring the milk to a gentle boil. Lower the heat to medium. Stir occasionally to prevent the milk from scorching at the bottom or forming a skin on top.


3. Mix in Rice: Take a few tablespoons of the hot milk and mix it with the ground rice to make a lump-free slurry. Slowly pour this rice-milk mixture into the simmering milk, stirring continuously. This step helps disperse the rice evenly and prevents any clumps from forming.


4. Cook the Pudding: Cook the rice and milk on low heat, stirring often with a spatula. As the mixture simmers, the ground rice will cook and the milk will begin to thicken. Scrape the sides and bottom of the pot regularly to avoid sticking. After about 10-15 minutes, the phirni will start to attain a velvety, thick consistency.


5. Sweeten and Flavor: When the rice is completely soft and the pudding has thickened, stir in the sugar until it dissolves. Add the crushed cardamom seeds and the saffron along with the infused milk. The saffron will impart a lovely golden hue and fragrance. Continue to cook for another 2-3 minutes, ensuring the sugar is fully dissolved and the flavors are well combined.


6. Finish with Nuts: Stir in the chopped or ground almonds (if using) and cook for another minute. Turn off the heat. The phirni should be creamy and thick, yet of pouring consistency (it will set further upon cooling).


7. Pour and Set: Pour the hot phirni into serving bowls. For an authentic touch, use small earthenware bowls (matka or shikora). The clay bowls naturally absorb excess moisture and enhance the texture and aroma of the phirni.


8. Chill: Let the bowls cool to room temperature, then cover them (with lids or foil) and refrigerate for at least 2 hours, or until the phirni is nicely chilled and firm. Phirni is always served cold for the best flavor and texture.


9. Garnish and Serve: Before serving, garnish each bowl of phirni with the reserved sliced almonds and pistachios. You can also sprinkle a few dried rose petals on top for a festive look. Serve the phirni chilled and enjoy the creamy, delicate flavors.


Tips for Texture and Flavor

Consistency of Rice: Grind the rice coarsely, not into a fine flour. A slightly grainy rice powder gives phirni its signature texture – creamy yet with a bit of body. If the rice is too finely ground, the pudding can become pasty; too coarse and it might be gritty, so aim for a happy medium.

Slow Cooking: Patience is key. Cook the phirni on a low flame and stir regularly. Slow cooking allows the milk to reduce and the flavors to concentrate, resulting in a richer taste. A heavy-bottomed pan is recommended to prevent burning.

Use Full-Fat Milk: Traditional phirni uses whole milk for a creamy richness. Skim milk won’t give the same results. For an extra indulgent version, you can even replace a portion of the milk with evaporated milk or add a couple of tablespoons of condensed milk, but the classic recipe is wonderful as is.

Flavor Enhancements: Saffron and cardamom are the classic flavorings – don’t skimp on them. Always bloom the saffron in warm milk before adding, to extract maximum color and aroma. If you don’t have saffron, a few drops of rose water or kewra (screw pine) essence can be added at the end of cooking for an aromatic twist.

Avoid Lumps: To prevent lumps, remember to stir the ground rice into milk slowly and whisk as you go. Creating a slurry with a bit of milk (as mentioned in the steps) is a handy trick to ensure a smooth result. If at any point you find lumps, you can also whisk vigorously or use an immersion blender briefly (off the heat) to smooth the pudding.

Sweetness Check: Phirni is meant to be sweet but not cloying. Taste the cooked mixture and adjust sugar if needed before setting it to chill. Keep in mind the cold temperature will slightly mellow the sweetness.


Serving and Storage Suggestions

Traditional Serving: For the most authentic experience, serve phirni in clay bowls. These bowls, called sakoras or matkas, not only look charming but also help thicken the dessert by absorbing moisture and add an earthy aroma. If you have them, soak the clay bowls in water for 30 minutes before use, which helps keep the phirni cold and prevents the bowls from drawing out too much liquid.

Garnish: Always top phirni with chopped nuts like almonds and pistachios for a lovely crunch that contrasts with the creamy pudding. Edible rose petals or a small sheet of edible silver leaf (chandi varq) can be added during festivals or weddings to make it look royal. A pinch of saffron strands on top of each bowl not only looks beautiful but hints at the flavor inside.

When to Serve: Phirni is best served chilled. Make it ahead of your event – it actually tastes better after a few hours as the flavors meld together. It’s a perfect dessert for festive occasions like Diwali, Eid, or family celebrations, and also a refreshing summer treat.

Storage: Keep phirni refrigerated until serving. If covered and kept cold, it stays fresh for about 2 to 3 days in the fridge. For longer storage, you can freeze phirni for up to a week, but the texture might turn slightly grainier upon thawing. Always store it in a well-sealed container or cover the bowls with cling film to prevent the pudding from absorbing any fridge odors.

Leftover Ideas: If you somehow have leftover phirni (which is rare in our home!), you can use it as a stuffing for pancakes or toast the next day for a fun fusion dessert. But generally, every last bit of this delicious pudding gets scraped clean from the bowl!


Enjoy your traditional homemade Phirni, and happy feasting! 😋

Dessert

Balushahi Recipe – Crisp & Flaky Indian Festive Sweet Delight

Introduction

Balushahi is a dessert that instantly transports me back to childhood Diwalis and family weddings. I remember the crunch of its sugar-glazed exterior and the soft, syrup-soaked interior with each bite. In many Indian households, recipes like Balushahi are heirlooms passed down through generations, evoking warm memories of grandmothers patiently frying these treats in ghee. Indeed, Balushahi holds a special place in celebrations – its appealing flakiness and rich taste make it an integral part of Diwali, Holi, weddings, and other festive occasions.

Often dubbed the “Indian doughnut” for its shape, Balushahi (known as Badusha in South India) is similar to a doughnut only in looks, but differs in texture and taste – it’s much denser, crispier, and richly infused with ghee and cardamom syrup. This traditional North Indian mithai (sweet) is usually prepared for auspicious events and even offered as prasad (sacred offering) in temples. From grand wedding dessert spreads to Diwali sweet boxes, Balushahi’s presence is a symbol of celebration and nostalgia. Its Mughal-era origins and enduring popularity across India speak to its timeless appeal. Get ready to learn how to make this flaky, golden delight at home, and bring a taste of festive nostalgia to your kitchen!

Ingredients

For the dough:

All-purpose flour (maida) – 2 cups (approximately 250 g)

Ghee (clarified butter) – 1/4 cup (60 g), in semi-solid state (soft but not melted)

Yogurt (curd) – 1/4 cup (60 g), chilled (helps yield a flaky texture)

Baking powder – 1/2 teaspoon

Baking soda – a pinch

Salt – a pinch (balances sweetness)

Cold water – 7 to 9 tablespoons, or as needed to form dough


For the sugar syrup:

Sugar – 1 cup (200 g)

Water – 1/2 cup (120 ml)

Green cardamom – 2 pods, crushed (or 1/2 teaspoon cardamom powder)

Saffron strands – a pinch (optional, for aroma and color)

Lemon juice – 1/2 teaspoon (a few drops, to prevent crystallization of syrup)


For frying & garnish:

Ghee or oil for deep-frying – about 2 cups (enough for ~2-inch depth in pan)

Nuts for garnish – 2 tablespoons chopped pistachios or almonds (optional)


(Makes about 12–15 Balushahi)

Step-by-Step Instructions

1. Cream the ghee and yogurt: In a mixing bowl, add the semi-solid ghee. Using a spoon or whisk, beat the ghee vigorously for a few minutes until it becomes light, smooth, and fluffy. The ghee will turn a pale cream color as air incorporates. Add the chilled yogurt to the creamed ghee and whisk them together until well combined and silky. This step of “creaming” the ghee with curd is crucial for the Balushahi’s flaky texture.


2. Combine dry ingredients: Sift the all-purpose flour into the bowl with the ghee-yogurt mixture. Add in the baking powder, baking soda, and salt. Gently mix the dry ingredients with the ghee-yogurt base using a spatula or your fingertips. The mixture will start to resemble coarse crumbs (similar to a pie crust or biscuit dough).


3. Form a soft dough: Sprinkle cold water a few tablespoons at a time into the flour mixture. Use light hands to bring the mixture together into a dough – do not knead vigorously. Add just enough water (around 7–9 Tbsp in total) so that the dough holds together and is soft but not sticky. It should form a ball that might have slight cracks (that’s okay). Over-kneading will develop gluten and make the Balushahi tough, so simply gather the dough until it just comes together. Cover the dough and let it rest for about 15 minutes at room temperature (this resting period helps hydrate the flour and gives a better texture).


4. Shape the Balushahi: After resting, divide the dough into small portions. For medium-sized Balushahi, each portion can be about the size of a ping-pong ball (roughly 2 tablespoons of dough). Smooth each portion between your palms and then press your thumb in the center to make a deep indent (doughnut-like shape). The disc should be about 2 inches wide and not too thick. The indentation in the middle ensures the inside cooks evenly. If the dough cracks at the edges while shaping, just smooth them gently – small cracks are fine and will contribute to the flaky layers.


5. Deep-fry on low heat: Heat the ghee or oil in a deep, heavy-bottomed kadai or pan over low to medium-low heat. To test the temperature, drop a tiny pinch of dough into the oil – it should slowly rise to the surface without turning brown immediately. Slide in 3–4 shaped Balushahi at a time, careful not to overcrowd the pan (frying too many can cool the oil and lead to uneven cooking). Fry slowly and patiently – the Balushahi will sink then float up as they cook. Keep the flame low: it will take several minutes for each side to turn a rich golden brown. Avoid the temptation to increase heat, as high heat will brown the outside too fast while leaving the inside undercooked. You can gently flip them occasionally for even coloring. It usually takes about 8–10 minutes per batch for them to fry to a beautiful golden hue. Tip: If you notice the oil getting too hot (sweets darkening too quickly), briefly lift the pan off the stove or lower the heat to regulate the temperature. Once the Balushahi are crisp and golden, remove them with a slotted spoon, allowing excess oil to drain, and set them aside on a plate. Continue frying the remaining batches in the same way.


6. Prepare the sugar syrup: While the Balushahi are frying (or immediately after frying, using the still-warm stove), start making the syrup. In a saucepan, combine the sugar and water. Heat on medium, stirring until the sugar completely dissolves. Once it dissolves, add the crushed cardamom and saffron strands to the syrup. Bring the syrup to a gentle boil and then reduce to a simmer. Simmer until it reaches one-string consistency: this means if you dip a spoon and let a drop of syrup cool a bit, it should feel sticky between your fingers and form a single thread when pulled apart. (You can also test by dropping a bit of syrup from the spoon – the last drop should form a thin thread). This stage is usually reached when the syrup thickens slightly and turns glossy. Be vigilant and do not over-boil – we want a syrup that is sticky but still liquid, not a hard caramel. Stir in the lemon juice toward the end of boiling (this helps prevent sugar crystallization). Once one-string consistency is reached, turn off the heat. Note: It’s important to keep the syrup warm; if it cools and thickens too much before use, you can reheat it gently with a splash of water.


7. Soak the fried Balushahi: Make sure your syrup is hot or warm (reheat if it has cooled). Now, gently place the fried Balushahi into the warm sugar syrup. If your pan is wide, you can soak several at once without overlapping (or do this in batches if needed). The syrup should cover them or you can spoon syrup over the top of each. Let each Balushahi soak for about 2–5 minutes per side. Flip them halfway through to ensure both sides absorb the syrup evenly. They will not get as soft as something like a gulab jamun – instead, they’ll drink in just enough syrup to coat the outside and impart sweetness inside. After a few minutes of soaking, they’ll become glossy and slightly heavier.


8. Garnish and cool: Using a fork or slotted spoon, carefully lift each Balushahi out of the syrup, allowing excess syrup to drip off. Place them on a plate or tray lined with parchment or a rack. While they are still sticky, garnish the tops with chopped pistachios or almonds (the nuts will stick to the syrupy glaze). Allow the Balushahi to cool down to room temperature. As they cool, the sugar syrup on the outside will set into a fine white sugary coating that gives that characteristic slight crunch. The inside will remain soft and moist. Your Balushahi are now ready to serve!


Tips for Achieving the Perfect Texture

The hallmark of a great Balushahi is a crisp, flaky exterior with a soft, tender inside that’s fully cooked and lightly infused with syrup. Keep these tips in mind to get that perfect texture:

Don’t over-knead the dough: Mix just until the ingredients come together, and avoid developing too much gluten. A gently combined dough yields a flaky, melt-in-mouth Balushahi, whereas over-kneading can make it hard or bready. Let the dough rest before shaping to relax it.

Shape with a dent: Always form a dimple or hole in the center of each dough round. Making the Balushahi with an indentation (and not too thick overall) ensures it cooks evenly all the way through. If it’s a solid ball with no dent, the inside might remain undercooked. This little trick helps achieve that delicate, fully cooked interior.

Slow fry at low heat: Patience is key when frying. Cook the Balushahi on low to medium-low heat rather than high. It should bubble gently in the oil, not aggressively. Slow frying gives it time to cook through to the center and develop that signature flaky crust. The result is a golden, crisp outside and a thoroughly cooked soft inside – much like how traditional halwais (confectioners) do it. Also, fry in small batches; adding too many at once can drop the oil temperature. Maintain an even heat for uniform frying.

Perfect sugar syrup absorption: For a Balushahi that is sweet yet not soggy, get the sugar syrup right. Simmer the syrup to a one-string consistency and keep it warm – this way, the Balushahi will readily absorb a thin coating of syrup without turning mushy. If the syrup is too thick (beyond one-string), it won’t soak in; too thin and it could make the sweets overly soft. Soak the fried Balushahi in warm syrup for a few minutes on each side. A warm, correctly prepared syrup infuses just the right amount of sweetness and gives that subtle sheen on the outside.


Serving and Storage

Serving: Balushahi is best enjoyed at room temperature once the sugar glaze has set. The outside will be crisp and sweet, while the inside remains soft and slightly flaky. They make a delightful addition to any festive spread – serve them on a decorative platter, perhaps lined with festive foil or banana leaf. You can even garnish with a touch of varq (edible silver leaf) on top of each for an authentic royal touch. Balushahi pairs wonderfully with a cup of masala chai or as a dessert after a traditional Indian meal. During festivals like Diwali, you can serve Balushahi along with other sweets and snacks as part of the celebrations, or pack them in boxes as a sugary gift for friends and family.

Storage: Once completely cooled, store the Balushahi in an airtight container at room temperature. They have a good shelf life and actually taste even better a day later, as the syrup has fully penetrated. In a cool, dry place, they stay fresh for about 5 to 6 days without refrigeration. (In fact, the high sugar content acts as a preservative.) Be sure to keep them away from humidity to prevent the sugar from melting. Avoid refrigerating Balushahi, as this can cause the sugar to crystallize and the texture to harden. If you need to store them longer than a week, you might refrigerate in a pinch and then allow them to come to room temperature before eating, but fresh is always best. Enjoy this indulgent treat as a make-ahead sweet for festivals – it’s a joy to bite into a Balushahi and savor the celebratory spirit it brings!

😋 Happy Cooking and Festive Eating!

Fastival Food

Meethe Chawal – A Sweet Saffron Rice for Festive Celebrations

The aroma of saffron and cardamom wafting through the house instantly brings back memories of family gatherings and festival celebrations. Meethe Chawal (literally “sweet rice”) is more than just a dessert – it’s a traditional Punjabi sweet saffron rice dish that symbolizes joy and togetherness. Often prepared during harvest festivals like Baisakhi and the winter bonfire festival of Lohri, this golden rice pulao is considered auspicious and is a staple on celebratory occasions. In many North Indian homes, a bowl of meethe chawal graces the table at weddings or family get-togethers, representing the wish for sweetness and prosperity in life. Each spoonful evokes nostalgia – from childhood Lohri nights where we huddled around a fire with warm sweet rice, to Baisakhi afternoons when neighbors exchanged bowls of this fragrant dessert as a gesture of goodwill and cheer.

*Meethe Chawal served in an ornate metal bowl, garnished with glossy raisins, toasted almonds, and a few strands of saffron. In festive Punjabi traditions, the sweet saffron rice is often adorned with vark (edible silver foil) and presented alongside nuts and spices, symbolizing the richness of the celebration. The golden hue of the rice comes from premium saffron threads and a pinch of turmeric, making it a vibrant centerpiece on any festival thali.*


Ingredients

1 cup basmati rice, long-grain preferred (soaked 20–30 minutes)

2–3 tablespoons ghee (clarified butter)

½ cup sugar (adjust to taste)

4–5 green cardamom pods (crushed lightly for aroma)

1 pinch saffron strands (about ¼ teaspoon, soaked in 2 tablespoons warm milk or water)

2 tablespoons chopped almonds (about 8–10 almonds)

2 tablespoons raisins (golden raisins or sultanas)

2 tablespoons cashews or pistachios (optional, for extra nutty richness)

½ teaspoon turmeric powder (optional, for deeper yellow color if needed)

2 cloves & 1 small cinnamon stick (optional whole spices for added warmth)

2 cups water (for cooking the rice)


These ingredients yield a small pot of Meethe Chawal, about 4 servings. You can scale up as needed, maintaining roughly a 1:2 ratio of rice to water for cooking.

Instructions

1. Rinse and Soak the Rice: Wash the basmati rice in cold water until the water runs clear. Soak the rice in plenty of water for about 20–30 minutes, then drain. (Soaking helps each grain cook longer without breaking and results in fluffier, longer rice grains.) Meanwhile, warm the saffron strands in a tablespoon or two of milk (or water) and set aside to steep. The saffron will release a deep golden color and aroma into the liquid.


2. Prepare Flavorful Ghee Base: In a heavy-bottomed pot or kadhai, heat 2 tablespoons of ghee on medium heat. Once hot, add the crushed cardamom pods (and cloves and cinnamon stick, if using). Sauté the spices for a minute until aromatic – you’ll smell the sweet cardamom fragrance. Be careful not to burn them.


3. Fry Nuts and Raisins: Add the chopped almonds, cashews (if using) and raisins to the ghee. Fry for 30–60 seconds, stirring constantly, until the nuts turn light golden and the raisins plump up. Remove the fried nuts and raisins with a slotted spoon and set aside for later garnish. (Frying in ghee gives the nuts a toasted crunch and infuses the ghee with nutty flavor.)


4. Toast the Rice: In the remaining ghee (add another 1 tablespoon if the pot is dry), gently stir in the drained basmati rice. Sauté the rice for 1–2 minutes on medium-low heat, coating each grain with ghee and spices. Toasting the rice lightly in ghee helps keep the grains separate and imparts a nutty aroma.


5. Simmer with Saffron and Sugar: Pour in 2 cups of water and the saffron along with its soaking milk/water. Add the sugar and a tiny pinch of salt (to enhance sweetness). Stir everything gently just once to distribute the saffron and sugar – the liquid will already start taking on a lovely yellow hue from the saffron. Increase heat to bring the mixture to a boil.


6. Cook the Rice: When the water comes to a boil, reduce the heat to low, cover the pot with a tight-fitting lid, and let the rice cook undisturbed for about 10–12 minutes. (If using a very heavy pot or scaling up the recipe, you may need a few extra minutes.) Do not open or stir frequently, as the steam trapped inside is cooking the rice. After about 10 minutes, check if most of the water is absorbed – you’ll see holes or dimples on the surface of the rice and might hear a subtle sizzling sound, which indicates the water has mostly steamed off.


7. Steam and Fluff: Turn off the heat (or keep it on the absolute lowest setting) and let the covered pot sit for another 5–7 minutes. This resting time allows the rice to finish cooking in its own steam. Afterwards, lift the lid and gently fluff the sweet rice with a fork. The grains should be cooked through yet separate, not mushy or clumped. Each strand of rice will be long, aromatic, and tinged yellow from the saffron (and turmeric, if added).


8. Add Ghee & Garnish: Drizzle the remaining 1 tablespoon of ghee over the fluffed rice and gently mix. (A bit of extra ghee at the end adds shine and keeps the rice moist). Now fold in most of the fried nuts and raisins, reserving a few for garnish. Do not stir vigorously – use a light hand to avoid breaking the rice. Finally, sprinkle the reserved almonds and raisins on top. You can also decorate with a few saffron strands and even edible silver foil if you have it for a festive touch.


9. Serve: Serve the Meethe Chawal warm. It can be enjoyed on its own as a dessert, or as part of a larger meal. For the authentic Punjabi presentation, dish out the sweet rice in a brass or silver bowl and garnish with the remaining nuts and a pinch of saffron strands on top. Enjoy the heavenly aroma of saffron and cardamom in every bite!


Tips for Perfect Texture & Flavor

Use Good-Quality Basmati: Always choose long-grain basmati rice for meethe chawal. The long grains and lower starch content ensure the cooked rice remains fluffy and separate, not sticky. Inferior or short-grain rice can turn mushy, so splurge on the best basmati for this special dish.

Soak and Rinse Rice: Don’t skip the soaking step. Soaking rice for about 30 minutes not only shortens the cooking time but also prevents the grains from breaking. Rinsing beforehand washes away excess starch. This all helps in achieving that perfect non-sticky texture.

Heavy Pan & Gentle Heat: Cook the rice in a wide, heavy-bottomed pan with a tight lid. A heavy pan distributes heat evenly and prevents the sugar in the recipe from burning or the rice from catching at the bottom. Keep the flame low once it’s simmering – patience is key to allow gentle steaming. Avoid stirring while simmering, as it can make the rice release starch and become sticky.

Correct Water & Sugar Ratio: For fluffy rice, use roughly 2 cups of water per 1 cup of basmati when cooking everything in one pot. This accounts for the added sugar, which will melt and release moisture as the rice cooks. If you notice the rice is still too firm when time’s up and there’s no water left, you can sprinkle a few extra tablespoons of hot water and cover for a few more minutes. Also, add the sugar after the rice is partially cooked (as in our method) to avoid hindering the rice from cooking through – sugar creates a syrup that can slow softening of the grain.

Saffron Soaking: Saffron is the star of this dish, providing both color and fragrance. Crumble the saffron strands slightly and soak them in warm milk or water for at least 15–20 minutes (you can even do this before you start prepping anything else). This allows the saffron to bloom and release its full hue and aroma, which then gets evenly distributed in the rice. You’ll get a beautiful golden color without needing any artificial food dye.

Fluff, Don’t Stir: Once the meethe chawal is cooked, use a fork to gently fluff up the rice. Never mash or stir vigorously, as the delicate grains can break or turn pasty. Fluffing helps to separate the grains. If the rice looks a bit wet when just finished, the 5-minute rest with the lid on (heat off) will fix that by absorbing excess moisture. Just before serving, gently toss again to mix the nuts and raisins so every serving has some.

Taste and Balance: Meethe Chawal should be richly sweet but not cloying. ½ cup sugar for 1 cup of rice yields a dessert-level sweetness; you can adjust to your preference. A tiny pinch of salt in the dish accentuates the sweetness (it won’t taste salty, just more balanced). The cardamom and cloves infuse warmth, so don’t skip them entirely – if you prefer a milder spice note, you can remove the whole spices before serving.

Extra Richness (Optional): For special occasions, some families make this dish extra indulgent. You can stir in a couple of tablespoons of crumbled khoya (mawa) or milk powder at the end for a richer texture, or even a spoon of condensed milk for a stickier sweet rice. Edible rose petals or a few drops of rose water/kewra essence can be added on top for a royal touch (this is common in Mughlai versions). However, these extras are optional – the classic recipe is delicious in its simplicity with saffron, nuts, and ghee.


Serving Suggestions and Accompaniments

Meethe Chawal is traditionally served as part of a festive thali (platter) or as a sweet finish to an elaborate meal. Here are a few serving ideas and pairings:

Festive Thali: Include meethe chawal in your festival spread alongside other Punjabi favorites. It sits beautifully in a small katori (bowl) on a thali that might feature dishes like chole (spiced chickpeas), puri (fried bread), and raita. The sweet rice provides a welcome contrast to spicy and tangy items on the plate. In Punjabi cuisine, it’s common to end a special meal with a spoonful of this sweet saffron rice as a sign of celebration.

Dessert Bowl: Of course, you can serve meethe chawal purely as a dessert on its own. After a robust Indian meal (say, palak paneer, dal makhani, and roti), a small bowl of warm sweet saffron rice makes for a perfect dessert that isn’t too heavy. The fragrant rice with nuts can also be paired with a scoop of vanilla ice cream for a East-meets-West fusion dessert – the cold creamy ice cream with the warm spiced rice is a surprisingly delicious combo.

Festive Drink Pairing: If you’re enjoying meethe chawal during festivals like Lohri or Diwali, consider serving it with a glass of masala chai or warm badam milk (almond-spiced milk). The milky drink complements the sweet rice and enhances the cozy festive vibe. On Basant Panchami (spring festival), serve the yellow rice with other yellow-hued foods or drinks (like mango panna or saffron sherbet) to go all-out with the theme of prosperity and sunshine.


Meethe Chawal truly shines during festivals – it’s commonly made for Basant Panchami, Diwali, Eid, and Gurpurabs, among others. But you don’t need to wait for a special day to enjoy this comfort food. Whenever you crave a sweet, aromatic treat, this recipe is at your service. Each bite of the soft, saffron-infused rice with crunchy nuts and plump raisins is a reminder of Punjab’s rich culinary heritage and the simple joys of life. Serve it with love, and you’ll understand why this dish has been a beloved part of North Indian celebrations for generations.