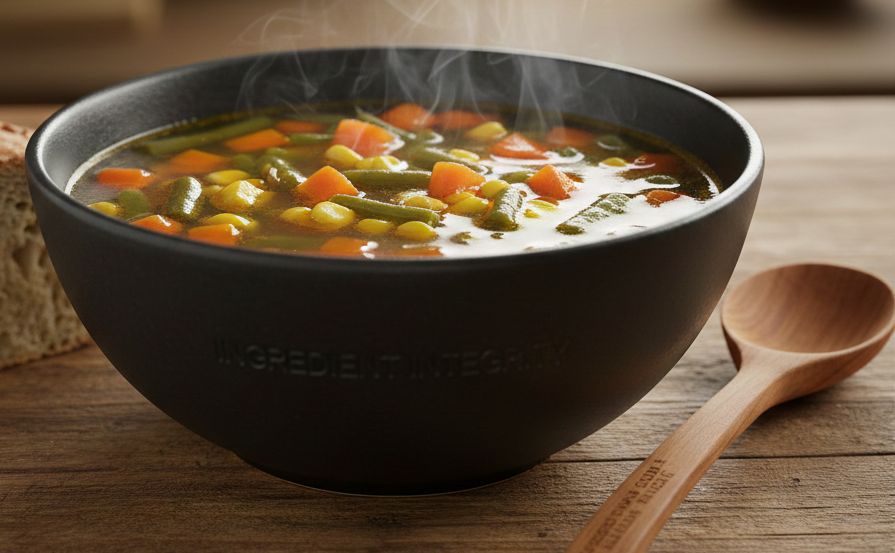
In the winter months, our kitchen didn’t just smell like food; it smelled like protection. While the tradition of a warm bowl began with my grandmother, it was my mother who turned the Mixed Vegetable Soup into a ritual of healing. To her, a soup wasn’t just a liquid meal; it was a way to “document the season” in a single pot. I remember her standing at the wooden counter, her knife-work precise and rhythmic. She believed that the way you chopped a vegetable determined its soul in the broth. “If the carrots are bigger than the beans,” she would say, “the soup has no harmony.” My mother viewed her soup as a “Parasocial Companion” a warm, reliable presence that comforted us during winter colds and rainy nights . Today, at The Pinch of Masala, we are stepping away from the “novel-length menus” of the modern era and returning to the “Quiet Luxury” of simple, technical, and honest cooking . This is my mother’s medicine, refined for a world that needs intention and longevity .
The most common mistake in home-style soups is a flat, watery flavor. To achieve a “Restaurant Style” depth at home, you must follow my mother’s two non-negotiable rules: The High-Heat Bloom: Most people boil their vegetables in water immediately. My mother insisted on sautéing the aromatics ginger, garlic, and spring onion whites and then the chopped veggies on a high flame for 2–3 minutes. This “sear” brings out the natural sugars and creates a smoky aroma that serves as the flavor base. The Starch Integrity: In 2026, we are seeing a move toward “real food sources” rather than “powders and potions” . Instead of using cornstarch or artificial thickeners, my mother would often blend a single boiled potato into a smooth paste and stir it back into the pot. This creates a silky, hearty consistency while remaining 100% natural.
Prep time: 15 mins | Cook time: 25 mins | Servings: 4 Diet: Vegan, Gluten-Free | Cuisine: Indian Homestyle
Ingredients: The Medley (1.5 to 2 cups): Finely chopped carrots, french beans, cabbage, and sweet corn. The Aromatics: 1 tbsp garlic (minced), ½ tbsp ginger (minced), and 2 sprigs of spring onion whites. The Liquid: 3 cups of Scrap Stock (see below) or water. The Seasoning: ½ tsp black pepper powder, salt to taste, and a pinch of sugar (to balance the acidity). The Finish: 1 tsp vinegar or lemon juice and a handful of fresh coriander. Instructions: The Chop: Rinse all vegetables under running water and chop them into uniform, small pieces. Uniformity ensures even cooking and prevents some veggies from turning mushy while others remain raw. The Wok Sear: Heat 1 tbsp oil or butter in a heavy pot. Sauté the ginger, garlic, and spring onion whites for 1 minute until fragrant but not browned. The Flavor Bloom: Add the rest of the chopped vegetables. Crank the heat to high and fry for 2–3 minutes. This brings out the deep, earthy aroma. The Simmer: Pour in the stock or water. Bring to a rolling boil, then lower the flame. Cover and cook for 10–12 minutes until the veggies are tender but still have a slight “bite”. The Natural Bind: If you prefer a thicker soup, stir in your blended potato paste (or a cornstarch slurry) and cook until it turns glossy and thick. The Polish: Add salt, sugar, and crushed black pepper. Turn off the heat and stir in the vinegar or lemon juice. Serve: Ladle into warm bowls and garnish with coriander. Serve bubbling hot, perhaps with a side of toasted croutons.
The Scrap Stock: In the 2026 “Use-Up” economy, we never cook with plain water. Collect your onion skins, carrot ends, and celery stalks throughout the week. Boil them in water for 20 minutes with a bay leaf to create a homemade vegetable stock. This “zero-cost” liquid adds an enzymatic complexity that transforms a simple soup into a gourmet experience.
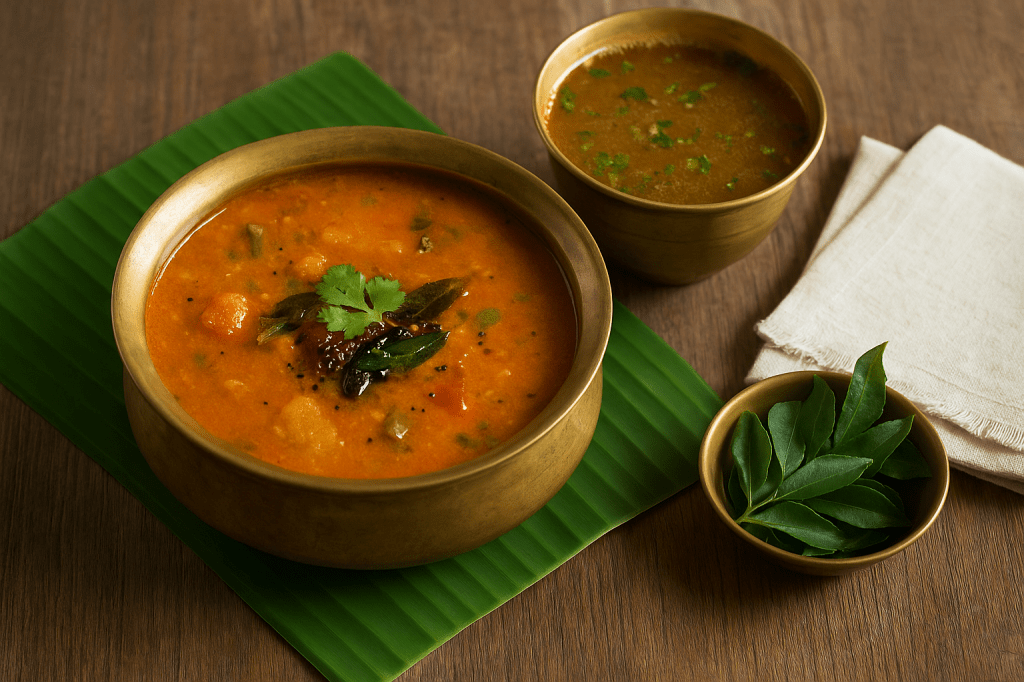
I still remember tagging along to my grandfather’s home in Udupi as a child and inhaling the aroma of sambar and rasam simmering in the kitchen. After morning temple prayers, my grandmother would serve a simple banana-leaf thali: steaming rice topped with our local sambar and rasam, a pat of ghee, and crispy fried peppers. Those humble temple-style dishes – fragrant with coconut, cumin and curry leaves, and completely free of onion or garlic – felt like pure comfort food. In Udupi cuisine, everything is prepared satvik (pure and vegetarian), so the sambar masala is based on coconut and spices, and the rasam is bright with tomato, tamarind and a touch of jaggery instead of pungent aromatics. These are the dishes I grew up loving, and I’m excited to share my version of Udupi-style Sambar and Rasam with you.
Udupi-Style Sambar
Servings: 4
Prep Time: 15 minutes
Cook Time: 30 minutes
Ingredients
For the Sambar:
1 cup toor dal (split pigeon peas), washed
~2 cups mixed vegetables (e.g. ½ cup chopped pumpkin or squash, 1 drumstick cut into pieces, ½ cup potato, 2 small eggplants), chopped
1 small tomato, chopped
2½–3 cups water
2 tbsp tamarind paste (or a small ball of tamarind, soaked)
½ tsp turmeric powder
½ tsp jaggery (optional, for a hint of sweetness)
Salt to taste
For the Masala Paste:
¼ cup fresh grated coconut (or frozen/thawed)
1 tbsp coriander seeds
1 tsp cumin seeds
1 tsp split urad dal (optional)
1 tsp split chana dal (optional)
2–3 dried red chilies (preferably mild Byadgi or Kashmiri)
½ tsp black peppercorns
½ tsp fenugreek seeds
5–6 fresh curry leaves
1 tbsp coconut or sesame oil (for roasting)
Water, as needed for grinding
For Tempering:
2 tsp coconut or sesame oil
½ tsp mustard seeds
½ tsp cumin seeds
A pinch of asafoetida (hing)
8–10 fresh curry leaves
Instructions
1. Cook the dal: In a pressure cooker or pot, combine the washed toor dal with a pinch of turmeric and 2 cups of water. Cook until very soft (about 3–4 whistles in a pressure cooker). Mash the dal and set aside.
2. Prepare the masala paste: In a small pan, heat 1 tbsp oil over medium heat. Add the coriander seeds, cumin, dals, fenugreek, peppercorns, and dried chilies. Roast, stirring, until aromatic and lightly golden. Add the grated coconut and curry leaves, and roast briefly until the coconut starts to brown. Let cool, then grind this mix to a smooth paste with a little water.
3. Cook vegetables: In a large pot or Dutch oven, heat a tablespoon of oil. Add the turmeric and the chopped vegetables and tomato. Stir for a minute, then pour in 2 cups of water, add salt, and bring to a boil. Reduce heat, cover, and simmer until the vegetables are almost tender (about 10–12 minutes).
4. Add tamarind and dal: Stir in the tamarind paste and jaggery. Once it comes to a boil and the raw tamarind smell disappears, add the mashed toor dal and mix well.
5. Add the spice paste: Pour the ground coconut-spice paste into the simmering pot. Stir and simmer gently for 3–5 minutes so all flavors meld. (The sambar will thicken as it sits – add a little water to adjust consistency as needed.)
6. Tempering: In a small pan, heat the remaining 2 tsp oil. Add mustard seeds; when they splutter, add cumin, a pinch of hing, and the curry leaves. Pour this hot seasoning over the simmering sambar, cover the pot, and let it sit for a minute to infuse. Stir once more and taste; add salt or jaggery if needed.
7. Serve: Garnish with fresh chopped coriander and a dash of lime juice if you like. Serve the sambar hot with rice, idlis, or dosas, and enjoy the mellow coconutty aroma of this Udupi specialty.
Udupi-Style Rasam
Servings: 4
Prep Time: 10 minutes
Cook Time: 20 minutes
Ingredients
Main Ingredients:
2 large ripe tomatoes, chopped
½ cup water (plus more during cooking)
2 cups water (for cooking the rasam)
1 tbsp tamarind paste (or soaked tamarind pulp)
1 tbsp jaggery or brown sugar
½ tsp turmeric powder
2 slit green chilies (adjust to taste)
1/4 cup toor dal (washed, then cooked until very soft)
2 tbsp Udupi-style rasam powder (store-bought or homemade)
Salt to taste
For Garnish:
A few curry leaves
Chopped coriander leaves
(Optional) 1 tsp freshly grated coconut
For Tempering:
1 tbsp coconut oil or ghee
1 tsp mustard seeds
½ tsp cumin seeds
A pinch of asafoetida (hing)
Instructions
1. Cook the dal: Pressure-cook the ¼ cup toor dal with a pinch of turmeric and enough water until very soft. Mash and set aside.
2. Boil tomatoes: In a saucepan, bring 2 cups of water to a boil with the chopped tomatoes, green chilies, turmeric and a little salt. When the tomatoes are very soft, mash them in the pot to release their juices.
3. Add seasonings: Stir in the tamarind paste, jaggery, and the rasam powder. Add the mashed dal and mix well. Add more water to reach your desired soup-like consistency. Bring the mixture to a gentle boil and simmer for 5–7 minutes so the flavors meld.
4. Finishing touches: Turn off heat and add a few curry leaves. (Optionally, stir in the grated coconut for richness.)
5. Tempering: In a small pan, heat the oil or ghee. Add mustard seeds; when they begin to pop, add cumin and a pinch of hing. Pour this fragrant seasoning over the hot rasam. Cover the saucepan and let the aromas infuse for a minute.
6. Serve: Give the rasam a final stir. Garnish with chopped coriander and serve piping hot. Udupi rasam is traditionally slightly sweet-spicy – the jaggery and hing give it that signature warmth. Enjoy it as a soup or ladle it over steamed rice with a drizzle of ghee.
Tips
Use fresh coconut and spices: Roasting the spice mix and freshly grated coconut brings out a nutty richness in the sambar. Don’t skimp on this step – it’s what gives Udupi sambar its deep flavor.
Choose your chilies: Udupi sambar is known for its mild, brick-red color. Using Byadgi or Kashmiri red chilies (with maybe one spicy chili) will give color without too much heat. Adjust the mix if you prefer it hotter or milder.
Balance jaggery and hing: The little bit of jaggery and hing in the rasam might seem odd, but they balance the tamarind’s sourness with sweetness and aroma. Be sure to include at least a pinch of each for authenticity.
Use coconut oil for tempering: Authentic Udupi rasam often uses coconut oil (or ghee) for the final seasoning, as it adds a subtle tropical fragrance.
Adjust consistency: Remember these dishes thicken as they sit. If your sambar or rasam becomes too thick after resting, simply add a little hot water and reheat to loosen it.
Closing Note
These Udupi-style sambar and rasam are a tribute to the simple temple cuisine of coastal Karnataka. The flavors are subtle but soulful – no onions or garlic, just wholesome lentils, fresh coconut, coriander, and traditional masalas. I hope this recipe brings you the same comfort it did for me, whether you’re enjoying a South Indian breakfast of idlis and dosas or a warm bowl over rice. Remember, the slow simmering and tempering are key: be patient as the ingredients meld, and your kitchen will soon be filled with that nostalgic aroma of home. Enjoy these healthy, vegan delights with family and friends, and maybe light a lamp or two – after all, this food was born in the light of temple faith and tradition!
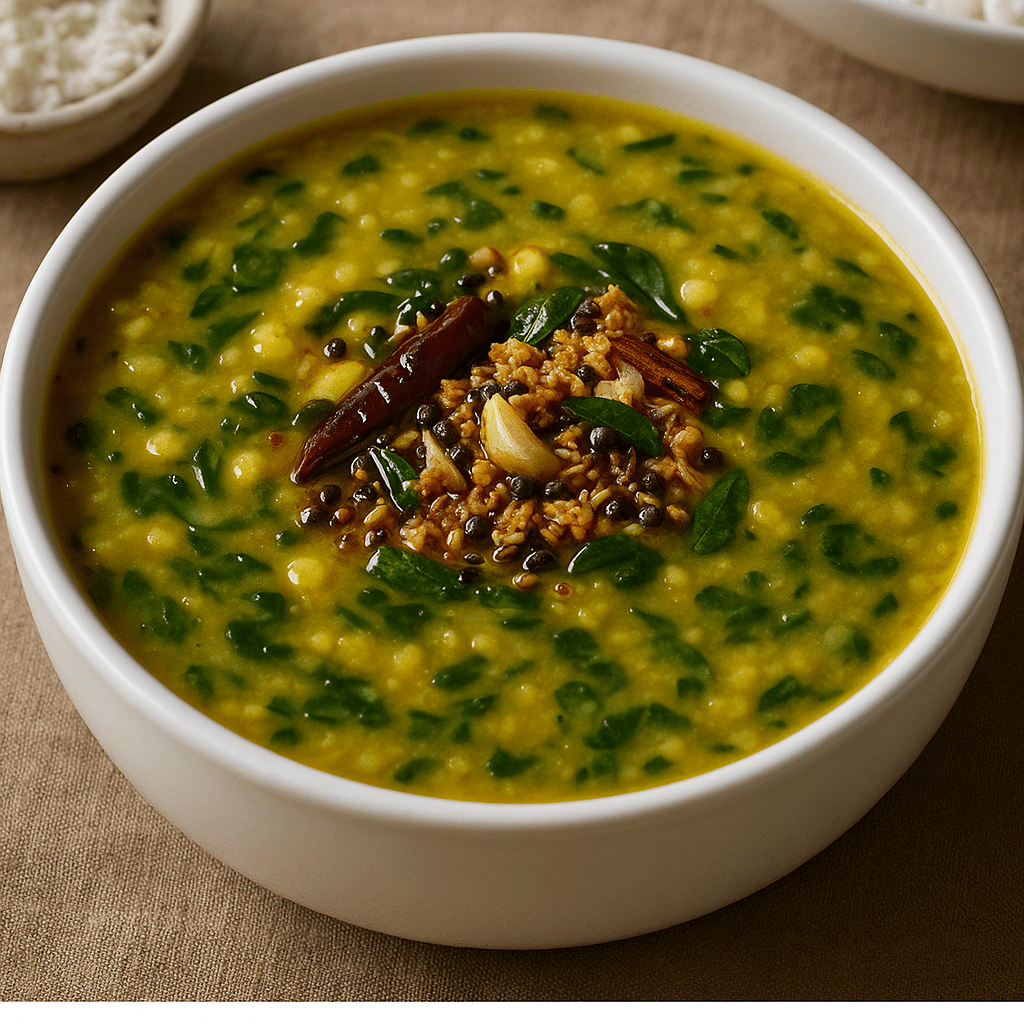
Drumstick leaves dal is a traditional South Indian dish that brings back memories of homely meals and backyard moringa trees. In many South Indian homes, drumstick (moringa) trees grow in the backyard, and the nutritious leaves are often shared with neighbors and family. I fondly remember sitting with my grandmother, patiently plucking the tiny green leaves from their stems for this dal – a true labor of love that was always worth the effort. Drumstick (moringa) pods are commonly used in sambar, but the leaves are a hidden gem of South Indian cooking, packed with nutrients and a unique earthy flavor. While some families (like mine) didn’t cook with the leaves very often in the past, many others have included them in their diet for generations. This recipe, known as Drumstick Leaves Dal or Moringa Dal (and even Sajana Patra Dal in some regions), is a simple, comforting lentil curry that pairs perfectly with rice or roti.
“A hearty bowl of South Indian Drumstick Leaves Dal (Moringa Dal) — creamy toor dal simmered with fresh moringa leaves, finished with a coconut tempering of mustard, cumin, garlic, and curry leaves. Perfect comfort food with steamed rice.”
Urad Dal (Split Black Gram) – 1/2 teaspoon (optional, adds crunch)
Dried Red Chili – 1 or 2, broken
Garlic – 3 cloves, sliced or finely chopped
Curry Leaves – 1 sprig (8-10 fresh curry leaves)
Asafoetida (Hing) – a pinch
Fresh Grated Coconut – 3 tablespoons
Step-by-Step Instructions
1. Prep the Drumstick Leaves: Pluck the drumstick leaves from their stems. Discard all thick, woody stems and collect only the tender leaves. Rinse the leaves thoroughly in plenty of water. (Tip: Soak the leaves in a large bowl of water, swish them around, then lift the leaves out, leaving any dirt to settle at the bottom. Repeat this process 2-3 times to ensure they are clean.) Drain and set the clean leaves aside.
2. Cook the Dal with Leaves: In a pressure cooker add the rinsed toor dal, the prepared drumstick leaves, chopped onion, chopped tomato, turmeric powder, green chilies, and about 2 cups of water. Cook for about 3-4 whistles on medium flame (or ~10 minutes) until the dal is soft and mushy. (If using an Instant Pot, pressure cook on high for ~6 minutes with natural pressure release, or if cooking in a pot on the stovetop, simmer until the dal is very soft, adding more water as needed.) Once cooked, let the pressure release naturally. Open the lid and gently mash the dal and leaves with the back of a spoon or ladle. The tomato and onion should have disintegrated, blending into the dal. If the mixture is too thick, add a bit of hot water to reach your desired consistency. Add salt to taste and simmer the dal on low heat while you prepare the tempering.
3. Prepare the Coconut Tempering: In a small pan, heat the oil or ghee over medium flame. Once hot, add the mustard seeds and let them splutter. Then add the cumin seeds and optional urad dal. Fry for a few seconds until the cumin sizzles and the urad dal turns golden. Reduce the heat to low and add the broken dried red chili, curry leaves, and a pinch of asafoetida. Be careful as the curry leaves might crackle. Next, add the sliced garlic. Sauté for a minute or until the garlic turns light golden and its raw smell disappears. Now add the fresh grated coconut to the pan. Stir continuously on low-medium heat, roasting the coconut in the oil. Fry the coconut until it becomes lightly golden and aromatic (this coconut tempering gives a lovely nutty finish to the dish).
4. Combine Tempering with Dal: Once the tempering is ready (the kitchen will smell amazing at this point), carefully pour all these fried spices and coconut along with the oil/ghee into the simmering dal. You should hear a satisfying sizzle as the tempering hits the dal. Immediately cover the pot for a minute to trap all the aromas. Then stir the dal well so the tempered spices and coconut are evenly mixed in. Let the dal simmer for another 1-2 minutes on low heat to let the flavors meld, then turn off the heat.
5. Finish and Serve: Check the consistency of the dal. It should be semi-thick and creamy; if it has thickened too much (drumstick leaves dal tends to thicken as it rests), you can stir in a bit of hot water to loosen it. Taste and adjust salt if needed. Squeeze a little fresh lemon juice at the end if you like a hint of tang (this is optional, but a small amount of acidity can brighten the flavors).
6. Garnish: Before serving, you can garnish the drumstick leaves dal with a sprinkle of freshly chopped coriander leaves or a few more fresh curry leaves. A small dollop of ghee on top of each serving bowl will make it extra aromatic and delicious.
Tips for Cleaning and Preparing Drumstick Leaves
Cleaning drumstick leaves (moringa leaves) is the only part of this recipe that requires a bit of patience. Here are some tips to make it easier:
Destemming: The leaves grow on hardy stems and thin stalks. Hold the end of a stalk with one hand, and use the thumb and forefinger of your other hand to strip the tiny leaves off in a downward motion. Alternatively, pinch off clusters of the leaves. Discard all the tough stems; only the small leaves (and very tiny tender stems attached to clusters of 2-3 leaves) are used for cooking.
Washing: Drumstick leaves can have dust or sand on them. After destemming, place the leaves in a large bowl of clean water. Swirl them gently with your hand. The dirt will settle at the bottom. Lift the leaves out into a colander. Refresh the water and repeat this washing once or twice until the water is clear. This soaking method cleans the leaves thoroughly without bruising them. Finally, drain well. You can also pat them dry on a clean kitchen towel or use a salad spinner to remove excess water if you’re prepping them in advance.
Handling bitterness: Drumstick leaves have a mild, pleasant bitterness. If you are very sensitive to bitter flavors, one trick is to add a tiny piece of jaggery (unrefined cane sugar) or a pinch of sugar while cooking the dal to balance the bitterness. In this recipe, the natural sweetness of coconut and onion usually balances the leaves, but a pinch of jaggery can be added if desired (about 1/2 teaspoon is enough).
Quantity after cleaning: Keep in mind the leaves will reduce in volume after removing stems. For example, ~2 cups of loosely packed leaves (after removing stems) is roughly what you get from a much larger bunch of leaves on the stalk. It’s fine to approximate; a little more or less leaves won’t harm the recipe. You can even throw in a handful of spinach or methi (fenugreek) leaves along with the drumstick leaves if you want to increase the greens.
Storing Leaves: If you’re not using the leaves immediately, wrap them in a newspaper or paper towel and keep them in the refrigerator. Use them within a day or two, as they tend to wilt and turn yellow quickly. Fresh is always best to get the most nutrients and flavor.
Health Benefits of Drumstick Leaves (Moringa)
Drumstick leaves are often called a superfood, and for good reason! These humble greens are a powerhouse of nutrition. They are rich in vitamins (like A and C), minerals (like iron and calcium), protein, and antioxidants. In fact, moringa leaves are said to contain more iron than spinach and more beta-carotene (Vitamin A) than carrots. Traditionally, moringa has been valued in Ayurveda and folk medicine for its health benefits. It’s known to have anti-inflammatory properties and is used to boost immunity and energy levels.
Modern studies and sources note that moringa leaves provide a wide range of nutrients – over 90 nutrients and 46 antioxidants have been identified in the moringa tree. People often consume moringa powder or supplements, but incorporating fresh leaves into recipes like this dal is an easy (and delicious) way to reap the benefits. Moringa is believed to help lower inflammation and even blood sugar levels, and has been used to manage conditions such as anemia, arthritis, high blood pressure, and more. It’s also traditionally given to new mothers, as it is thought to improve lactation (production of breast milk) and provide strength after childbirth.
Do keep in mind that while drumstick leaves are highly nutritious, they are best enjoyed as part of a balanced diet. This drumstick leaves dal is a great example of a healthy dish – it combines the goodness of moringa leaves with protein-rich lentils. Together, they make a nutrient-dense, high-fiber, high-iron meal that’s also low in calories. It’s wholesome food that our ancestors loved, and now the world is catching on to its benefits (moringa is often dubbed the “Miracle Tree” in wellness circles)!
Tip: If you’re new to drumstick leaves, start with a moderate amount the first time to see how you like the taste, since they do have a slight bitter note. Most people find the flavor very mild (less bitter than fenugreek leaves, for example) and the dal itself is mild and comforting in taste.
Serving Suggestions
Drumstick Leaves Dal is typically enjoyed with steamed rice for a satisfying meal. In South India, a dollop of homemade ghee on hot rice topped with this moringa dal is considered the ultimate comfort food. You can serve it with plain white rice or nutrient-rich brown rice; it even pairs well with millets or quinoa for a healthier twist. It’s equally delicious with roti, chapati or other Indian flatbreads – you can scoop up the dal with the bread for a hearty bite.
For a complete meal, consider pairing this drumstick leaves dal with some sides and condiments. A simple stir-fried vegetable (a poriyal or thoran, such as a beans poriyal or carrot thoran) makes a great accompaniment, adding texture and additional veggies to your plate. Crispy papad (appalam) or fryums on the side add a nice crunch and are a classic combo with dal and rice. A tangy pickle (such as mango or lime pickle) or a spoon of coconut chutney can elevate the flavors if you like some tang and spice on the side. You might also include a cooling raita (yogurt-based side) like cucumber raita to balance the meal, especially on a warm day.
This drumstick leaves dal is quite filling on its own, thanks to the fiber from the greens and protein from the lentils, but it’s light on the stomach. It’s a perfect everyday dish for lunch or dinner. In our home, we often enjoy it for a weeknight dinner with rice, and if there are leftovers, it thickens up by next day – you can dilute it with a little water and reheat. Sometimes, we even have a small bowl of this dal as a soup; squeeze a bit of lemon and sip it warm – it’s nourishing and soothing.
Lastly, don’t forget the finishing touch when serving: if you have reserved a teaspoon of that toasted coconut and garlic tempering, drizzle it on top of each serving bowl for an extra burst of aroma. Serve the dal hot. As you spoon it over rice, you’ll notice how the soft lentils and tender moringa leaves blend into a creamy texture. The fragrance of curry leaves and coconut in the tempering is enticing. This is wholesome Indian comfort food at its best – simple, nutritious, and made with love.
Enjoy your Drumstick Leaves Dal with your family, and bask in the satisfaction that you’re serving a meal that is both delicious and packed with health benefits. Happy cooking!
References: Drumstick leaves have been a staple in South Indian diets and are renowned for their nutritional value. Indians have cooked with moringa for generations, appreciating its health benefits long before it gained “superfood” status globally. This recipe is inspired by traditional methods and beloved family recipes, with the addition of coconut tempering that is common in regions like Kerala and Tamil Nadu for extra flavor. The information on health benefits is drawn from nutritional research and traditional knowledge, underlining why incorporating these greens into meals like dal is so worthwhile. Enjoy this South Indian moringa dal, a dish that’s as nourishing as it is delicious!
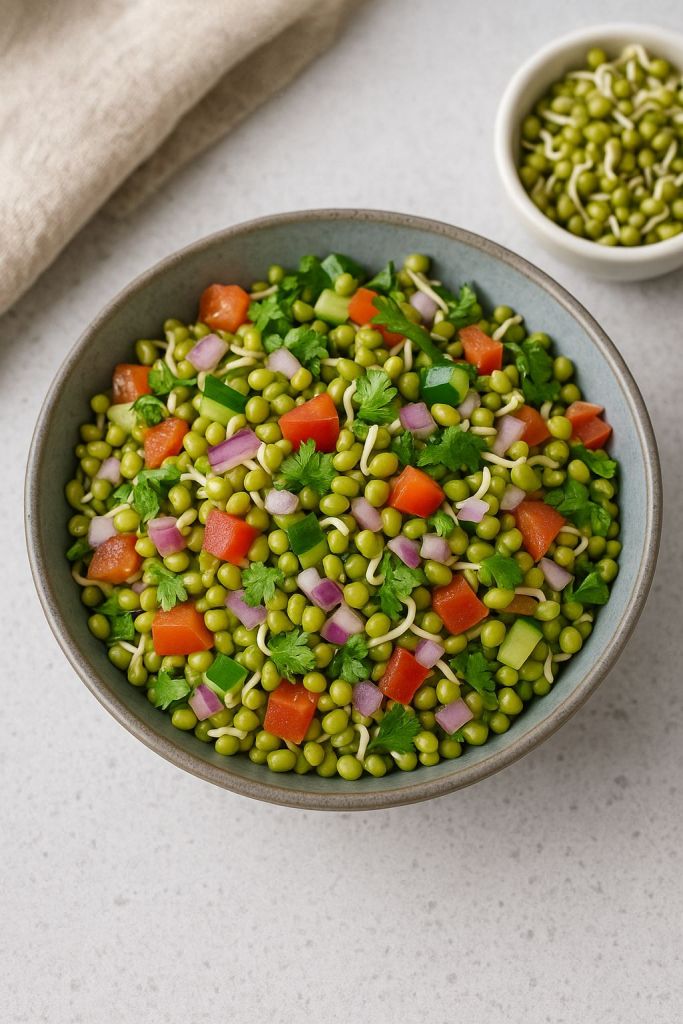
There’s something empowering about starting your day with a bowl full of colors, textures, and nutrients — and Sprouts Salad delivers just that.
I discovered this gem when I started a clean eating journey after Diwali one year. My body craved something light yet fulfilling, fresh but not boring. That’s when my mother suggested moong sprouts – “high in protein, easy on the stomach, and full of energy,” she said.
At first, it sounded a bit plain, but once I added a few crunchy veggies, fresh lemon juice, and a touch of chaat masala — it transformed into a bowl of flavor and vitality. It became my post-workout go-to, my detox dinner, and even a crunchy snack on busy workdays.
This salad isn’t just food — it’s fuel. Light, vibrant, and endlessly customizable.
🧾 Ingredients (Serves 2)
1 cup green moong sprouts (steamed or raw as per preference)
¼ cup finely chopped cucumber
¼ cup finely chopped tomato (firm, deseeded)
¼ cup finely chopped onion (optional)
2 tablespoons grated carrot
1 green chili, chopped (optional)
1 tablespoon lemon juice
Salt to taste
A pinch of chaat masala or roasted cumin powder
Fresh coriander leaves, chopped
👩🍳 Method
1. Prep the sprouts: Use homemade or store-bought green moong sprouts. Lightly steam them for 2–3 minutes if you prefer them softer, or use raw for crunch.
2. Combine the veggies: In a large bowl, mix sprouts, cucumber, tomato, onion (if using), carrot, and green chili.
3. Add flavor: Sprinkle salt, chaat masala or cumin, and lemon juice. Mix well.
4. Garnish and serve: Top with fresh coriander and serve immediately for best texture and flavor.
🥗 Add-On Options
For extra crunch: Add roasted peanuts or puffed rice (murmura).
For a boost: Toss in pomegranate seeds or grated beetroot.
For a creamy twist: Add a spoonful of curd and turn it into a sprout raita.