chutney

Authentic Mint and Coriander Chutney: Traditional Hari Chutney Recipe

The Green Ritual: My Mother’s Sil-Batta Secret
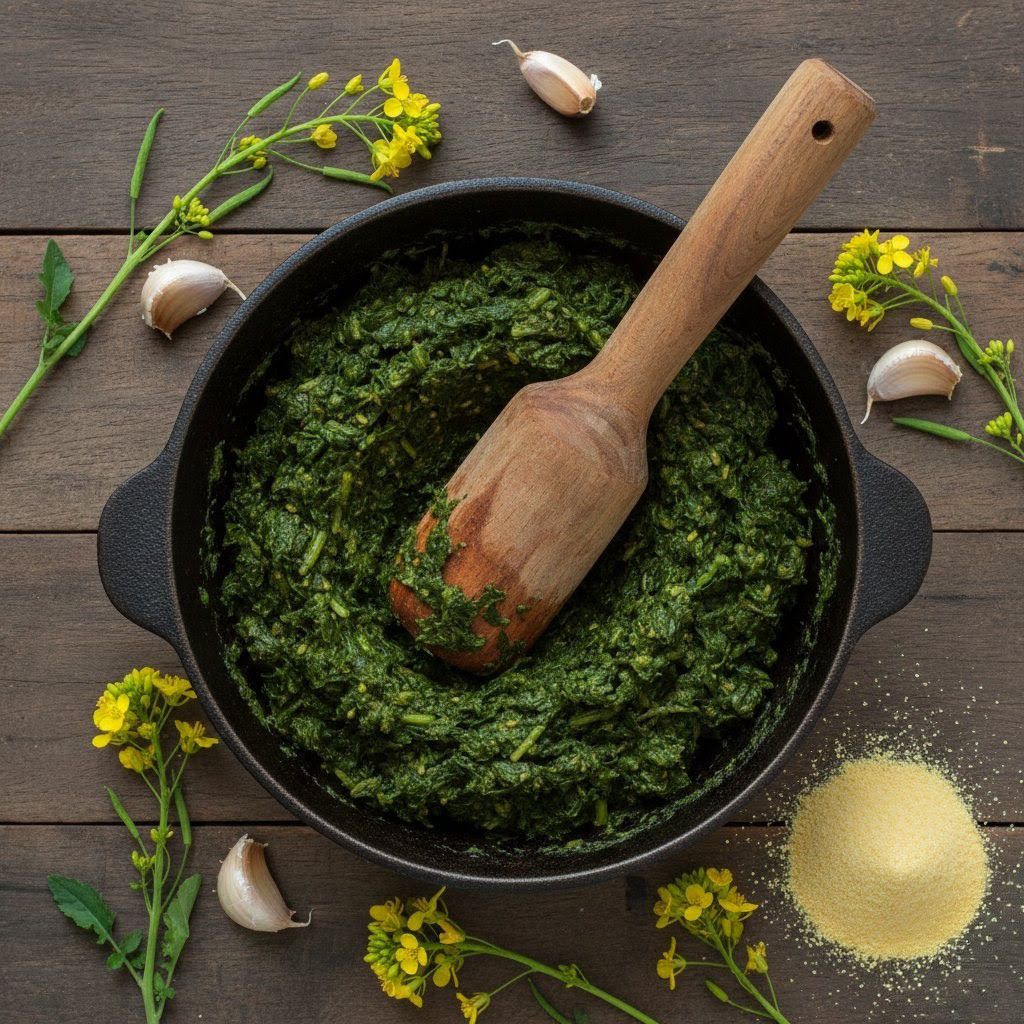
In our home, a meal was never truly finished until the Hari Chutney was placed on the table. I remember my mother standing in the kitchen, the air filling with the sharp, cooling scent of fresh mint. While many modern kitchens rely on high-speed blenders, she remained loyal to her stone Sil-Batta (grinding stone).

She believed that electric blades “burned” the delicate oils of the herbs, while the slow, shearing action of the stone preserved their soul and vibrant emerald hue. “A chutney should taste like the earth it came from,” she would say. She viewed this condiment as more than just a dip; it was a “Parasocial Companion” that bridged every flavor on the plate from spicy kebabs to buttery parathas.

Today, at The Pinch of Masala, we are documenting her method of “Minimalist Precision,” celebrating the “Quiet Luxury” of a condiment made with absolute “Ingredient Integrity”.

The “Digital Anthropologist” Technical Secrets

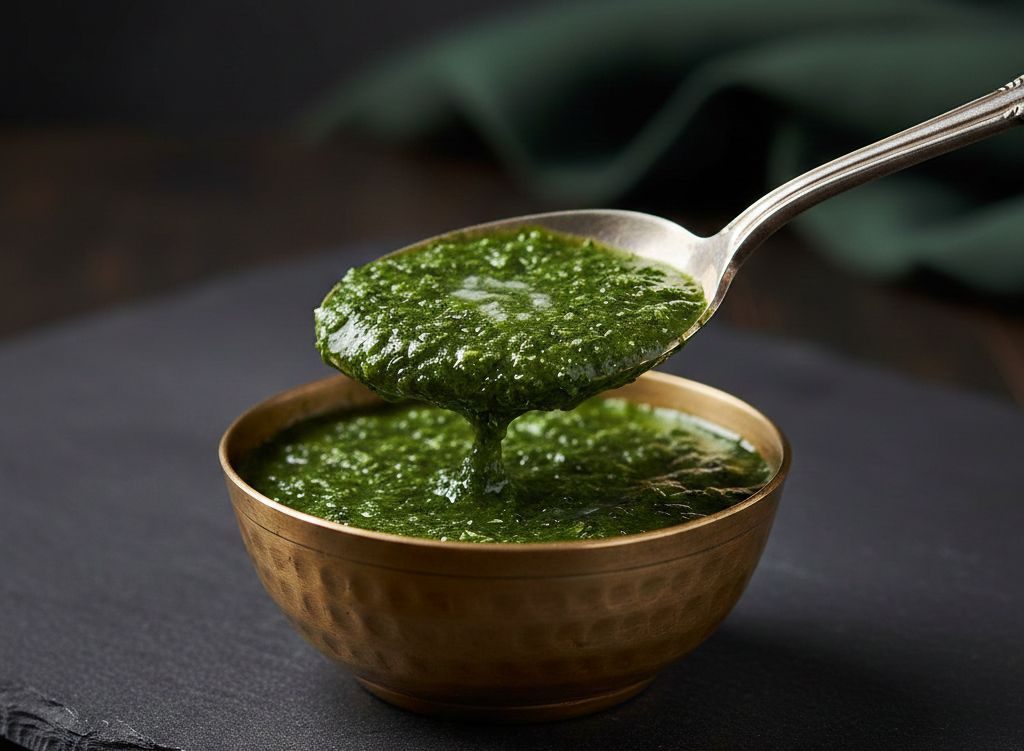
To ensure your chutney stays a brilliant, restaurant-style emerald green rather than turning a muddy brown, you must follow my mother’s two non-negotiable rules:

The “Citrus Guard” Rule: The biggest enemy of fresh greens is oxidation. My mother never added salt until the very end. Instead, she would grind the herbs with Lemon Juice or a small piece of Dry Mango (Amchur). The acid acts as a shield, protecting the chlorophyll from turning dark when exposed to air.

The Ice-Cube Friction: If you must use a blender, add one or two ice cubes instead of plain water. High-speed blades generate heat, which “cooks” the herbs and dulls their color. The ice keeps the temperature low, ensuring the chutney remains as vibrant as the day it was picked.

The Recipe Card
Prep time: 10 mins | Cook time: 0 mins | Servings: 1 small jar
Diet: Vegan, Gluten-Free, Keto-Friendly | Cuisine: Indian Heritage

Ingredients:

2 cups Fresh Coriander (Dhaniya): Including the tender stems for maximum fiber.

1 cup Fresh Mint (Pudina): Leaves only (stems can be bitter).

The Aromatics: 2 Green Chillies (slit), 1 inch Ginger, and 3 cloves of Garlic.
The Sour Agent: 1 tbsp Lemon Juice or a small marble-sized ball of Tamarind.

The Crunch: 1 tbsp Roasted Peanuts or Roasted Gram (Dalia)—this provides a “velvet” texture and prevents the water from separating.

Spices: 1 tsp Cumin seeds (Jeera), ½ tsp Black Salt (Kala Namak) for umami, and regular salt to taste.

Instructions:

The Cleanse: Wash the coriander and mint 3-4 times in cold water to remove all grit.

The Prep: Roughly chop the coriander, including those nutrient-dense stems.

The Blend: Add the peanuts, ginger, garlic, chillies, and cumin seeds to the blender first. Pulse into a coarse paste.
The Greens: Add the coriander and mint along with the lemon juice and one ice cube.

The Pulse: Use the Pulse mode in short bursts. Do not over-process into a thin liquid. We are looking for a slightly textured, artisanal consistency.[3]
Final Seasoning: Stir in the salt and black salt only after you have finished blending.

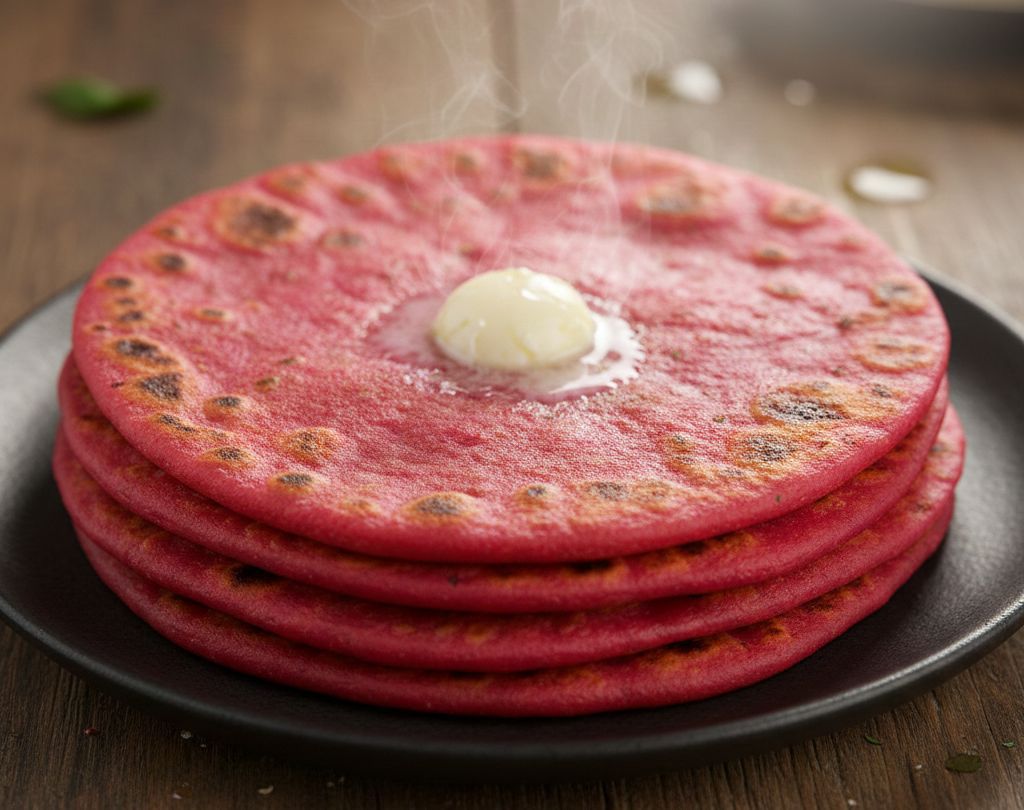
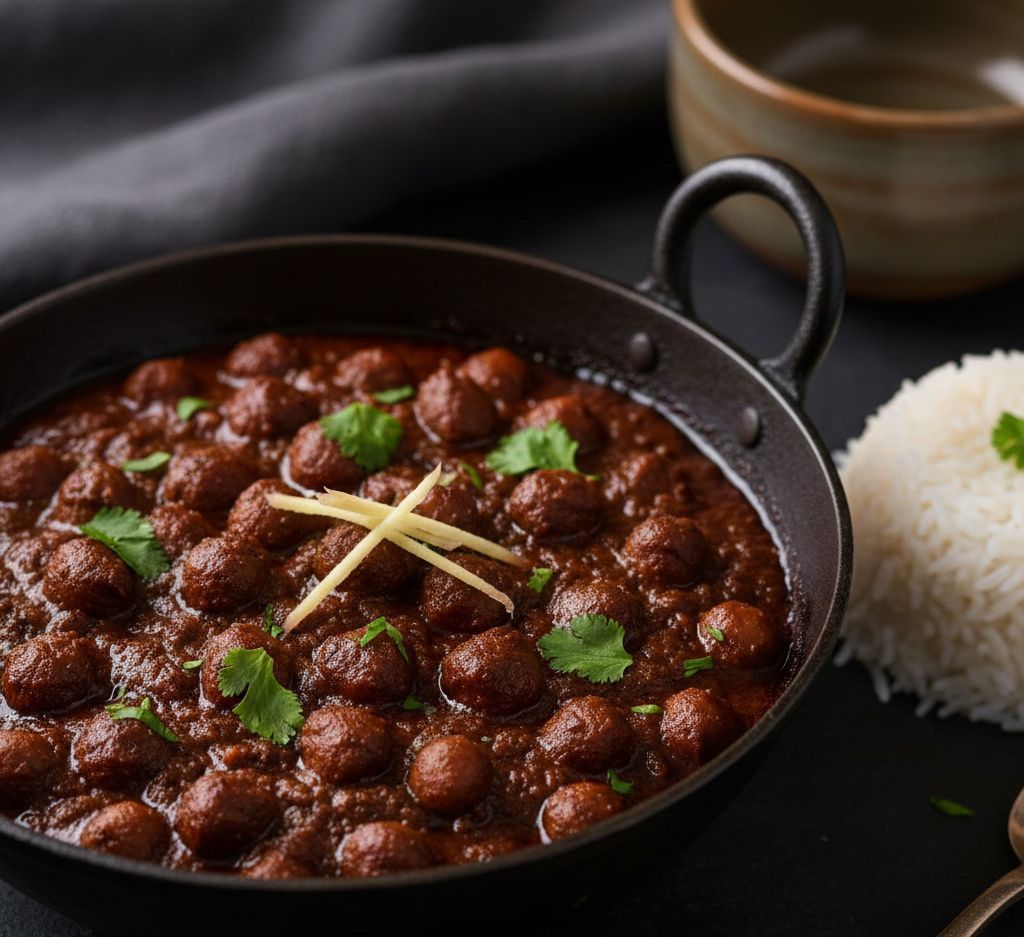
Serve: This chutney is the perfect accompaniment for Beetroot Parathas, Chicken Tikka, or even a simple Dal-Chawal.
The “Pinch of Thrift” Tip (Zero Waste)
The Stalk Power: In the 2026 “Use-Up” economy, we value every part of the plant.[1] Do not discard the thicker coriander stems! While they are too fibrous for a smooth chutney, they are packed with more flavor and nutrients than the leaves.[2] Finely chop them and add them to your Paratha dough or Vegetable Soup for a concentrated hit of herbal aroma and “Fibremaxxing” benefits.

Breakfast

My Mother’s Pink Ritual: The Story of Our Favorite Winter Beetroot Paratha

In our home, the arrival of winter was announced by my mother’s pink-stained palms. I remember her sitting in the morning light, a bowl of deep-red beetroots before her. To her, Beetroot Paratha wasn’t just a “healthy alternative”; it was a visual celebration of the season.
She treated the beetroot with a level of precision that felt almost scientific. She believed that the vibrancy of the paratha was a direct reflection of the cook’s patience. “If the color fades, the spirit of the root is gone,” she would say. She taught me that the secret to a royal beetroot paratha lay in the “Quiet Luxury” of a dough that was as smooth as silk and as bright as a winter sunset.
Today, at The Pinch of Masala, we are documenting her technique for a 2026 audience that craves “Ingredient Integrity” and the “Fibremaxxing” power of whole-plant eating.

The primary struggle with beetroot paratha is managing the moisture and the “earthy” raw smell. To master the “Vibrant Pink,” follow my mother’s three non-negotiable rules:

The “Brief Blanch” Rule: To remove the raw, pungent flavor that often puts children off, you must cook the beetroot briefly. My mother would sauté or steam the grated beetroot for just 2 to 3 minutes. Be careful: if you cook it longer than 8–10 minutes, the vibrant red color begins to suffer.

The Mixed-Dough Mastery: While some prefer stuffing, my mother always used the Mixed Dough method, kneading the beetroot puree directly into the wheat flour. This ensures the color is perfectly even and makes it much easier for novice cooks to avoid the hassle of leaking stuffing.

The “Thick Roll” Secret: In 2026, we value “Technical Excellence”. My mother always rolled her parathas slightly thicker than a standard chapati. If you roll them too thin, the beetroot fibers lose their moisture on the tawa, and the paratha will turn hard instead of staying soft and pliable.

Prep time: 15 mins | Resting time: 30 mins | Cook time: 20 mins | Servings: 6 parathas
Diet: Vegan, High-Fiber | Cuisine: North Indian Heritage

Ingredients:

1.5 cups Whole Wheat Flour (Atta): Sifted for a smooth dough.

1 cup Beetroot Puree: Prepared from grated and lightly steamed beets.

The Aromatics: 1 tsp ginger paste, 1 finely chopped green chili.

Spices: 1 tsp Cumin seeds (Jeera), ½ tsp Ajwain (Carom seeds), ½ tsp Garam Masala, and ½ tsp Amchur (Dry Mango Powder).

Fat: Ghee or oil for roasting.

Instructions:

The Prep: Grate your fresh, juicy beetroot grating it first speeds up the cooking process significantly.

The Puree: Sauté or steam the grated beetroot with ginger and chili for just 2–3 minutes until tender. Cool and blend into a smooth paste without adding any extra water.

The Mix: In a large bowl, combine flour, spices, and the vibrant beetroot puree.
The Knead: Knead into a smooth, soft, non-sticky dough. If the dough feels too sticky, add a little extra flour.

The Rest: Cover with a damp cloth and let the dough rest for at least 15–30 minutes to allow the gluten to relax.

Rolling: Divide into balls. Dust with flour and roll into discs that are slightly thicker than a chapati.

The Roast: Place on a hot tawa. When bubbles appear, flip it. Apply ghee or oil and press gently with a spatula to help it puff.

Serve: Cook until golden-brown spots appear. Serve hot with fresh yogurt, raita, or a spicy pickle.

The Nitre-Boost: Beetroots are a superfood rich in nitrates, which research suggests can help regulate blood pressure and improve heart health. By using my mother’s “Brief Blanch” method, you preserve these heat-sensitive antioxidants while enjoying a delicious, fiber-rich meal.

Breakfast

Authentic Methi Paratha Recipe: How to Make Soft Fenugreek Flatbread

In our house, the arrival of winter was signaled by a very specific aroma: the sharp, herbal scent of fresh fenugreek leaves being chopped on a wooden board. I remember my mother sitting near the window every January morning, a massive pile of Methi (fenugreek) in front of her. She didn’t just pluck the leaves; she performed a “leaf-picking ritual,” separating the tender heart from the fibrous stalks with the focus of a scientist.
“The bitterness is where the health lives,” she would say, “but the softness is where the love is.” She taught me that a royal Methi Paratha wasn’t just about mixing leaves into flour; it was about the “Quiet Luxury” of a dough that felt like silk and tasted like a winter morning. Watching her knead the emerald-flecked dough was a masterclass in patience she believed that the dough needed to “breathe” before it was ready for the fire.
Today, at The Pinch of Masala, we are documenting this heritage breakfast for a 2026 audience that values “Ingredient Integrity” and the digestive power of “Fibremaxxing”.

The primary challenge with methi paratha is either a lingering harsh bitterness or a dry, cardboard-like texture. To master the “Eternal Softness,” follow my mother’s three non-negotiable rules:
The “Curd Catalyst”: This is the ultimate “Digital Anthropologist” secret. My mother never used plain water to knead the dough. She used fresh curd (yogurt) or even slightly sour buttermilk. The lactic acid in the curd doesn’t just tenderize the gluten for a melt-in-the-mouth texture; it chemically neutralizes the sharp bitterness of the fenugreek without removing its health benefits.
The “Fibremaxxing” Stem-Chop: In 2026, we don’t discard nutrients. While most recipes tell you to throw away the stems, my mother insisted on using the tender, thin stalks. She would mince them so finely that they vanished into the dough, providing a concentrated hit of fiber and a deeper aroma that leaves alone cannot provide.
The 30-Minute Rest: Flour needs time to hydrate. My mother would cover the dough with a damp muslin cloth and let it rest for exactly 30 minutes. This “Relaxation Period” ensures the parathas stay soft for hours, making them the perfect “Parasocial Companion” for tiffin boxes or long journeys.

Prep time: 20 mins | Resting time: 30 mins | Cook time: 20 mins | Servings: 4
Diet: Vegetarian, High-Fiber | Cuisine: North Indian Heritage

Ingredients:

2 cups Whole Wheat Flour (Atta): Sifted for a smooth dough.

1.5 cups Fresh Methi Leaves: Finely chopped (include tender stems for extra fiber).

The “Softness” Agent: ¼ cup Fresh Curd (Yogurt) or Buttermilk.

The Aromatics: 1 tbsp Ginger-Garlic paste, 2 Green Chillies (finely chopped).

Spices: 1 tsp Carom seeds (Ajwain—essential for digestion), ½ tsp Turmeric, 1 tsp Red Chili powder, and Salt to taste.

Fat: 2 tbsp Oil for the dough + Ghee for roasting.

Instructions:

The Cleanse: Wash the methi leaves 3-4 times to remove all grit. Shake off excess water and chop them as finely as possible.

The Mix: In a large bowl, combine the flour, chopped methi, ginger-garlic paste, chillies, and all dry spices. Mix well with your fingers to ensure the leaves are coated in flour.

The Knead: Add the curd and 2 tsp oil. Gradually add warm water and knead into a soft, pliable, non-sticky dough.

The Rest: Cover with a damp cloth and let the dough rest for 30 minutes.

Shape: Take a medium-sized ball of dough. Roll it into a round circle (or a triangle for a layered heritage look).

The Roast: Heat a tawa on medium-high. Place the paratha and cook for 30 seconds until tiny bubbles appear. Flip and apply a teaspoon of ghee.

The Gold Finish: Press down with a spatula until golden-brown “beauty spots” appear on both sides and the edges are slightly crisp.

Serve: Stack them to keep them soft. Serve piping hot with a blob of white butter, chilled curd, and a tangy mango pickle.

The Whey Secret: In the 2026 “Use-Up” economy, every drop of nutrition counts. If you are straining your own yogurt to make hung curd for another dish (like Shrikhand), use the leftover Whey (the liquid) to knead this methi dough. It is packed with protein and minerals, and it makes the parathas even softer than plain water.

Lunch & Dinner

Authentic Punjabi Sarson Da Saag & Makki Ki Roti: Traditional Winter Recipe

In a Punjabi home, winter doesn’t arrive with the first frost; it arrives with the first bunch of Sarson (mustard greens) on the kitchen counter. I remember my mother spending hours in the morning fog, meticulously cleaning the greens leaf by leaf. She called it the “Season’s Meditation.”
While the world now uses high-speed blenders, she remained loyal to her Ghotna the heavy wooden masher. She believed that a blender “killed the soul” of the greens, whereas the manual mash preserved the coarse, creamy texture that defines a true saag. To her, Makki Ki Roti (cornmeal flatbread) was the essential partner, a “Parasocial Companion” that required the warmth of her palms to hold its shape. Watching her hand-pat the gluten-free dough into perfect circles was a masterclass in “Quiet Luxury” it was slow, it was technical, and it was deeply honest.
Today, at The Pinch of Masala, we are documenting this winter ritual for a 2026 audience that craves “Ingredient Integrity” and the rugged health benefits of “Fibremaxxing”.

The barrier to a perfect saag is often a bitter taste or a watery texture. To master this Punjabi masterpiece, follow my mother’s three non-negotiable rules:
The “Trinity of Greens” Ratio: In 2026, we prioritize balance. My mother used a strict 2:1:1 ratio 2 parts Sarson (mustard) for pungency, 1 part Palak (spinach) for creaminess, and 1 part Bathua (chenopodium) for an earthy depth. This prevents the mustard from becoming overwhelmingly bitter.
The “Allan” Binder: This is the ultimate “Digital Anthropologist” secret. Once the greens are mashed, you must add Makki ka Atta (maize flour) while the saag is simmering. This flour acts as a “binder” (traditionally called Allan), absorbing excess moisture and transforming a loose mash into a velvety, cohesive gravy.
The Hot Water Knead: Makki ka atta is notoriously brittle. To make soft rotis that don’t crack at the edges, you must use boiling hot water to knead the dough. The heat partially gelatinizes the starch, making the dough pliable enough to shape by hand.

Prep time: 30 mins | Cook time: 60 mins | Servings: 4
Diet: Vegetarian, Gluten-Free (Roti) | Cuisine: Punjabi Heritage

Ingredients:

For the Saag:

1 kg Sarson (Mustard Greens): Cleaned, stems included (peel the tough outer skin of thick stems).

250g Palak (Spinach) & 250g Bathua (Chenopodium): Cleaned and sorted.

The Aromatics: 2-inch Ginger (grated), 10 cloves Garlic (crushed), 4-5 Green Chillies (chopped).

The Allan: 3 tbsp Makki ka Atta (Maize Flour).

The Tadka: 3 tbsp Ghee, 2 Dry Red Chillies, 1 Onion (finely chopped), 1 Tomato (optional).

The Finish: A huge dollop of white butter (Makhan).

For the Makki Ki Roti:

2 cups Makki ka Atta: Fine ground yellow cornmeal.

½ cup Radish (Mooli): Grated (for moisture and flavor).

1 tsp Ajwain (Carom seeds): For digestion.

Liquid: Boiling hot water as needed.

Instructions:

The Boil: Add all the greens, ginger, half the garlic, and green chillies to a pressure cooker with 1 cup water and salt. Cook for 2 whistles, then simmer on low for 20 minutes.

The Ghotna Ritual: Once cooked, drain the excess water (save it!). Use a wooden masher (ghotna) or a stick blender (on pulse mode) to mash the greens into a coarse, thick paste. Do not make a smooth puree.

Thicken: Return to the heat. Slowly sprinkle in the 3 tbsp of cornmeal (Allan) while stirring constantly to avoid lumps. Simmer for 10 minutes until the saag looks creamy and glossy.

The Tadka: Heat ghee in a pan. Add dry chillies, remaining garlic, and onions. Sauté until deep golden brown. Add tomatoes and spices. Pour this into the saag and mix well.

The Roti Dough: Mix cornmeal, salt, ajwain, and grated radish. Gradually add boiling water and mix with a spoon. When cool enough to touch, knead vigorously with the heel of your hand for 8 minutes until smooth.

Shape & Roast: Take a ball of dough. Hand-pat it between your palms or roll between two parchment sheets. Roast on a medium-hot tawa with ghee until both sides have golden-brown blisters.

Serve: Serve the saag piping hot, topped with white butter and a piece of jaggery (gud) on the side, with the crispy rotis.

The Saag Water: In the 2026 “Use-Up” economy, we value every nutrient. Never throw away the water drained from the boiled greens! It is packed with iron and minerals. Use this “Green Gold” to knead your Makki ki Roti dough instead of plain water—it adds a subtle earthy flavor and ensures no vitamins are wasted.

Lunch & Dinner

Authentic Black Chana Masala: Traditional Kala Chana Recipe

In our home, Sunday nights had a specific, earthy rhythm. While the world outside prepared for the work week, my mother was busy in the kitchen, preparing what she called “the fuel for the soul.” I remember the sound of the pressure cooker whistle a sharp contrast to the quiet evening signaling that the Black Chana (Kala Chana) was nearly ready.
She treated these small, dark legumes with a level of respect usually reserved for expensive meats. “The darker the grain, the deeper the strength,” she would say. She believed that black chickpeas were a “Parasocial Companion” that looked after our health when we were too busy to notice. My mother taught me that a royal Kala Chana Masala wasn’t just a side dish; it was a nutrient-dense masterpiece that bridged the gap between ancient Ayurvedic wisdom and the practical needs of a modern family.
Today, at The Pinch of Masala, we are moving away from the thin, watery curries of the past and returning to the “Quiet Luxury” of a thick, tea-infused masala a method designed for a world that craves both “Technical Excellence” and “Fibremaxxing”.

The barrier to a perfect black chana dish is often the texture getting them soft enough to melt on the palate while keeping them distinct and firm. To master the “Mahogany Masala,” follow my mother’s three non-negotiable rules:
The “Black Tea” Infusion: This is the ultimate “Digital Anthropologist” secret. To achieve that dark, rich mahogany color found in the best street-side Dhabas, my mother would drop a simple tea bag or a muslin cloth filled with tea leaves into the pressure cooker. The tannins in the tea don’t just add color; they provide a complex, smoky depth that highlights the earthy flavor of the chana.
The “Double Soak” Ritual: In 2026, we prioritize “Ingredient Integrity”. Most people soak chana for 2-3 hours; my mother insisted on a full 8-hour soak, followed by a thorough rinse. This reduces phytic acid, making the legumes much easier to digest and preventing the bloating often associated with high-fiber meals.
The “Mash-and-Melt” Thickener: To create a thick, velvety gravy without using cream or cashew paste, my mother would take a half-cup of the boiled chickpeas, mash them into a smooth paste, and stir them back into the simmering masala. This creates a natural, starchy body that allows the gravy to hug the whole chickpeas perfectly.

Prep time: 10 mins | Soaking: 8 hours | Cook time: 45 mins | Servings: 4
Diet: Vegan, Gluten-Free, High-Protein | Cuisine: Punjabi Heritage

Ingredients:

1 cup Kala Chana (Black Chickpeas): Picked and washed.

The Infusion: 1 Black Tea bag or 1 tsp tea leaves in a cloth.

The Masala Base: 2 Large Onions (finely chopped), 3 Medium Tomatoes (pureed), and 1.5 tbsp Ginger-Garlic paste.

Fat: 3 tbsp Ghee or Mustard Oil (for that authentic Dhaba kick).

The Bloom: 1 tsp Cumin seeds, 1 Bay leaf, 2 Green Cardamoms, and 1 stick Cinnamon.

Powder Spices: 1 tsp Red Chili powder, ½ tsp Turmeric, 1 tsp Coriander powder, and 1 tsp Aamchur (Dry Mango Powder) for the essential tang.

The Finish: 1 tsp Kasuri Methi and fresh Cilantro.

Instructions:

1. The Pressure: Add soaked chana, the tea bag, salt, and 3 cups of water to a cooker. Pressure cook for 5-6 whistles until the chana is soft enough to mash between your fingers. Remove the tea bag.

2. The Tempering: Heat oil in a heavy pan. Add the whole spices and let them sizzle until the aroma fills the room.

3. The Slow Bhuna: Add onions and sauté on medium-low for 10 minutes until deep golden brown. Stir in the ginger-garlic paste and cook until the raw smell disappears.

4. The Union: Add tomato puree and all dry spices. Cook until the oil begins to leave the sides of the masala.

5. The Secret Bind: Add the mashed chickpeas (Step 3 of Secrets) and the whole boiled chickpeas along with their dark cooking water.

6. The Simmer: Cover and cook on low heat for 10-15 minutes. The gravy will thicken into a rich, dark velvet consistency.

7. Serve: Turn off the heat. Sprinkle Kasuri Methi and cilantro. Serve hot with steamed Jeera Rice or puffy Pooris.

The Chana Stock: In the 2026 “Use-Up” economy, we value “Concentrated Nutrition”. Never throw away the dark water left after boiling the chickpeas! If you have extra, use it as a base for a Vegetable Soup or to knead your Chapati dough. It is packed with minerals and adds an incredible earthy flavor to anything it touches.