Dessert

Dry Fruit Halwa – The Royal Sweet of Diwali

A Bite of Luxury and Love

When I think of Diwali sweets, I think of color  golden diyas, crimson rangoli, and the deep amber shine of Dry Fruit Halwa.

In my childhood home, this halwa was a once-a-year indulgence. My mother would prepare it in her heavy brass kadai on the day before Diwali, while the kitchen glistened with ghee and the air carried the fragrance of roasted cashews. I remember her saying, “Halwa is like gold  it shines only when stirred with patience.”

We’d all wait by the stove, watching the mixture turn from milky white to a translucent golden sheet. When it was finally spread on a greased tray and sprinkled with pistachios, it looked like a pane of edible glass. The first bite was always chewy, nutty, and sweet with just a touch of ghee a flavor so rich, it felt like Diwali itself.

Even now, when I make it, that memory comes alive  my mother’s bangles jingling as she stirred, my father sneaking a warm piece from the tray, and the sound of laughter echoing through our glowing home.

About This Recipe

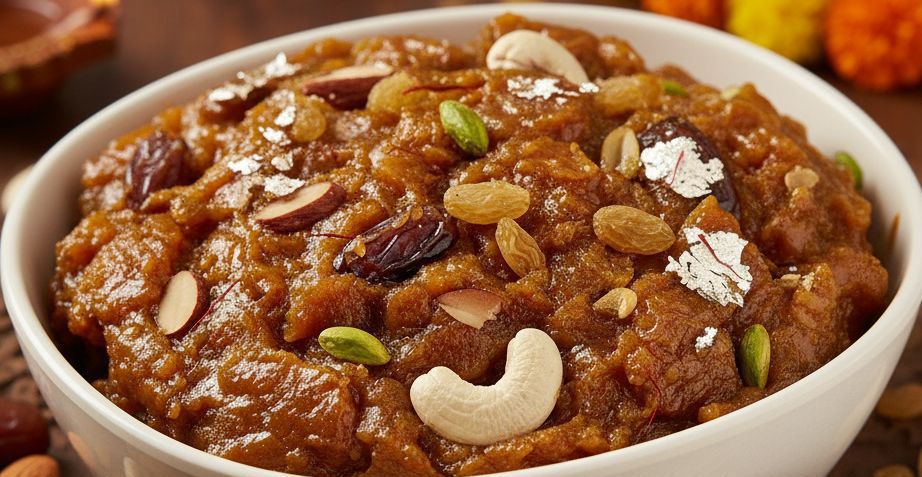
Dry Fruit Halwa, also known as Karachi Halwa or Bombay Halwa, is a traditional Indian sweet famous for its chewy, translucent texture and nutty richness. It’s made from cornflour (or arrowroot), ghee, sugar, and dry fruits, resulting in a glossy halwa that looks as stunning as it tastes.

Unlike milk-based sweets, this halwa stays fresh longer, making it ideal for festive gifting and travel-friendly treats.

Recipe Details

Servings: 10–12 pieces
Prep Time: 10 minutes
Cook Time: 25 minutes
Setting Time: 2 hours

Ingredients

For the Halwa

½ cup cornflour (cornstarch)

2 cups water (for slurry)

1½ cups sugar

¾ cup water (for syrup)

¼ cup ghee (use more as needed)

¼ teaspoon cardamom powder

1 pinch saffron strands (optional, soaked in 1 tbsp warm water)

2–3 drops natural food color (orange or red, optional)


For the Dry Fruits

2 tablespoons cashews, chopped

2 tablespoons almonds, slivered

2 tablespoons pistachios, chopped
(You can also add melon seeds or raisins for variation.)

Step-by-Step Instructions

1. Prepare the Cornflour Slurry

In a bowl, mix cornflour with 2 cups of water until smooth and lump-free. Set aside.
(Tip: Stir just before using as the mixture tends to settle at the bottom.)


2. Make the Sugar Syrup

In a heavy-bottomed kadai, add sugar and ¾ cup water.
Stir over medium heat until the sugar dissolves completely and forms a clear syrup.
Add the saffron water and a few drops of food color, if desired.


3. Cook the Halwa Mixture

Lower the heat and gradually pour in the cornflour slurry, stirring continuously to prevent lumps.
As the mixture begins to thicken, add 1 tablespoon of ghee at a time.
Keep stirring patiently the mixture will turn glossy and start to leave the sides of the pan.
This process takes around 15–20 minutes.

(Tip: The halwa should look shiny, translucent, and stretchy that’s when you know it’s ready!)


4. Add Nuts and Flavoring

Mix in the chopped cashews, almonds, and pistachios along with cardamom powder.
Stir well and cook for another 2–3 minutes until everything is combined evenly.


5. Set and Cool

Grease a steel or glass tray with ghee.
Pour the halwa mixture into it and spread evenly with a spatula.
Smooth the top, sprinkle extra nuts, and let it rest for 2–3 hours at room temperature to set.

Once firm, cut into neat squares or diamond shapes with a sharp, greased knife.

Expert Tips for Perfect Halwa

Stir Constantly: Halwa thickens quickly — keep stirring to avoid lumps and ensure even cooking.

Ghee Gradually: Add ghee in intervals; this helps the halwa achieve its glossy finish and prevents sticking.

Texture Check: When the halwa turns transparent and pulls away from the sides, it’s perfectly cooked.

Nuts Variation: You can use roasted cashews, walnuts, or dried figs for a richer version.

Flavor Twist: Try adding rose water or a drop of kewra essence for a royal aroma.

Storage: Stays fresh for up to 10 days at room temperature, or longer when refrigerated.

Serving & Gifting Ideas

Pack square pieces of Dry Fruit Halwa in small butter-paper wrappers or festive boxes for gifting.

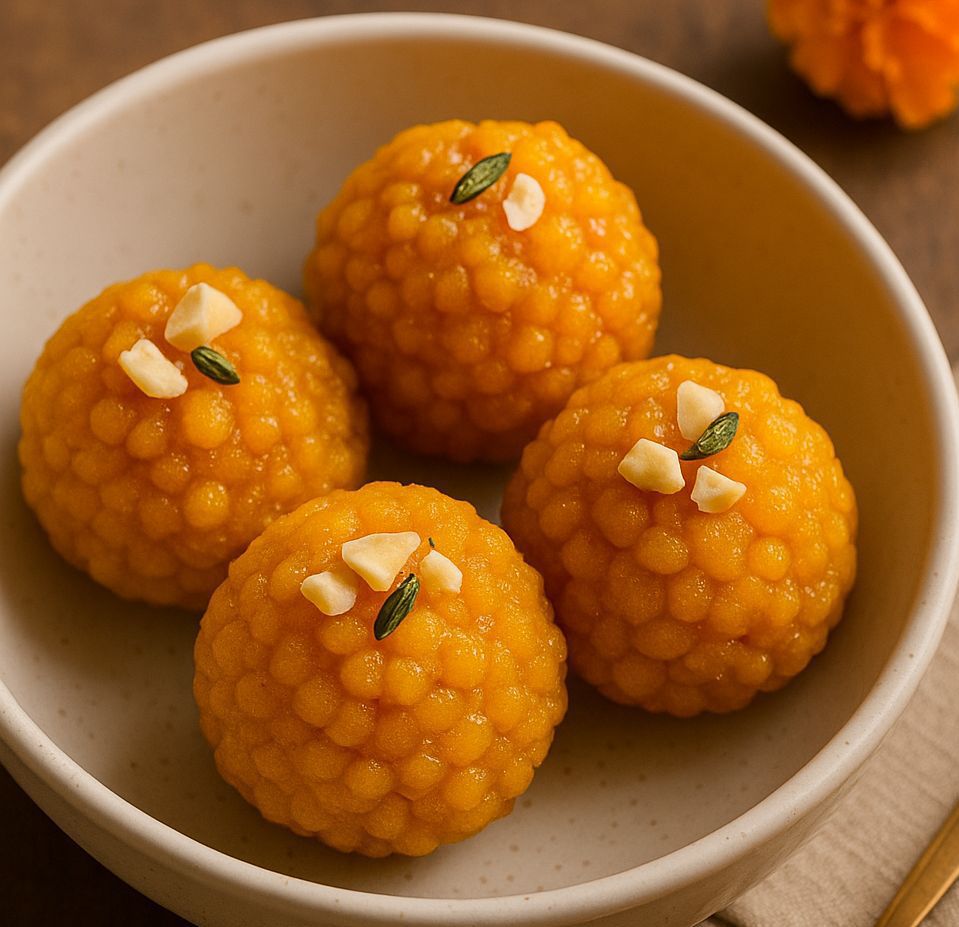
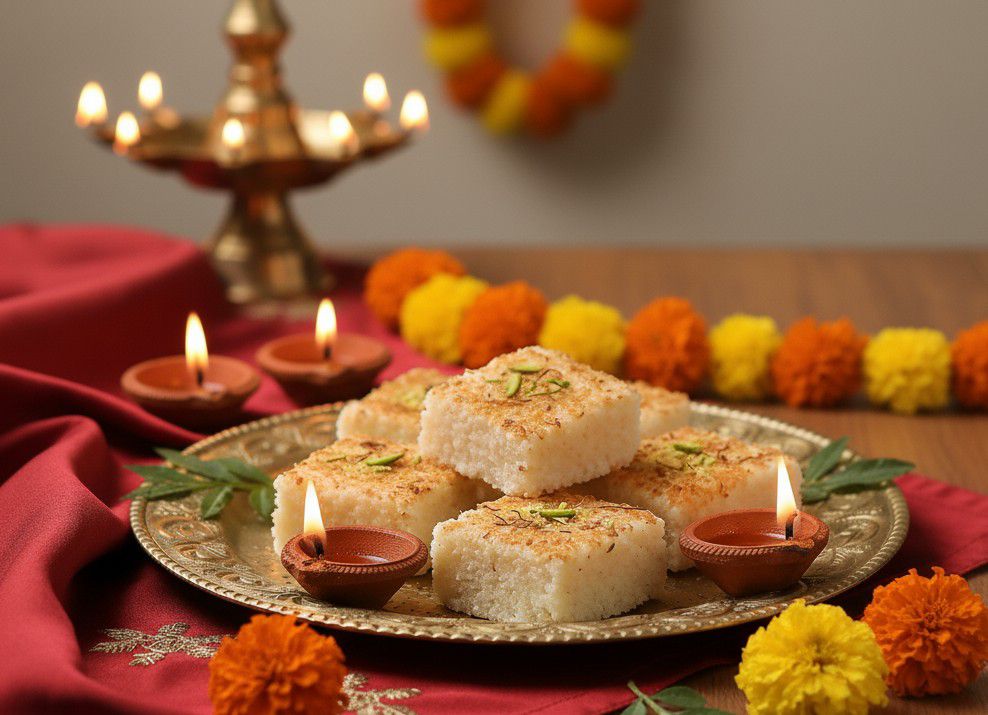
Serve it alongside Boondi Laddoo and Coconut Burfi for a complete Diwali dessert platter.

Warm slightly before serving to enjoy its soft, melt-in-mouth texture.

Closing Note

Making Dry Fruit Halwa is like watching alchemy in your kitchen a simple mixture of cornflour, sugar, and ghee transforms into a jewel-toned delicacy.
Each glossy piece holds the sweetness of memories, the crunch of celebration, and the shimmer of Diwali lights.

Every time I prepare it, I’m reminded of my mother’s patience, of the golden glow of diyas, and of how festival sweets are more than recipes  they’re traditions passed down through love and time.

So this Diwali, take an hour to make this royal treat yourself.
As you stir, breathe in the aroma, feel the ghee coat your spoon, and remember — the real sweetness of a festival lies not in the sugar, but in the hands that make it. ✨

Dessert

Boondi Laddoo – A Sweet Circle of Celebration and Nostalgia

Sweet Memories of Diwali Evenings

If there’s one sweet that embodies the joy, chaos, and warmth of Indian festivals, it’s the Boondi Laddoo.
For me, its story begins in the heart of our family kitchen where laughter mingled with the sound of bubbling sugar syrup and the rhythmic tap-tap of the ladle as tiny golden boondis rained into hot ghee.

Every Diwali, my grandmother would take charge of the sweet-making marathon. The house turned into a miniature sweet factory trays lined with ladoos, besan aroma floating through the air, and me stealing half-made boondis when she wasn’t looking.
When she finally rolled the warm boondis into perfect spheres, her hands worked like art precise, practiced, full of love.

The laddoos glistened like marigold orbs, fragrant with cardamom and saffron, and no store-bought sweet could ever match their warmth. For us, Boondi Laddoo wasn’t just dessert; it was the taste of family, devotion, and celebration.

About This Recipe

Boondi Laddoo (also called Motichoor Ladoo when made with finer boondi) is one of India’s most loved festive sweets.
It’s made by frying tiny gram flour pearls (boondis), soaking them in aromatic sugar syrup, and shaping them into soft, golden laddoos.

Every region adds its twist from the coarse-textured Temple-style Laddoo of South India to the delicate Motichoor version of North India — but the essence remains the same: warmth, sweetness, and tradition in every bite.

Recipe Details

Servings: 12–15 laddoos
Prep Time: 15 minutes
Cook Time: 30 minutes
Setting Time: 20 minutes

Ingredients

For the Boondi

1 cup gram flour (besan), sifted

½ cup water (approx., to make smooth batter)

A pinch of baking soda (optional, for puffier boondi)

Ghee or oil, for deep frying


For the Sugar Syrup

1 cup sugar

½ cup water

3–4 cardamom pods, crushed

5–6 saffron strands (optional, for festive aroma and color)

1 teaspoon lemon juice (to prevent crystallization)


For Flavor and Garnish

1 tablespoon ghee

2 tablespoons chopped cashews and raisins (lightly fried in ghee)

1–2 drops orange or yellow food color (optional, for festive hue)

Step-by-Step Instructions

1. Prepare the Batter

In a large bowl, sift gram flour and add water gradually.
Whisk until you get a smooth, lump-free batter with a flowing consistency neither too thick nor runny.
Add a pinch of baking soda and whisk once more.
(Tip: The consistency should be similar to pancake batter it should fall in droplets when poured through a slotted spoon.)

2. Fry the Boondi

Heat ghee or oil in a deep frying pan over medium heat.
Hold a perforated ladle (boondi jhara) over the pan.
Pour a ladleful of batter over it and gently tap the edge so small droplets fall evenly into the oil.

Fry the boondis for 30–40 seconds, until they puff up slightly but remain soft not crisp.
Remove with another slotted spoon and drain on paper towels.
Repeat for remaining batter.
(Tip: Do not over-fry we need soft boondis so they can absorb the syrup later.)

3. Prepare the Sugar Syrup

In another pan, combine sugar and water.
Boil until you reach a one-thread consistency when a drop pressed between your fingers forms a thin thread.
Add cardamom, saffron, and lemon juice.
Turn off the heat once syrup slightly thickens.

4. Combine Boondi and Syrup

Add the fried boondi directly into the warm syrup.
Mix gently until all boondis are well coated.
Add fried cashews and raisins.
Cover and let the mixture rest for 10–15 minutes so the boondis absorb the syrup.


5. Shape the Laddoos

Once the mixture cools slightly (it should be warm, not hot), grease your palms with ghee.
Take a handful of mixture and gently press it into a round ball.
If the mixture feels too loose, cook it for 2–3 more minutes to thicken before shaping.

Place the laddoos on a plate and allow them to set completely.

Expert Tips for Perfect Laddoos

Consistency of batter: The key to perfect boondi lies in the batter smooth, free-flowing, and lump-free.

Temperature of oil: Medium heat works best. Too hot, and the boondis will become hard; too cold, and they’ll absorb oil.

Syrup stage: One-thread consistency is ideal. Over-thick syrup will make the boondis dry; too thin will make laddoos sticky.

Softness factor: Don’t fry boondis too long soft, porous ones make melt-in-mouth laddoos.

Flavor magic: A pinch of cardamom, ghee-fried cashews, and a few saffron strands bring divine aroma especially when offered as prasad.

Storage: Store laddoos in an airtight box at room temperature for up to a week.

Serving Suggestions

Offer warm Boondi Laddoos as prasad during Diwali, Ganesh Chaturthi, or weddings.

Pair with Coconut Burfi or Rava Ladoo for a perfect festive sweet platter.

Wrap them in decorative foil or paper cups for gifting.

Closing Note

The process of making Boondi Laddoo is like crafting joy slow, rhythmic, and full of meaning.
Each tiny boondi represents a drop of sweetness, and when bound together, they form something whole much like family during festivals.

When I make laddoos now, I remember my grandmother’s voice  “Keep your patience, beta. Syrup listens to love, not hurry.”
And truly, when stirred with love, these humble gram flour pearls turn into golden spheres of happiness.

So this Diwali, light your diyas, let the aroma of cardamom fill your kitchen, and roll a few laddoos with your own hands.
Because some sweetness is best when made  and shared from the heart. ✨

Dessert

Coconut Burfi – A Festive Sweet Full of Simplicity and Soul

Memories of Sweet Aroma and Shimmering Festivals

As a child, I always knew Diwali was near when the kitchen began to smell of roasted coconut and ghee.
Those evenings were magical diyas flickered in every corner, and the air was filled with the warm sweetness of Coconut Burfi cooking on the stove.

I’d sit beside my mother as she grated coconut with her old metal scraper, tiny curls of white piling up like snowflakes. She would roast it slowly in a heavy-bottomed kadai, the fragrance blending with the sound of bubbling sugar syrup. When the mixture turned glossy and thick, she’d spread it onto a greased plate, press it smooth, and let it cool.
The best part came next  she’d cut it into perfect diamonds with a buttered knife, and the first piece was always mine.

Even today, I make Coconut Burfi the same way she did  simple ingredients, patient stirring, and lots of love. It’s not just a sweet; it’s a tradition. Every bite takes me back to those golden Diwali evenings when family, laughter, and the aroma of coconut filled our home.

About This Recipe

Coconut Burfi (also called Nariyal Barfi in Hindi or Kobbari Mithai in Kannada) is a traditional Indian sweet made with freshly grated coconut, milk, sugar, and cardamom. Some variations use jaggery for an earthy sweetness, while others add a touch of ghee or khoya for richness.

It’s one of those sweets that’s easy to make, quick to set, and always satisfying perfect for festive offerings, gifting, or temple prasad.

Recipe Details

Servings: 10–12 pieces
Prep Time: 10 minutes
Cook Time: 25 minutes
Total Time: 35 minutes

Ingredients

2 cups freshly grated coconut (preferably from medium-aged coconut — not too tender or too dry)

1 cup milk (or ½ cup condensed milk for richer flavor)

1 cup sugar (or adjust to taste; substitute with ¾ cup jaggery for a traditional version)

1 tablespoon ghee

½ teaspoon cardamom powder

5–6 chopped cashews or almonds (optional, for garnish)


Instructions

1. Prepare the Coconut

Grate the coconut using a fine grater only the white portion (avoid the brown shell layer).
Measure 2 cups of grated coconut and keep aside.
(Tip: For extra softness, pulse the grated coconut once in a mixer without adding water.)


2. Start the Base

In a heavy-bottomed kadai or non-stick pan, heat ghee and add the grated coconut.
Roast gently on low flame for 3–4 minutes — just enough to release aroma, without browning.


3. Add Milk and Sugar

Pour in the milk and stir. When it comes to a gentle boil, add sugar (or grated jaggery if using).
Stir continuously until the sugar dissolves completely.
Cook this mixture on medium flame, stirring often, until it thickens and begins to leave the sides of the pan.


4. Flavor It

Add cardamom powder and mix well.
If using condensed milk, you can skip part of the sugar — the mixture will thicken faster.
Continue to stir until it reaches a soft, fudge-like consistency.

(To test: Drop a small portion on a plate it should firm up slightly when cooled, not sticky.)


5. Set the Burfi

Grease a steel or glass plate with ghee.
Pour the thickened mixture and spread evenly using a spatula.
Smooth the surface and sprinkle nuts if desired.
Let it rest for 10–15 minutes, then mark pieces with a greased knife.
Once fully cooled, cut into squares or diamonds and gently lift them out.

Expert Tips

Fresh Coconut Works Best: Always use freshly grated coconut for authentic taste. Frozen coconut works in a pinch just thaw it and squeeze out excess moisture before use.

Texture Control: Roast lightly for soft burfi or a bit longer for a chewy, halwa-like texture.

Jaggery vs Sugar: Jaggery gives a deep, earthy sweetness and slightly darker color, while sugar makes the burfi pure white and clean-flavored.

Avoid Overcooking: Once the mixture starts leaving the sides of the pan, remove immediately  overcooking makes the burfi dry and crumbly.

Shelf Life: Stays fresh for 3–4 days at room temperature, and up to a week refrigerated in an airtight container.

Serving Ideas

Serve Coconut Burfi as part of your Diwali thali with Besan Ladoo, Mysore Pak, and Chiroti.

Wrap individual pieces in butter paper for festive gifting.

Add a thin edible silver leaf (vark) for a traditional festive touch.

Serve warm with a drizzle of ghee for temple-style prasadam vibes.

Closing Note

Every Diwali, when I prepare Coconut Burfi, I still hear my mother’s words echoing  “Stir it patiently, and don’t rush the sweetness.”

It’s a humble sweet, but it carries generations of love in every bite  the laughter of cousins sneaking warm pieces from the tray, the sparkle of diyas, and the gentle glow of home.

So this festive season, skip the store-bought sweets and try this simple, soulful Coconut Burfi.
It takes just 30 minutes, yet the memory of its sweetness will last long after the lights of Diwali fade. 🌙✨

Dessert

Balushahi Recipe – Crisp & Flaky Indian Festive Sweet Delight

Introduction

Balushahi is a dessert that instantly transports me back to childhood Diwalis and family weddings. I remember the crunch of its sugar-glazed exterior and the soft, syrup-soaked interior with each bite. In many Indian households, recipes like Balushahi are heirlooms passed down through generations, evoking warm memories of grandmothers patiently frying these treats in ghee. Indeed, Balushahi holds a special place in celebrations – its appealing flakiness and rich taste make it an integral part of Diwali, Holi, weddings, and other festive occasions.

Often dubbed the “Indian doughnut” for its shape, Balushahi (known as Badusha in South India) is similar to a doughnut only in looks, but differs in texture and taste – it’s much denser, crispier, and richly infused with ghee and cardamom syrup. This traditional North Indian mithai (sweet) is usually prepared for auspicious events and even offered as prasad (sacred offering) in temples. From grand wedding dessert spreads to Diwali sweet boxes, Balushahi’s presence is a symbol of celebration and nostalgia. Its Mughal-era origins and enduring popularity across India speak to its timeless appeal. Get ready to learn how to make this flaky, golden delight at home, and bring a taste of festive nostalgia to your kitchen!

Ingredients

For the dough:

All-purpose flour (maida) – 2 cups (approximately 250 g)

Ghee (clarified butter) – 1/4 cup (60 g), in semi-solid state (soft but not melted)

Yogurt (curd) – 1/4 cup (60 g), chilled (helps yield a flaky texture)

Baking powder – 1/2 teaspoon

Baking soda – a pinch

Salt – a pinch (balances sweetness)

Cold water – 7 to 9 tablespoons, or as needed to form dough


For the sugar syrup:

Sugar – 1 cup (200 g)

Water – 1/2 cup (120 ml)

Green cardamom – 2 pods, crushed (or 1/2 teaspoon cardamom powder)

Saffron strands – a pinch (optional, for aroma and color)

Lemon juice – 1/2 teaspoon (a few drops, to prevent crystallization of syrup)


For frying & garnish:

Ghee or oil for deep-frying – about 2 cups (enough for ~2-inch depth in pan)

Nuts for garnish – 2 tablespoons chopped pistachios or almonds (optional)


(Makes about 12–15 Balushahi)

Step-by-Step Instructions

1. Cream the ghee and yogurt: In a mixing bowl, add the semi-solid ghee. Using a spoon or whisk, beat the ghee vigorously for a few minutes until it becomes light, smooth, and fluffy. The ghee will turn a pale cream color as air incorporates. Add the chilled yogurt to the creamed ghee and whisk them together until well combined and silky. This step of “creaming” the ghee with curd is crucial for the Balushahi’s flaky texture.


2. Combine dry ingredients: Sift the all-purpose flour into the bowl with the ghee-yogurt mixture. Add in the baking powder, baking soda, and salt. Gently mix the dry ingredients with the ghee-yogurt base using a spatula or your fingertips. The mixture will start to resemble coarse crumbs (similar to a pie crust or biscuit dough).


3. Form a soft dough: Sprinkle cold water a few tablespoons at a time into the flour mixture. Use light hands to bring the mixture together into a dough – do not knead vigorously. Add just enough water (around 7–9 Tbsp in total) so that the dough holds together and is soft but not sticky. It should form a ball that might have slight cracks (that’s okay). Over-kneading will develop gluten and make the Balushahi tough, so simply gather the dough until it just comes together. Cover the dough and let it rest for about 15 minutes at room temperature (this resting period helps hydrate the flour and gives a better texture).


4. Shape the Balushahi: After resting, divide the dough into small portions. For medium-sized Balushahi, each portion can be about the size of a ping-pong ball (roughly 2 tablespoons of dough). Smooth each portion between your palms and then press your thumb in the center to make a deep indent (doughnut-like shape). The disc should be about 2 inches wide and not too thick. The indentation in the middle ensures the inside cooks evenly. If the dough cracks at the edges while shaping, just smooth them gently – small cracks are fine and will contribute to the flaky layers.


5. Deep-fry on low heat: Heat the ghee or oil in a deep, heavy-bottomed kadai or pan over low to medium-low heat. To test the temperature, drop a tiny pinch of dough into the oil – it should slowly rise to the surface without turning brown immediately. Slide in 3–4 shaped Balushahi at a time, careful not to overcrowd the pan (frying too many can cool the oil and lead to uneven cooking). Fry slowly and patiently – the Balushahi will sink then float up as they cook. Keep the flame low: it will take several minutes for each side to turn a rich golden brown. Avoid the temptation to increase heat, as high heat will brown the outside too fast while leaving the inside undercooked. You can gently flip them occasionally for even coloring. It usually takes about 8–10 minutes per batch for them to fry to a beautiful golden hue. Tip: If you notice the oil getting too hot (sweets darkening too quickly), briefly lift the pan off the stove or lower the heat to regulate the temperature. Once the Balushahi are crisp and golden, remove them with a slotted spoon, allowing excess oil to drain, and set them aside on a plate. Continue frying the remaining batches in the same way.


6. Prepare the sugar syrup: While the Balushahi are frying (or immediately after frying, using the still-warm stove), start making the syrup. In a saucepan, combine the sugar and water. Heat on medium, stirring until the sugar completely dissolves. Once it dissolves, add the crushed cardamom and saffron strands to the syrup. Bring the syrup to a gentle boil and then reduce to a simmer. Simmer until it reaches one-string consistency: this means if you dip a spoon and let a drop of syrup cool a bit, it should feel sticky between your fingers and form a single thread when pulled apart. (You can also test by dropping a bit of syrup from the spoon – the last drop should form a thin thread). This stage is usually reached when the syrup thickens slightly and turns glossy. Be vigilant and do not over-boil – we want a syrup that is sticky but still liquid, not a hard caramel. Stir in the lemon juice toward the end of boiling (this helps prevent sugar crystallization). Once one-string consistency is reached, turn off the heat. Note: It’s important to keep the syrup warm; if it cools and thickens too much before use, you can reheat it gently with a splash of water.


7. Soak the fried Balushahi: Make sure your syrup is hot or warm (reheat if it has cooled). Now, gently place the fried Balushahi into the warm sugar syrup. If your pan is wide, you can soak several at once without overlapping (or do this in batches if needed). The syrup should cover them or you can spoon syrup over the top of each. Let each Balushahi soak for about 2–5 minutes per side. Flip them halfway through to ensure both sides absorb the syrup evenly. They will not get as soft as something like a gulab jamun – instead, they’ll drink in just enough syrup to coat the outside and impart sweetness inside. After a few minutes of soaking, they’ll become glossy and slightly heavier.


8. Garnish and cool: Using a fork or slotted spoon, carefully lift each Balushahi out of the syrup, allowing excess syrup to drip off. Place them on a plate or tray lined with parchment or a rack. While they are still sticky, garnish the tops with chopped pistachios or almonds (the nuts will stick to the syrupy glaze). Allow the Balushahi to cool down to room temperature. As they cool, the sugar syrup on the outside will set into a fine white sugary coating that gives that characteristic slight crunch. The inside will remain soft and moist. Your Balushahi are now ready to serve!


Tips for Achieving the Perfect Texture

The hallmark of a great Balushahi is a crisp, flaky exterior with a soft, tender inside that’s fully cooked and lightly infused with syrup. Keep these tips in mind to get that perfect texture:

Don’t over-knead the dough: Mix just until the ingredients come together, and avoid developing too much gluten. A gently combined dough yields a flaky, melt-in-mouth Balushahi, whereas over-kneading can make it hard or bready. Let the dough rest before shaping to relax it.

Shape with a dent: Always form a dimple or hole in the center of each dough round. Making the Balushahi with an indentation (and not too thick overall) ensures it cooks evenly all the way through. If it’s a solid ball with no dent, the inside might remain undercooked. This little trick helps achieve that delicate, fully cooked interior.

Slow fry at low heat: Patience is key when frying. Cook the Balushahi on low to medium-low heat rather than high. It should bubble gently in the oil, not aggressively. Slow frying gives it time to cook through to the center and develop that signature flaky crust. The result is a golden, crisp outside and a thoroughly cooked soft inside – much like how traditional halwais (confectioners) do it. Also, fry in small batches; adding too many at once can drop the oil temperature. Maintain an even heat for uniform frying.

Perfect sugar syrup absorption: For a Balushahi that is sweet yet not soggy, get the sugar syrup right. Simmer the syrup to a one-string consistency and keep it warm – this way, the Balushahi will readily absorb a thin coating of syrup without turning mushy. If the syrup is too thick (beyond one-string), it won’t soak in; too thin and it could make the sweets overly soft. Soak the fried Balushahi in warm syrup for a few minutes on each side. A warm, correctly prepared syrup infuses just the right amount of sweetness and gives that subtle sheen on the outside.


Serving and Storage

Serving: Balushahi is best enjoyed at room temperature once the sugar glaze has set. The outside will be crisp and sweet, while the inside remains soft and slightly flaky. They make a delightful addition to any festive spread – serve them on a decorative platter, perhaps lined with festive foil or banana leaf. You can even garnish with a touch of varq (edible silver leaf) on top of each for an authentic royal touch. Balushahi pairs wonderfully with a cup of masala chai or as a dessert after a traditional Indian meal. During festivals like Diwali, you can serve Balushahi along with other sweets and snacks as part of the celebrations, or pack them in boxes as a sugary gift for friends and family.

Storage: Once completely cooled, store the Balushahi in an airtight container at room temperature. They have a good shelf life and actually taste even better a day later, as the syrup has fully penetrated. In a cool, dry place, they stay fresh for about 5 to 6 days without refrigeration. (In fact, the high sugar content acts as a preservative.) Be sure to keep them away from humidity to prevent the sugar from melting. Avoid refrigerating Balushahi, as this can cause the sugar to crystallize and the texture to harden. If you need to store them longer than a week, you might refrigerate in a pinch and then allow them to come to room temperature before eating, but fresh is always best. Enjoy this indulgent treat as a make-ahead sweet for festivals – it’s a joy to bite into a Balushahi and savor the celebratory spirit it brings!

😋 Happy Cooking and Festive Eating!

Dessert

Gujiya – Traditional Indian Sweet Dumplings for Festivals

Intro: A Pocket Full of Festive Memories

In every Indian home, when Gujiyas are being fried, you know festivals are near.

As a kid, the kitchen would transform during Holi.
Large plates of kneaded dough, sweet khoya stuffing laid out, and the entire family — aunts, cousins, grandmothers — sitting together, shaping gujiyas by hand, sealing the edges, and sneaking tastes of raw filling when no one was watching!

One bite into a warm, crispy gujiya — flaky outside, soft and rich inside — and it feels like celebrating life itself.

Ingredients:

For Dough:

2 cups maida (all-purpose flour)

4 tbsp ghee (for moyan)

Water (to knead)

A pinch of salt


For Filling:

1 cup khoya (mawa)

¼ cup powdered sugar

2 tbsp chopped nuts (almond, cashew, pistachio)

2 tbsp desiccated coconut

1 tsp cardamom powder

Raisins (optional)


For Frying:

Oil or ghee


Steps to Make Gujiya:

1. Prepare the Dough

Mix maida, ghee, and salt.

Rub to form a breadcrumb texture.

Knead into a stiff dough using water. Cover and rest for 30 mins.


2. Prepare the Filling

Roast khoya lightly until it turns slightly golden. Cool.

Mix roasted khoya, powdered sugar, nuts, coconut, cardamom powder.


3. Shape the Gujiyas

Roll small portions of dough into circles.

Place a spoonful of filling in the center.

Fold over into a half-moon shape. Seal edges properly using water.

You can press with a fork or hand-crimp for traditional design.


4. Fry

Deep fry gujiyas in medium-hot oil until golden and crisp.


(Optional: Dip fried gujiyas in light sugar syrup if you want a glazed version.)


Serving Suggestions:

Serve warm or at room temperature during Holi or Diwali feasts

Store in airtight container — stays good for 5–6 days


Why I Love It

Because Gujiya is not just a sweet. It’s family laughter, festive spirit, and heritage folded into a crispy, golden hug.