
Introduction
Balushahi is a dessert that instantly transports me back to childhood Diwalis and family weddings. I remember the crunch of its sugar-glazed exterior and the soft, syrup-soaked interior with each bite. In many Indian households, recipes like Balushahi are heirlooms passed down through generations, evoking warm memories of grandmothers patiently frying these treats in ghee. Indeed, Balushahi holds a special place in celebrations – its appealing flakiness and rich taste make it an integral part of Diwali, Holi, weddings, and other festive occasions.
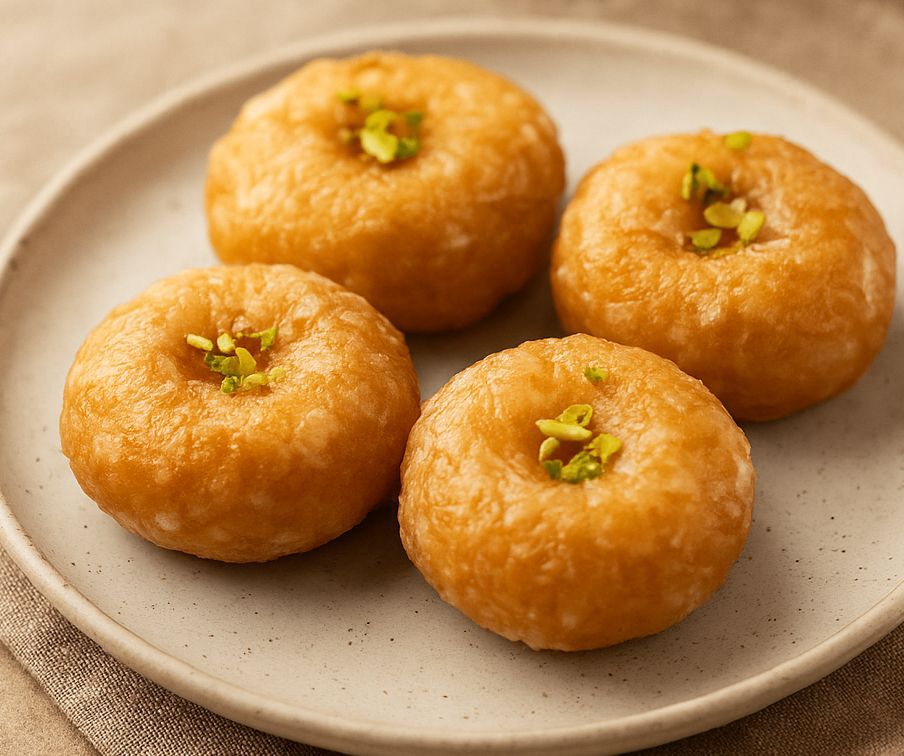
Often dubbed the “Indian doughnut” for its shape, Balushahi (known as Badusha in South India) is similar to a doughnut only in looks, but differs in texture and taste – it’s much denser, crispier, and richly infused with ghee and cardamom syrup. This traditional North Indian mithai (sweet) is usually prepared for auspicious events and even offered as prasad (sacred offering) in temples. From grand wedding dessert spreads to Diwali sweet boxes, Balushahi’s presence is a symbol of celebration and nostalgia. Its Mughal-era origins and enduring popularity across India speak to its timeless appeal. Get ready to learn how to make this flaky, golden delight at home, and bring a taste of festive nostalgia to your kitchen!
Ingredients
For the dough:
All-purpose flour (maida) – 2 cups (approximately 250 g)
Ghee (clarified butter) – 1/4 cup (60 g), in semi-solid state (soft but not melted)
Yogurt (curd) – 1/4 cup (60 g), chilled (helps yield a flaky texture)
Baking powder – 1/2 teaspoon
Baking soda – a pinch
Salt – a pinch (balances sweetness)
Cold water – 7 to 9 tablespoons, or as needed to form dough
For the sugar syrup:
Sugar – 1 cup (200 g)
Water – 1/2 cup (120 ml)
Green cardamom – 2 pods, crushed (or 1/2 teaspoon cardamom powder)
Saffron strands – a pinch (optional, for aroma and color)
Lemon juice – 1/2 teaspoon (a few drops, to prevent crystallization of syrup)
For frying & garnish:
Ghee or oil for deep-frying – about 2 cups (enough for ~2-inch depth in pan)
Nuts for garnish – 2 tablespoons chopped pistachios or almonds (optional)
(Makes about 12–15 Balushahi)
Step-by-Step Instructions
1. Cream the ghee and yogurt: In a mixing bowl, add the semi-solid ghee. Using a spoon or whisk, beat the ghee vigorously for a few minutes until it becomes light, smooth, and fluffy. The ghee will turn a pale cream color as air incorporates. Add the chilled yogurt to the creamed ghee and whisk them together until well combined and silky. This step of “creaming” the ghee with curd is crucial for the Balushahi’s flaky texture.
2. Combine dry ingredients: Sift the all-purpose flour into the bowl with the ghee-yogurt mixture. Add in the baking powder, baking soda, and salt. Gently mix the dry ingredients with the ghee-yogurt base using a spatula or your fingertips. The mixture will start to resemble coarse crumbs (similar to a pie crust or biscuit dough).
3. Form a soft dough: Sprinkle cold water a few tablespoons at a time into the flour mixture. Use light hands to bring the mixture together into a dough – do not knead vigorously. Add just enough water (around 7–9 Tbsp in total) so that the dough holds together and is soft but not sticky. It should form a ball that might have slight cracks (that’s okay). Over-kneading will develop gluten and make the Balushahi tough, so simply gather the dough until it just comes together. Cover the dough and let it rest for about 15 minutes at room temperature (this resting period helps hydrate the flour and gives a better texture).
4. Shape the Balushahi: After resting, divide the dough into small portions. For medium-sized Balushahi, each portion can be about the size of a ping-pong ball (roughly 2 tablespoons of dough). Smooth each portion between your palms and then press your thumb in the center to make a deep indent (doughnut-like shape). The disc should be about 2 inches wide and not too thick. The indentation in the middle ensures the inside cooks evenly. If the dough cracks at the edges while shaping, just smooth them gently – small cracks are fine and will contribute to the flaky layers.
5. Deep-fry on low heat: Heat the ghee or oil in a deep, heavy-bottomed kadai or pan over low to medium-low heat. To test the temperature, drop a tiny pinch of dough into the oil – it should slowly rise to the surface without turning brown immediately. Slide in 3–4 shaped Balushahi at a time, careful not to overcrowd the pan (frying too many can cool the oil and lead to uneven cooking). Fry slowly and patiently – the Balushahi will sink then float up as they cook. Keep the flame low: it will take several minutes for each side to turn a rich golden brown. Avoid the temptation to increase heat, as high heat will brown the outside too fast while leaving the inside undercooked. You can gently flip them occasionally for even coloring. It usually takes about 8–10 minutes per batch for them to fry to a beautiful golden hue. Tip: If you notice the oil getting too hot (sweets darkening too quickly), briefly lift the pan off the stove or lower the heat to regulate the temperature. Once the Balushahi are crisp and golden, remove them with a slotted spoon, allowing excess oil to drain, and set them aside on a plate. Continue frying the remaining batches in the same way.
6. Prepare the sugar syrup: While the Balushahi are frying (or immediately after frying, using the still-warm stove), start making the syrup. In a saucepan, combine the sugar and water. Heat on medium, stirring until the sugar completely dissolves. Once it dissolves, add the crushed cardamom and saffron strands to the syrup. Bring the syrup to a gentle boil and then reduce to a simmer. Simmer until it reaches one-string consistency: this means if you dip a spoon and let a drop of syrup cool a bit, it should feel sticky between your fingers and form a single thread when pulled apart. (You can also test by dropping a bit of syrup from the spoon – the last drop should form a thin thread). This stage is usually reached when the syrup thickens slightly and turns glossy. Be vigilant and do not over-boil – we want a syrup that is sticky but still liquid, not a hard caramel. Stir in the lemon juice toward the end of boiling (this helps prevent sugar crystallization). Once one-string consistency is reached, turn off the heat. Note: It’s important to keep the syrup warm; if it cools and thickens too much before use, you can reheat it gently with a splash of water.
7. Soak the fried Balushahi: Make sure your syrup is hot or warm (reheat if it has cooled). Now, gently place the fried Balushahi into the warm sugar syrup. If your pan is wide, you can soak several at once without overlapping (or do this in batches if needed). The syrup should cover them or you can spoon syrup over the top of each. Let each Balushahi soak for about 2–5 minutes per side. Flip them halfway through to ensure both sides absorb the syrup evenly. They will not get as soft as something like a gulab jamun – instead, they’ll drink in just enough syrup to coat the outside and impart sweetness inside. After a few minutes of soaking, they’ll become glossy and slightly heavier.
8. Garnish and cool: Using a fork or slotted spoon, carefully lift each Balushahi out of the syrup, allowing excess syrup to drip off. Place them on a plate or tray lined with parchment or a rack. While they are still sticky, garnish the tops with chopped pistachios or almonds (the nuts will stick to the syrupy glaze). Allow the Balushahi to cool down to room temperature. As they cool, the sugar syrup on the outside will set into a fine white sugary coating that gives that characteristic slight crunch. The inside will remain soft and moist. Your Balushahi are now ready to serve!
Tips for Achieving the Perfect Texture
The hallmark of a great Balushahi is a crisp, flaky exterior with a soft, tender inside that’s fully cooked and lightly infused with syrup. Keep these tips in mind to get that perfect texture:
Don’t over-knead the dough: Mix just until the ingredients come together, and avoid developing too much gluten. A gently combined dough yields a flaky, melt-in-mouth Balushahi, whereas over-kneading can make it hard or bready. Let the dough rest before shaping to relax it.
Shape with a dent: Always form a dimple or hole in the center of each dough round. Making the Balushahi with an indentation (and not too thick overall) ensures it cooks evenly all the way through. If it’s a solid ball with no dent, the inside might remain undercooked. This little trick helps achieve that delicate, fully cooked interior.
Slow fry at low heat: Patience is key when frying. Cook the Balushahi on low to medium-low heat rather than high. It should bubble gently in the oil, not aggressively. Slow frying gives it time to cook through to the center and develop that signature flaky crust. The result is a golden, crisp outside and a thoroughly cooked soft inside – much like how traditional halwais (confectioners) do it. Also, fry in small batches; adding too many at once can drop the oil temperature. Maintain an even heat for uniform frying.
Perfect sugar syrup absorption: For a Balushahi that is sweet yet not soggy, get the sugar syrup right. Simmer the syrup to a one-string consistency and keep it warm – this way, the Balushahi will readily absorb a thin coating of syrup without turning mushy. If the syrup is too thick (beyond one-string), it won’t soak in; too thin and it could make the sweets overly soft. Soak the fried Balushahi in warm syrup for a few minutes on each side. A warm, correctly prepared syrup infuses just the right amount of sweetness and gives that subtle sheen on the outside.
Serving and Storage
Serving: Balushahi is best enjoyed at room temperature once the sugar glaze has set. The outside will be crisp and sweet, while the inside remains soft and slightly flaky. They make a delightful addition to any festive spread – serve them on a decorative platter, perhaps lined with festive foil or banana leaf. You can even garnish with a touch of varq (edible silver leaf) on top of each for an authentic royal touch. Balushahi pairs wonderfully with a cup of masala chai or as a dessert after a traditional Indian meal. During festivals like Diwali, you can serve Balushahi along with other sweets and snacks as part of the celebrations, or pack them in boxes as a sugary gift for friends and family.
Storage: Once completely cooled, store the Balushahi in an airtight container at room temperature. They have a good shelf life and actually taste even better a day later, as the syrup has fully penetrated. In a cool, dry place, they stay fresh for about 5 to 6 days without refrigeration. (In fact, the high sugar content acts as a preservative.) Be sure to keep them away from humidity to prevent the sugar from melting. Avoid refrigerating Balushahi, as this can cause the sugar to crystallize and the texture to harden. If you need to store them longer than a week, you might refrigerate in a pinch and then allow them to come to room temperature before eating, but fresh is always best. Enjoy this indulgent treat as a make-ahead sweet for festivals – it’s a joy to bite into a Balushahi and savor the celebratory spirit it brings!
😋 Happy Cooking and Festive Eating!
