Lunch & Dinner

Mangalorean Chicken Masala Fry: The Spicy, Tangy “Sunday Roast” of the Coast

Introduction
There is a distinct difference between “Fried Chicken” and what we Indians call a “Chicken Masala Fry.”
The Western version is about the crunch of the batter. The Indian coastal version specifically from the Mangalorean and Konkan belt is about the “Bhuna” (the roast). It’s about cooking the chicken in its own juices along with a fiery red masala paste until every drop of moisture evaporates, leaving behind meat that is coated in a dark, rich, caramelized spice crust.
This recipe is close to my heart. It uses the “Holy Trinity” of coastal non-veg cooking: Byadgi Chilies (for that stunning red color), Tamarind (for a sour kick), and Ghee (for the aroma).
This isn’t a quick 10-minute stir-fry. It’s a slow-roast ritual that turns simple ingredients into a dish that demands to be eaten with your hands.
The Secret: “Byadgi” & “Ghee”
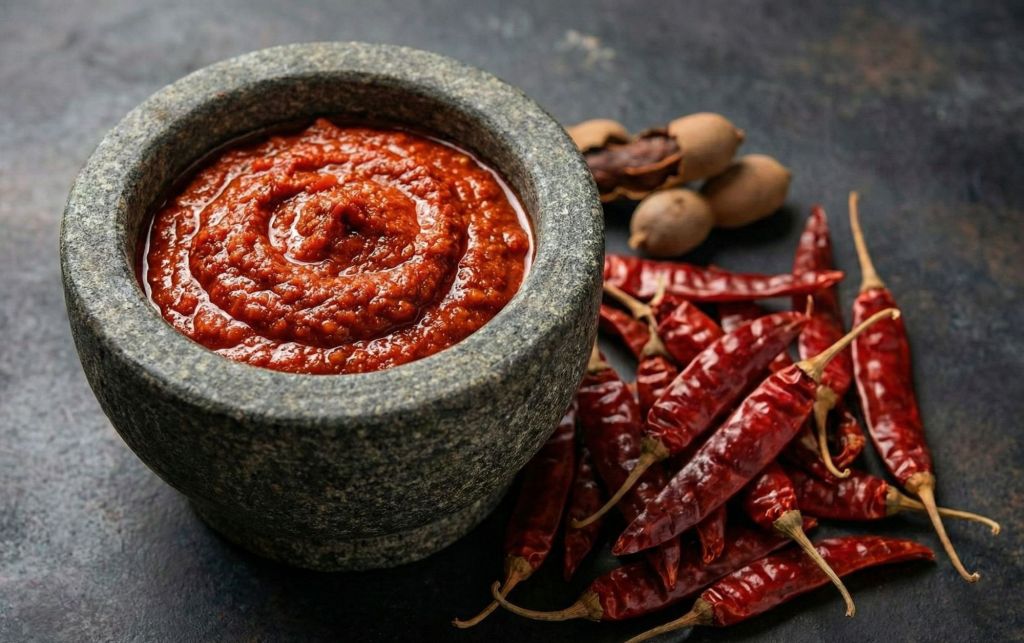
To get that authentic restaurant-style dark red color without food coloring, you need Byadgi Chilies. They are wrinkled, deep red, and mild in heat.
The Roasting: The flavor comes from slowly roasting the wet masala paste in Ghee (Clarified Butter) or Coconut Oil until it separates. If you rush this, the masala will taste raw.
The Recipe Card
Prep time: 20 mins | Cook time: 40 mins | Servings: 4

Ingredients:
1 kg Chicken: Curry cut (bone-in pieces taste best for this recipe).
The Aromatics: 2 Large Onions (finely chopped), 1 sprig Curry Leaves.
The Fat: 4 tbsp Ghee (or Coconut Oil for a more rustic taste).
The Masala Paste (Roast and Grind):
8-10 Dried Red Chilies (preferably Byadgi).
2 tbsp Coriander Seeds.
1 tsp Cumin Seeds (Jeera).
½ tsp Whole Black Peppercorns.
¼ tsp Fenugreek Seeds (Methi).
4 Cloves Garlic.
1 inch Ginger.
A small marble-sized ball of Tamarind (Imli).
Seasoning: Salt to taste, ½ tsp Turmeric powder.
Instructions:
Roast the Spices: In a dry pan, lightly roast the red chilies, coriander seeds, cumin, peppercorns, and fenugreek on low heat until fragrant. Do not burn them.
Make the Paste: Transfer the roasted spices to a blender. Add the raw garlic, ginger, and tamarind. Add a splash of water and grind to a thick, smooth, vibrant red paste.
The Onion Base: Heat the ghee in a heavy-bottomed Kadhai (wok). Add the curry leaves and the chopped onions. Sauté patiently until the onions turn golden brown. This caramelization is crucial for the “roast” flavor.
The Masala Bhuna: Add the ground red paste to the onions. Fry this mixture on medium heat for 5-8 minutes. You will see the ghee starting to separate and ooze out from the sides. This means the masala is cooked.
Add Chicken: Add the chicken pieces, turmeric, and salt. Crank the heat to high and toss the chicken vigorously for 2 minutes to seal the juices.
The Slow Roast: Lower the heat to medium-low. Cover the pan. Let the chicken cook in its own juices for 20 minutes. (Add a splash of hot water only if it’s sticking, but remember, this is a dry dish).
The “Sukka” Finish: Open the lid. The chicken should be cooked, but there might be some liquid left. Increase the heat and cook open (uncovered), stirring continuously. The moisture will evaporate, and the masala will thicken and coat the chicken pieces.
Final Touch: Roast until the masala turns a dark reddish-brown. Turn off the heat.
Serve: Squeeze a little lemon juice on top (optional) and serve hot with Neer Dosa, Roti, or Dal Rice.


The “Pinch of Thrift” Tip (Zero Waste)
Masala Rice: Once you finish serving the chicken, don’t wash that kadhai immediately! There is always a lot of flavorful masala stuck to the bottom of the pan.
The Hack: Throw a cup of cooked white rice into the empty pan. Toss it around to mop up all that spicy, ghee-laden masala. We call this “Charr” Rice in local dialects it’s often the tastiest part of the meal that the cook keeps for themselves!

Lunch & Dinner

Aloo Patta Gobhi Matar: The Unsung Hero of the Indian Winter Lunch

Introduction
Let’s be honest Cabbage (Patta Gobhi) often gets a bad reputation. It’s seen as “boring hostel food” or that watery vegetable you eat only when there is nothing else in the fridge.
But if you ask any North Indian mother, she will tell you that a well-made Patta Gobhi Ki Sabzi is a masterpiece of texture. It shouldn’t be a soggy mash; it should be a vibrant stir-fry where the potatoes are soft as butter, the peas pop in your mouth, and the cabbage retains a slight “bite” and sweetness.
This recipe is the classic “Winter Tiffin” version. We are using the seasonal trio: Cabbage, New Potatoes (Naya Aloo), and Fresh Green Peas. There is no onion or garlic in this traditional version (often called Satvik style), allowing the natural sweetness of the veggies to shine through the spices.
The “Crunch” Secret
Why does restaurant cabbage stay crunchy while homemade cabbage gets watery?
The Cut: Don’t use a food processor. Hand-shredding the cabbage into long, thin ribbons ensures it cooks evenly without turning into a paste.
Salt Timing: This is the most crucial tip. Do not add salt at the beginning. Salt draws out moisture, making the cabbage soggy. We add salt only towards the end of the cooking process.
The Recipe Card
Prep time: 15 mins | Cook time: 20 mins | Servings: 3-4

Ingredients:
500g Cabbage: Shredded (remove the hard core/stalk).
2 Medium Potatoes: Peeled and cut into 1-inch cubes.
½ Cup Green Peas: Fresh (winter peas) are best, but frozen works too.
1 inch Ginger: Finely chopped (the main aromatic).
2 Green Chilies: Slit lengthwise.
2 tbsp Mustard Oil: For that authentic pungent kick (or any vegetable oil).
Spices: 1 tsp Cumin Seeds (Jeera), ½ tsp Turmeric (Haldi), 1 tsp Coriander Powder (Dhaniya), ½ tsp Red Chili Powder, ½ tsp Garam Masala, ½ tsp Amchur (Dry Mango Powder).
Fresh Coriander: Lots of it for garnish.
Instructions:
The Potato Fry: Heat the mustard oil in a heavy-bottomed pan (Kadhai) until it smokes gently. Lower the heat. Add cumin seeds and let them crackle. Add the chopped potatoes and sauté them on medium heat for 5-7 minutes. We want the potatoes to get a golden crust and be 80% cooked before the cabbage goes in.
The Aromatics: Add the chopped ginger, green chilies, and green peas. Sauté for another 2 minutes until the raw smell of ginger disappears.
The Cabbage Entry: Add the shredded cabbage. Increase the flame to high for 2 minutes and toss everything vigorously. This “sears” the cabbage.
The Spice Mix: Lower the heat. Add turmeric, coriander powder, and red chili powder. Mix well. Do NOT cover the pan. Covering it creates steam and makes the cabbage soggy. Let it cook open for 5-7 minutes, stirring occasionally.
The Final Seasoning: Once the potatoes are fully soft and the cabbage has shrunk but still looks vibrant, add Salt, Amchur, and Garam Masala.
The “Bhuna” Finish: Crank the heat up again for the last 1 minute to dry out any remaining moisture. Stir well.
Serve: Turn off the heat and mix in a generous handful of fresh coriander. Serve hot with Parathas and Dal.


The “Pinch of Thrift” Tip (Zero Waste)
The “Gobhi Paratha” Hack: Leftover cabbage sabzi is arguably better than fresh sabzi because the flavors have matured.
How to use: Mash the leftover sabzi with a fork (squash the potato chunks). Stuff this mixture inside whole wheat dough to make Stuffed Gobhi Parathas for breakfast. You don’t even need extra spices the filling is already seasoned!

Lunch & Dinner

Shahi Paneer Kofta: The “Melt-in-Mouth” Vegetarian Royal

Introduction
In the grand hierarchy of Indian vegetarian curries, Paneer Kofta sits on the throne.
The word Kofta comes from the Persian Kooftan, meaning “to beat” or “to grind.” While the world knows koftas as meatballs, we Indians did something remarkable: we turned them into clouds of cheese.
But here is the problem: most restaurant Paneer Koftas are hard, rubbery, and drowning in a curry that tastes like sugar syrup. That is not the heritage way.
Today, we are making Authentic Shahi Paneer Kofta. These dumplings are crisp on the outside but break apart at the slightest touch of a spoon. Inside, they hide a secret jewel a stuffing of raisins and cashews. The gravy isn’t just “tomato sauce”; it’s a velvety, cashew-enriched masterpiece that requires one non-negotiable step: Sieving.
This is not a 15-minute meal. This is Sunday Lunch art.
The “Binding” Secret
The biggest fear with koftas is that they will disintegrate in hot oil.
The Ratio: The golden ratio is 80% Paneer to 20% Potato. The potato is just the glue; the paneer is the star.
The Cornflour Test: Before you fry the whole batch, fry one tiny test ball. If it breaks, add another spoon of cornflour. If it stays firm, you are ready.
The Recipe Card
Prep time: 30 mins | Cook time: 30 mins | Servings: 4

Ingredients:
For the Royal Koftas:
250g Paneer: Fresh and grated. (If store-bought, dip in warm water first to soften).
2 Medium Potatoes: Boiled, peeled, and grated (must be cool, not hot).
3 tbsp Cornflour: For binding.
Spices: ½ tsp Cardamom Powder, ½ tsp Black Pepper, Salt to taste.
The “Shahi” Stuffing: 10 Cashews (chopped) + 1 tbsp Raisins (Kishmish).
Oil: For deep frying.
For the “Velvet” Gravy:
The Base: 3 Onions (roughly chopped), 3 Tomatoes (roughly chopped), 10-12 Cashew nuts.
Whole Spices: 1 Bay leaf, 1 inch Cinnamon, 2 Green Cardamoms.
Powder Spices: 1 tsp Kashmiri Red Chili Powder (for color, not heat), ½ tsp Turmeric, 1 tsp Coriander Powder, ½ tsp Garam Masala.
The Finish: 1 tbsp Butter, 1 tbsp Kasuri Methi (dried fenugreek leaves), 2 tbsp Fresh Cream.
Instructions:
The Gravy Base (Boil & Blend): In a pot, add the onions, tomatoes, cashews, and whole spices (bay leaf, cinnamon, cardamom) with 1 cup of water. Boil for 10-15 minutes until the tomatoes are mushy. Let it cool.
The “Silk” Step: Remove the bay leaf and cinnamon stick. Blend the mixture into a fine puree. Crucial: Pass this puree through a strainer (sieve). Press it with a spoon to get all the liquid out and discard the skins/seeds. This gives you that restaurant-style silky texture.
Making Koftas: In a large bowl, mash the grated paneer and potato. Add cornflour, cardamom powder, pepper, and salt. Knead it gently into a soft dough.
Stuff & Shape: Take a small lemon-sized ball of dough. Flatten it in your palm. Place a piece of cashew and a raisin in the center. Seal the edges and roll it into a smooth ball. Tip: Ensure there are NO cracks, or they will burst in oil.
The Fry: Heat oil on medium flame. Slide the koftas in gently. Do not crowd the pan. Fry until golden brown. Drain on tissue paper.
Simmering the Gravy: Heat butter in a pan. Add the ginger-garlic paste and sauté. Add the Kashmiri chili powder and turmeric (adding spices to oil brings out the color). Immediately pour in the strained puree.
Cook: Cover and cook for 10 minutes until the gravy thickens and oil releases from the sides. Add salt and sugar.
The Finish: Stir in the fresh cream and crush the Kasuri Methi between your palms into the gravy.
Serving Rule: Never boil the koftas in the gravy. They are too delicate. Arrange the koftas in a serving dish and pour the hot gravy over them just before serving.


The “Pinch of Thrift” Tip (Zero Waste)
Stalk Stock: Do not throw away the coriander stems or the leftover onion/tomato scraps from the boiling step (the stuff left in the sieve). Boil them with a little water and salt to make a Veg Stock. Use this liquid to thin out your gravy instead of plain water for an extra punch of umami flavor.

Lunch & Dinner

Bharli Paplet: The Art of the Konkani Green Masala Stuffed Pomfret

Introduction
In the coastal homes of Maharashtra, Sunday lunch is not a meal; it is a religion. And the deity often worshipped is the Paplet (Pomfret).
While fried fish is common, Bharli Paplet (Stuffed Pomfret) is reserved for special occasions. It is a dish that requires a delicate hand. Unlike the Goan Recheado which uses a fiery red vinegar paste, the traditional Malvani/Konkani version uses a fresh “Hirva Masala” (Green Paste) made from coconut, coriander, and green chilies.
I remember watching the fishmongers (or my grandmother) perform the surgical feat of slicing the fish. They would make a deep slit on one side, right next to the central bone, creating a “pocket” without cutting through the skin on the other side. This pocket holds the treasure a sweet, spicy, herbal coconut paste that steams inside the fish while the skin crisps up in semolina.
Today, we are making the authentic Malvani Green Stuffed Pomfret. It is crispy on the outside, juicy on the inside, and smells like the coast.
The “Pocket” Technique
The success of this recipe lies in the cut. You need a whole white pomfret.
The Slit: Ask your fishmonger to cut “pockets” for stuffing. If doing it yourself, use a sharp filleting knife. Cut along the central bone from the gill to the tail, but do not slice all the way through. You want a pouch, not two fillets.
The Marination: Because the stuffing is mild, the fish itself must be salted and soured (with lime) well before stuffing, or it will taste bland.
The Recipe Card
Prep time: 20 mins | Marination time: 15 mins | Cook time: 15 mins | Servings: 2

Ingredients:
2 Medium White Pomfrets: Cleaned, with a pocket slit on one side.
First Marinade: ½ tsp Turmeric, 1 tsp Salt, 1 tbsp Lemon Juice.
The “Hirva” Stuffing (Grind to a thick paste):
1 cup Fresh Grated Coconut.
1 cup Fresh Coriander Leaves (with tender stems).
4-5 Green Chilies (adjust to heat).
6-7 Garlic Cloves.
1 inch Ginger.
1 tsp Cumin Seeds (Jeera).
1 tbsp Lemon Juice or a small ball of Tamarind.
Salt to taste.
Tip: Do not add water while grinding. The moisture from the coriander and coconut is enough. We need a dry, thick paste.
The Crispy Coat: 3 tbsp Fine Rava (Semolina) + 2 tbsp Rice Flour mixed together with a pinch of salt.
Oil: For shallow frying.
Instructions:
Marinate: Rub the slit pomfrets with turmeric, salt, and lemon juice. Apply it inside the pocket too. Let it rest for 15 minutes. This removes the “fishy” smell.
Stuff: Take a generous ball of the Green Stuffing. Gently open the fish pocket and push the masala all the way in. Fill it well, but not so much that it bursts open. Press the fish flat to seal it.
Coat: Spread the Rava and Rice Flour mix on a plate. Gently press the stuffed fish into the flour. Flip and coat the other side. Dust off the excess. Note: The coating seals the moisture inside.
The Fry: Heat oil in a flat tawa (pan). Place the fish gently in the hot oil.
Patience: Fry on medium heat for 4-5 minutes. Do not flip until the bottom is golden and crispy. If you flip too early, the skin will tear.
The Flip: Gently flip and fry the other side for another 4-5 minutes. The green masala inside will steam-cook, releasing an incredible aroma.
Serve: Serve hot with a slice of lemon and onion rings.


The “Pinch of Thrift” Tip (Zero Waste)
Masala Recycled: You will likely have leftover Green Stuffing. Do not toss it!
Quick Curry: Heat a little oil, fry the leftover green paste for 2 minutes, add a cup of water and a dash of coconut milk. Bring to a boil and drop in some boiled eggs or prawns. You have an instant Green Malvani Curry ready for dinner!

starters, Street Foods

Murgh Malai Tikka: The “Reshmi” Secret of Royal Kitchens

Introduction
In the colorful spectrum of Indian Tandoori dishes, the Red Tikka (fiery and loud) often gets all the attention. But true connoisseurs know that the White Tikka—the Murgh Malai Tikka—is where the real artistry lies.
Historically known as Reshmi Kabab (Silky Kebab), this dish hails from the Mughal kitchens where food was designed to be rich, subtle, and melt-in-the-mouth. Unlike its red cousin, this recipe doesn’t rely on chili powder. It relies on the “Holy Trinity” of creaminess: Malai (Cream), Cheese, and Cashews.
When I eat this at a good restaurant, I look for that specific char on the edges that contrasts with the creamy, white marination. Today, we are cracking the code on how to get that exact texture at home without a Tandoor oven.
The “Double Marination” Secret
Why does restaurant chicken taste softer than homemade chicken? The secret is Double Marination.
The First Marination: Uses acid (lemon) and ginger-garlic to break down the fibers and tenderize the meat from within.
The Second Marination: Uses fat (cream/cheese) to coat the outside, creating that velvety layer that protects the meat from drying out in the heat.
The Recipe Card
Prep time: 15 mins | Marination time: 4 hours (minimum) | Cook time: 20 mins

Ingredients:
500g Boneless Chicken: Thigh pieces work best for juiciness, but breast works if marinated well. Cut into 1.5-inch cubes.
First Marinade: 1 tbsp Ginger-Garlic paste, 1 tsp Lemon Juice, ½ tsp Salt.
The Creamy Base: ½ cup Hung Curd (Greek Yogurt), 3 tbsp Fresh Cream (Malai), 2 tbsp Processed Cheese (Grated this is the secret binder!).
The Aromatics: 2 tbsp Cashew Paste (soaked and ground cashews), 1 tbsp Green Chili Paste (for the only heat), 1 tsp Cardamom Powder (Elaichi – essential for that royal aroma), 1 tbsp Kasuri Methi (crushed).
Binding: 1 tsp Cornflour (prevents the marinade from falling off).
Instructions:
The Tenderize Step: Mix the chicken with the First Marinade ingredients (ginger-garlic, lemon, salt). Cover and set aside for 20 minutes. This allows the meat to relax.
The Royal Coat: In a separate bowl, whisk the hung curd, cream, grated cheese, cashew paste, green chili paste, cardamom powder, cornflour, and Kasuri Methi. Whisk until smooth and lump-free.
Combine: Add the chicken to this creamy mixture. Coat every piece thick and well. Crucial: Let this sit in the fridge for at least 4 hours (overnight is best). The longer it sits, the silkier it gets.
The Cook (Pan or Oven):
Oven: Thread onto skewers. Grill at 200°C (400°F) for 15-20 minutes, flipping once, until golden spots appear.
Stove-Top: Heat a little oil/butter in a non-stick pan. Place chicken pieces (without overcrowding). Sear on high heat for 2 minutes to seal juices, then lower heat and cook for 8-10 minutes until tender.
The “Dhungar” (Smoke Technique): This gives it the Tandoori taste.
Heat a small piece of charcoal until red hot.
Place the cooked chicken in a bowl. Place a small steel katori (cup) in the center. Put the hot coal in the cup.
Pour 1 tsp of ghee over the coal. It will smoke heavily.
Immediately cover the bowl with a lid. Trap the smoke for 5 minutes.
Serve: Brush with melted butter and serve with onion rings and green chutney.
The “Pinch of Thrift” Tip (Zero Waste)
The “Malai” Gravy: You will almost certainly have leftover marinade in the bowl after taking the chicken out. Do not wash it away! This mixture is pure liquid gold (cashews, cream, cheese).
How to use: Heat a little butter in a pan, pour in the leftover marinade, add a splash of milk or water, and simmer it for 5 minutes. You now have a rich White Korma Gravy. Dip your naan in it, or toss some boiled potatoes/peas in it for a side dish!

Lunch & Dinner

Dim Begun Khagina: The Smoky “Omelette” of Rural Bengal

Introduction
If you scroll through Instagram today, you will see people frying eggs inside eggplant rings. It looks pretty, but ask any grandmother from rural Bengal, and she will tell you: that is not how we treat a Brinjal.
Today, I am sharing a heritage recipe that is slowly disappearing: Dim Begun Khagina (Smoky Eggplant & Egg Hash).
Unlike a standard French omelette which is folded and flat, a Khagina is a rustic scramble. My grandmother used to make this on winter mornings when there wasn’t enough meat for a full curry, but she wanted to give us something nutritious. It combines the smoky, charred flesh of a roasted brinjal (baingan) with the fluffiness of scrambled eggs. 
The magic happens when the charcoal flavor of the eggplant meets the richness of the egg. It is buttery, spicy, and tastes like a winter campfire.
The “Pora” (Roasting) Technique
The secret to this dish is not boiling the eggplant; it is roasting it on an open flame. This technique (known as Pora in Bengali) imparts a smoky flavor that you simply cannot get from a non-stick pan. We also use a little trick: stuffing garlic cloves inside the eggplant before roasting, so the garlic steams in the vegetable’s own juices. 
The Recipe Card
Prep time: 10 minutes | Cook time: 20 minutes | Servings: 2-3

Ingredients:
1 Large Brinjal (Bharta Baingan): The large, purple variety with few seeds. 
2-3 Eggs: Whisked lightly.
4 Cloves of Garlic: Peeled.
1 Large Onion: Finely chopped.
2 Green Chilies: Finely chopped (adjust to heat preference).
2 tbsp Mustard Oil: Highly recommended for that authentic pungent kick (or use Ghee).
Fresh Coriander: A generous handful.
Spices: ½ tsp Turmeric, ½ tsp Red Chili Powder, Salt to taste.
1 tsp Lemon Juice: To balance the smokiness.
Instructions:
The Roasting Ritual: Wash the brinjal and dry it. Make 4 deep slits in the flesh with a knife. Tuck the garlic cloves inside these slits. Rub the skin with a drop of oil.
Fire Roasting: Roast the brinjal directly over an open gas flame (use a wire mesh/roti jali if you have one). Turn it frequently for about 10-12 minutes until the skin is completely charred and the inside is soft and mushy.
The Mash: Let it cool slightly, then peel off the charred skin. Mash the flesh and the roasted garlic cloves together. It should be pulpy.
The Masala Base: Heat mustard oil in a pan. Add the chopped onions and green chilies. Sauté until the onions are golden brown. Add the turmeric and chili powder.
The Mix: Add the mashed eggplant to the pan. Cook it for 2-3 minutes on medium heat to remove excess moisture.
The Scramble: Push the eggplant to one side of the pan. Pour the whisked eggs into the empty space. Let them set slightly, then scramble them. Once the eggs are semi-cooked, mix them vigorously with the eggplant mash.
Finish: Cook for another minute until everything is well combined but still moist (do not overcook it into rubber!). Turn off the heat. Stir in lemon juice and fresh coriander.
Serve: Eat warm with Parathas or simple toasted bread.
The “Pinch of Thrift” Tip (Zero Waste)
The Toastie Hack: If you have leftover Khagina, do not reheat it in the microwave (it gets rubbery). Instead, use it as a sandwich filler. Butter two slices of bread, stuff them with cold Khagina, and grill it. The crispy bread contrasts perfectly with the soft, smoky filling.

Street Foods

Chicken Manchow Soup: The Spicy, Crunchy Heart of Indo-Chinese Comfort

Introduction
If you grew up in India, you know that “Chinese food” is an emotion, not just a cuisine. It has little to do with authentic flavors from Beijing and everything to do with Kolkata street carts, high flames, and that distinct aroma of soy sauce hitting a hot wok.
Chicken Manchow Soup is the undisputed king of this genre. It is spicy, tangy, loaded with shredded chicken, and most importantly topped with those addictive crunchy fried noodles that get soggy in the best way possible.
But here is a fun fact for the “Digital Anthropologist” in you: Manchow Soup is not from Manchuria. It is an entirely Indian invention, likely originating in Meghalaya or the tangled bylanes of Kolkata. It was created to suit the Indian palate we wanted the heat of green chilies, the zing of ginger, and the comfort of a thick soup all in one bowl.
Today, we are recreating that exact “Restaurant Style” taste at home. No packets, no msg-laden shortcuts. Just fresh ingredients and a lot of vigorous chopping.
The “Desi Chinese” Secret
Why does restaurant soup taste different from homemade? The secret lies in the Aromatics Trinity: Ginger, Garlic, and Green Chilies.
In this recipe, we use more ginger and garlic than you think is necessary. When sautéed on high heat, they create that smoky base flavor that defines Indo-Chinese cooking.
The Recipe Card
Prep time: 20 minutes | Cook time: 20 minutes | Servings: 4

Ingredients:
1 Cup Chicken: Boiled and shredded (Use chicken thighs for better flavor).
The Aromatics: 2 tbsp Finely Chopped Ginger, 2 tbsp Finely Chopped Garlic, 3-4 Green Chilies (finely chopped).
The Veggies: ½ cup Cabbage (finely chopped), ½ cup Carrot (finely chopped), ½ cup Capsicum (finely chopped), ¼ cup Mushrooms (sliced).
The Liquids: 4 cups Chicken Stock (or water), 2 tbsp Dark Soy Sauce, 1 tbsp Red Chili Sauce, 1 tbsp Vinegar.
Thickener: 3 tbsp Cornflour mixed with ¼ cup water (slurry).
The Secret: 1 Egg (beaten) – Optional, but highly recommended for that silky texture.
Topping: Fried Noodles and fresh Coriander leaves.
Seasoning: Salt, ½ tsp Black Pepper, ½ tsp Sugar (to balance the vinegar).
Instructions:
The Wok Sear: Heat 1 tbsp oil in a large pot or wok on high heat. Add the ginger, garlic, and green chilies. Sauté for 30 seconds until fragrant. Do not burn them, but let them get golden.
Veggie Crunch: Add the cabbage, carrot, capsicum, and mushrooms. Stir-fry on high heat for just 2 minutes. Note: We want the veggies to stay crunchy, not turn into mush.
The Base: Add the shredded chicken, soy sauce, red chili sauce, black pepper, and sugar. Mix well.
The Simmer: Pour in the chicken stock (or water). Bring it to a rolling boil. Let it bubble for 3-4 minutes so the flavors meld.
The Thickening: Lower the heat. Slowly pour in the cornflour slurry while stirring continuously to prevent lumps. The soup will turn glossy and thick.
The Egg Drop (Restaurant Style): This step is optional but magical. While the soup is simmering gently, slowly pour the beaten egg in a thin stream while swirling the soup with a fork. This creates beautiful, silky ribbons of egg.
The Finish: Turn off the heat. Stir in the vinegar now (adding it at the end keeps the sour kick fresh).
Serve: Ladle into bowls. Top generously with fried noodles and fresh coriander.
The “Pinch of Thrift” Tip (Zero Waste)
Broth from Scraps: Since this recipe requires boiling chicken, do not throw away the water! Boil the chicken bones with the vegetable peels (carrot ends, cabbage cores, ginger skin) to make a nutrient-dense stock. Use this stock as the base for the soup instead of plain water. It deepens the flavor by 10x.

Dessert

Shrikhand: The Ancient Dessert of Gods and Warriors

Introduction
In a world obsessed with complicated patisserie and 20-ingredient cakes, Shrikhand stands as a testament to the power of minimalism. It is, in essence, just two things: Yogurt and Sugar. But to say that is like saying the Taj Mahal is just marble.
Growing up, Shrikhand wasn’t just a dessert; it was a ritual of patience. I remember the muslin cloth hanging from a hook in the kitchen for hours, slowly dripping whey into a brass bowl below. My grandmother would say that the cloth was doing the cooking, not the stove.
Today, we are documenting the traditional method. While you can use store-bought Greek Yogurt, true Shrikhand the kind that melts on your tongue like flavored clouds comes from the art of making Chakka (hung curd) at home.
The Mythology: A Dessert Created in Exile
Did you know this humble dessert might have roots in the Mahabharata?
According to legend, when the Pandavas were in exile, Bhima the strongest brother worked as a cook in the kingdom of Virata. He is said to have invented a dish called Shikharini by straining curd and mixing it with sugar and saffron to create a rich, energy-dense food.
Over centuries, Shikharini evolved into Shrikhand (derived from the Sanskrit Ksheer for milk and Persian Qand for sweet). When you eat this, you aren’t just having a sweet treat; you are tasting a piece of Indian history that has survived empires.
The Secret Technique: “Chakka”
The heart of this recipe is Chakka yogurt that has been drained of all its water (whey) until it becomes as thick as cream cheese.
The Texture Rule: If you rush the draining, your Shrikhand will be runny. If you drain it too long, it becomes chalky. The sweet spot is usually 4 to 6 hours of hanging.
The Sieve: My grandmother insisted on pushing the chakka through a fine mesh sieve (or a Puran Yantra) to break down any lumps. This is the secret to that glossy, restaurant-style finish.
The Recipe Card
Prep time: 15 minutes | Passive time: 6 hours (for hanging) | Servings: 4

Ingredients:
1 kg Fresh Curd (Dahi): Use full-fat milk curd. It should be fresh and not too sour.
¾ Cup Powdered Sugar: Adjust to taste. Note: Do not use granulated sugar; it will make the mixture watery.
A generous pinch of Saffron (Kesar): Soaked in 1 tbsp warm milk.
½ tsp Cardamom Powder (Elaichi): Freshly pounded is non-negotiable.
A pinch of Nutmeg (Jaiphal): The secret ingredient in traditional Maharashtrian Shrikhand.
Nuts for Garnish: Charoli (Chironji) is traditional, but pistachios work beautifully too.
Instructions:
The Hanging Ritual: Line a strainer with a clean muslin cloth (or a men’s cotton handkerchief, as is tradition in many homes!). Pour the fresh curd into it. Tie the edges tightly and hang it over a bowl in a cool place (or in the fridge if it’s a hot day) for 5-6 hours.
The Transformation: Untie the cloth. What you have inside is a solid ball of creamy yogurt solids. This is the Chakka.
The Smooth-Out: Transfer the Chakka to a bowl. Optional but recommended: Press it through a sieve to ensure it’s silky smooth.
Flavoring: Add the powdered sugar, saffron milk, cardamom, and nutmeg.
The Whisk: Whisk vigorously. You want to incorporate air into the mixture to make it light and fluffy.
Chill: Shrikhand tastes best when chilled for at least 2 hours before serving. This allows the saffron to release its golden color fully.
The “Pinch of Thrift” Tip (Zero Waste)
Liquid Gold (Whey): The greenish water collected in the bowl below your hanging curd is called Whey. Do not pour it down the sink! It is packed with protein and probiotics.
How to use it: Use it to knead the dough for your Rotis or Parathas. It makes the rotis incredibly soft and adds a subtle tang. You can also add it to curries (like Kadhi) instead of water.

Dessert

The Winter Ritual: Nani’s Slow-Cooked Gajar Ka Halwa

Introduction
In my family, winter didn’t officially begin when the calendar turned to December. It began when the vegetable market turned red.
I am talking about the arrival of Delhi Gajar those long, ruby-red, sweet carrots that are only available for a few precious months of the year. My grandmother (Nani) used to say that making Gajar Ka Halwa with orange carrots was a crime against the season. “Orange carrots are for salads,” she would say, dismissing them with a wave of her hand. “Red carrots are for the soul.”
This recipe is not the “instant” version you see on TikTok. There is no condensed milk, no microwave, and no shortcuts. This is an act of preservation a “Digital Anthropologist” attempt to document the way it was made before we all got too busy. It is slow, it uses just milk and patience, and it tastes exactly like a winter afternoon in a sunlit courtyard.
Why We Cook It Slowly
In 2026, we talk a lot about “slow living,” but our grandmothers invented it. The magic of this dish lies in the Maillard reaction the caramelization of the milk solids as they slowly reduce into khoya (dried milk solids) right inside the pot.
When you cook the carrots in milk for an hour, they don’t just get soft; they absorb the richness of the dairy until they turn into jewel-like confections. It requires time, but I promise you, the first bite is worth every second.
The Recipe Card
Prep time: 20 minutes | Cook time: 60 minutes | Servings: 4

Ingredients:
1 kg Red Winter Carrots (Delhi Gajar): Washed, peeled, and grated. Tip: Hand grating gives a better texture than a food processor.
1.5 Liters Full-Fat Milk: Do not use skim milk. We need the fat content for that rich mouthfeel.
4 tbsp Ghee (Clarified Butter): Plus a little extra for frying nuts.
3/4 Cup Sugar: The red carrots are naturally sweet, so we use less sugar than standard recipes.
1 tsp Cardamom Powder (Elaichi): Freshly pounded.
A handful of Cashews & Almonds: Chopped.
1 tbsp Kishmish (Raisins): Optional, but traditional.
Instructions:
The “Bhuna” Start: Heat 1 tablespoon of ghee in a heavy-bottomed Kadhai (wok). Add the grated carrots and sauté on medium heat for 8-10 minutes. This releases the moisture and deepens the red color.
The Milk Bath: Pour in the milk. Bring it to a gentle boil, then turn the heat down to low. Now, let it simmer. Stir it every few minutes so it doesn’t stick to the bottom.
The Reduction: This is where patience comes in. Cook until the milk has almost completely evaporated. You will see tiny grains of milk solids mixing with the carrots. This takes about 45 minutes.
Sweetening: Add the sugar. The mixture will turn glossy and liquid again as the sugar melts. Keep cooking until the liquid evaporates once more.
The Ghee Finish: Add the remaining ghee, cardamom powder, and nuts. Roast (bhuna) the mixture for another 10 minutes. The halwa should leave the sides of the pan and have a deep, reddish-brown shine.
Serve: Serve piping hot.
The “Pinch of Thrift” Tip (Zero Waste)
Leftover Magic: If you have leftover Halwa that is a few days old, don’t throw it away! Use it to make “Gajar Halwa Spring Rolls.” Stuff a spoonful of cold halwa into a spring roll wrapper, fry it until crisp, and serve with vanilla ice cream. It gives the traditional dish a modern, crunchy texture and ensures nothing goes to waste.

Lunch & Dinner

Bharli Vangi – Maharashtra’s Beloved Stuffed Brinjal

Bharli Vangi is a beloved Maharashtrian comfort dish – small eggplants (brinjals) stuffed with a rich peanut-coconut masala – often starring in festive thalis and wedding menus.  A spicy, tangy curry of stuffed baby brinjals, it’s as much a part of everyday home cooking as it is of special occasion feasts.  In Marathi, bharli means stuffed and vangi means eggplant, so the name literally describes the cooking method. This humble curry has a nostalgic pull: one blogger recalls that each time she makes it, “it reminds me of home, my mom, and my grandmother”.

Cultural Roots and Regional Variations

Maharashtra’s diverse regions each add their own twist to Bharli Vangi.  In the coastal Konkan area (including Malvan), for example, cooks often add roasted peanuts and fresh coriander to the stuffing and may use a local Malvani spice mix for heat.  Moving inland to the Deccan (around Pune and Satara), the curry is gently sweetened with jaggery and soured with tamarind, and scented with goda masala – a signature Marathi blend of warm spices.  Further south in Kolhapur, the version is noticeably spicier: cooks layer in fiery Kanda Lasun masala (an onion-garlic chili blend) for extra kick.  Despite these regional tweaks, the core idea remains the same everywhere: tender baby brinjals are slit and filled with a fragrant paste of peanuts, coconut, sesame and spices, then simmered until meltingly soft. Across Maharashtra, a festive thali simply isn’t complete without these stuffed eggplants – a testament to their deep roots in the state’s culinary culture.

Ingredients for Traditional Bharli Vangi

To make Bharli Vangi the authentic way, gather: baby eggplants (the tiny, round variety), peanuts, white sesame seeds, desiccated or grated coconut, onion, garlic, ginger, green chili, tamarind, jaggery, goda masala, and basic spices (turmeric, chili powder, cumin, mustard, etc.).  These ingredients reflect a classic Maharashtrian flavor profile: nutty and slightly sweet (from peanuts, coconut and jaggery), with heat and sour notes from chili and tamarind.  For the stuffing, peanuts, sesame and coconut are first dry-roasted and ground with aromatics into a thick paste.  This paste is then stuffed into the slitted brinjals, which are simmered in a tomato-onion gravy spiced with goda masala and a touch of tang (tamarind) and sweetness (jaggery).

How to Make Bharli Vangi (Step-by-Step)

Prepare the brinjals: Rinse 250–300g of small, tender brinjals. With a sharp knife, make 3–4 slits from the stem end towards the base (don’t cut all the way through) to create pockets for the filling. Soak the slit eggplants in a bowl of salted water for about 15 minutes to draw out any bitterness. (Tip: Light-purple or green baby brinjals with thin skins work best. If using larger ones, cut them into chunks instead, as big brinjals tend to remain tough.) Drain and pat them dry.

Make the stuffing paste: In a dry pan on medium heat, roast ¼ cup peanuts until golden and fragrant. Add 1–2 tablespoons of white sesame seeds and roast briefly. Then add ½ cup of unsweetened shredded/dry coconut and stir continuously until lightly browned. Transfer these to a grinder and let cool slightly. To the grinder add about 1 small chopped onion, 5–6 cloves of garlic, a 1-inch piece of ginger, and 1–2 green chilies. Grind everything to a coarse, moist paste. (You can add a splash of water if needed.)

Stuff the brinjals: Mix the ground paste with ½ teaspoon turmeric, 1 teaspoon goda masala, ¼ cup tamarind water (soaked and strained), 1 teaspoon jaggery, and salt to taste.  Carefully open the slits of each eggplant and press about a tablespoon of the stuffing into each one. (Reserve any leftover masala for the curry.) The eggplants should be generously filled, as the stuffing will enrich the gravy when cooked.

Cook the curry: Heat 2 tablespoons oil in a deep pan or kadhai. Temper with 1 teaspoon cumin seeds and ½ teaspoon mustard seeds until they pop. Add a pinch of asafoetida and 10–12 curry leaves. Sauté 1 chopped onion and 1 chopped tomato until soft. Stir in the reserved peanut-coconut paste, along with ½ teaspoon chili powder and more goda masala or Kanda Lasun masala if you like it spicier. Add the stuffed brinjals, turning them gently to coat with the gravy. Pour in about 1 cup of hot water (enough to create a saucy curry) and bring to a boil. Finally, mix in the tamarind and jaggery (if not already added). Reduce heat to low, cover, and simmer for 10–15 minutes, stirring occasionally, until the brinjals are very tender and the gravy thickens. Uncover and cook a few more minutes if you prefer a drier consistency. Garnish with chopped coriander. The eggplants should be soft and fully infused with the spicy, nutty masala by the end.


After cooking, the stuffed brinjals are meltingly tender and drenched in a rich, reddish curry of coconut–peanut–tamarind gravy. Each bite delivers warm spices and a hint of sweetness – a truly soul-satisfying Maharashtrian curry.

Dry-Style Variation

For a less saucy version (often called a dry Bharli Vangi), simply reduce the water: after sautéing and adding the stuffed brinjals and masala, cover and cook on very low flame without adding extra water or with just a splash of oil. Let the stuffed eggplants cook slowly until the stuffing and juices coat them in a thick, drier glaze. This method yields a stir-fry–like dish that clings to the brinjals. (In fact, some sources note that a similar Gujarati stuffed eggplant is steamed or cooked with minimal liquid for a dryer result.) The choice between a juicy curry or dry-style is up to you and the occasion.

Tips for Perfect Bharli Vangi

Use the right brinjals: Small, round “Kateri” brinjals with thin skin and few seeds become soft and creamy when cooked. Avoid large purple ones, which can stay fibrous.

Soak to remove bitterness: Salted water soak (10–15 min) takes the bite out of eggplants. After soaking, rinse and dry them well.

Roast the stuffing ingredients: Dry-roasting peanuts, sesame, and coconut deepens their flavor and aroma. Don’t skip this step – it makes the stuffing far more flavorful.

Temper gentle cooking: Stuffed brinjals are best cooked covered on low heat. This traps steam, helping them cook through to a soft, creamy texture. Turn them gently so they don’t break apart.

Balance sweet and sour: Traditional recipes use both tamarind (or kokum) and a bit of jaggery. Adjust these to taste for the signature sweet-tangy bite.

Extra flavor boosters: Some cooks add a teaspoon of poppy seed powder or ground coriander to the paste for a richer gravy. Fresh curry leaves and a pinch of garam masala can also enhance the aroma.


Serving Suggestions

Bharli Vangi is typically enjoyed hot with hearty flatbreads or grain sides.  In Maharashtra, it’s classic to serve this curry with jowar or bajra bhakri (millet flatbreads). It also goes wonderfully with soft phulkas or chapatis. A simple mound of steamed rice and a dollop of ghee pairs beautifully with the rich curry. Accompany the meal with varan-bhat (daal and rice) and crunchy papad for a traditional thali spread. One blog notes that Bharli Vangi “paired with Bajrichi Bhakri is a winter delight” and it can also be served with jeera rice, chapati, dal, papad and salad. A side of cooling yogurt raita or cucumber salad balances the heat. Whatever you choose, the tangy, nutty spice of Bharli Vangi brings warmth and nostalgia to the table – a taste of Maharashtrian home cooking at its best.