Lunch & Dinner, Street Foods

Potato 65 – Crispy, Spicy & Tangy Indo-Chinese Appetizer

When I think of Potato 65, I’m flooded with warm memories. Growing up, my mother would fry up a big batch of this spicy, bright-red potato dish for special occasions. The kitchen would fill with the aroma of curry leaves crackling in hot oil and chiles, and we kids would line up eagerly to snag the first crispy bite. Whether it was a family Diwali get-together or a rainy monsoon evening, a platter of Potato 65 instantly made it feel like a celebration, with its vibrant colors and bold flavors bringing joy to everyone.

Potato 65 is an Indo-Chinese inspired snack that’s popular across India, especially as a vegetarian take on the famous Chicken 65. It features golden deep-fried potato cubes coated in a spiced batter, then tossed in a tangy, chili-infused yogurt sauce along with curry leaves and chilies. The result is a crispy, spicy, and tangy appetizer that’s finger-licking good. (Ever wondered why it’s called 65? Legend has it the original Chicken 65 got its quirky name either from being item #65 on a Chennai canteen menu or from being introduced in the year 1965. Whatever the true story, all that matters is how delicious these “65” dishes taste!)

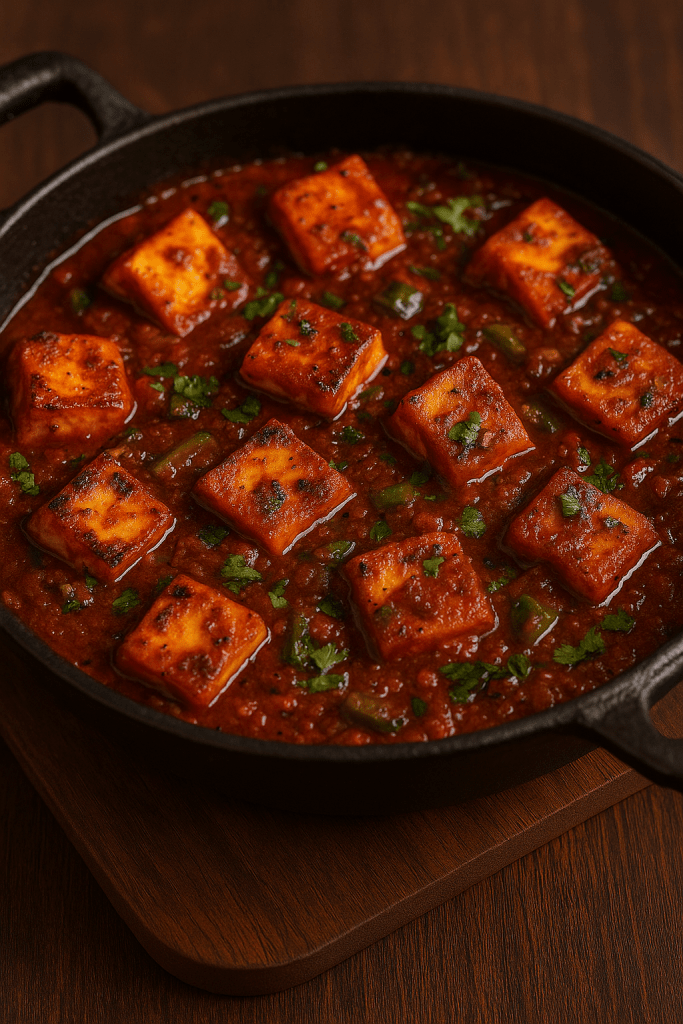
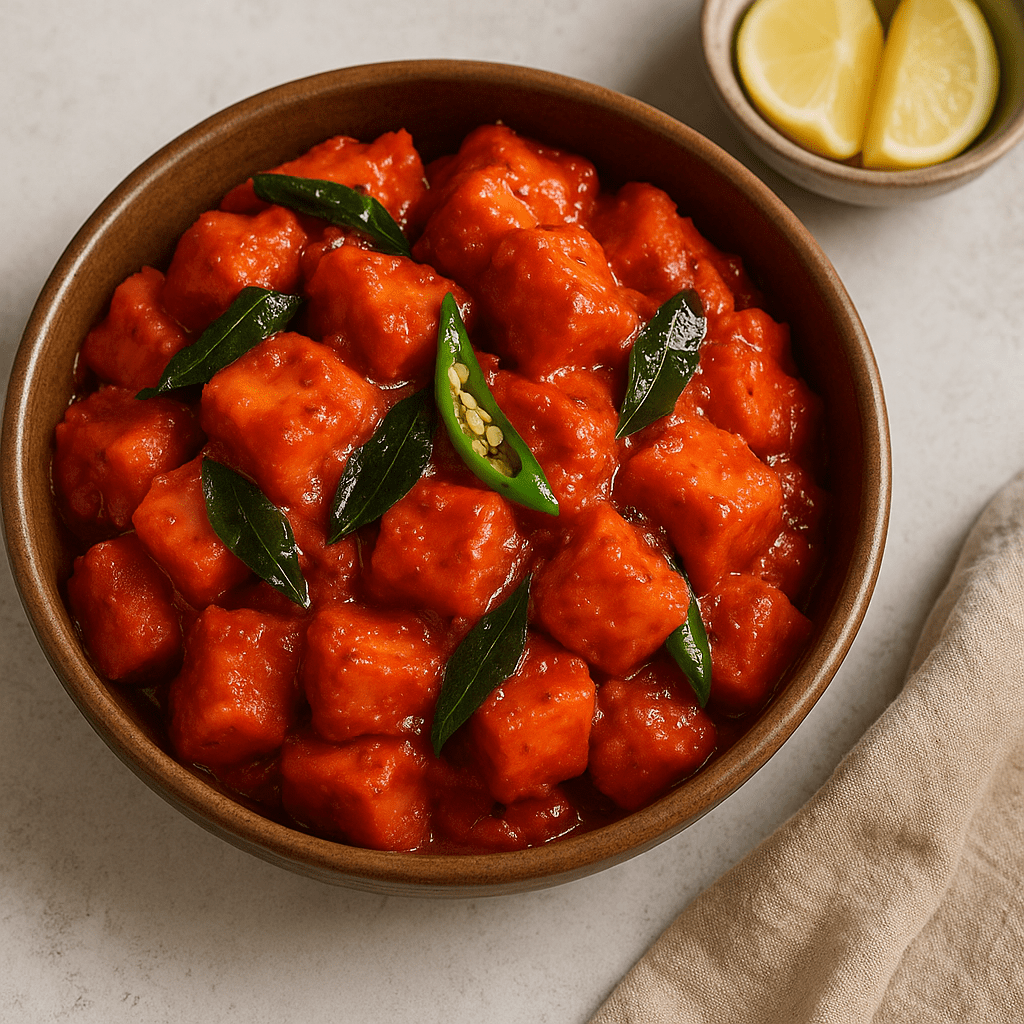
Potato 65 served in a bowl, garnished with curry leaves and green chili – a vibrant appetizer that’s crispy, spicy, and irresistibly tangy. In the photo above, you can see how the fried potato cubes are generously coated in the reddish yogurt-chili sauce and dotted with fried curry leaves. Each bite bursts with flavor: the crunch of the batter, the heat of chilies, and a slight tang from that special sauce. It’s no wonder this dish is a crowd-pleaser at parties and family gatherings.

Despite its restaurant-style flair, Potato 65 is quite straightforward to make at home. Below, I’ll guide you through the ingredients and step-by-step instructions, along with plenty of handy tips to ensure your Potato 65 comes out perfectly crispy (and not greasy or soggy!). This festive snack makes a fantastic starter for any party, and also doubles as a flavorful side dish – you can serve it alongside naan or biryani, or even with fried rice and pulao. Now, let’s get cooking this spicy treat!

Ingredients

For the Potatoes & Batter:

Potatoes (boiled) – 3 medium potatoes, peeled and cut into 1-inch cubes (par-boiled until just fork tender).

All-purpose flour (Maida) – ¼ cup (for binding the batter).

Corn flour (Cornstarch) – 3 tablespoons (adds extra crispness).

Rice flour – 1–2 tablespoons (optional, for even more crunch; you can skip if not available).

Ginger-Garlic paste – 2 teaspoons (for robust flavor in the marinade).

Kashmiri red chili powder – 1 teaspoon (mild, for color).

Garam masala – ½ teaspoon (warm spice mix).

Black pepper powder – ½ teaspoon (for a slight kick).

Turmeric powder – ¼ teaspoon (adds color and flavor).

Salt – to taste.

Baking soda – a pinch (helps make the coating light and crisp).

Water – ~¼ cup, or as needed to make a thick batter.


For the Tempering (Yogurt-Chili Sauce):

Oil or Ghee – 2 tablespoons (for tempering the spices).

Cumin seeds – 1 teaspoon (adds a nutty aroma when tempered).

Mustard seeds (optional) – ½ teaspoon (for a South Indian touch, optional).

Garlic – 3–4 cloves, finely chopped.

Onion – 1 small, finely chopped (optional, adds extra flavor in the final toss).

Green chilies – 2, slit lengthwise (for heat and garnish).

Dried red chilies – 2, broken into pieces.

Curry leaves – 1 sprig (about 8–10 fresh curry leaves).

Kashmiri red chili powder – ½ teaspoon (for color in the sauce; adjust for spice level).

Coriander powder – 1 teaspoon (adds earthy flavor to the sauce).

Soy sauce – 1 teaspoon (optional, for an Indo-Chinese twist and umami).

Tomato ketchup – 1 teaspoon (optional, adds tangy sweetness in the Indo-Chinese version).

Yogurt (curd) – ¼ cup, thick and whisked (this is the base of the tangy sauce; use plain yogurt or Greek yogurt, at room temperature to avoid curdling).

Salt – a pinch (to season the sauce, remember the batter already has salt).

Sugar – ½ teaspoon (optional, to balance the heat and tang if needed).


For Garnish:

Fresh cilantro (coriander leaves) – a handful, chopped.

Fried curry leaves & chilies – reserved from tempering (they become crispy and aromatic).

Lemon wedges – to serve on the side (a squeeze of lemon before eating elevates the flavors).

Chaat masala – a pinch to sprinkle on top (optional, for a tangy finish).


Tip: Using Kashmiri red chili powder gives a brilliant red color without making the dish too spicy – no artificial food coloring needed. If you prefer extra heat, you can mix in a bit of hotter chili powder or a couple of chopped green chilies to the batter or sauce.

Step-by-Step Instructions

1. Prep the Potatoes: Peel and cut the potatoes into cubes (about 1-inch pieces). Par-boil the potato cubes in salted water until just tender but not mushy. You can boil for about 5–6 minutes or pressure cook for 1 whistle – the potatoes should be cooked through yet firm enough to hold their shape. Tip: Do not overcook the potatoes, or they’ll break apart and soak up oil later, making them soggy. Once done, drain and let the potato cubes cool slightly (excess moisture will also make the batter slip off, so ensure they are not water-logged).


2. Make the Batter: In a mixing bowl, combine the flours (all-purpose, corn flour, and rice flour if using), ginger-garlic paste, Kashmiri chili powder, garam masala, black pepper, turmeric, baking soda, and salt. Add a little water at a time and whisk to form a thick, smooth batter that can coat the potatoes (no big lumps). The batter consistency should be like pancake batter – not too thin (or it won’t cling) and not too thick (or the coating will be dense). Tip: If the batter looks too runny, sprinkle a bit more flour; if too thick, add a spoon of water. Also, taste-test the batter and adjust salt or spice if needed (keeping in mind the sauce will add more flavor later).


3. Batter Coat the Potatoes: Add the boiled potato cubes into the bowl of batter. Gently toss or fold until every potato piece is well coated with the spiced batter. Let it sit for 5–10 minutes while you heat the oil. (This short rest helps the batter adhere better, but don’t leave it too long or the potatoes might start releasing moisture).


4. Deep Fry the Potatoes: Heat oil in a deep kadai or heavy-bottom pan for deep frying. You’ll need enough oil to submerge the potato pieces (about 2 inches of oil depth). Once the oil is hot (around 350°F/180°C; you can test by dropping a bit of batter – it should sizzle and rise immediately), carefully drop in the batter-coated potato cubes in small batches. Do not crowd the pan. Fry on medium-high heat until the potatoes turn crispy and golden-brown on the outside, about 4–5 minutes per batch. Stir occasionally for even frying. Tip: Frying at too low a heat will make the potatoes absorb oil and turn limp, so keep the oil moderately hot. On the other hand, don’t crank the heat to smoking – you want the potatoes to crisp up gradually; they take a little time to get a nice crunchy coating, so be patient. Once done, remove the fried potatoes with a slotted spoon and drain excess oil on paper towels.


5. Prepare the Tempering (Tadka): In a wide pan or wok, heat 2 tablespoons of oil (or ghee for extra flavor) on medium heat. Add the cumin seeds (and mustard seeds, if using). Let them splutter for a few seconds (this releases their aroma). Then toss in the finely chopped garlic, broken dried red chilies, slit green chilies, and fresh curry leaves. Sauté these for a minute until the garlic turns lightly golden and the curry leaves turn crisp. (Careful, this will release spicy fumes – keep your face away!). If using onions, add the chopped onion now and sauté until translucent. Your kitchen should smell divine at this point with all those aromatics frying.


6. Add Spice Powders & Sauce Base: Reduce the heat to low. Now add the spice powders: Kashmiri chili powder (for that bright color), coriander powder, and a pinch of salt to season the masala. If you want the Indo-Chinese twist, also stir in the soy sauce and ketchup at this stage, mixing everything well so the spices and sauces combine. Sauté for just 20–30 seconds – be careful not to burn the powders. Tip: Adding the sauces (soy & ketchup) gives a lovely sweet-spicy kick reminiscent of chili sauce; you can skip them for a more traditional flavor, but they do elevate that Indo-Chinese profile.


7. Stir in the Yogurt: Still on low heat, add the whisked yogurt to the pan. Immediately stir continuously as you add it, allowing it to form a creamy, spiced sauce with the tempered spices. Cook this yogurt-chili sauce for about 30 seconds to a minute on low flame, just until it heats through and thickens slightly. Important Tip: Keep the flame low when adding yogurt to prevent it from curdling or splitting. You can even take the pan off the heat, stir in the yogurt, then return to low heat – this gentler approach helps if you’re worried about curdling. The sauce should be fairly thick and clingy; if it looks too thick or dry, you can stir in a splash of water to loosen it a bit (or if you prefer more “saucy” Potato 65).


8. Toss Fried Potatoes in the Sauce: Now add the fried potato pieces into this yogurt sauce. Increase heat to medium-low and gently toss or fold the potatoes so that each piece is well coated with the tangy, spiced sauce. Do this for a minute until the potatoes are reheated and nicely covered in the masala. You’ll see the potato 65 take on a gorgeous fiery color and shiny glaze from the sauce. Finally, turn off the heat.


9. Garnish and Serve: Transfer the Potato 65 to a serving dish. Sprinkle the chopped fresh cilantro on top. For extra punch, you can sprinkle a pinch of chaat masala over the top and a squeeze of fresh lemon juice. Garnish with the crispy fried curry leaves and green chili pieces from the pan (they’re edible and delicious!). Serve immediately while it’s hot and crispy.


Tip: Potato 65 tastes best when served right away, as that’s when it’s most crispy. If it sits too long, it may soften – but you can re-crisp it in a hot oven or air fryer for a few minutes if needed. Also, if you find the dish too spicy, serve a cooling mango lassi or yogurt raita on the side to balance the heat.

Variations and Tips

Air-Fryer Potato 65: Want a lighter version? You can air-fry the batter-coated potatoes instead of deep frying. Preheat your air fryer to 180°C (350°F). Lightly grease the basket and place the coated potato cubes in a single layer. Spray or brush a little oil on them for extra crispness. Air-fry for about 15–18 minutes, shaking the basket halfway, until the potatoes are crispy and golden. Then, toss them in the prepared yogurt-chili tempering as in the main recipe. (They’ll be slightly less evenly browned than deep-fried, but still delicious!).

Baked Potato 65: Similarly, you can bake the coated potatoes in a conventional oven. Preheat the oven to 200°C (400°F). Arrange the batter-coated potato pieces on a greased or parchment-lined baking sheet, spacing them out. Drizzle or spray a bit of oil on top. Bake for ~25–30 minutes, flipping them once halfway through, until they turn crisp and golden-brown. Then toss in the sauce. Baked Potato 65 will be a bit lighter in texture but is a great option if you want to avoid deep frying.

Pan-Fried (Tawa) Version: If you don’t want to deep fry, you can shallow-fry the potatoes on a tawa (griddle) or wide pan with a few tablespoons of oil. Place the batter-coated potatoes on the hot pan and cook on medium heat, turning them to cook all sides. They may not get uniformly crispy like deep-fried ones, but you can achieve a good golden crust on most sides. Proceed with the tempering and sauce once they are nicely browned. Tip: Ensure your potatoes aren’t over-boiled for this method, as they need to hold up to flipping.

“Chili-Sauce” Base Alternative: While the recipe above uses a yogurt-based sauce, you can make a pure Indo-Chinese style Potato 65 by replacing the yogurt with a chili-garlic sauce base. For example, skip the yogurt and instead add 2–3 tablespoons of schezwan sauce or your favorite bottled chili-garlic sauce (along with the soy sauce and ketchup) into the tempering. Toss the fried potatoes in that; it will give a spicier, stickier coating similar to Chili Potato (another Indo-Chinese dish). This variation packs an extra punch and has no dairy. (If doing this, you can also add a teaspoon of vinegar for a tangy kick instead of yogurt).

Other 65 Variations: The “65” style is so versatile that you can swap out the potato for other ingredients. Cauliflower 65 (Gobi 65) and Paneer 65 are popular variations – using the same marinade and process, just replacing with cauliflower florets or paneer cubes. Even baby corn 65 or mushroom 65 are delicious alternatives. So, feel free to use this recipe as a template and get creative with other veggies or proteins!

Healthier Flour Swap: If you prefer not to use refined flour (maida), you can substitute whole wheat flour for the batter – it works, though the coating might be slightly denser. You can also experiment with using gram flour (besan) for a different flavor, but the texture will change a bit.

Adjusting Spice Levels: Potato 65 is meant to be spicy, but you can always adjust it to your taste. Use fewer chilies (or remove chili seeds) for a milder version. For extra-spicy, add more green chilies in the tempering or a hotter variety of chili powder in the batter. Tasting as you cook is key!


Serving Suggestions

Potato 65 is best enjoyed hot and fresh, when the exterior is still crispy. It makes for an excellent party appetizer – stick toothpicks in the pieces to serve them finger-food style, and watch them disappear in no time! For a party platter, you can serve Potato 65 alongside other Indo-Chinese snacks like spring rolls or Gobi Manchurian, and a bowl of green chutney or ketchup for dipping (although it’s flavorful enough on its own).

For a more substantial meal, pair Potato 65 as a side dish with Indian breads or rice. It goes wonderfully with chapati or naan, since the tangy sauce can be scooped up, almost like a dry curry. I also love it with a mild fried rice, pulao, or even jeera rice, to add a spicy kick on the side. In South India, it’s not unusual to serve it alongside biryani or pilaf as a crunchy contrast.

To balance the spiciness, serve a cooling accompaniment: a simple raita (yogurt dip with cucumber) works well, or the classic mango lassi as mentioned earlier for kids and adults alike. A squeeze of lemon on top of the Potato 65 just before eating also brightens up the flavors and adds extra tang.

If you have any leftovers (a rare occurrence!), you can reheat them in an oven or air fryer to bring back some of the crispiness. However, avoid microwaving, as that will make the batter soft. But honestly, once you put this dish out, there’s seldom anything left to store – it’s that addictive!

Enjoy your homemade Potato 65 – a dish that’s crispy, spicy, tangy, and absolutely unforgettable. It’s the kind of recipe that brings people together, be it at a festive holiday gathering or just a fun weekend snack night. Happy cooking and happy eating! 🎉🥔🔥

Lunch & Dinner

Paneer Sukhi Masala (Dry Paneer Masala Sabzi)

When I think of comfort food from my childhood, Paneer Sukhi Masala instantly comes to mind. I remember the aroma of cumin seeds crackling in hot oil and the sizzle of paneer cubes hitting the pan in my mother’s kitchen. This dish – essentially a sukhi sabzi, meaning a dry vegetable preparation – was a weeknight staple for us. It’s a North Indian-style paneer dish with no heavy gravy, just soft golden paneer (Indian cottage cheese) cubes coated in a thick, flavorful masala. Each bite would take me back to those cozy family dinners, with warm rotis in hand and this spicy paneer sabzi disappearing faster than anything else on the table.

Paneer Sukhi Masala served hot and garnished with fresh coriander. This dry paneer dish has a thick onion-tomato masala clinging to each cube of cheese, making it irresistibly flavorful. The aroma of sautéed cumin, ginger, and garam masala fills the kitchen as it cooks, truly a homestyle sabzi that brings warmth and comfort.

Despite its bold flavors, Paneer Sukhi Masala is a simple recipe that uses minimal ingredients and comes together quickly – perfect for busy days. In fact, you can have this lip-smacking dish on the table in around 30 minutes, making it an ideal last-minute vegetarian main course. Below, I’ll walk you through the ingredients, step-by-step method, and some personal tips to get the best texture and flavor. I’ll also share a few variations (like adding capsicum or a touch of cream) and serving suggestions. Let’s get cooking!

Ingredients

Paneer (Indian cottage cheese) – 250 g, cut into cubes (roughly 2 cups cubed). Use fresh or store-bought; if using refrigerated paneer, see tips for softening. (Paneer is a soft, non-melting fresh cheese common in Indian cuisine.)

Oil or Ghee – 2 tablespoons, for sautéing (use ghee for richer flavor).

Cumin seeds (Jeera) – 1 teaspoon, for tempering.

Ginger & Garlic – 1 teaspoon ginger-garlic paste (or 1 tsp each of freshly grated ginger and minced garlic).

Onions – 2 medium, finely chopped (about 1 cup).

Tomatoes – 2 medium, chopped (or pureed) (about 1 cup puree).

Green Chili – 1, slit or chopped (optional, for extra heat).

Spice Powders:

Turmeric – ½ teaspoon

Red Chili Powder – ½ teaspoon (adjust to taste; use Kashmiri chili powder for milder heat and color)

Coriander Powder – 1 teaspoon

Cumin Powder – ½ teaspoon (optional, for extra cumin flavor)

Garam Masala – 1 teaspoon (a flavorful spice blend)


Kasuri Methi (dried fenugreek leaves) – 1 teaspoon, crushed between your palms (optional but highly recommended for aroma).

Salt – ¾ teaspoon, or to taste.

Fresh Coriander Leaves – 2 tablespoons, chopped, for garnish.

Optional Add-Ins:

Capsicum (Bell Pepper) – 1 small, diced into 1-inch pieces (any color; add for extra flavor and crunch, commonly used in paneer sabzi).

Heavy Cream – 2 tablespoons (optional, to stir in at the end for a richer, slightly creamier finish).


Step-by-Step Method

1. Prep the Paneer: If your paneer is store-bought and firm, cut it into bite-size cubes and soak them in warm water for 5–10 minutes, then drain before cooking. This helps the paneer stay soft and moist. (Do not soak longer than 10 minutes or the cubes can start to break down.)


2. Temper Spices: Heat the oil or ghee in a heavy pan or kadhai over medium heat. Once hot, add the cumin seeds and let them sizzle until they begin to crackle and release their aroma (about 30 seconds). This infuses the oil with a warm, earthy flavor.


3. Sauté Ginger, Garlic, and Chilies: Add the ginger-garlic paste (or minced ginger & garlic). Sauté for a minute until the raw smell disappears. If using green chili for heat, add it now and fry for a few seconds. Be careful not to burn the garlic or spices – keep the heat on medium.


4. Onions: Add the chopped onions and a pinch of salt (salt helps them cook faster). Sauté the onions, stirring often, until they turn golden-brown. This may take about 5–6 minutes. Browning the onions well is key to developing the sabzi’s deep flavor and slight sweetness. If the onions start sticking to the pan, you can sprinkle a teaspoon of water to deglaze and prevent burning.


5. Tomatoes: Stir in the chopped or pureed tomatoes. Cook the mixture (masala) for about 5–7 minutes on medium flame, stirring occasionally, until the tomatoes break down and the masala becomes thick. You want the oil to begin to separate from the sides of the pan and the raw tomato smell to vanish. Cooking the tomato-onion masala thoroughly ensures a rich taste (under-cooked masala can taste bland or raw).


6. Spice Powders: Once the tomatoes have softened and the masala looks well cooked, add the spice powders – turmeric, red chili powder, coriander powder, cumin powder (if using), and garam masala. Also add the remaining salt at this stage. If you are adding capsicum (bell peppers) for a crunch, toss them in now. Mix everything well. Sauté this spiced masala on a medium-low flame for about 2–3 minutes, until it becomes aromatic and the spices are well roasted. Tip: Keep the flame low to medium while frying spices – cooking the masala on a low flame prevents it from burning and turning bitter. You should see the oil start to gleam on the edges of the mix; that’s a sign the spices are cooked. If the masala is too dry or starts to stick, add a few tablespoons of water to deglaze the pan and scrape up any browned bits (this also helps avoid burning).


7. Add Paneer: Reduce heat to low. Add the paneer cubes to the pan, along with the kasuri methi (crush the fenugreek leaves between your fingers as you sprinkle, to release their oils). Gently fold the paneer into the masala, coating each piece with the spices. Be gentle while stirring – paneer is delicate and can break apart if handled roughly. If you prepared the paneer by soaking, it should be soft and will absorb the flavors nicely.


8. Simmer: After mixing, cover the pan and let the paneer simmer on low heat for about 2–3 minutes. This helps the paneer warm through and lets it soak up the flavors of the masala. Keep it on low – remember, paneer doesn’t need long cooking. Overcooking can make it chewy. Just a few minutes is enough for it to heat and meld with the spices.


9. Finish: Remove the lid and give it a final stir. If you opted to use heavy cream for a richer twist, pour in the cream now and gently mix. The cream will coat the paneer and give a slight creamy touch to the masala (this is optional – the traditional recipe is typically dry). Finally, sprinkle the chopped fresh coriander leaves on top and switch off the heat.


10. Taste & Adjust: Taste the Paneer Sukhi Masala and adjust salt or spices if needed. You can squeeze a bit of fresh lemon juice if you want a pop of tanginess to brighten the flavors. A tiny pinch of sugar can also be added if the tomatoes were too acidic, to balance the taste – this is totally up to your preference.


11. Serve: Transfer the paneer sabzi to a serving dish. Serve hot (paneer tastes best when warm and soft). See below for serving suggestions on how to enjoy this dish!


Tips for Texture and Flavor

Keep Paneer Soft: No one likes rubbery paneer. For tender results, use fresh paneer or soften store-bought paneer before cooking. As mentioned, soaking the paneer cubes in hot water for about 5–10 minutes is a simple, hassle-free way to ensure they stay soft. Just be sure not to exceed 10 minutes of soaking, or the paneer can start to lose its structure and creamy texture. Another method is to briefly blanch the cubes in boiling water for 1 minute, then transfer to cold water – but soaking is easiest. Also, avoid frying the paneer for too long; a quick sauté is enough since overcooking will make it firm.

Gentle Handling: Paneer is delicate. Always stir gently after adding the paneer to the masala. We don’t want to break the cubes while mixing. Use a flat spatula to softly turn the pieces over. Coat them with masala by folding instead of vigorous stirring. This way, your paneer cubes remain intact and presentable.

Cook Masala Thoroughly (but Not Too Hot): The key to a flavorful dry paneer masala is a well-cooked onion-tomato base. Take your time to sauté the onions until golden and cook down the tomatoes until you see the oil separating. This step builds a deep flavor. However, do this on a moderate flame. Spices can burn easily and turn bitter, so it’s advised to cook the masala on a low flame to avoid burning. Stir regularly, and if you sense anything catching at the bottom, add a splash of water and lower the heat. A burnt masala will spoil the taste, so slow and steady wins here.

Balancing Flavor: Taste as you go. Once the masala is ready (before adding paneer), taste it. It should be slightly salty and spicy because the paneer will mellow it out. If it tastes too tangy (from tomatoes) or too spicy, you can adjust. Add a pinch of sugar to balance excess tang. If it’s too spicy, a spoonful of yogurt or cream can help tone it down (or use milder Kashmiri chili powder for color without heat). Garam masala can be adjusted at the end – if you feel it needs more warmth, sprinkle a little extra and cook 1 minute. Kasuri methi is a secret weapon for flavor: a small amount added at the end makes the dish very aromatic with a restaurant-like finishing touch. Just don’t overdo it; 1 teaspoon is enough as it’s potent.

Texture: For a true “sukhi” (dry) sabzi, avoid adding too much water. We only deglaze with a few tablespoons if needed, not more. The goal is a thick masala that clings to the paneer, not a curry. If you do accidentally add extra water and the dish looks wetter than desired, you can cook it uncovered on high heat for a minute to evaporate excess moisture. Conversely, if it’s too dry and starting to scorch, that’s when a tiny splash of water comes to rescue. It’s all about that perfect balance where the masala is moist enough to bind everything but there’s no gravy or liquid pooling.

Consistency of Paneer: If you prefer a slightly crisp edge on your paneer, you can pan-fry the cubes in 1 tablespoon oil separately for 2-3 minutes until lightly golden, then add them. This adds a chewiness on the outside. But keep in mind, pan-frying can make the inside of the paneer a bit firmer. If you do this, you might still want to soak the fried paneer in warm salted water for a few minutes to retain softness (yes, you can fry then soak – it’s a trick to get soft yet golden paneer). For the softest result, you can skip the pre-frying and just let the paneer cook in the masala as we did above.

Avoid Overcooking: As a general rule, once paneer is in the pan, do not cook it for too long. Only 2-3 minutes of simmering is needed for it to absorb flavors. Prolonged cooking will make the paneer tough and rubbery. Always add paneer towards the end of the recipe.


Variations

One of the joys of cooking paneer dishes is how versatile they are. Here are a few variations and tweaks you can try with Paneer Sukhi Masala:

Add Capsicum (Bell Peppers): As mentioned, adding capsicum is a popular variation. It brings a lovely aroma and a bit of crunch. You can use green, red, or yellow bell peppers. Slice or dice them and toss in when the onions are halfway done or along with the tomatoes/spices (timing depends on how soft you want them). I usually add them just after the tomatoes but before the powdered spices, so they cook slightly yet remain a bit crisp. Capsicum cooks fast, so 3-4 minutes is enough. This essentially makes the dish similar to a Paneer Tawa Masala or Kadai Paneer style preparation which often includes bell peppers.

Peas (Matar Paneer Dry): For a variation with some greenery and sweetness, add a handful of green peas. You can use frozen peas (thawed) or fresh peas (boiled until nearly cooked). Stir them in along with the paneer in the final few minutes. Peas pair well with paneer and give you a paneer-matar sukhi sabzi. Just ensure the peas are cooked to your liking (frozen peas usually cook through in 2-3 minutes).

Creamy Twist: If you’re in the mood for a richer flavor, the heavy cream trick at the end works wonders. Even a tablespoon or two of malai (the thick cream that forms on boiled milk) or fresh cream will add a subtle richness that coats the paneer. This is an optional step and turns the dish into more of a semi-dry curry rather than completely dry. It won’t be as creamy as a Paneer Butter Masala (which is a different gravy-based dish), but it adds a touch of luxury. Stir in the cream on low heat and don’t boil the sabzi after adding it to prevent curdling. You could also add a knob of butter at the end for a buttery finish.

Nutty Richness: For special occasions, you can make the masala richer by adding a tablespoon of cashew paste or almond paste (soaked and ground nuts) into the tomato-onion base. This gives a slightly thicker coating on the paneer and a Mughlai touch. It’s not traditional for a sukhi masala, but it’s a nice twist if you want a drier version of shahi paneer vibes.

Achari Paneer Sukhi Masala: Give it a pickled punch by adding achari masala (Indian pickling spices) or even just a teaspoon of your favorite pickle oil (from Indian mango or chili pickle) into the masala. This infuses a tangy, spiced flavor (often with notes of mustard, fennel, nigella) into the dish, making it taste like achari paneer (pickle-style paneer). Add this towards the end of cooking for maximum aroma.

No Onion No Garlic (Jain style): If you follow dietary restrictions or just ran out of onions/garlic, you can still make a delicious Paneer Sukhi Masala. In fact, the famous chef Tarla Dalal has a Jain version where she skips onion and garlic altogether. The trick is to compensate with a freshly ground masala of whole spices. For example, roast 2-3 dried red chilies with a tablespoon of coriander seeds, grind them into a powder, and use that along with tomatoes and capsicum. You start by tempering cumin in oil, then add capsicum, the ground chili-coriander powder, tomatoes, etc. The result is surprisingly flavorful even without alliums. Just ensure you add a pinch of asafoetida (hing) while tempering the cumin to give a subtle onion-like depth if you like.

Vegan Option: The recipe is almost vegan if you simply swap out paneer. You can replace the paneer with tofu cubes for a vegan version (extra-firm tofu works best; pat it dry and pan-fry it slightly for texture). Use oil instead of ghee, and skip the cream or use a non-dairy cream (cashew cream works well). The spices and method remain the same, and you get a tasty tofu sukhi masala that even non-vegans will enjoy.


Feel free to mix and match these ideas. You can truly make this recipe your own by experimenting with different vegetables or seasonings. The base of onion-tomato and spices is like a canvas – for instance, sometimes I throw in a handful of mushrooms or baby corn along with the paneer for variation. As long as you cook the base properly and don’t add too much liquid, it will remain a sukhi sabzi with its signature concentrated flavors.

Serving Suggestions

Paneer Sukhi Masala is a versatile dish that can be enjoyed in a number of ways. Here are some serving ideas to make it a satisfying meal:

With Indian Breads: The most classic way to serve this sabzi is with Indian flatbreads. Soft rotis or chapatis (whole wheat flatbreads) are perfect for scooping up the spiced paneer. It also pairs wonderfully with parathas – especially plain paratha or even a simple flavored one like ajwain (carom seed) paratha. Because the paneer masala is dry, it’s actually an excellent filling for a wrap: you can roll it inside a warm paratha or naan along with some onion slices and make a delicious paneer kathi roll.

With Rice: Serve it as a side alongside rice and dal for a complete meal. In many North Indian households, a dry sabzi like this is served with dal (lentil curry), rice, and roti – part of a wholesome lunch thali. You can pair Paneer Sukhi Masala with plain steamed basmati rice or a mild pulao. Jeera rice (cumin-flavored rice) is also a great companion; its aromatic but not overpowering flavor complements the spiciness of the paneer dish. Take a spoon of paneer masala, some rice, a bit of yogurt or raita on the side – it’s comfort in every bite.

As a Side Dish: This paneer sabzi can work as a main curry or as a side. If you have a larger Indian spread, you might have a gravy dish (like dal or curry) and also a dry sabzi like this on the table. It provides a nice contrast in texture. You can serve it alongside a richer curry such as dal makhani or butter chicken for a non-veg option, or alongside chole (chickpea curry) – the dry paneer balances a gravied dish. It’s also a good option for parties or potlucks where you need a dry item that’s easy to handle and serve.

With Raita: Because this dish packs a punch of spice, a cooling accompaniment goes well. Serve it with a side of raita (yogurt dip). Boondi raita (yogurt with crispy gram flour pearls) or cucumber raita would be lovely. In fact, a photographer on Wikimedia showed paneer sabzi served with boondi raita and roti, highlighting how common that combo is. The creamy cool yogurt tones down the heat and adds a refreshing element.

Lunchbox or Make-Ahead: Paneer Sukhi Masala is quite lunchbox-friendly too. Since it’s dry, it doesn’t leak or make rotis soggy, which is a bonus. You can pack it with parathas for a work or school lunch. Reheating is easy, though paneer might firm up a tad on cooling – a sprinkle of water before reheating will help. It’s also a great picnic or travel food when paired with puri or paratha, because it stays good at room temperature for a few hours.

Light Meal / Snack: You can even serve leftover cold pieces on cocktail picks as a party snack (kind of like paneer tikka, but without the tandoor). Or stuff the paneer masala into a frankie (wrap) or sandwich for a quick snack. Melt some cheese over it in a sandwich and you have an Indo-fusion grilled sandwich!


However you serve it, enjoy it hot for the best texture. The paneer is softest when warm, and the spices are most aromatic. Typically, we would have this dish for dinner with fresh chapatis and maybe a simple salad on the side. It’s the kind of dish that’s hearty enough to be the star of a meal but also flexible enough to pair with other items. And since it’s dry and flavorful, it **goes perfect with roti or paratha, and can also be served as a side with dal-chawal (dal and rice)** – truly a home-style favorite that fits wherever you need it to.


I hope you enjoy this Paneer Sukhi Masala as much as my family does. It’s amazing how a simple dish of spiced paneer can bring such comfort and joy. Happy cooking, and do let me know in the comments if this recipe brings back any memories for you or if you gave it your own twist! 😋

Lunch & Dinner, Street Foods

Homestyle Chhole Kulcha Recipe

Introduction

There’s a special kind of warmth in the air when chhole kulcha is on the stove. I remember my mother soaking chickpeas overnight and simmering a pot of chhole on lazy Sunday mornings, the aroma of onions, ginger, and garlic filling our home. This dish is a homestyle spin on the Punjabi classic – tender chickpeas simmered in a thick, mildly spiced onion-tomato masala with notes of bright tomato and warm cumin. Unlike the fiery restaurant versions, this everyday chhole is gentle on heat yet full of flavor, perfect for family lunches or weeknight dinners.

On the side, we have kulchas – soft leavened flatbreads that are the perfect vehicle to scoop up the curry. Kulcha dough traditionally uses all-purpose flour and a leavening (yeast or baking soda), and the breads are cooked in a tandoor (clay oven) or even on a skillet at home. My family often bought plain kulchas from the local bakery and oven-warmed them with a dab of butter until soft and aromatic. The combination of buttery hot kulcha with flavorful chhole is pure comfort on a plate. In North India, such chickpea curries with bread are a staple meal – hearty, nourishing, and made from simple pantry staples. This recipe stays true to that spirit of simplicity. It uses common ingredients you likely have on hand (no hard-to-find spices required) yet yields a deeply satisfying meal.

Pull up a chair as I share our family-style chhole kulcha recipe – complete with a few nostalgic tips, easy shortcuts, and optional sides like tangy pickled onions and mint chutney. It’s a story of comfort cooking, perfect for when you crave something warm, homely, and delicious.

Ingredients

For the Chhole (Chickpea Curry)

Chickpeas (Chana) – 1 cup dried white chickpeas (Kabuli chana), soaked overnight and drained. (Or use 2–3 cups cooked/canned chickpeas for convenience – drain and rinse if canned.)

Onions – 2 medium, finely chopped (for a sweet depth in the gravy).

Tomatoes – 2 large, ripe tomatoes, pureed or finely chopped (provides the tangy, thick base).

Ginger & Garlic – 1-inch ginger and 4–5 cloves garlic, minced or made into paste (aromatics that build flavor).

Green Chili – 1–2, slit (optional, for heat; skip or use less for a mild curry).

Whole Spices (optional) – 1 bay leaf and 1 small cinnamon stick (for subtle warm aroma, optional for everyday cooking).

Ground Spices – 1 teaspoon cumin seeds (jeera), 1 teaspoon coriander powder, ½ teaspoon turmeric powder, 1 teaspoon red chili powder (or Kashmiri chili powder for milder heat and color), 1 teaspoon garam masala (or chole masala if available – a Punjabi chickpea spice blend that’s actually milder than regular garam masala). Adjust chili to taste.

Salt – to taste (about 1½ teaspoons, divided).

Oil or Ghee – 2 tablespoons (for sautéing the masala).

Kasuri Methi – 1 teaspoon dried fenugreek leaves, crushed (optional, add at end for fragrance).

Amchur (Dry Mango Powder) – ½ teaspoon (or juice of ½ lemon, for tangy finish).

Fresh Coriander Leaves – a handful, chopped (for garnish).


For the Kulchas (Flatbread)

(This is a quick no-yeast kulcha dough using pantry staples. Feel free to use store-bought kulchas and see reheating instructions below.)

Flour – 2 cups all-purpose flour (maida). You can swap half with whole wheat flour for a healthier twist (kulchas will be slightly denser).

Leavening – 1 teaspoon baking powder + ¼ teaspoon baking soda (this combo will help the dough rise in place of yeast).

Dairy – ¼ cup plain yogurt (dahi). Yogurt makes kulchas soft and adds a slight tang; it helps ferment the dough quickly. (Use unsweetened yogurt. If avoiding dairy, you can use warm water or a non-dairy yogurt alternative, though yogurt is traditional for soft texture.)

Sugar – 1 teaspoon (feeds the leavening and gives a mild sweetness).

Salt – ½ teaspoon.

Oil – 2 teaspoons (neutral vegetable oil or ghee; adds moisture to the dough).

Warm Water – ~¾ cup (as needed to knead a soft dough).

Toppings (optional) – 1–2 teaspoons nigella seeds (kalonji) or sesame seeds, and/or 2 tablespoons chopped fresh coriander, to press on top of kulchas for a traditional touch.

Butter or Ghee – 2 tablespoons, melted (for brushing hot kulchas).


Step-by-Step Instructions

Preparing the Chhole (Chickpea Curry)

1. Soak and Boil Chickpeas: Rinse the dried chickpeas and soak them in ample water overnight (at least 8 hours). They will double in size. Drain the next day. In a pressure cooker or pot, add the soaked chana with fresh water to cover by a few inches. If using, drop in a bay leaf (and cinnamon stick). Add ½ teaspoon salt and ¼ teaspoon turmeric. Cook until chickpeas are very soft – about 2–3 whistles in a pressure cooker (or ~45–60 minutes simmering in a pot, adding a pinch of baking soda to help soften). The chickpeas should be soft enough to easily mash between fingers. (Tip: If you forgot to soak, you can quick-soak by pouring boiling hot water over the chickpeas and letting them sit for 1–2 hours.) Once cooked, reserve 1 cup of the cooking liquid and drain the rest. (If using canned chickpeas, skip the soaking/boiling – just drain and rinse them. You’ll add them directly to the masala and simmer a bit less.)


2. Make the Masala Base: Heat 2 tablespoons of oil or ghee in a deep pan on medium heat. Add the cumin seeds and let them sizzle for a few seconds. If you reserved a bay leaf from boiling, you can toss it in now for extra aroma. Next, add the finely chopped onions. Sauté the onions for about 5–7 minutes until they turn golden brown. Stir often so they cook evenly. This slow browning of onions forms a flavorful base.


3. Ginger, Garlic & Chilies: Add the minced ginger and garlic to the onions (and green chilies, if using). Sauté for 1–2 minutes until the raw smell disappears. Be careful not to burn the garlic.


4. Tomato and Spices: Stir in the chopped or pureed tomatoes. Cook this mixture for about 5–8 minutes, stirring frequently, until the tomatoes break down into a sauce and you see oil starting to separate from the sides of the pan. This step, called “bhuno”, cooks off raw tomato flavor. Now add the ground spices: coriander powder, the remaining turmeric, red chili powder, and garam masala (or chole masala). Also add 1 teaspoon salt (or to taste). Mix well and cook the masala for another 2–3 minutes. Tip: Frying the spices in the tomato-onion base releases their flavors – patience here is key to a tasty chhole. If the masala gets too dry or starts sticking, sprinkle a tablespoon of water and scrape the pan.


5. Simmer Chickpeas in Masala: Add the boiled chickpeas to the masala and stir to coat them well. Pour in about 1 cup of the reserved cooking liquid (or plain hot water) to reach your desired curry consistency (for a thick gravy, you might not use all the liquid). Mash a few chickpeas with the back of the spoon to thicken the curry. Cover and simmer on low heat for 10–15 minutes, allowing the chickpeas to absorb the flavors. If you used canned chickpeas, simmer for only about 10 minutes since they are already soft. Stir occasionally to prevent sticking. The curry will become beautifully thick and aromatic.


6. Finish and Garnish: Turn off the heat. Crush the kasuri methi between your palms and stir it in (if using). Add the amchur powder and give a final mix (if you don’t have amchur, squeeze in lemon juice to taste for that bright tang). Check seasoning and adjust salt or chili if needed. Let the chhole rest covered for 5 minutes. Just before serving, garnish with lots of fresh coriander leaves. The chickpea curry is now ready – it should be a hearty, mildly spiced gravy clinging to the soft chickpeas, rather than a thin soup.


7. Serving: Serve the chhole hot, topped with a few rings of raw onion and a lemon wedge on the side. This homestyle curry is delicious scooped up with warm kulchas. (It also goes well with rice or other breads if you have leftovers.)


Preparing the Kulchas (Flatbread)

Option A: Homemade No-Yeast Kulchas
(If making from scratch, start the dough before you cook the chhole, since the dough needs to rest.)

1. Make the Dough: In a large mixing bowl, combine the dry ingredients – flour, baking powder, baking soda, sugar, and salt. Pour in the yogurt and the 2 teaspoons of oil. Mix slightly. Now gradually add warm water, a few tablespoons at a time, and start kneading. Knead until a soft, smooth dough forms (it will be slightly sticky at first – that’s okay). You may need around ¾ cup water; add just enough for a pliable dough. The yogurt and leavening will react to make the dough light. Knead for about 5 minutes, stretching and folding, until the dough is elastic and not lumpy. Rub a light coat of oil over the dough ball.


2. Rest the Dough: Cover the dough with a damp cloth or plastic wrap and let it rest in a warm place for 2 hours. The dough will rise a bit and become airy (though not as much as a yeast dough). This resting time yields softer kulchas. (If you’re in a hurry, even 30-60 minutes rest will do, but texture improves with longer rest.)


3. Divide and Shape: After resting, punch down the dough to release air. Divide it into equal portions – about 6–8 pieces for medium kulchas. Roll each portion into a smooth ball. Keep the dough balls covered to prevent drying. On a lightly floured surface, take one ball and roll it out with a rolling pin into an oval or circle about ¼-inch thick (not too thin). If the dough springs back, let it rest another 5 minutes. Optional: Sprinkle a pinch of nigella seeds or chopped coriander on the rolled dough and press lightly so they stick (gives that traditional look and flavor).


4. Cook on Stovetop: Heat a tawa or heavy skillet over medium-high flame. Place the rolled kulcha on the hot skillet. Cook for about 30–40 seconds until you see bubbles forming on the surface. Flip the kulcha to the other side and cook for another minute or so, pressing gently with a spatula, until you see golden-brown spots on both sides. You can flip once or twice more as needed. (The kulcha may puff up in places – that’s good!). If you want a more charred finish, you can use tongs to briefly roast the kulcha directly over a gas flame after pan-cooking it, but this step is optional. Remove the kulcha and immediately brush one side with melted butter or ghee. Wrap it in a clean kitchen towel (or foil) to keep warm while you cook the remaining kulchas. Repeat for all dough balls, and serve hot.


5. Alternative – Bake in Oven: For a less hands-on method, you can bake the kulchas. Preheat your oven to 220°C (475°F). Place the rolled out kulchas on a baking sheet lined with parchment. Bake for ~8–10 minutes until they puff up and get light brown on top. (No need to flip in the oven.) Remove from oven, brush with butter, and stack in a towel to keep soft. Oven-baked kulchas won’t char as much, but they will be soft and perfect to accompany chhole.


Option B: Reheating Store-Bought Kulchas
If you have pre-made or store-bought kulchas, preparing them is even easier:

Oven Method: Wrap the kulchas in foil to prevent drying out and place in a preheated 175°C (350°F) oven for about 5–7 minutes. Then unwrap and heat for 1–2 minutes more to get a bit of crispness on the edges. This will make them soft, warm, and almost like freshly made.

Stovetop Method: Heat a tawa or skillet on medium. Lightly sprinkle a few drops of water on the kulcha (this reintroduces moisture). Place on the hot tawa and warm each side for about 1–2 minutes, pressing down gently. This refreshes the bread. Again, finish with a brush of butter. (Avoid microwaving kulchas – it can make them tough or chewy.)


Now your soft, buttery kulchas are ready to serve alongside the chhole. Keep them wrapped or covered until serving to maintain warmth and pliability.

Serving Suggestions (Optional Sides)

A plate of chhole kulcha is often accompanied by a few simple sides that add extra zing and freshness to the meal:

Pickled Onions (Sirke Wale Pyaaz): These are a classic accompaniment. You can make a quick onion salad by tossing thinly sliced red onions with a dash of lemon juice and a sprinkle of chaat masala. Let them sit for 15–20 minutes. The onions turn lightly pickled and add a crunchy, tangy bite that cuts through the richness of the chickpeas. (For a more intense pickle, soak the onion rings in vinegar, salt, and a pinch of sugar for an hour.) Serve a small bowl of these on the side or simply top your chhole with a few onion slices and a squeeze of lemon.

Mint Coriander Chutney: A vibrant green chutney brings freshness to each bite. Blend a handful of fresh mint leaves, an equal amount of fresh coriander (cilantro) leaves, 1–2 green chilies, a clove of garlic (optional), juice of one lemon, and salt to taste into a smooth paste. This mint-coriander chutney is zingy and herby, and a spoonful of it livens up the chhole. Drizzle some on top of your serving or use it as a dip for the kulcha.

Others: A dollop of plain yogurt or cucumber raita can be served alongside to cool the palate (especially if your chhole ended up spicier than intended). And if you have an Indian pickle like mango pickle, a small piece on the side can provide a spicy-sour kick that pairs wonderfully with the chickpeas.


Feel free to mix and match these sides. The combination of creamy chhole, soft kulcha, crunchy spiced onions, and cool chutney/yogurt creates a symphony of flavors and textures on your plate.

Meal Prep and Leftover Tips

Cooking chhole kulcha can fit into a busy schedule with a little planning, and leftovers are something to celebrate rather than dread! Here are some practical tips:

Make Ahead Chickpeas: You can cook a big batch of chickpeas in advance (either by pressure cooking or boiling) and freeze them in portions. Cooked chickpeas store well in the freezer for up to 3 months – keep them in airtight containers or freezer bags with a bit of their cooking liquid. This way, you have soft chickpeas ready to go for a quick weeknight chhole. (Alternatively, keep a few cans of chickpeas in your pantry for instant cravings.)

Prep in Advance: If you plan to serve this for dinner, you can do a lot beforehand. Soak the chickpeas the night before. You can even boil them earlier in the day and refrigerate (or use an Instant Pot to cook them quickly). The dough for kulcha can also be made earlier in the day – let it slow-rise in the fridge after the initial 2-hour counter rise. When it’s time to cook, the heavy lifting is already done.

Chhole Tastes Better Next Day: Believe it or not, chickpea curries often taste even better the next day! The spices deepen and the flavors meld overnight. So feel free to cook the chhole a day ahead of serving – it will reward you with an even richer taste. This also means leftovers are delightful. Store leftover chhole in the refrigerator for 2 to 3 days in a sealed container. Reheat gently on the stovetop (you may need to add a splash of water as it thickens in the fridge).

Storing Kulchas: Kulchas are best fresh, but you can keep leftovers too. If you made fresh kulchas and have extras, let them cool completely. Then store in an airtight container at room temperature for up to 1 day, or in the fridge for 1–2 days. Place a piece of parchment or a cloth between them to prevent sticking. For longer storage, wrap each kulcha in foil and freeze for up to 3–4 weeks. To reheat, use the skillet or oven methods described above (thaw frozen kulchas for 10 minutes on the counter or just heat from frozen, adding a minute or two extra).

Reinventing Leftovers: If you find yourself with a bowl of leftover chhole and a couple of kulchas the next day, you’re in for a treat. One simple idea is to make chhole toasties or sandwiches – spoon the thickened chhole onto a slice of bread (or inside a slit kulcha), top with some sliced onions and maybe cheese, and grill it into a hot sandwich. The spiced chickpeas make for a satisfying filling. You can also use leftover chhole as a topping for a baked potato or as a protein-rich stuffing for a wrap or dosa (I’ve even spread leftover chana masala inside a dosa for a fusion twist, as some home cooks do!). Get creative: turn it into a quick chaat by adding chopped onions, tomatoes, chutney and sev (crunchy noodles) on top of warmed chhole for a snack. Remember, this dish started as street food too – so those flavors lend themselves to fun street-style snacks with leftovers.

Scaling and Storing: This recipe is easy to scale up for a crowd or to meal-prep for the week. You can double the curry and it will freeze well (freeze just the chhole, not the kulchas). When reheating frozen chhole, do it gently over low heat, stirring occasionally, until it’s bubbling and hot. The kulcha dough can also be doubled; any extra dough can be kept in the fridge for a day (punch it down if it over-rises). Freshly cooked kulchas can be cooled and frozen, as noted.


By following these tips, you’ll find that chhole kulcha isn’t just a one-time meal – it’s two or three different meals in one! From the main dinner to next day’s lunch, it keeps on giving. And with a little prep, it can be a quick comfort food even on a busy evening.


Enjoy this homestyle chhole kulcha, and happy cooking! Each bite – the soft bread, the spiced chickpeas, the zing of onion and mint – tells a story of North Indian kitchens and family dinners. It’s amazing how such simple ingredients from the pantry can come together to create something so heart-warming and satisfying. I hope this recipe brings the same warmth to your home as it does to mine. Serve it up, share with your loved ones, and bask in the delicious nostalgia of this classic meal.

Fastival Food, Lunch & Dinner

Kashmiri Sweet Pulao: Festive Saffron Rice with Dry Fruits & Nuts

A Sweet Celebration from Kashmir

I still remember the first time I savored Kashmiri Sweet Pulao at a close friend’s Kashmiri wedding. The platter of golden rice, jeweled with nuts and raisins, perfumed the air with saffron and cardamom. Each bite of the warm, sweet rice mixed with crunchy nuts felt like a warm welcome into a Kashmiri home. In Kashmiri culture, this pulao is much more than just rice with dry fruits – it’s often described as “poetry in a pot,” a royal dish that carries the soul of Kashmir’s hospitality.

A bowl of Kashmiri sweet pulao garnished with fried nuts and raisins, served alongside a tomato onion raita and lauki yakhni (yogurt-based bottle gourd curry) – classic companions for this festive rice.

Unlike the spicy vegetable pulaos or biryanis common elsewhere in India, Kashmiri pulao stands apart with its mild, faintly sweet profile. Fragrant basmati rice is cooked with a medley of aromatic whole spices (think cinnamon, cardamom, cloves, bay leaf) that remain gentle, not overpowering. A pinch of Kashmiri saffron, sourced from the fields of Pampore, gives the dish its regal golden hue and heavenly aroma. A generous mix of dry fruits and nuts – cashews, almonds, raisins, and sometimes even walnuts or pistachios – provides luxurious texture and natural sweetness. In fact, this pulao is so mellow and rich that traditionally no meat or heavy spice is needed to make it special. Many authentic recipes also include a hint of crushed fennel seeds and a pinch of dry ginger (saunth) for that signature Kashmiri flavor note. The result is an aromatic rice pilaf that’s subtly sweet, delicately spiced, and utterly celebratory.

Kashmiri sweet pulao is often prepared on joyous occasions – it’s usually served at weddings, festivals like Eid, or family get-togethers to symbolize warmth and love. In Kashmiri homes, presenting this pulao to guests is a way of sharing a piece of their culture and hospitality. Now, let’s dive into my tried-and-tested recipe for this festive dish, along with all the tips to get it just right in your kitchen.

Ingredients

Basmati rice – 1 cup, preferably aged long-grain (soaked for 20–30 minutes)

Saffron strands (kesar) – a generous pinch (8–10 strands)

Milk – 3–4 tablespoons, warm (to soak saffron; use water for a vegan option)

Ghee – 2 tablespoons (clarified butter, for authentic flavor)

Mixed nuts – ~2 tablespoons cashew nuts (8–10 pieces) and 2 tablespoons almonds, halved or slivered (you can also add a few pistachios or walnuts)

Raisins – 2 tablespoons (golden or regular)

Whole spices – 1 bay leaf, 3 green cardamom pods, 4 cloves, 1 inch cinnamon stick, 1 teaspoon shahi jeera (caraway seeds) or cumin, 1 small piece of mace and 1 black cardamom (both optional)

Fennel seeds (saunf) – ½ teaspoon (or use ½ teaspoon fennel powder)

Dry ginger powder (saunth) – ¼ teaspoon (optional, for authentic flavor)

Onion – 1 small, thinly sliced (for fried onion garnish)

Sugar – 2 teaspoons (up to 1 tablespoon for a sweeter pulao, optional)

Salt – ½ teaspoon, or to taste

Water – 2 cups (for stovetop cooking; if using a pressure cooker, about 1½ cups is sufficient)


Yield: This ingredient list makes about 3–4 servings of pulao as a side dish.

Instructions

1. Prep the Rice: Rinse the basmati rice in cold water until the water runs clear. Soak the rinsed rice for 20–30 minutes in enough water. This helps the grains cook up fluffy and separate (soaked rice absorbs water and cooks more evenly). Meanwhile, warm the 3–4 tablespoons of milk, add the saffron strands to it, and set aside to let the saffron infuse its color and flavor.


2. Fry Nuts & Onions: Heat 1 tablespoon of ghee in a heavy-bottomed pot on medium heat. Add the cashews and almonds, stirring until they turn light golden. Then toss in the raisins and fry until they puff up. Remove all the nuts and raisins with a slotted spoon and set aside. In the same pot, add the remaining 1 tablespoon ghee. Add the sliced onions and fry, stirring frequently, until they turn golden-brown and caramelized. (Be careful not to burn them; lower the heat if needed toward the end.) Remove the fried onions and set aside on a paper towel. Tip: Frying the garnishes separately ensures they stay crisp and keeps the ghee flavored for the rice.


3. Sauté Spices: In the same pot, there should be a little ghee left. Add a touch more ghee if the pot looks dry. Keep the heat on low-medium. Now add the whole spices – bay leaf, green cardamoms, cloves, cinnamon, shahi jeera (or cumin), mace, and black cardamom. Sauté for a minute until they release their aroma (the spices will sizzle and become fragrant). Next, add the fennel seeds. If using dry ginger powder and/or fennel powder instead of seeds, you can briefly turn off the heat and stir them in now to prevent burning. Stir for just a few seconds to combine the spices with the ghee.


4. Add Rice and Seasonings: Drain the soaked rice completely and gently add it to the pot. Sauté the rice grains with the spices for 1–2 minutes on low heat, stirring carefully to coat each grain of rice with the spiced ghee. This step of frying the rice helps to keep the grains separate and aromatic. Now add the salt and the sugar to the rice and stir. (The sugar is optional, but a small amount gives that subtle sweetness characteristic of Kashmiri pulao.)


5. Cook the Pulao: Pour in the saffron-infused milk along with 2 cups of water (use 1½ cups water if you plan to pressure-cook). Give it a gentle stir. Increase the heat to high and bring the liquid to a boil. As soon as it starts boiling, reduce the heat to low, and cover the pot with a tight-fitting lid. Let the rice cook on low heat until all the water is absorbed and the rice is tender. This should take about 10 minutes. Do not uncover or stir while it’s cooking, to allow proper steam cooking (dum). If using a stovetop pressure cooker, cook for 1 whistle on medium heat, then turn off and let the pressure release naturally.


6. Rest and Fluff: After the rice is cooked (water absorbed), turn off the heat. Keep the pot covered and let the pulao rest for 5–10 minutes. This resting period allows the moisture to redistribute, so each grain turns fluffy without breaking. Remove the lid and gently fluff the rice with a fork, being careful not to mush the grains.


7. Garnish and Serve: Transfer the Kashmiri pulao to a serving dish (or you can serve straight from the pot). Gently fold in the fried cashews, almonds, and raisins. Top with the crispy fried onions. For an authentic touch, you can also garnish with a sprinkle of fresh pomegranate arils or a few small apple or pineapple cubes for a pop of color and extra sweetness (this is optional, but sometimes fresh fruit is added in festive versions of this pulao). Serve the pulao warm and enjoy its aroma!


Serving Suggestions

With Raita: The sweet and aromatic notes of Kashmiri pulao pair wonderfully with a cooling yogurt raita. Serve it with a simple cucumber raita or boondi raita, or even an onion-tomato raita spiced with cumin. The tanginess and creaminess of raita balance the richness of the pulao. In fact, because this pulao is on the sweeter side, it is typically served with a spiced yogurt dish to complement it.

With a Light Curry: For a more elaborate meal, pair the pulao with a mild curry so that the flavors don’t overpower the rice. A classic choice from Kashmiri cuisine is Lauki Yakhni, a delicate curry of bottle gourd in yogurt gravy. Its lightly spiced, tangy sauce is an excellent accompaniment to the sweet pulao. Alternatively, a gentle shahi paneer (paneer in a light creamy gravy) or a navratan korma can work well, providing a savory contrast without being too heavy.

Festive Feast Pairing: At grand Kashmiri gatherings like weddings (or in a traditional Wazwan feast), this pulao often appears alongside richer dishes. It may be served with a flavorful Rogan Josh (a Kashmiri lamb curry) or other spicy meats, acting as a sweet, fragrant counterpoint between spicy courses. If you have meat lovers at the table, a spoonful of a savory curry gravy alongside the pulao gives a delightful sweet-and-spicy contrast in each bite.


Tips for Perfect Fluffy Pulao and Make-Ahead

Choose the Right Rice: Opt for high-quality aged basmati rice for this recipe. Aged basmati has a lower moisture content and stays non-sticky, yielding long, fluffy grains once cooked. Avoid short-grain or new rice, as they can turn mushy.

Rinse & Soak: Always rinse the rice thoroughly 3-4 times to wash off excess starch (which is a culprit for sticky rice). Soaking the rice for at least 20 minutes is key – the grains absorb water and expand, which helps them cook perfectly fluffy and separate later. Just remember to drain the soaking water before cooking.

Low and Slow Cooking: Use a heavy-bottomed pot with a tight lid and cook the rice on a low flame. This slow, gentle cooking (similar to the traditional dum method) ensures the rice cooks evenly without burning. Resist the urge to peek too often or stir, as trapped steam is what cooks the rice fully. Once done, let the rice rest covered for a few minutes off the heat – this steam resting finishes the cooking and makes it easier to fluff the pulao without breaking the grains.

Don’t Skimp on Ghee: Frying the nuts, onions, and rice in ghee not only imparts a rich aroma but also coats the rice grains with a thin layer of fat. This helps in achieving a grain-separated pulao and enhances flavor. If you prefer, you can use half oil and half ghee, but a little ghee truly makes a difference in authenticity and taste.

Adjusting Sweetness: Traditional Kashmiri pulao is mildly sweet. The recipe uses a small amount of sugar for a hint of sweetness, but you can adjust this to your taste. Add an extra teaspoon of sugar if you want it sweeter, or skip the sugar entirely if you prefer the sweetness to come only from the raisins and nuts. The beauty of this dish is in its balance – it should not taste like a dessert, just a whisper of sweetness.

Make-Ahead and Reheating: You can prep parts of this dish in advance. Make-Ahead Garnishes: Fry the nuts and caramelize the onions a day ahead and store them in airtight containers (keep the fried onions in a paper towel to absorb excess oil so they stay crisp). Par-cook Rice: If you need to cook the rice ahead of time, slightly undercook it (leave it a tad firm), spread it on a tray to cool (this stops the cooking and prevents clumping), then refrigerate. When ready to serve, sprinkle 2–3 tablespoons of water or broth over the rice and reheat it gently – either on the stovetop covered (on low heat) or in the microwave covered with a damp paper towel. The added moisture will create steam and revive the rice’s fluffy texture. Once heated through, fluff the rice again and mix in the fried nuts and onions. (For food safety and best texture, reheat only the amount you plan to eat, and avoid reheating multiple times.)


With these tips in hand, you’re ready to create a truly memorable Kashmiri Sweet Pulao. The combination of saffron, nuts, and gentle spices will transport you straight to the Kashmir valley – right from your kitchen. Enjoy this royal, soul-soothing dish with your family, and feel the warmth and tradition of Kashmiri hospitality in every bite!

Lunch & Dinner

Garlic Chicken Curry (North Indian Style)

There’s something magical about the aroma of garlic sizzling in my kitchen. Whenever my family craves comfort with a kick of spice, Garlic Chicken Curry is on the menu. This North Indian favorite – also known as Lehsuni Murgh in Hindi (with lehsun meaning garlic and murgh meaning chicken) – has been a staple in our home. My dad always said there’s no such thing as “too much garlic,” and this dish proves it true. Rich, aromatic, and slightly spicy, each bite of tender chicken is infused with bold garlic flavor to satisfy any garlic lover’s craving.

Despite its complex taste, this curry is surprisingly simple and practical to make. It uses everyday pantry staples – think fresh garlic, yogurt, onions, and a few warm spices – so I can whip it up even when I haven’t planned ahead. The secret lies in a quick marinade that tenderizes the chicken and layers in flavor. I often marinate the chicken in yogurt, garlic, and spices a few hours before (or even the night before) so that by dinnertime, the meat is ultra-flavorful and succulent. As it simmers, the kitchen fills with an irresistible garlicky aroma that draws everyone to the stove, eagerly awaiting dinner. This curry has that hearty, one-pot charm – comforting enough for a cozy evening yet easy enough for a weeknight meal. So, let’s get cooking!

Garlic Chicken Curry (Lehsuni Murgh) garnished with golden fried garlic chips and fresh cilantro. This North Indian dish is perfect for garlic lovers, and it’s often served with lemon wedges for a pop of freshness. Notice the rich, thick gravy coating the chicken pieces, indicating the robust flavors infused by the slow simmer.

Ingredients

Chicken: 500 g (about 1 lb), cut into curry-sized pieces. Bone-in pieces yield the best flavor (but boneless works for convenience).

Yogurt (Dahi/Curd): ½ cup, plain (for marinating the chicken).

Garlic: 12 cloves, divided – use about 6 cloves minced or grated for the marinade, and slice the remaining cloves for cooking. (Yes, it’s a garlic-packed recipe!)

Ginger: 1-inch piece, grated (about 1 tablespoon, for the marinade).

Onions: 2 medium, finely chopped.

Green Chilies: 2, slit lengthwise (optional, adjust for spice preference).

Turmeric Powder: ½ teaspoon.

Red Chili Powder: 1 teaspoon (use Kashmiri chili powder for a milder heat and bright color, or adjust to your taste).

Cumin Powder: 1 teaspoon.

Coriander Powder: 2 teaspoons.

Garam Masala: 1 teaspoon (aromatic Indian spice blend, added at the end).

Salt: to taste (about 1 teaspoon for the marinade, plus more to adjust later).

Oil or Ghee: 2 tablespoons (vegetable or sunflower oil works well; for extra authenticity, use mustard oil or ghee).

Fresh Cilantro: a handful of cilantro leaves, chopped (for garnish).

Lemon: 1 lemon, cut into wedges (to squeeze on top when serving, optional).


Instructions

1. Marinate the Chicken: In a large bowl, combine the chicken pieces with yogurt, the minced garlic (reserve the sliced garlic for later), grated ginger, turmeric, ½ teaspoon of chili powder (if you like some heat in the marinade), and about 1 teaspoon of salt. Mix everything well so the chicken is thoroughly coated. Cover and let it marinate for at least 30 minutes (if you have time, marinate for 2-4 hours or overnight for deeper flavor and extra tenderness). This step helps infuse the chicken with garlic and spice, making it super juicy and flavorful.


2. Prepare to Cook: When you’re ready to cook, heat the oil in a heavy-bottomed pot or deep pan over medium heat. Tip: Add the sliced garlic to the cold oil before the oil gets hot, then heat them together – this way the garlic slowly releases its flavor without burning. Sauté the garlic slices, stirring frequently, until they turn golden brown and crispy. (Keep a close eye; garlic can go from golden to burnt quickly!) Use a slotted spoon to remove a few of these fried garlic slices and set them aside on paper towel – we’ll use them later as a crunchy garnish for our curry. Leave the rest of the garlic in the pan for the next step.


3. Sauté Onions & Spices: In the same pan with the remaining garlic-infused oil, add the chopped onions and the slit green chilies. Sauté this mixture on medium heat for about 8-10 minutes, stirring occasionally, until the onions turn soft and golden-brown. The golden onions will give a natural sweetness and depth to the curry. If the spices from the marinade or garlic bits start sticking to the bottom, you can sprinkle a tablespoon of water to deglaze and prevent burning. Once the onions are browned, add the cumin powder and coriander powder (and the remaining ½ teaspoon of red chili powder, if you like a spicier curry). Toast these spices with the onions for just a minute, stirring constantly – this awakens their aroma. (Enjoy that whiff of spice in the air!)


4. Cook the Chicken: Increase to medium-high heat and add the marinated chicken (along with all the yogurt marinade) into the pan. The pan will sizzle as the chicken hits the hot oil and onions. Stir well to combine, coating the chicken in the onion, garlic, and spice mixture. Cook for about 5-7 minutes, stirring occasionally, until the chicken is no longer pink on the outside and starts to brown slightly. This quick sear locks in the juices and gives a nice color.


5. Simmer with Gravy: Add about 1 cup of hot water to the pan to create a gravy (use more or less water depending on how thick or thin you want the curry). Scrape the bottom of the pan with your spoon to deglaze any flavorful browned bits into the sauce. Once it comes to a gentle boil, reduce the heat to low, cover the pan with a lid, and let the chicken simmer. Cook for about 15-20 minutes on low heat until the chicken is fully cooked and tender. (If using bone-in chicken, aim for the higher end of that range – around 20 minutes – whereas boneless pieces may cook through in about 15 minutes.) Stir occasionally to prevent sticking. You’ll see the oil start to separate on the edges of the gravy when it’s done, and the chicken should be fork-tender.


6. Adjust Consistency: After 15-20 minutes, check the curry’s consistency and seasoning. If it looks too thin for your liking, cook it uncovered for a few more minutes on medium heat to let some liquid evaporate and thicken the gravy. If it’s too thick or you prefer more sauce, you can add a splash of hot water and simmer for another minute. Taste and add more salt if needed. (Optional: for a touch of extra richness, you could stir in 2 tablespoons of heavy cream at this stage, but this curry is traditionally made without cream.)


7. Finish with Aromatics: Turn off the heat and sprinkle garam masala over the curry. (You can also crush in a pinch of dried fenugreek leaves (kasuri methi) at this point for an added layer of North Indian aroma, if you have it.) Gently stir the curry so the garam masala is mixed in. Finally, add the chopped fresh cilantro and the reserved fried garlic slices from earlier, scattering them on top as a garnish. The fresh cilantro and crispy garlic on top make the curry look and taste irresistible!


8. Serve: Let the Garlic Chicken Curry rest for 5 minutes with the lid on (off the heat) – this brief rest helps all the flavors settle and marry together. Serve it hot in a bowl, and enjoy the wafting fragrance as you lift the lid. Enjoy! (Be prepared for everyone to ask for seconds!)


Serving Suggestions & Customizations

Garlic Chicken Curry served with flaky, buttery parathas (layered flatbread). A simple salad of sliced onions, cucumbers, and lemon on the side adds a refreshing crunch.

In North India, it’s common to enjoy this curry with warm flatbreads, but it’s equally delightful spooned over rice. Here are some serving ideas and customization tips to make this garlic chicken curry just right for you:

Serving – Breads or Rice: For a drier, thicker curry (reduce the gravy as noted), pair the garlic chicken with Indian breads like naan, parathas, or roti. The bread can be used to scoop up the flavorful pieces and sauce. If you prefer a more soupy curry with extra gravy, keep it a bit fluid and ladle it over steamed basmati rice. The rice will soak up all that garlicky goodness!

Garlic Intensity: This dish is already loaded with garlic, but true garlic enthusiasts can absolutely add more. Toss in a few extra cloves (either crushed into the gravy or sliced and fried) if you can’t get enough of that garlic flavor. On the other hand, if you want to tone it down, you can use slightly fewer cloves than called for – the curry will still be tasty, just a touch milder on the garlic.

Spice Level: Adjust the heat to your liking. The recipe as given is moderately spicy (thanks to the chili powder and green chilies). For a milder version, skip the green chilies and use half the amount of chili powder (or choose a mild paprika/Kashmiri chili for color). If you love heat, you can add an extra green chili or a pinch of cayenne. Remember, you can also remove the seeds from the green chilies to reduce their heat while still getting that flavor.

Richer or Creamier Curry: For a special occasion or if you prefer a creamier curry, you can enrich the gravy by stirring in a spoonful of cream or thick coconut milk at the end of cooking. This will give a slightly creamier, restaurant-style finish (though it’s not traditional for Lehsuni Murgh). Another way to add richness is blending a few cashews into the yogurt marinade (creating a creamy cashew-garlic paste) – this will thicken the sauce and add a mild sweetness. These tweaks are entirely optional but can be fun to experiment with.

Authentic Touch: For an extra authentic North Indian flavor, try cooking with mustard oil instead of regular vegetable oil. Mustard oil has a pungent aroma that mellows as you cook and adds depth to the curry. (If using mustard oil, be sure to heat it until it just starts to smoke before adding other ingredients – this step removes its raw sharpness.) Many traditional recipes swear by mustard oil for its unique flavor. If you don’t have it, using ghee (clarified butter) or any neutral oil is perfectly fine – your curry will still turn out delicious.


Enjoy your Garlic Chicken Curry! Serve it hot, garnish with more fresh cilantro and a squeeze of lemon juice on top for brightness. Don’t forget to include those crispy fried garlic chips as a topping – they’re little bursts of flavor in each bite. This hearty North Indian garlic chicken is sure to fill your kitchen with wonderful aromas and bring a satisfied smile to everyone at the table. Happy cooking and happy eating!

Lunch & Dinner

🥚 Egg Tadka Dal – Dhaba Style Comfort in a Bowl

🧡 A Personal Note

Some dishes don’t just satisfy hunger — they settle your soul. Egg Tadka Dal is one of those. A blend of creamy lentils and spicy scrambled eggs, this dish is popular in Bengal and Odisha, where dhaba cooks stir it up in iron kadhais over open flames.

During my student days in Bhubaneswar, a late-night walk often ended with a hot plate of egg tadka dal and tandoori roti from a roadside stall. The aroma of cumin, ghee, and garlic wafting into the night air still lingers in memory.

Let’s recreate that magic at home.

🥄 Ingredients (Detailed)

For the Dal:

½ cup Green Moong Dal (split green gram) – gives body and protein

¼ cup Masoor Dal (red lentil) – optional but adds silkiness

1½ cups Water

½ tsp Turmeric powder

Salt to taste


For the Egg Bhurji (Scrambled Eggs):

3 Eggs

1 medium Onion, finely chopped

1 small Tomato, finely chopped

1–2 Green Chilies, chopped

1 tsp Ginger-Garlic Paste

¼ tsp Red Chili Powder

¼ tsp Garam Masala

1 tbsp Fresh Coriander Leaves, chopped

Salt to taste

1 tbsp Oil or Ghee


For the Tadka (Tempering):

2 tbsp Mustard Oil or Desi Ghee

½ tsp Cumin Seeds

2–3 Garlic Cloves, thinly sliced

1 small Onion, thinly sliced

1 whole Dried Red Chili

A pinch of Asafoetida (hing) – optional but highly aromatic


🔪 Step-by-Step Method

Step 1: Pressure Cook the Dal

1. Wash moong and masoor dal thoroughly until water runs clear.


2. In a pressure cooker, add dal, turmeric, water, and salt.


3. Cook for 3–4 whistles until soft and mushy. Open the lid after pressure releases naturally.


4. Mash the dal lightly using a ladle or a whisk and set aside.


Step 2: Make Egg Bhurji

1. Heat 1 tbsp oil in a kadai or pan.


2. Add chopped onions and green chilies. Sauté till onions turn translucent.


3. Add ginger-garlic paste and cook for 1 minute until raw smell disappears.


4. Add tomatoes, red chili powder, salt, and garam masala. Cook until oil separates.


5. Beat eggs and pour into the mixture. Stir and scramble them into soft bhurji.


6. Add coriander leaves and mix well. Remove from flame and keep aside.


Step 3: Prepare the Tadka (Tempering)

1. In the same or a separate pan, heat 2 tbsp mustard oil or ghee.


2. Add cumin seeds. Let them crackle.


3. Add sliced garlic, red chili, and hing. Sauté till fragrant.


4. Add sliced onions and sauté till golden brown.


Step 4: Combine Everything

1. Add the mashed dal to the pan with tadka. Mix well.


2. Simmer for 3–4 minutes to absorb the flavors.


3. Now, gently fold in the egg bhurji into the dal. Mix and let it sit for 2 more minutes.


Optional:

Add 1 tsp of ghee or a squeeze of lemon before serving for an extra kick.


🍽️ Serving Suggestions

Best served with tandoori roti, lachha paratha, or jeera rice

Serve with pickled onions, green chutney, or just a wedge of lemon

For dhaba-style plating, serve in a steel bowl with a dollop of ghee on top


🌿 Tips for Perfection

Don’t overcook the scrambled eggs – you want them soft, not rubbery.

Add a smoky twist using dhungar method (burning charcoal + ghee in a bowl placed inside the dal).

Use only moong dal if you want a lighter version, or add chana dal for a nuttier bite.

Lunch & Dinner

Aloo Posto – Creamy Bengali Potatoes with Poppy Seeds

My earliest memories revolve around Aloo Posto – soft cubes of potato in a creamy poppy-seed sauce. The name itself is humble (“aloo” means potato, “posto” means poppy seed), but this dish has a beloved place in Bengali cuisine. Warm and nutty, with the bright hit of green chili and the distinct bite of mustard oil, Aloo Posto epitomizes Bengali comfort food. In our home and many others, it’s a staple – often served with dal and rice on ordinary days, and honored in Bengali thalis during Durga Puja and other celebrations. A single spoonful takes me right back to childhood lunches under the mango tree, where my grandmother ladled generous helpings onto my plate.

Ingredients

4 medium potatoes (about 500g), peeled and cut into 1-inch cubes

3 tablespoons white poppy seeds (posto)

2 tablespoons mustard oil

2–3 green chilies, slit lengthwise (optional, for heat)

1 teaspoon nigella seeds (kalonji)

½ teaspoon turmeric powder (optional)

Pinch of sugar (optional, to balance flavors)

Salt, to taste

~½ cup water (or as needed to make a sauce)

Fresh cilantro (coriander) for garnish (optional)


Preparation

1. Soak poppy seeds: In a small bowl, soak the poppy seeds in warm water for at least 20 minutes. Drain and transfer the soaked seeds to a blender or mortar. Add one chopped green chili (if using) and a splash of water, then grind to a smooth, creamy paste.


2. Heat the oil: In a heavy-bottomed pan or kadai, heat the mustard oil over medium heat until it just begins to smoke. This step is important to mellow the raw pungency of mustard oil. Carefully add the nigella seeds (kalonji) and the slit green chilies. Fry them for 5–10 seconds until fragrant.


3. Add potatoes: Add the cubed potatoes and a generous pinch of salt. Stir to coat all the pieces in the oil and spices, then cook for about 5 minutes, stirring occasionally. The potato edges should sizzle and turn lightly golden.


4. Spice and cover: Sprinkle in the turmeric and stir again. Cover the pan and let the potatoes cook for another 5 minutes. This helps the potatoes become tender without browning too much.


5. Add poppy paste: Uncover and pour in the ground poppy seed paste. Stir well so every potato piece is coated in the creamy paste. Add about ½ cup of water and mix in more salt to taste. The mixture should be just saucy enough to simmer into a thick gravy.


6. Simmer: Cover again and lower the heat. Let the Aloo Posto simmer for 10–15 minutes, or until the potatoes are fork-tender. Stir once or twice during this time, and if the sauce becomes too dry, add a little more water. You’re aiming for a rich gravy that clings to the potatoes.


7. Finish: Uncover and let any excess water evaporate so the sauce thickens. To balance the mustard-oil bite, sprinkle in a pinch of sugar and add more chopped chilies if you like extra heat, then simmer uncovered for another minute or two. Turn off the heat.


8. Garnish and serve: Garnish with chopped cilantro and a final drizzle of mustard oil or a squeeze of lemon if you like. Serve the Aloo Posto hot.


Tips for Balancing Flavors

Use fresh poppy seeds: Ensure your posto is fresh and well-soaked. Stale or under-soaked seeds can make the curry taste bitter.

Be generous with mustard oil: Mustard oil is non-negotiable for authentic flavor. Heat it just to smoking to release its aroma, and consider a small drizzle at the end for extra pungency.

Mellow the heat: A pinch of sugar (or a squeeze of lime) at the end can round out the sharp mustard flavor.

Adjust spice: Green chilies add brightness and mild heat that complements the nutty sauce. Add them gradually – you can always add more if you want extra kick.


Serving Suggestions

Steamed rice & dal-bhaat: Traditionally, Aloo Posto is enjoyed with plain steamed rice and a simple dal. In Bengali homes it often appears alongside a bowl of split-pea or moong dal. The mellow lentils and fluffy rice soak up the creamy poppy sauce perfectly.

Bengali thali: Serve it on a colorful plate (thali) with other sabzis, dal, and maybe a fried fish or papad on the side. The nutty, pungent curry pairs beautifully with sweet or tangy condiments – think a spoonful of mango chutney or a cucumber raita to balance the richness.

Breads: For a festive variation, enjoy Aloo Posto with warm puris or luchis (deep-fried flatbreads). Their slight crunch and mild sweetness make a lovely contrast to the saucy potatoes.

Lunch & Dinner

Tawa Paneer Masala (Dhaba-Style)

The very name “Tawa” hints at its roots: a tawa is a flat iron griddle, and cooking paneer on it imparts a special charred aroma. As Chef Ajay Chopra notes, *“Paneer Tawa Masala is a quintessential North Indian dish… cooked on a flat griddle (tawa) to impart a smoky flavor.”*  It’s the kind of curry you’d find simmering in a roadside dhaba, the air thick with spice and smoke. In my kitchen, making this dish always transports me to those merry family meals on the road – a reminder that good food is as much about memory as it is about taste.

A homestyle Dhaba-style tawa paneer masala: charred paneer cubes in a glossy, spiced tomato-onion gravy, garnished with fresh cilantro. The vibrant curry looks comforting and rich, just like a plateful of warm memories.

Ingredients

Paneer (cubed): 400g (about 20 pieces)

Yogurt (Dahi): 8 tbsp (for marinating paneer)

Tandoori masala: 1 tbsp

Chaat masala: ½ tsp

Dried fenugreek leaves (Kasuri methi): 2 tbsp, crushed

Kashmiri red chili powder: 2 tsp

Salt: 1 tsp (or to taste)

Oil/Ghee: 4 tbsp (for cooking)

Cumin seeds (Jeera): 1 tsp

Carom seeds (Ajwain): ½ tsp

Asafoetida (Hing): a pinch

Onion: 1½ cups, finely chopped

Garlic: 2 tbsp, chopped or minced

Ginger: 1½ tbsp, chopped or grated

Green chilies: 4, chopped

Bell pepper (Capsicum): 1 cup, diced

Tomatoes: 4 medium, puréed (about 1¼ cups)

Turmeric powder: ¼ tsp

Coriander powder: 2 tsp

Red chili powder: 4 tsp (adjust for heat)

Garam masala powder: 1 tsp

Water: ¾ cup (or as needed)

Fresh cilantro (Coriander leaves): 3 tbsp, chopped (for garnish)


Instructions

1. Marinate the paneer: In a bowl, combine yogurt, tandoori masala, chaat masala, crushed kasuri methi, red chili powder, and salt. Add the paneer cubes and toss gently until well coated. Cover and refrigerate for 20–30 minutes to let the flavors meld.


2. Pan-fry the paneer: Heat 2 tbsp oil or ghee in a flat skillet or tawa over medium heat. When hot, add the marinated paneer cubes and shallow-fry until each side turns lightly golden (about 2–3 minutes per side). Remove the paneer and set aside.


3. Prepare the tawa masala base: In the same pan (or a wide, heavy-bottomed wok/pan), heat the remaining 2 tbsp oil on medium-high. Add cumin seeds, ajwain, and a pinch of hing, and let them sizzle. Toss in the chopped onions and sauté until they turn translucent (about 3 minutes).


4. Build the aromatics: Add the chopped ginger, garlic, and green chilies. Stir-fry until the raw aroma disappears. Then add the diced capsicum and cook for 2–3 minutes – it should still remain slightly crunchy for texture.


5. Tomato and spices: Stir in the puréed tomatoes and salt. Cook the mixture, stirring often, until it thickens and the oil begins to separate (about 5–6 minutes). Then sprinkle the coriander powder, turmeric, and extra red chili powder. Mix well and cook for another 2 minutes.


6. Add liquid: Pour in ¾ cup water, scraping the pan to incorporate any stuck bits. Let the gravy simmer on medium heat for 2–3 minutes so it comes together into a rich, saucy consistency.


7. Finish the curry: Stir in the garam masala. Add the fried paneer cubes back into the pan along with half of the chopped cilantro. Gently mix so the paneer is coated with the hot gravy. Simmer for 1–2 minutes to warm the paneer through and let it absorb the flavors.


8. Smoke infusion (optional): For an authentic dhaba-style smokiness, use the dhungar method. After turning off the heat, place a small piece of hot charcoal in a steel bowl and set it in the center of the curry. Drizzle ½ tsp ghee over the charcoal and immediately cover the pan. Let it rest for 5–7 minutes – the curry will take on a delicious smoky aroma.


9. Garnish and serve: Sprinkle the remaining cilantro on top. Serve the Tawa Paneer Masala piping hot.


Tips for Restaurant-Style Tawa Paneer

High heat & heavy pan: Use a cast-iron griddle (tawa) or a thick-bottomed pan on a high flame. This gives a slight char to the veggies and sauce, mimicking the roadside-dhaba sizzle.

Kasuri methi magic: Don’t skip the dried fenugreek – kasuri methi is key for that authentic dhaba aroma. Crush it between your palms before adding to release more fragrance.

Richness: A splash of cream or a small knob of butter/ghee at the end will make the curry luxuriously smooth and buttery, just like a restaurant version.

Marination: Marinating paneer in yogurt and spices (as above) helps it soak up flavor. If your store-bought paneer is very firm, briefly soak it in hot (not boiling) water before use to soften.

Char veggies: You can char the bell peppers and even tomatoes over an open flame or under a broiler before adding – this adds smoky depth (Chef Chopra suggests flaming the ingredients for extra char).

Sweet-tart balance: Use ripe red tomatoes (or even add a pinch of sugar) to balance the tartness. The goal is a slightly sweet-spicy gravy, not an overly sour one.


Serving Suggestions

Tawa Paneer Masala is a versatile dish that pairs beautifully with many sides:

Indian Breads: Warm butter naan, tandoori roti, or flaky parathas are perfect for scooping up the curry. They soak up the sauce and carry the flavor. Serve straight from the tawa or hot off the griddle.

Rice: Steamed basmati rice or jeera rice (cumin rice) provide a neutral, fragrant bed for the curry. The spiced paneer over rice is a comforting combo.

Accompaniments: A simple salad of sliced red onions and lemon wedges (common in dhabas) adds crunch and freshness. Cooled cucumber raita or a fresh cucumber-tomato salad also balance the heat. Pickled onions or lime pickle are classic sides that brighten each bite.

Lunch & Dinner

Bhindi Do Pyaza

Nostalgic Beginnings

In our home, monsoon mornings were always special for Bhindi Do Pyaza. I can still see my mother at the stove, frying sweet onions until golden and adding tender chopped okra. Soon, the kitchen would fill with the cozy aroma of garlic, ginger, and warming spices. The dish’s name literally means *“okra with double onions”*, a nod to adding onions twice in the recipe. Do-pyaza was originally a Mughal-style curry, but in North Indian kitchens it became a beloved vegetarian favorite.

Ingredients

300 grams okra (bhindi), washed and thoroughly dried

3 large onions (about 300 grams total), thinly sliced (half reserved for garnish)

2 medium tomatoes, finely chopped or pureed

1-2 green chilies, slit (optional, for heat)

½ inch ginger, julienned or minced

3 cloves garlic, minced (or 1 teaspoon garlic paste)

1 teaspoon cumin seeds

½ teaspoon carom seeds (ajwain) (optional)

½ teaspoon turmeric powder

1 teaspoon coriander powder

½–1 teaspoon red chili powder (adjust to taste)

½ teaspoon garam masala (for finishing)

1 teaspoon dried mango powder (amchur) or a squeeze of lemon (for tang)

1 teaspoon kasuri methi (dried fenugreek leaves, optional)

2 tablespoons cooking oil (mustard oil or vegetable oil)

Salt, to taste


Preparation

1. Prep the okra: Rinse the okra pods and pat them completely dry with a towel. Trim off the stem end and slice each pod into ¾–1 inch (2–3 cm) pieces. Keeping them dry and spaced prevents sliminess.


2. Slice the onions: Thinly slice all the onions. Set aside half of the sliced onions to fry separately as a garnish in the end.


3. Other prep: Chop or puree the tomatoes. Peel and mince the ginger and garlic. If using whole spices like cumin and carom, measure them out now. Crumble the kasuri methi leaves between your palms if using.


Cooking Instructions

1. Fry the onions (Stage 1): Heat 1 tablespoon of oil in a pan over medium heat. Add half of the sliced onions and sauté, stirring often, until soft and golden brown. Remove these caramelized onions and set them aside.


2. Spice tempering: In the same pan, add the remaining oil and reduce heat to low. Add cumin and carom seeds, frying until they sizzle and crackle. Then stir in the ginger and garlic, cooking briefly until fragrant.


3. Cook the masala: Increase the heat to medium and add the chopped tomatoes. Cook until they soften and begin to release oil at the edges. Sprinkle in turmeric, coriander powder, and chili powder; stir well and cook for another minute to roast the spices.


4. Add the okra: Raise the heat to high and add the chopped okra to the pan. Mix gently to coat the okra in the onion-tomato-spice mixture. Add about 2 tablespoons of water to help it cook, then season with salt. Cook uncovered, stirring occasionally, for 5–7 minutes until the okra is tender (avoid covering the pan, as trapped steam can make okra slimy).


5. Finish the dish: Once the okra is cooked through, sprinkle garam masala, amchur (or a squeeze of lemon juice), and crushed kasuri methi on top. Stir to combine and adjust salt if needed.


6. Fry the onions (Stage 2): Quickly heat a little more oil in a small pan on high heat. Add the reserved onion slices (and green chilies, if using) and fry for about 1 minute until crispy at the edges. Immediately pour this sizzling onion tempering over the bhindi do pyaza and give it a gentle mix. Turn off the heat and cover the pan briefly to let the flavors meld.


Tips for Perfect Bhindi Do Pyaza

Always start with dry okra: Any moisture will release slime. Pat the washed okra completely dry before cutting or cooking.

High heat stir-fry: Cook the okra on a relatively high flame with constant stirring. This keeps the okra pieces crisp and prevents them from turning mushy.

Add an acidic ingredient: Once the okra is in the pan, add a splash of lemon juice or a pinch of amchur powder after a few minutes. The acid helps neutralize the okra’s mucilage, keeping it firm.

Salt at the end: Salt draws out moisture, so season the dish only towards the end of cooking. This ensures the okra doesn’t release excess water mid-cook.

Avoid covering: Do not cover the pan tightly while cooking okra. Steam makes okra slimy, so cook uncovered so excess moisture can evaporate.

Generous oil: Use enough oil when sautéing. A slick of oil around each okra piece helps it fry rather than stew, resulting in a dry, non-sticky texture.


Serving Suggestions

Bhindi Do Pyaza is a classic North Indian sabzi that shines as part of a comforting homestyle meal. Serve it hot with soft rotis or parathas, using the bread to scoop up the tangy okra and onions. A simple dal (like yellow moong dal or dal tadka) alongside completes the meal. It also pairs wonderfully with plain or jeera-flavored basmati rice. As noted by Swasthi’s recipe, it “goes well…with rice, roti, paratha, naan”, making it perfect for a nostalgic lunch thali alongside dal, raita, and pickles.

Breakfast, Lunch & Dinner

Lachha Paratha – Flaky Layered Punjabi Flatbread

Introduction

Picture a lazy Sunday in a Punjabi household: the whole family gathers as the kitchen fills with the mouthwatering aroma of ghee. On the tawa (griddle), Lachha Parathas sizzle and puff up, promising a hearty treat. Lachha Paratha is a beloved North Indian flatbread (often dubbed a Punjabi bread) known for its crisp, flaky layers. In many Punjabi families, weekend meals or festive thalis (traditional feast platters) feel incomplete without a stack of these golden, multi-layered parathas at the center. The name “lachha” literally means layers (or rings), and indeed each paratha reveals concentric rings of dough when cooked, a testament to the unique folding technique that creates its signature flaky texture. It’s an all-time favorite comfort food, lovingly served during special breakfasts, family get-togethers, and celebratory dinners alike. One bite into a warm lachha paratha – with those ghee-brushed layers melting in your mouth – and you’ll understand why this bread holds a special place in Punjabi cuisine.

Lachha Parathas are traditionally cooked on a hot griddle with ghee until they turn flaky and crisp, revealing their beautiful ring-like layers. These buttery flatbreads are best enjoyed fresh off the tawa with a dollop of ghee or butter melting on top for extra indulgence. Serve them immediately while hot to fully appreciate the tender layers and golden-brown crunch of each paratha.


Ingredients

To make Lachha Paratha at home, you’ll need just a few pantry staples:

Whole Wheat Flour (Atta) – 2 cups (the base for an authentic Punjabi lachha paratha)

Salt – 1 teaspoon (to taste)

Ghee or Oil – ~4 tablespoons (use ghee for genuine flavor and flakiness; some for the dough and more for cooking)

Water – ~¾ to 1 cup (for kneading a soft dough)


Optional: A tablespoon of all-purpose flour (maida) can be mixed into the wheat flour for extra softness, and a pinch of ajwain (carom seeds) can be added for aroma (this is optional, but some traditional recipes include it for a subtle flavor). You can also keep a little extra dry flour handy for dusting and a bit more ghee for layering and frying.

Step-by-Step Instructions

Follow these steps to prepare flaky, layered Lachha Parathas from scratch:

1. Make the Dough: In a mixing bowl, combine the whole wheat flour and salt. Drizzle 1 tablespoon of melted ghee (or oil) into the flour. Rub the ghee into the flour with your fingers until it’s well incorporated (this step makes the parathas soft and flavorful). Gradually add water, a little at a time, and mix until a shaggy dough forms. Knead the dough for about 5–8 minutes to make it smooth and pliable. The dough should be soft but not sticky. (Tip: A well-kneaded dough is key – kneading develops the gluten, making it easier to roll out thin layers.) Gather the dough into a ball, smear a tiny bit of ghee on its surface, and cover it with a damp cloth. Let it rest for 20–30 minutes. Resting relaxes the dough, making it easier to roll out later.


2. Divide and Shape Balls: After resting, give the dough a quick second knead. Divide it into equal portions – you should get about 6–8 medium dough balls from this quantity (for larger parathas, make 6). Roll each portion between your palms to make smooth balls. Keep the dough balls covered to prevent drying out.


3. Roll Out the Disc: Take one dough ball at a time. Dust your work surface and rolling pin lightly with dry flour. Flatten the ball and roll it out into a thin disc, roughly 8–10 inches in diameter. Don’t worry if it’s not a perfect circle – the key is to get it thin (around 1 mm thickness). You should almost be able to see a bit of light through the rolled dough.


4. Apply Ghee and Flour (Layering): Spread a generous teaspoon of ghee all over the surface of the rolled dough – use a brush or your fingers to coat it evenly. Next, sprinkle a pinch of dry flour on top of the greased dough. (This little flour trick helps create distinct flaky layers by preventing the folded dough from fully sticking together.) Now comes the classic lachha folding: starting from one end of the circle, fold the dough into pleats as if you’re making a paper fan or a sari pleat. Make ½-inch pleats all the way to the other end – the more pleats, the more layers your paratha will have. You’ll end up with a long strip of pleated dough.


5. Form the Layers: Gently stretch the pleated strip a bit longer. Then roll it up tightly into a coil, like a spiral or “snail shell,” tucking the end underneath. You will now have a coiled dough round that already shows a spiral pattern of layers. Lightly press it with your palm to flatten it slightly. Prepare all dough balls this way. If you have time, let the coiled dough rounds rest for 5–10 minutes (this helps the layers fuse and prevents shrinking when rolling out).


6. Roll Out the Paratha: Take one coiled dough round, dust it lightly with flour on both sides, and gently roll it out again. Do not press too hard while rolling – use a light hand to preserve those layers. Roll it into a flat circle about 6–7 inches in diameter. It will be thicker than a regular roti, and you should see the spiral layers within the rolled dough. If needed, dust off excess flour. Repeat this process for all the coiled dough portions.


7. Cook on Tawa: Heat a heavy tawa or flat skillet over medium heat. When hot, carefully place the rolled paratha onto the tawa. Cook for about 30 seconds to 1 minute until the bottom side gets light brown spots and the dough changes color. Flip the paratha. Now drizzle ~½ teaspoon of ghee around the edges and on top. Cook this side until it sizzles and develops golden-brown patches. Flip again and apply ghee on the other side as well. Gently press the paratha’s surface and edges with a spatula, moving it in circles – this helps it puff up in places and ensures even cooking. Cook until both sides are golden-brown and crisp, with distinct flaky layers visible on the surface. Each paratha may take 2–3 minutes to cook. Adjust the flame between low-medium as needed: too high heat can brown it too fast leaving inner layers undercooked, while moderate heat allows it to crisp up nicely. Once done, remove from heat and optional: brush a bit more butter or ghee on top. Serve hot. Continue frying the remaining parathas the same way.


Tips for Perfect Flaky Layers

Creating those bakery-style flaky layers in Lachha Paratha can be tricky, but these tips will help you get it just right:

Use Ghee Generously: Ghee is the magic ingredient that yields soft yet crispy layers. Knead a bit of ghee into the dough and definitely use ghee (not just oil) for layering and frying – it imparts a rich aroma and keeps the paratha tender and flaky. Parathas made with ghee will be much more flavorful and crisp than those made with oil.

Sprinkle Flour Between Layers: When you brush the rolled dough with ghee, also sprinkle a pinch of dry flour over it before folding. This clever trick helps to separate the layers. As one recipe notes, even about half a teaspoon of flour over the greased dough can prevent the layers from sticking completely, yielding ultra-flaky results.

Pleat Tightly & Roll Gently: Make as many pleats as you can – thin, accordion-like folds ensure numerous layers. Roll the pleated strip into a tight coil to build up the layers. Later, when rolling out the layered dough, be gentle. Do not apply heavy pressure with the rolling pin; otherwise you’ll squish the layers together. Roll lightly and only to the size needed. A thicker paratha (within reason) will have more visible flaky tiers, whereas rolling too thin can merge the layers.

Moderate Heat is Key: Cook the paratha on a moderately hot tawa. Too low heat will dry it out and make it hard rather than flaky. Too high heat will char the outside quickly while inner dough may remain raw. A steady medium flame allows the paratha to crisp up beautifully and cook through. You want a golden-brown color on each side. Add ghee during frying to help it turn a lovely golden and to fry the layers to a slight crisp.

Toss or Crush to Separate Layers: A pro tip for extra-flaky texture – once a paratha is cooked, gently crush it or clap it between your hands (careful, it’s hot!) to separate the layers slightly. You’ll see the lachha layers “bloom” out. This also keeps it from becoming flat or soggy. Restaurants often lightly smack the parathas to highlight the flaky layers.

Serve Immediately: Lachha Parathas taste best when they’re fresh off the pan. The longer they sit, the more they tend to toughen or lose flakiness. Have everything else ready to eat, so you can enjoy the parathas piping hot. If you must reheat, use a tawa on low heat rather than a microwave (which can make them chewy).


By following these tips – using plenty of ghee, proper folding technique, and the right heat – you’ll get parathas with gorgeous, bakery-like layers that are flaky on the outside and soft on the inside.

Serving Suggestions

Lachha Paratha is a versatile bread that pairs well with many North Indian dishes. Here are some classic pairings to complete your meal:

Dal Makhani: A rich, slow-simmered lentil dal (usually made with whole black urad dal and kidney beans) cooked with butter and cream. The creamy, smoky flavor of Dal Makhani is a match made in heaven with flaky lachha parathas – perfect for scooping and savoring.

Paneer Butter Masala: This smooth tomato-based curry with soft cottage cheese (paneer) chunks is mildly spiced and slightly sweet. Scooping up the luscious Paneer Butter Masala gravy with a crisp lachha paratha is pure bliss. The buttery paratha complements the buttery gravy beautifully.

Punjabi Chole (Chickpea Curry): Spicy, tangy chickpea masala (chana masala or Pindi chole) makes for a hearty combo. The layers of the paratha soak up the flavorful gravy. Add some sliced onions and a squeeze of lemon on the side, and you have a rustic Punjabi favorite.

Pickle and Curd: For a simple accompaniment, serve lachha parathas with a side of achar (Indian pickle – such as mango or chili pickle) and plain dahi (yogurt) or raita. The tang of the pickle and the coolness of yogurt balance the paratha’s richness. Many enjoy a hot paratha just with a dollop of homemade white butter, a bit of mango pickle, and a spoon of creamy yogurt – comfort food at its best.

Paneer Bhurji or Curry: Aside from Paneer Butter Masala, any paneer dish works well. Paneer bhurji (spiced scrambled paneer) or Palak Paneer (spinach and paneer curry) are great choices to serve alongside. The paratha’s mild taste lets the curry shine, and its texture stands up to thick gravies.

Breakfast Combo: You can even enjoy lachha parathas for breakfast by pairing them with masala chai (spiced milk tea) and perhaps an omelette or fried eggs. In Punjab, a common breakfast is parathas with lassi (a sweet or salted yogurt drink) – filling and satisfying.


Whether you serve these parathas with a deluxe curry like Dal Makhani or something simple like spiced pickle and curd, be sure to relish them hot. The flaky layers, when warm, are wonderful for mopping up any sauce or flavorful curry. And don’t forget to add that pat of butter or ghee on top of the parathas just before serving – it takes the indulgence to the next level!