Lunch & Dinner

Chhatu Besara – Odisha’s Earthy Mustard Mushroom Curry

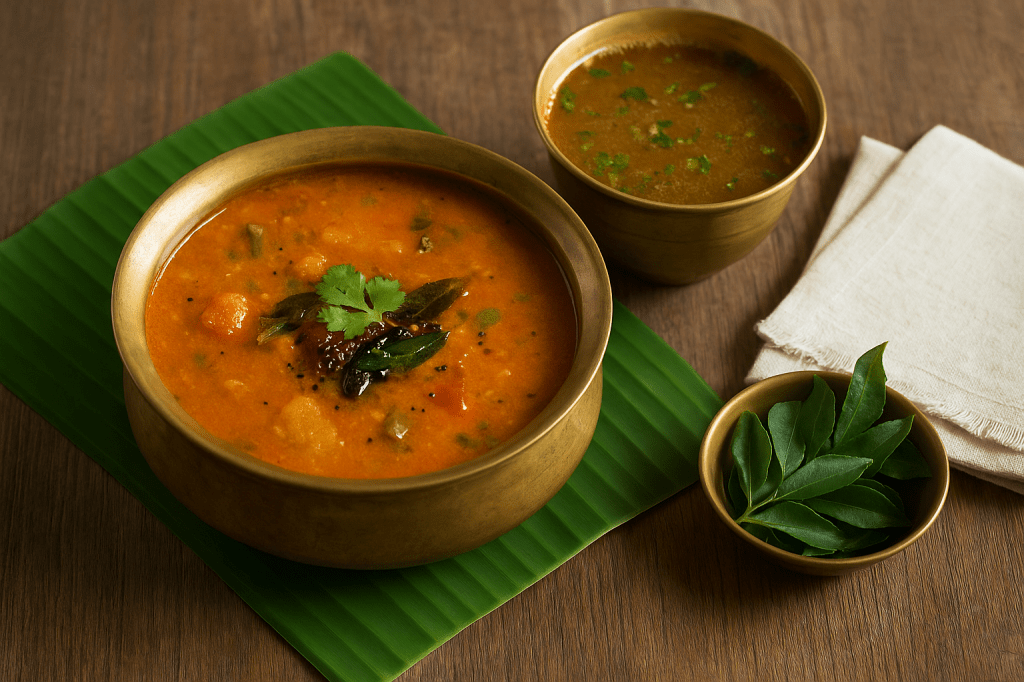
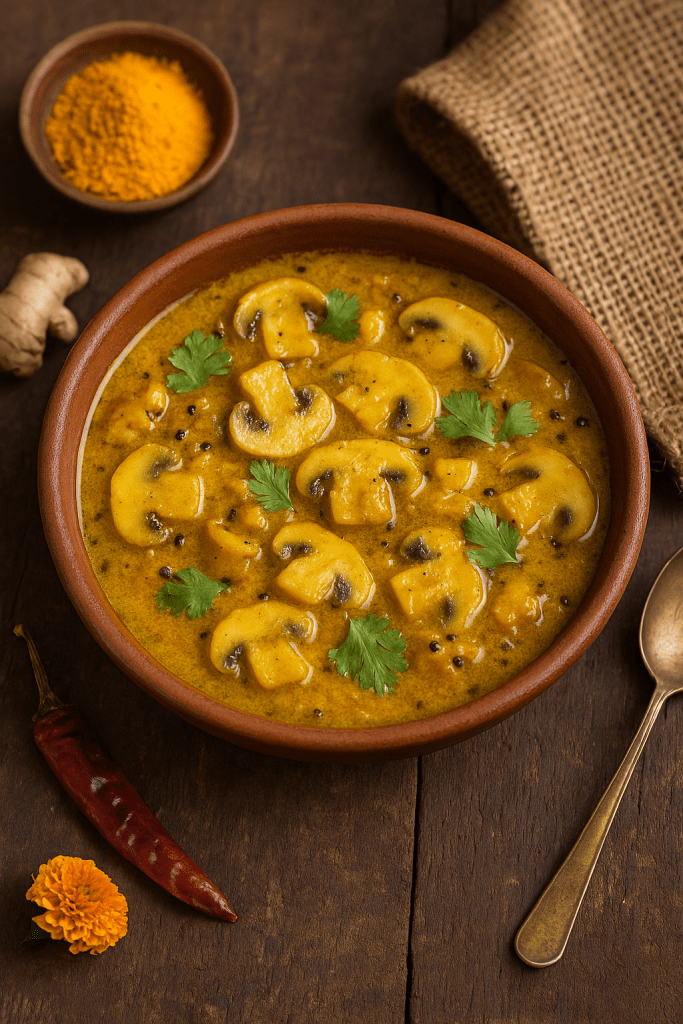
In Odisha’s kitchens, the pungency of sorisa (mustard) paste is a staple of the cuisine and soul food.  Besara (literally “mustard-bathed”) is a classic Odia curry style built around a ground mustard sauce.  In my home state, Chhatu Besara – mushrooms (“chhatu” in Odia) cooked in mustard gravy – is a beloved monsoon comfort. Fresh wild mushrooms from the forests are gently simmered with potato (for heft and sweetness) in a minimal spice blend of garlic, turmeric and green chilies, all brought together by a hot mustard paste. Odisha’s cooks revere this sorisa-bata (mustard paste) – it is the cornerstone of many dishes. As one Odia food writer notes, these forests yield the wild mushrooms known as chhatu, “cooked alongside potatoes and simmered in a thick mustard paste infused with garlic and turmeric”, making a “pungent, creamy and aromatic” curry that evokes Odisha’s jungle and temple heritage.

In fact, mustard is woven through Odisha’s food culture.  Every summer and monsoon, long before the rains arrive, tiny wild mushrooms start sprouting in the damp fields and forests.  The humid, moderate monsoon climate is perfect for these fungi, and Odias celebrate the season with Chhatu Besara and other sorisa-rich dishes.  This curry is so traditional that the mixed vegetable Besar (Odia spelling) cooked in sorisa-bata is one of the 56 bhoga offerings (Mahaprasad) to Lord Jagannath at the Puri Temple. Even if you’re cooking at home, spooning hot rice over a bowl of mustardy mushrooms can feel like a devotional ritual – each bite connecting us to the earth and our ancestors’ kitchens.

Throughout the recipe, be prepared to work with a sharp mustard sauce (Odia curries often skip many spices). As Sasmita Sahoo notes in her Odia food blog, the mustard paste is traditionally ground on a silbata with garlic, chilies and cumin, but nowadays a blender works just fine.  Do use mustard oil if you can – it lends that classic Odia aroma and fragrance that no other oil can match. (If needed, you can substitute a mild oil, but it won’t be as authentic.)  With just a handful of ingredients, this dish comes together quickly – it’s a “specialty of Odisha” that uses minimal spices to create deep flavor.

Ingredients

Mushrooms (Chhatu) – 400 g (about 14 oz) fresh button or oyster mushrooms, cleaned and halved.

Potato – 1 medium, peeled and cut into 1-inch chunks (optional, for a heartier curry).

Raw banana (kacha kela) – 1 small (around 100 g), peeled and cut into chunks (optional variation).

Mustard paste: 2 tbsp mustard seeds (sorisa), 1 tsp cumin seeds, 4–5 cloves garlic, 2–3 dried red chilies – ground together with very little water.

Turmeric powder – ½ teaspoon.

Salt – to taste (about ½ to 1 tsp).

Green chilies – 2 fresh, slit (adjust to taste).

Tomato – 1 small, chopped (adds tang; optional).

Onion – 1 small, chopped (optional; traditional temple-style besara omits onion).

Mustard oil – 3 tablespoons (or neutral oil if unavailable, though mustard oil is traditional).

Water – ¼ to ½ cup (as needed for gravy).

Garnish: Fresh cilantro (coriander leaves), chopped.


Method

1. Prepare the Mustard Paste:  In a small bowl or mortar, soak 2 tablespoons mustard seeds with the cumin seeds, garlic cloves, and dried red chilies in a splash of warm water for 10–15 minutes. Then grind them to a coarse paste with as little water as possible (this keeps the paste thick). Alternatively, use a spice grinder or blender. The goal is a very pungent, thick mustard-garlic paste – this is the flavor base of the curry.


2. Prep Vegetables: Clean and halve the mushrooms. Keep them whole or large, as they will shrink when cooked. If using potato and/or raw banana, peel and cut them into bite-sized pieces and set them in water to prevent browning. Chop the onion and tomato if using.


3. Heat Mustard Oil: In a deep pan or kadhai, add 3 tablespoons mustard oil and heat on medium. When the oil is hot but not smoking, add a pinch of fenugreek seeds (optional) and let it crackle. Lower the flame and add the chopped onion and green chilies. Sauté until the onion is translucent and slightly golden. (Tip: For an extra Odia touch, you can add a pinch of panch phoron (five-spice mix) with the oil – cumin, fennel, mustard, nigella, fenugreek – but this curry tastes great with just mustard and cumin alone.)


4. Cook Potatoes/Banana: Add the drained potato and raw banana pieces. Sprinkle a pinch of salt and turmeric. Sauté on medium-high heat, stirring occasionally, until the edges begin to brown. This browning adds a nice sweet caramelized flavor to the vegetables. Remove and set aside for a moment.


5. Sauté Mushrooms: In the same pan, add the mushrooms. You may add a bit more oil if the pan is dry. Sauté the mushrooms on high heat until they start to release moisture and then that water evaporates. This helps concentrate their flavor. Stir frequently so they brown slightly on the edges.


6. Spice it Up: Return the browned potatoes/banana to the pan. Add the chopped tomato (if using), remaining turmeric, red chili powder, and salt. Mix well and cook for another 2–3 minutes until the tomatoes soften.


7. Add Mustard Paste: Now, stir in the prepared mustard paste. Mix quickly so it coats all the veggies. You should smell a very strong, sharp aroma now – that’s the sorisa getting awakened. Cook the paste for 1–2 minutes on low heat, being careful not to let it burn.


8. Simmer: Pour in about ¼ to ½ cup water (depending on how thick you like the gravy) and stir everything together. Cover the pan and simmer for 5–7 minutes on low heat, or until the potatoes (and banana, if used) are tender. The sauce will thicken slightly as it cooks. Check seasoning and add more salt if needed.


9. Finishing Touch: For tang and authenticity, add a souring agent now. If you have ambula (sun-dried green mango slices), soak 1–2 pieces in 2 tablespoons warm water and stir them into the gravy. (The ambula will infuse a subtle sour note.) If you don’t have ambula, a splash of tamarind water or even a squeeze of lemon can brighten the curry. Cook another minute, then turn off the heat. Finally, drizzle a teaspoon of raw mustard oil on top, and garnish with chopped cilantro.


10. Serve Hot: Transfer the Chhatu Besara to a serving bowl. Enjoy it piping hot as part of a rustic Odia meal.


Tips & Variations

Mustard Paste: Always grind the mustard seeds with minimal water. A bit of soaking makes grinding easier, but the paste should be very thick and pungent (it will mellow when cooked). For safety, taste a dab of raw mustard paste mixed with a drop of oil first – it will be VERY hot!

Make it Traditional: In temple-style Odia besara, no onion or garlic are used – only sorisa with spices like cumin, pepper and ginger, plus coconut or jaggery for balance. Our home version uses garlic and onion for extra body, but you can skip them if desired.

Souring Agents: Dried mango (ambula) is prized in Odisha for its unique tang. If unavailable, use tamarind, raw mango, or even yogurt at the end. Tomatoes alone will add some tartness too.

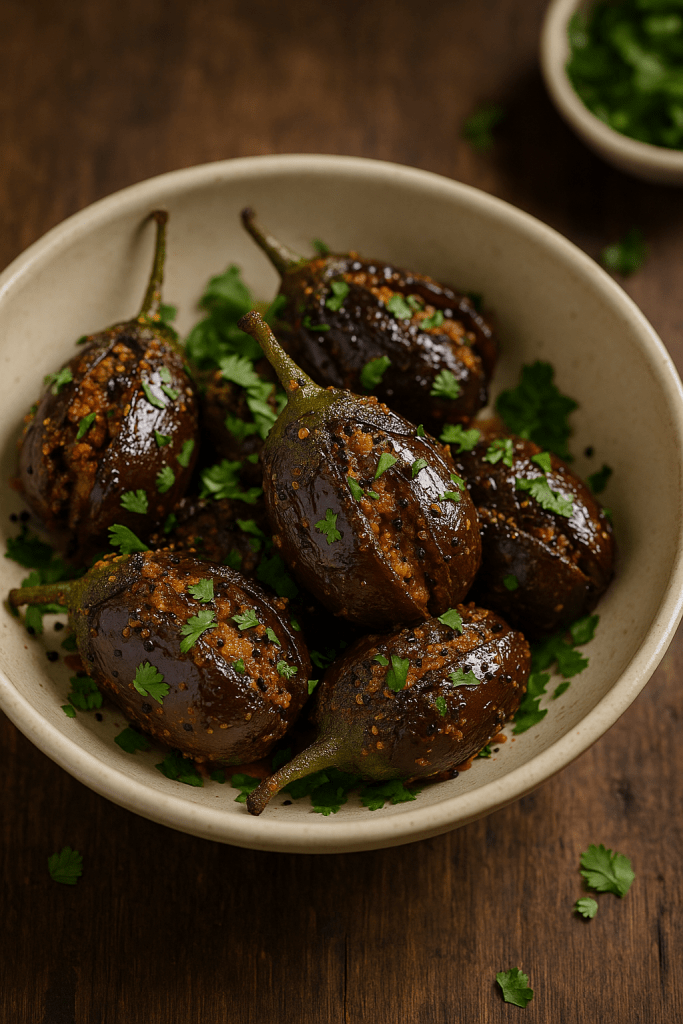
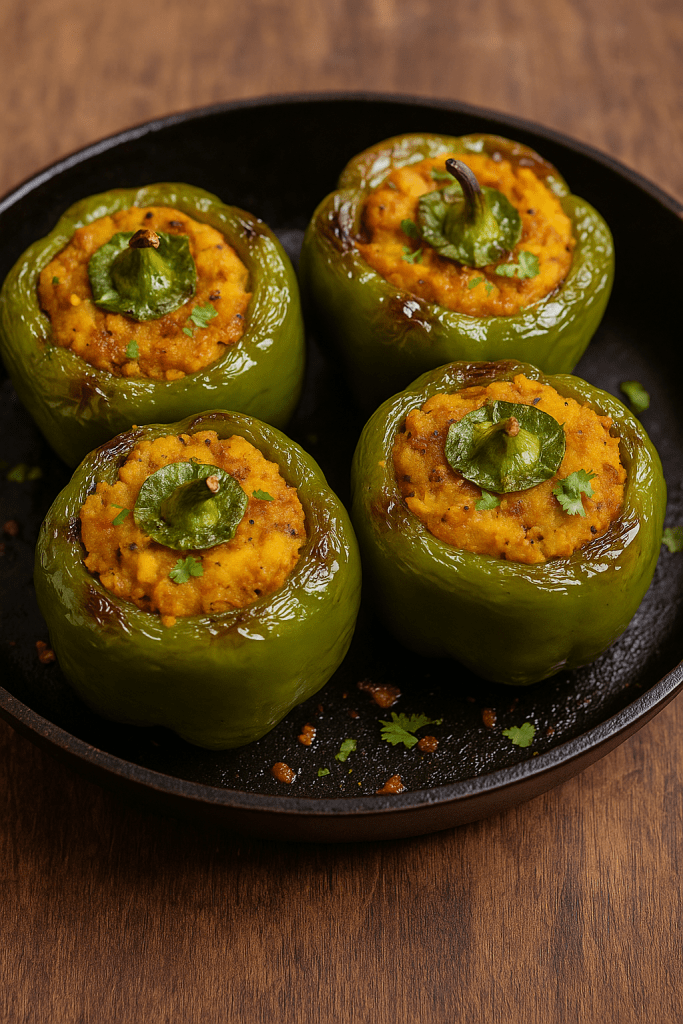
Veggie Variations: This curry is very forgiving – you can add other veggies like potatoes, jackfruit seed, or even bottle gourd in place of (or along with) mushrooms. Kacha Kela (raw green banana) and aloo (potato) are very common. Make “Aloo Besara” or “Kela Besara” by using them as the main stars, with the same mustard base.

Use Fresh Ingredients: In Odisha, Chhatu Besara is simplest when made with just-grown mushrooms and home-pressed mustard oil. The aroma of fresh mustard oil is key. If you don’t have it, heat vegetable oil until very hot and let it cool slightly before adding to mimic the sharp flavor.

Quick Prep: You can prepare the mustard paste ahead of time and refrigerate it (it stays pungent in an airtight jar). On cooking day, stir-fry the veggies and simply add the paste from the fridge.


Serving & Seasonal Context

Chhatu Besara is most often enjoyed with steaming rice (basmati or short-grain) and a simple dal. In Odisha, it would join other dishes like dalma (lentils with veggies), plain yogurt or raita, and a vegetable bhaja or bharta. It also pairs beautifully with soft flatbreads (roti or paratha), which soak up the mustard gravy. A bowl of hot pakhala (fermented rice water) on the side can cool the palate if the curry is extra fiery. Pickles and papad (crispy lentils wafers) add nice contrasts.

Because mushrooms flourish in the rains, Chhatu Besara is often celebrated as a monsoon specialty. In Odisha’s villages, mothers and grandmothers eagerly collect fresh chhatu after the first rains, then prepare this dish with devotion. Each spoonful is earthy and nourishing, a reminder of the seasons and the land. Whether you’re serving it at a family dinner or as a festive ritual offering, this humble curry carries with it the soul of Odisha – simple, rustic, and deeply rooted in devotion to the earth’s bounty.

Enjoy this soulful Odia classic with the warmth of home and the devotion of tradition.

Breakfast, Lunch & Dinner

Udupi-Style Sambar and Rasam


I still remember tagging along to my grandfather’s home in Udupi as a child and inhaling the aroma of sambar and rasam simmering in the kitchen. After morning temple prayers, my grandmother would serve a simple banana-leaf thali: steaming rice topped with our local sambar and rasam, a pat of ghee, and crispy fried peppers. Those humble temple-style dishes – fragrant with coconut, cumin and curry leaves, and completely free of onion or garlic – felt like pure comfort food.  In Udupi cuisine, everything is prepared satvik (pure and vegetarian), so the sambar masala is based on coconut and spices, and the rasam is bright with tomato, tamarind and a touch of jaggery instead of pungent aromatics. These are the dishes I grew up loving, and I’m excited to share my version of Udupi-style Sambar and Rasam with you.

Udupi-Style Sambar

Servings: 4

Prep Time: 15 minutes

Cook Time: 30 minutes

Ingredients

For the Sambar:

1 cup toor dal (split pigeon peas), washed

~2 cups mixed vegetables (e.g. ½ cup chopped pumpkin or squash, 1 drumstick cut into pieces, ½ cup potato, 2 small eggplants), chopped

1 small tomato, chopped

2½–3 cups water

2 tbsp tamarind paste (or a small ball of tamarind, soaked)

½ tsp turmeric powder

½ tsp jaggery (optional, for a hint of sweetness)

Salt to taste


For the Masala Paste:

¼ cup fresh grated coconut (or frozen/thawed)

1 tbsp coriander seeds

1 tsp cumin seeds

1 tsp split urad dal (optional)

1 tsp split chana dal (optional)

2–3 dried red chilies (preferably mild Byadgi or Kashmiri)

½ tsp black peppercorns

½ tsp fenugreek seeds

5–6 fresh curry leaves

1 tbsp coconut or sesame oil (for roasting)

Water, as needed for grinding


For Tempering:

2 tsp coconut or sesame oil

½ tsp mustard seeds

½ tsp cumin seeds

A pinch of asafoetida (hing)

8–10 fresh curry leaves


Instructions

1. Cook the dal: In a pressure cooker or pot, combine the washed toor dal with a pinch of turmeric and 2 cups of water. Cook until very soft (about 3–4 whistles in a pressure cooker). Mash the dal and set aside.


2. Prepare the masala paste: In a small pan, heat 1 tbsp oil over medium heat. Add the coriander seeds, cumin, dals, fenugreek, peppercorns, and dried chilies. Roast, stirring, until aromatic and lightly golden. Add the grated coconut and curry leaves, and roast briefly until the coconut starts to brown. Let cool, then grind this mix to a smooth paste with a little water.


3. Cook vegetables: In a large pot or Dutch oven, heat a tablespoon of oil. Add the turmeric and the chopped vegetables and tomato. Stir for a minute, then pour in 2 cups of water, add salt, and bring to a boil. Reduce heat, cover, and simmer until the vegetables are almost tender (about 10–12 minutes).


4. Add tamarind and dal: Stir in the tamarind paste and jaggery. Once it comes to a boil and the raw tamarind smell disappears, add the mashed toor dal and mix well.


5. Add the spice paste: Pour the ground coconut-spice paste into the simmering pot. Stir and simmer gently for 3–5 minutes so all flavors meld. (The sambar will thicken as it sits – add a little water to adjust consistency as needed.)


6. Tempering: In a small pan, heat the remaining 2 tsp oil. Add mustard seeds; when they splutter, add cumin, a pinch of hing, and the curry leaves. Pour this hot seasoning over the simmering sambar, cover the pot, and let it sit for a minute to infuse. Stir once more and taste; add salt or jaggery if needed.


7. Serve: Garnish with fresh chopped coriander and a dash of lime juice if you like. Serve the sambar hot with rice, idlis, or dosas, and enjoy the mellow coconutty aroma of this Udupi specialty.


Udupi-Style Rasam

Servings: 4

Prep Time: 10 minutes

Cook Time: 20 minutes


Ingredients

Main Ingredients:

2 large ripe tomatoes, chopped

½ cup water (plus more during cooking)

2 cups water (for cooking the rasam)

1 tbsp tamarind paste (or soaked tamarind pulp)

1 tbsp jaggery or brown sugar

½ tsp turmeric powder

2 slit green chilies (adjust to taste)

1/4 cup toor dal (washed, then cooked until very soft)

2 tbsp Udupi-style rasam powder (store-bought or homemade)

Salt to taste


For Garnish:

A few curry leaves

Chopped coriander leaves

(Optional) 1 tsp freshly grated coconut


For Tempering:

1 tbsp coconut oil or ghee

1 tsp mustard seeds

½ tsp cumin seeds

A pinch of asafoetida (hing)


Instructions

1. Cook the dal: Pressure-cook the ¼ cup toor dal with a pinch of turmeric and enough water until very soft. Mash and set aside.


2. Boil tomatoes: In a saucepan, bring 2 cups of water to a boil with the chopped tomatoes, green chilies, turmeric and a little salt. When the tomatoes are very soft, mash them in the pot to release their juices.


3. Add seasonings: Stir in the tamarind paste, jaggery, and the rasam powder. Add the mashed dal and mix well. Add more water to reach your desired soup-like consistency. Bring the mixture to a gentle boil and simmer for 5–7 minutes so the flavors meld.


4. Finishing touches: Turn off heat and add a few curry leaves. (Optionally, stir in the grated coconut for richness.)


5. Tempering: In a small pan, heat the oil or ghee. Add mustard seeds; when they begin to pop, add cumin and a pinch of hing. Pour this fragrant seasoning over the hot rasam. Cover the saucepan and let the aromas infuse for a minute.


6. Serve: Give the rasam a final stir. Garnish with chopped coriander and serve piping hot. Udupi rasam is traditionally slightly sweet-spicy – the jaggery and hing give it that signature warmth. Enjoy it as a soup or ladle it over steamed rice with a drizzle of ghee.


Tips

Use fresh coconut and spices: Roasting the spice mix and freshly grated coconut brings out a nutty richness in the sambar. Don’t skimp on this step – it’s what gives Udupi sambar its deep flavor.

Choose your chilies: Udupi sambar is known for its mild, brick-red color. Using Byadgi or Kashmiri red chilies (with maybe one spicy chili) will give color without too much heat. Adjust the mix if you prefer it hotter or milder.

Balance jaggery and hing: The little bit of jaggery and hing in the rasam might seem odd, but they balance the tamarind’s sourness with sweetness and aroma. Be sure to include at least a pinch of each for authenticity.

Use coconut oil for tempering: Authentic Udupi rasam often uses coconut oil (or ghee) for the final seasoning, as it adds a subtle tropical fragrance.

Adjust consistency: Remember these dishes thicken as they sit. If your sambar or rasam becomes too thick after resting, simply add a little hot water and reheat to loosen it.


Closing Note

These Udupi-style sambar and rasam are a tribute to the simple temple cuisine of coastal Karnataka. The flavors are subtle but soulful – no onions or garlic, just wholesome lentils, fresh coconut, coriander, and traditional masalas. I hope this recipe brings you the same comfort it did for me, whether you’re enjoying a South Indian breakfast of idlis and dosas or a warm bowl over rice. Remember, the slow simmering and tempering are key: be patient as the ingredients meld, and your kitchen will soon be filled with that nostalgic aroma of home. Enjoy these healthy, vegan delights with family and friends, and maybe light a lamp or two – after all, this food was born in the light of temple faith and tradition!

Lunch & Dinner

Ragi Mudde – Karnataka’s Traditional Finger Millet Balls


I still remember the smell of earthy millet flour and boiling water from my childhood kitchen in rural Karnataka. On those lazy afternoons my grandmother would scoop bright orange finger millet flour (ragi) into a heavy pot of bubbling water and stir with a wooden spatula. The rhythm of her stirring matched the beating of my heart in anticipation. We kids pressed our faces close as the mixture thickened into a soft dough, the familiar aroma of ragi mudde (finger millet balls) filling the air. As soon as it was ready, she’d break off a warm ball and hand it to me—no utensils, just bare hands—and I’d dip it into tangy chutney or a hot soppu saaru (greens curry). Each bite of those warm, soft dumplings was pure comfort: simple, wholesome, and nourishing.

For generations, Ragi Mudde has been a rural staple in Karnataka, loved for its simplicity and nutrition. Made with just finger millet flour and water, it’s naturally gluten-free and surprisingly healthy. Finger millet is known to be high in protein, fiber and even calcium, so these humble balls pack a nutritional punch. In fact, they were (and still are) a favorite among farmers and laborers – the energy and fiber in ragi helped give them strength for a hard day’s work. My family always served ragi mudde steaming hot alongside a spicy greens or lentil curry (massoppu or soppu saaru) and tangy chutneys. Those were simple meals, but they felt deeply satisfying and left us full and content.

Servings: 2–3
Prep Time: 5 minutes
Cook Time: 15 minutes

Ingredients

1 cup ragi (finger millet) flour

2 cups water (approximately)

¼ teaspoon salt (optional, to taste)

1 teaspoon ghee or oil (optional, for richness)


Instructions

1. Mix a smooth paste: In a small bowl, whisk 2 tablespoons of ragi flour with about ¼ cup water until smooth and lump-free. Set aside this slurry.


2. Boil water: In a heavy-bottomed pot, bring the remaining 1¾ cups of water to a rolling boil over medium-high heat. Stir in salt and ghee (or oil) if using.


3. Add the slurry: Pour the ragi-water slurry into the boiling water, stirring constantly. The mixture will thicken almost immediately.


4. Add remaining flour: Gradually add the rest of the ragi flour (remaining ⅔ cup) to the pot in small increments. After each addition, stir vigorously with a wooden spatula or ladle to incorporate the flour and prevent lumps. Continue adding and stirring until all the flour is mixed in and the dough forms a thick mass.


5. Simmer and cook: Lower the heat to medium-low, cover the pot, and let it steam for 2–3 minutes. Uncover and stir vigorously again – the dough should look glossy and pull away from the sides of the pot. If it’s very dry, add a splash of hot water and continue stirring until it comes together.


6. Form the balls: Remove the pot from heat and let it sit for a minute. Grease your palms with a little water or ghee, then scoop out portions of the mixture and roll into firm balls (mudde). (Tip: Using a bowl to shape each ball can make it easier to handle the hot dough.)


Tips

Use a heavy-bottomed pot and a sturdy wooden spatula to stir – ragi mudde batter is thick and can stick or burn easily.

Stir continuously when adding flour to prevent lumps. A smooth paste and constant stirring lead to silky, lump-free mudde.

A teaspoon of ghee or oil (even though optional) adds flavor and helps make the dough smoother. Traditionally many cooks prefer ghee for its taste and digestion benefits.

After covering the pot, let it steam on low for a few minutes before stirring again – this helps cook the dough through without burning.

Ragi Mudde is best enjoyed hot. Serve it with a vibrant soppu saaru (leafy greens curry), hot rasam or sambar, and your favorite chutneys. This plain, comforting dish pairs perfectly with spicy or tangy sides.


Closing Note

Ragi Mudde may seem like a humble dish, but it carries the warmth of home and tradition in every bite. These simple millet balls remind us of lazy village afternoons and the strength of the food that kept generations of Karnataka farmers going. I hope this recipe brings a bit of that comfort to your table. Try serving it with a favorite curry or dal, sit down with loved ones, and enjoy a taste of South India’s heritage.

Lunch & Dinner

Drumstick Leaves Dal (South Indian Moringa Dal)

Drumstick leaves dal is a traditional South Indian dish that brings back memories of homely meals and backyard moringa trees. In many South Indian homes, drumstick (moringa) trees grow in the backyard, and the nutritious leaves are often shared with neighbors and family. I fondly remember sitting with my grandmother, patiently plucking the tiny green leaves from their stems for this dal – a true labor of love that was always worth the effort. Drumstick (moringa) pods are commonly used in sambar, but the leaves are a hidden gem of South Indian cooking, packed with nutrients and a unique earthy flavor. While some families (like mine) didn’t cook with the leaves very often in the past, many others have included them in their diet for generations. This recipe, known as Drumstick Leaves Dal or Moringa Dal (and even Sajana Patra Dal in some regions), is a simple, comforting lentil curry that pairs perfectly with rice or roti.

“A hearty bowl of South Indian Drumstick Leaves Dal (Moringa Dal) — creamy toor dal simmered with fresh moringa leaves, finished with a coconut tempering of mustard, cumin, garlic, and curry leaves. Perfect comfort food with steamed rice.”

Ingredients

Toor Dal (Split Pigeon Peas) – 3/4 cup, rinsed

Drumstick Leaves (Moringa Leaves) – ~2 cups fresh, tightly packed (stems removed)

Onion – 1 small, finely chopped

Tomato – 1 medium, chopped

Green Chilies – 2, slit (adjust to taste)

Turmeric Powder – 1/2 teaspoon

Salt – to taste

Water – ~2 to 2.5 cups (for cooking the dal)


For Tempering (Tadka):

Oil or Ghee – 2 teaspoons (using coconut oil adds authentic flavor)

Mustard Seeds – 1 teaspoon

Cumin Seeds (Jeera) – 1/2 teaspoon

Urad Dal (Split Black Gram) – 1/2 teaspoon (optional, adds crunch)

Dried Red Chili – 1 or 2, broken

Garlic – 3 cloves, sliced or finely chopped

Curry Leaves – 1 sprig (8-10 fresh curry leaves)

Asafoetida (Hing) – a pinch

Fresh Grated Coconut – 3 tablespoons


Step-by-Step Instructions

1. Prep the Drumstick Leaves: Pluck the drumstick leaves from their stems. Discard all thick, woody stems and collect only the tender leaves. Rinse the leaves thoroughly in plenty of water. (Tip: Soak the leaves in a large bowl of water, swish them around, then lift the leaves out, leaving any dirt to settle at the bottom. Repeat this process 2-3 times to ensure they are clean.) Drain and set the clean leaves aside.


2. Cook the Dal with Leaves: In a pressure cooker add the rinsed toor dal, the prepared drumstick leaves, chopped onion, chopped tomato, turmeric powder, green chilies, and about 2 cups of water. Cook for about 3-4 whistles on medium flame (or ~10 minutes) until the dal is soft and mushy. (If using an Instant Pot, pressure cook on high for ~6 minutes with natural pressure release, or if cooking in a pot on the stovetop, simmer until the dal is very soft, adding more water as needed.) Once cooked, let the pressure release naturally. Open the lid and gently mash the dal and leaves with the back of a spoon or ladle. The tomato and onion should have disintegrated, blending into the dal. If the mixture is too thick, add a bit of hot water to reach your desired consistency. Add salt to taste and simmer the dal on low heat while you prepare the tempering.


3. Prepare the Coconut Tempering: In a small pan, heat the oil or ghee over medium flame. Once hot, add the mustard seeds and let them splutter. Then add the cumin seeds and optional urad dal. Fry for a few seconds until the cumin sizzles and the urad dal turns golden. Reduce the heat to low and add the broken dried red chili, curry leaves, and a pinch of asafoetida. Be careful as the curry leaves might crackle. Next, add the sliced garlic. Sauté for a minute or until the garlic turns light golden and its raw smell disappears. Now add the fresh grated coconut to the pan. Stir continuously on low-medium heat, roasting the coconut in the oil. Fry the coconut until it becomes lightly golden and aromatic (this coconut tempering gives a lovely nutty finish to the dish).


4. Combine Tempering with Dal: Once the tempering is ready (the kitchen will smell amazing at this point), carefully pour all these fried spices and coconut along with the oil/ghee into the simmering dal. You should hear a satisfying sizzle as the tempering hits the dal. Immediately cover the pot for a minute to trap all the aromas. Then stir the dal well so the tempered spices and coconut are evenly mixed in. Let the dal simmer for another 1-2 minutes on low heat to let the flavors meld, then turn off the heat.


5. Finish and Serve: Check the consistency of the dal. It should be semi-thick and creamy; if it has thickened too much (drumstick leaves dal tends to thicken as it rests), you can stir in a bit of hot water to loosen it. Taste and adjust salt if needed. Squeeze a little fresh lemon juice at the end if you like a hint of tang (this is optional, but a small amount of acidity can brighten the flavors).


6. Garnish: Before serving, you can garnish the drumstick leaves dal with a sprinkle of freshly chopped coriander leaves or a few more fresh curry leaves. A small dollop of ghee on top of each serving bowl will make it extra aromatic and delicious.


Tips for Cleaning and Preparing Drumstick Leaves

Cleaning drumstick leaves (moringa leaves) is the only part of this recipe that requires a bit of patience. Here are some tips to make it easier:

Destemming: The leaves grow on hardy stems and thin stalks. Hold the end of a stalk with one hand, and use the thumb and forefinger of your other hand to strip the tiny leaves off in a downward motion. Alternatively, pinch off clusters of the leaves. Discard all the tough stems; only the small leaves (and very tiny tender stems attached to clusters of 2-3 leaves) are used for cooking.

Washing: Drumstick leaves can have dust or sand on them. After destemming, place the leaves in a large bowl of clean water. Swirl them gently with your hand. The dirt will settle at the bottom. Lift the leaves out into a colander. Refresh the water and repeat this washing once or twice until the water is clear. This soaking method cleans the leaves thoroughly without bruising them. Finally, drain well. You can also pat them dry on a clean kitchen towel or use a salad spinner to remove excess water if you’re prepping them in advance.

Handling bitterness: Drumstick leaves have a mild, pleasant bitterness. If you are very sensitive to bitter flavors, one trick is to add a tiny piece of jaggery (unrefined cane sugar) or a pinch of sugar while cooking the dal to balance the bitterness. In this recipe, the natural sweetness of coconut and onion usually balances the leaves, but a pinch of jaggery can be added if desired (about 1/2 teaspoon is enough).

Quantity after cleaning: Keep in mind the leaves will reduce in volume after removing stems. For example, ~2 cups of loosely packed leaves (after removing stems) is roughly what you get from a much larger bunch of leaves on the stalk. It’s fine to approximate; a little more or less leaves won’t harm the recipe. You can even throw in a handful of spinach or methi (fenugreek) leaves along with the drumstick leaves if you want to increase the greens.

Storing Leaves: If you’re not using the leaves immediately, wrap them in a newspaper or paper towel and keep them in the refrigerator. Use them within a day or two, as they tend to wilt and turn yellow quickly. Fresh is always best to get the most nutrients and flavor.


Health Benefits of Drumstick Leaves (Moringa)

Drumstick leaves are often called a superfood, and for good reason! These humble greens are a powerhouse of nutrition. They are rich in vitamins (like A and C), minerals (like iron and calcium), protein, and antioxidants. In fact, moringa leaves are said to contain more iron than spinach and more beta-carotene (Vitamin A) than carrots. Traditionally, moringa has been valued in Ayurveda and folk medicine for its health benefits. It’s known to have anti-inflammatory properties and is used to boost immunity and energy levels.

Modern studies and sources note that moringa leaves provide a wide range of nutrients – over 90 nutrients and 46 antioxidants have been identified in the moringa tree. People often consume moringa powder or supplements, but incorporating fresh leaves into recipes like this dal is an easy (and delicious) way to reap the benefits. Moringa is believed to help lower inflammation and even blood sugar levels, and has been used to manage conditions such as anemia, arthritis, high blood pressure, and more. It’s also traditionally given to new mothers, as it is thought to improve lactation (production of breast milk) and provide strength after childbirth.

Do keep in mind that while drumstick leaves are highly nutritious, they are best enjoyed as part of a balanced diet. This drumstick leaves dal is a great example of a healthy dish – it combines the goodness of moringa leaves with protein-rich lentils. Together, they make a nutrient-dense, high-fiber, high-iron meal that’s also low in calories. It’s wholesome food that our ancestors loved, and now the world is catching on to its benefits (moringa is often dubbed the “Miracle Tree” in wellness circles)!

Tip: If you’re new to drumstick leaves, start with a moderate amount the first time to see how you like the taste, since they do have a slight bitter note. Most people find the flavor very mild (less bitter than fenugreek leaves, for example) and the dal itself is mild and comforting in taste.

Serving Suggestions

Drumstick Leaves Dal is typically enjoyed with steamed rice for a satisfying meal. In South India, a dollop of homemade ghee on hot rice topped with this moringa dal is considered the ultimate comfort food. You can serve it with plain white rice or nutrient-rich brown rice; it even pairs well with millets or quinoa for a healthier twist. It’s equally delicious with roti, chapati or other Indian flatbreads – you can scoop up the dal with the bread for a hearty bite.

For a complete meal, consider pairing this drumstick leaves dal with some sides and condiments. A simple stir-fried vegetable (a poriyal or thoran, such as a beans poriyal or carrot thoran) makes a great accompaniment, adding texture and additional veggies to your plate. Crispy papad (appalam) or fryums on the side add a nice crunch and are a classic combo with dal and rice. A tangy pickle (such as mango or lime pickle) or a spoon of coconut chutney can elevate the flavors if you like some tang and spice on the side. You might also include a cooling raita (yogurt-based side) like cucumber raita to balance the meal, especially on a warm day.

This drumstick leaves dal is quite filling on its own, thanks to the fiber from the greens and protein from the lentils, but it’s light on the stomach. It’s a perfect everyday dish for lunch or dinner. In our home, we often enjoy it for a weeknight dinner with rice, and if there are leftovers, it thickens up by next day – you can dilute it with a little water and reheat. Sometimes, we even have a small bowl of this dal as a soup; squeeze a bit of lemon and sip it warm – it’s nourishing and soothing.

Lastly, don’t forget the finishing touch when serving: if you have reserved a teaspoon of that toasted coconut and garlic tempering, drizzle it on top of each serving bowl for an extra burst of aroma. Serve the dal hot. As you spoon it over rice, you’ll notice how the soft lentils and tender moringa leaves blend into a creamy texture. The fragrance of curry leaves and coconut in the tempering is enticing. This is wholesome Indian comfort food at its best – simple, nutritious, and made with love.

Enjoy your Drumstick Leaves Dal with your family, and bask in the satisfaction that you’re serving a meal that is both delicious and packed with health benefits. Happy cooking!

References: Drumstick leaves have been a staple in South Indian diets and are renowned for their nutritional value. Indians have cooked with moringa for generations, appreciating its health benefits long before it gained “superfood” status globally. This recipe is inspired by traditional methods and beloved family recipes, with the addition of coconut tempering that is common in regions like Kerala and Tamil Nadu for extra flavor. The information on health benefits is drawn from nutritional research and traditional knowledge, underlining why incorporating these greens into meals like dal is so worthwhile. Enjoy this South Indian moringa dal, a dish that’s as nourishing as it is delicious!

Lunch & Dinner

Kankada Curry (Spiny Gourd Curry in Onion-Tomato Gravy)

Introduction

As the first rains of monsoon arrive, local markets in parts of India (especially Odisha and North India) overflow with fresh kankada – the spiny green gourds that herald the season. This seasonal vegetable (Momordica dioica) is eagerly awaited because it’s not only tasty but also packed with nutrients. In fact, there’s wisdom in eating seasonal produce: spiny gourd is said to have unique nutritional value that helps ward off seasonal illnesses during the rainy season. My family always believed that these little gourds help keep us healthy when monsoon colds and coughs are common.

Kankada – also known as kantola or kakrol in other parts of India – has a unique flavor profile. It’s mildly bitter (nowhere near as bitter as karela, the bitter melon) and takes on a soft, almost meaty texture when cooked. I remember how my mother would turn these spiky little veggies into a delicious curry, simmering them gently in an onion-tomato gravy. The slight bitterness would mellow into a rich, savory taste, making this curry a beloved comfort food at home. Spiny gourd is used in regional cuisines across India, and this curry version is inspired by the Odia/North Indian style of preparation – simple, homely, and letting the vegetable shine.

A warm bowl of Kankada Curry (spiny gourd curry) in onion-tomato gravy, garnished with fresh coriander. This curry showcases tender spiny gourd pieces coated in a lightly spiced masala. The vibrant color comes from ripe tomatoes and turmeric in the gravy, making it as appealing to the eyes as it is to the palate. It’s a true monsoon delight that brings both comfort and nutrition to the table.

Ingredients

(Serves 4)

Spiny gourd (Kankada/Kantola) – 250 grams (about 10 small spiny gourds)

Onion – 1 medium, finely chopped

Tomatoes – 2 medium, finely chopped (or pureed)

Ginger – 1-inch piece, grated or minced

Garlic – 4 cloves, minced

Green chili – 1, slit lengthwise (optional, for extra heat)

Turmeric powder – 1/2 teaspoon

Red chili powder – 1/2 teaspoon (adjust to taste)

Coriander powder – 1 teaspoon

Cumin seeds – 1 teaspoon

Garam masala – 1/2 teaspoon (add at the end for aroma)

Salt – 3/4 teaspoon, or to taste (plus a pinch for pre-frying)

Oil – 3 tablespoons (traditional Odia/North Indian recipes often use mustard oil for extra flavor, but any vegetable oil works)

Water – approx. 1 cup (as needed for the gravy)

Fresh coriander leaves – 2 tablespoons, chopped (for garnish)


Optional: 1 medium potato, peeled and cubed (if you want to add some potato to the curry for extra body; fry it along with the spiny gourds in step 1).

Step-by-Step Instructions

1. Prep the Spiny Gourds: Wash the kankada (spiny gourds) thoroughly and pat them dry. Trim off the stem ends. Cut each spiny gourd into pieces – you can halve or quarter them if they are small, or slice into thick rounds/wedges. (If the seeds inside are very hard, scrape those out and discard; tender seeds can remain.)


2. Shallow-Fry the Gourd (and Potato): Heat 2 tablespoons of oil in a kadai or deep pan on medium heat. Once the oil is hot, add the cut spiny gourd pieces (and potato cubes, if using). Sprinkle a pinch of salt and 1/4 teaspoon of turmeric over them. Sauté or shallow-fry for about 5–6 minutes, stirring occasionally, until the gourds get lightly browned and are half-cooked. This initial fry with salt and turmeric enhances the flavor and reduces the gourd’s slight bitterness. Remove the partially cooked spiny gourd (and potatoes) from the pan and set aside.


3. Prepare the Masala Base: In the same pan, there should be a little oil left; if not, add another 1 tablespoon of oil. Heat it on medium. Add the cumin seeds and let them splutter for a few seconds. (If using mustard oil instead of regular oil, heat it until it just starts to smoke before adding the seeds, to reduce its pungency.) Once the cumin is fragrant, add the chopped onions. Sauté the onions for about 4-5 minutes, stirring, until they turn golden-brown and softened.


4. Add Ginger, Garlic, and Chili: Add the minced ginger and garlic (and the slit green chili, if using) to the sautéed onions. Cook for 1-2 minutes, stirring continuously, until the raw smell of garlic disappears. Be careful not to burn the garlic.


5. Cook the Tomatoes: Stir in the chopped tomatoes. Add a pinch of salt (this helps the tomatoes cook down faster). Cook the onion-tomato mixture for about 5-7 minutes, mashing the tomatoes with the spoon, until the tomatoes turn soft and pulpy and the oil starts to release from the masala. You want this base to be a fairly smooth gravy. (If you prefer an extra-smooth gravy, you can cool this onion-tomato mixture and blend it to a paste, then return it to the pan – but this step is optional.)


6. Add the Spice Powders: Once the tomatoes are cooked down, lower the heat and add the dry spices – turmeric powder (if any remains from frying step), red chili powder, and coriander powder. Stir well and sauté the spices with the onion-tomato masala for another 1 minute. This toasts the spices and brings out their flavors. If the masala is very dry and sticking, sprinkle a few drops of water to prevent burning.


7. Combine Gourd with Masala: Add the partially fried spiny gourd pieces (and potato) into the pan. Stir to coat the pieces in the masala. Sauté together for 2-3 minutes so that the gourds absorb the flavors of the spices.


8. Add Water and Simmer: Pour in about 1 cup of water (enough to submerge the gourd pieces about 3/4 of the way). Stir and bring the curry to a gentle boil. Then reduce the heat to low, cover the pan with a lid, and let it simmer. Cook for about 8-10 minutes, or until the spiny gourds become tender but not mushy. Stir occasionally to prevent sticking. (If you cover the pan, check and stir every few minutes so nothing burns on the bottom.) The gourds should be soft enough to pierce with a fork, and the gravy will have slightly thickened.


9. Finish with Garam Masala: Once the vegetables are cooked through and the curry has reached your desired consistency (you can add a bit more water if you want more gravy, or simmer uncovered for a few extra minutes to thicken it), turn off the heat. Sprinkle the garam masala powder and half of the fresh coriander leaves into the curry and stir. Cover and let it rest for 2 minutes so the garam masala aroma infuses the dish.


10. Garnish and Serve: Transfer the Kankada Curry to a serving bowl. Garnish with the remaining chopped coriander leaves. Serve it hot. (See Serving Suggestions below for ideas on what to pair this curry with.)


Tips for Selecting and Prepping Spiny Gourd (Kankada)

Choosing the Right Gourds: Pick fresh, firm, bright green spiny gourds when they’re in season (rainy months). Smaller, locally grown gourds are often more flavorful and less mature – in fact, the small local variety of spiny gourd has a far better taste than the bigger, commercial variety. Avoid any that have yellow or orange patches or feel soft, as those may be overripe or starting to spoil.

No Need to Peel: Despite their prickly appearance, the “spines” on these gourds are actually quite soft. You do not need to peel or scrape off the skin. Simply scrub the spiny gourds gently and rinse well under water to remove any dirt. The skin is edible and becomes tender upon cooking.

Cutting and Seeding: Use a sharp knife to trim the tip and stem ends. Cut the gourd into uniform pieces so they cook evenly – you can slice them into rounds or wedge them into halves/quarters depending on size. Check the seeds: if you find large, hard seeds, it’s best to scoop those out and discard them, as they can be tough to eat. If the seeds are small and tender, you can leave them in – they are absolutely fine to eat once cooked.

Reducing Bitterness: Spiny gourd has only a mild bitterness, but if you are sensitive to it, there are a couple of traditional tricks. One method is to sprinkle the raw cut pieces with a little salt and let them sit for 10-15 minutes; the salt will draw out some bitterness and moisture. Rinse and pat dry before cooking. Another method is exactly what we do in this recipe – shallow-fry the pieces with a bit of salt and turmeric initially. This not only reduces any bitterness but also gives the gourds a nice flavor boost. Either way, you’ll be rewarded with a pleasantly flavored curry.

Using Mustard Oil (Optional): In Eastern India (including Odia cuisine), mustard oil is often the cooking medium for vegetables like kankada. If you choose to use mustard oil for an authentic touch, remember to heat it until it just begins to smoke before adding your spices or veggies. This step removes the raw pungency of mustard oil and brings out its nutty aroma. Always reduce the heat before adding ingredients after smoking the oil, to avoid burning them.

Enriching the Gravy: This curry is delicious as is, but if you want to make the gravy richer, you can take inspiration from some regional cooks who add nuts or seeds. For example, grinding a tablespoon of pumpkin seeds or cashews into the onion-tomato masala can thicken the gravy and add nutrients. One recipe even notes that adding pumpkin seeds makes the curry more nutritious and adds healthy omega-3 fats. This is optional, but a nice twist if you want a creamier consistency.


Serving Suggestions

With Rice: Kankada Curry is often enjoyed with plain steamed rice. In Odisha, a serving of hot rice topped with this spiny gourd curry is a comforting meal. You can also serve it alongside dal (lentil soup) and rice as part of a traditional lunch. The mild bitterness of the gourd curry pairs well with the neutral taste of rice and dal, creating a balanced, homely platter.

With Indian Breads: This curry also goes wonderfully with Indian flatbreads. Serve it with soft rotis or chapatis, or even with parathas. The onion-tomato gravy is perfect for scooping up with bread. For a North Indian style meal, you can pair the spiny gourd curry with roti and perhaps a side of yogurt.

Complete the Meal: To elevate the meal, add a side of raita (a yogurt-based side dish) – for example, a cucumber or mint raita will cool the palate and complement the spices of the curry. A small salad or a few slices of onion and a wedge of lemon can be served for freshness. You might also include a crispy papad and a tangy pickle on the side for extra crunch and zing. These little additions turn the meal into a satisfying Indian thali experience.

Enjoy Seasonal Goodness: This curry is a star of monsoon season, so enjoy it when you can find fresh spiny gourds. It makes for a wholesome vegetarian main course. During cooler rainy evenings, you could even serve it with a comforting bowl of khichdi (rice-lentil porridge) – the smooth khichdi and spiced gourd curry make a nourishing combination. And if you’re in the mood, a glass of chilled buttermilk (chaas) on the side would be the perfect traditional beverage to wash it down.


With its warm, lightly spiced gravy and the unique flavor of seasonal spiny gourd, Kankada Curry is a dish that brings together health and taste. Enjoy this regional Indian delicacy with your family, and savor the taste of the monsoon on your plate! Happy cooking! 😋

Lunch & Dinner

Chicken Bhuna Masala

One whiff of Chicken Bhuna Masala simmering on the stove takes me straight back to my childhood kitchen. The aroma of bhuna – spices and aromatics frying slowly in oil – would fill the house and draw everyone to the table. This dish is a classic North Indian curry where chicken is stir-fried and then slow-cooked in a spicy, fragrant onion-tomato masala until tender, each piece coated in a finger-licking flavorful sauce. It’s the kind of rich, hearty curry that warms you from the inside, perfect for a family feast or a cozy dinner reminiscing about home.

The word “bhuna” literally means “to fry” or “to sauté,” referring to the cooking method of patiently frying onions, tomatoes, and spices to build a deep flavor base. In a traditional Bhuna, the chicken is added to this base and slow-cooked in its own juices with little to no added water, intensifying the flavors as the masala reduces. The result is a semi-dry curry – unlike a runny gravy, here a thick, concentrated sauce clings to the chicken instead of pooling around it. The magic of Chicken Bhuna Masala lies in this slow browning and layering of flavors: sweet browned onions, tangy tomatoes cooked down until jammy, and aromatic spices toasted to perfection. The cooking process may take a bit of time and love, but the reward is an irresistibly rich, spicy curry that hits all the right notes.

A plate of Chicken Bhuna Masala, a semi-dry curry where the thick masala clings to each piece of chicken. This rich, spicy dish is slow-cooked to achieve its signature deep flavors and thick consistency. Notice how the sauce is reduced and hugging the chicken pieces — that’s exactly what defines a great Bhuna Masala!

Ingredients

1 kg (2.2 lbs) chicken, cut into medium pieces (bone-in preferred for more flavor; you can use boneless, but bone-in yields a richer taste)

1 tbsp ginger-garlic paste, divided (½ for marinating, ½ for cooking) – or use 1-inch ginger + 5 garlic cloves, minced

1 tbsp fresh lemon juice – for marinating the chicken (tenderizes and adds tang)

½ cup plain yogurt (curd) – at room temperature, whisked until smooth

3 tbsp cooking oil (vegetable oil or mustard oil for authenticity; or use 2 tbsp oil + 1 tbsp ghee for extra flavor)

2 large onions, finely chopped (about 2 cups)

3 medium tomatoes, finely chopped (or 1 cup tomato purée)

2 green chilies, slit lengthwise (adjust to taste; these add aroma and heat)

Whole spices: 1 bay leaf, 4 green cardamom pods, 4 cloves, 1-inch cinnamon stick, 2 dried red chilies (optional, for extra smoky heat)

Spice powders:

2 tsp coriander powder

1 tsp cumin powder

½ tsp turmeric powder

2 tsp Kashmiri red chili powder (for a rich red color, mildly spicy) – or 1 tsp regular hot red chili powder (for more heat, adjust to your spice level)

1 to 1½ tsp garam masala, divided (1 tsp for cooking, plus an extra ½ tsp to finish)


1 tsp salt, or to taste (divide: use a pinch for marinating, remainder in the masala)

1 tsp dried fenugreek leaves (Kasuri Methi), crushed between your fingers (optional but highly recommended for a finishing aroma)

Fresh cilantro leaves for garnish (a small handful, chopped)


Tip: Try to cut the chicken into uniform bite-sized pieces. This ensures even cooking throughout.

Instructions

1. Marinate the Chicken: In a large bowl, combine the cleaned chicken pieces with ½ tablespoon of the ginger-garlic paste, 1 teaspoon of salt (or simply a generous pinch, since you’ll add more salt later), and the lemon juice. Rub this all over the chicken. Tip: If you have 30 minutes or more, let the chicken marinate – this helps infuse flavor and keeps it juicy. You can even cover and refrigerate it for several hours or overnight for deeper flavor. (If short on time, even a quick 10-minute marinade while you prep other ingredients is beneficial.)


2. Prepare the Bhuna Masala Base: Heat the oil (or oil+ghee) in a heavy-bottomed pan or kadhai over medium heat. Add the whole spices (bay leaf, cardamoms, cloves, cinnamon, and dried red chilies). Sauté for a minute until they sizzle and release their aroma. Now add the chopped onions and a pinch of salt. Fry the onions on medium heat, stirring frequently, until they turn golden-brown. This will take about 10 minutes – be patient and avoid high heat. Tip: Browning the onions slowly is crucial for a rich bhuna masala; the deep caramelized onions will give sweetness and depth to the curry. Stir often and scrape the bottom of the pan to prevent burning (add a teaspoon of water if the onions start sticking too much).


3. Layer in Ginger, Garlic & Spices: Once the onions are nicely browned, add the remaining ½ tablespoon of ginger-garlic paste. Sauté for about 1 minute until the raw smell disappears. Reduce the heat to low, then add all the ground spice powders except the garam masala (we’ll use that later). This includes the coriander, cumin, turmeric, and red chili powders. Stir them into the onion mixture and fry for 30-60 seconds on low heat. Tip: Keep the heat low at this stage – you want to bhunao (gently roast) the spices in the oil without burning them. This step blooms the spices and layers the oil with flavor, which will coat the chicken later. You should smell the fragrant spices toasting – that’s a sign they’re releasing their goodness.


4. Add Tomatoes and Cook Until Masala is Thick: Stir in the chopped tomatoes (and any tomato paste if using). Increase heat to medium. Cook the tomatoes with the onions and spices, stirring occasionally, until the tomatoes break down completely. This will take another 7-10 minutes. As the tomatoes cook, they’ll release moisture; scrape up any browned bits from the pan so they mix into the sauce. Cook until you see the oil start to separate from the masala or edges of the pan – you’ll notice the paste thickening and darkening in color. This “oil release” is a key indicator that your bhuna masala base is well cooked and the raw tomato flavor is gone. If at any point the masala gets too dry and starts sticking, add a splash (a few tablespoons) of hot water to loosen it. (Don’t worry – adding a little water here won’t make it into a gravy, it’ll just help everything cook down and prevent burning.)


5. Incorporate the Yogurt: Lower the heat to very low. Add the whisked yogurt to the pan, stirring continuously as you pour it in. Mix it well into the onion-tomato masala. Keep sautéing on low heat for 2-3 minutes until the yogurt is fully blended and the masala once again becomes thick and starts to emit oil on the sides. Tip: Adding yogurt on low heat prevents it from splitting. For extra precaution, you can temper the yogurt by stirring a spoonful of the hot tomato-onion mixture into the yogurt bowl first, then pour it all back into the pan. The yogurt adds a lovely tang and richness to the bhuna masala, balancing the heat. Cook this mixture until it’s a thick paste and the oil leaves the sides of the pan – now your base is ready.


6. Add Chicken – The Bhuna (Frying) Step: Increase the heat to medium-high and add the marinated chicken pieces to the pan. Stir well so each piece is coated with the masala. Fry the chicken in the masala for about 5-7 minutes, stirring occasionally. The chicken will initially release some of its juices – let it cook uncovered during this time so that most of these juices evaporate. Tip: This step of briskly stir-frying the chicken with the masala on high heat is essential to bhuna cooking. It helps the spices and aromatics penetrate the meat and intensifies the flavor by reducing excess liquid. You want the chicken to start looking a bit seared on the outside. It’s okay (actually great) if the masala starts sticking to the pan a little – just keep scraping and stirring so it doesn’t burn.


7. Slow-Cook Until Tender: Now that the chicken is well sautéed, add about ¼ to ½ cup of hot water to the pan – just enough to create some steam and prevent scorching (remember, this curry should be semi-dry, not watery). Scrape up any browned bits, then cover the pan with a lid. Reduce the heat to low and let the chicken simmer gently for 15-20 minutes, or until it is fully cooked and tender. Stir occasionally to make sure the masala isn’t catching on the bottom. If it starts to dry out too much, you can add a few more tablespoons of water as needed (add it along the sides of the pan, not directly on the chicken, so you don’t cool the pan too much). The goal is a thick gravy that clings to the chicken. You’ll know it’s done when the oil separates again, the chicken is fork-tender, and the sauce is reduced and nicely coating the pieces. Tip: Traditionally, no extra water is added in a bhuna, but it’s fine to adjust slightly to prevent burning – you won’t dilute the taste. At this stage, taste the masala and adjust seasoning. Add a bit more salt if needed. If the curry tastes too tangy (from the tomatoes and yogurt), stir in a pinch of sugar to balance the flavors.


8. Finish with Aromatics: Once the chicken is cooked and you’re happy with the consistency of the masala, sprinkle the reserved ½ teaspoon of garam masala over the curry. Also add the crushed fenugreek leaves (Kasuri methi) and stir them in. These final touches will release a burst of aroma – the garam masala and fenugreek are your finishing flavor layer. Let the curry simmer for another 2 minutes uncovered, so these flavors infuse. Then turn off the heat. Garnish with freshly chopped cilantro. Optional: For the best flavor, cover the pan and let the Chicken Bhuna Masala rest for 5 minutes before serving. This resting time lets the spices mellow and merge, and you’ll notice the curry tastes even better.


Now your kitchen should be smelling absolutely divine, and it’s time to dig in!

Serving Suggestions

Chicken Bhuna Masala is best enjoyed hot. It pairs wonderfully with Indian breads or rice. Serve it with soft naan, flaky parathas, or simple chapati (roti) – the thick bhuna gravy is perfect for scooping up with bread. It’s equally delightful with a side of steamed basmati rice or fragrant jeera rice (cumin rice), allowing the bold curry flavors to shine. For a complete meal, consider serving a cooling cucumber raita (yogurt dip) or some fresh onion slices and lemon wedges on the side – the cool crunch and citrus will complement the rich, spicy chicken beautifully.

This rich and spicy Chicken Bhuna Masala is a real treat for the taste buds – the chicken is tender, the masala is deeply flavorful, and every bite comes with a punch of spice and tang. It’s the kind of dish that might even taste better the next day, as the flavors continue to develop (if you’re lucky enough to have leftovers!). Enjoy your Chicken Bhuna Masala with your loved ones, and savor each hearty, aromatic bite. Happy cooking!

Lunch & Dinner

Chicken Cafreal – Goan Green Masala Chicken Roast

When I first visited Goa, I was captivated by more than just its beaches and sunsets. One balmy evening at a local shack, the aroma of spices and charred chicken wafting from the grill introduced me to Chicken Cafreal. This legendary Goan green masala chicken is as vibrant as Goa’s culture – tender chicken coated in a fragrant green herb paste and roasted dry until succulent and slightly charred. The dish carries a fascinating history: it was originally brought to Goa by the Portuguese from their African colonies (Mozambique, to be precise) with help from African soldiers during colonial times. In fact, the name Cafreal comes from “Cafre” – a term referring to the inhabitants of Southern Africa. Over the years, Goans embraced this recipe, infusing local flavors and making it a celebratory staple. Today, no Goan feast is complete without chicken cafreal’s deep-green goodness and a squeeze of lime on top.

This Portuguese-Indian fusion dish showcases how diverse influences shaped Goan cuisine. The magic lies in its green masala marinade – a blend of fresh cilantro (coriander leaves), fiery green chilies, ginger, garlic and warm spices. Traditionally, whole chicken legs are marinated in this paste and shallow-fried or pan-roasted until the masala coats each piece in a spicy, herbaceous crust. Walk into any Goan restaurant or beach shack and you’ll likely find chicken cafreal served with potato wedges and lime, plus crisp onion rings on the side for an extra tangy crunch. The first bite is a flavor explosion – herbal freshness from the coriander, subtle heat from the chilies, and an addictive smoky tang from charred spices. Below, I’ll share a dry-roasted version of Chicken Cafreal (no curry gravy here!) just like it’s authentically enjoyed, along with tips to nail the marination, searing, and roasting for the perfect Goan experience at home.

Ingredients

Chicken: 1 kg chicken (whole legs or drumsticks preferred, bone-in pieces for best flavor). You can use thighs or leg quarters; traditionally skin-on is used for extra juiciness (optional).

Fresh cilantro leaves (coriander): 1 large bunch (about 100 g), stems removed – this gives the signature green color and flavor.

Green chilies: 5–6 (adjust to taste), for heat and color. Goan Cafreal is meant to be spicy, but you can use fewer for a milder palate.

Garlic: 10–12 cloves, peeled.

Ginger: 2-inch piece, peeled and roughly chopped.

Whole spices: 1 tablespoon cumin seeds; 1 tablespoon coriander seeds; 1-inch stick of cinnamon; 5–6 cloves; 1 teaspoon black peppercorns; optional: 2 green cardamom pods (for aroma).

Poppy seeds: 1 tablespoon white poppy seeds (khus khus) – this adds body to the masala paste. (If unavailable, you may substitute 8–10 cashew nuts or 1 teaspoon peanut butter for thickness.)

Turmeric powder: 1/2 teaspoon, for a hint of earthy flavor and color.

Vinegar: 3 tablespoons Goan coconut vinegar (toddy vinegar) if available, for authenticity. If not, use 3 tbsp regular white vinegar or apple cider vinegar. (Some recipes use 1 tablespoon tamarind paste instead of vinegar for tang – you can use tamarind if you prefer a slightly fruity sourness.)

Sugar or Jaggery: 1 teaspoon (optional) – a touch of sweetness helps balance the spice and acidity in the marinade.

Salt: 2 teaspoons (or to taste) for seasoning the chicken and masala.

Oil or ghee: 3–4 tablespoons for pan-roasting (vegetable oil or mustard oil for authenticity).

To serve: Lemon or lime wedges, sliced onion rings, and boiled potato wedges or fries on the side.


Instructions

1. Prepare the Chicken: Rinse and pat dry the chicken pieces. Using a sharp knife, make 2–3 deep slits in each piece of chicken. This helps the flavorful masala penetrate deeply for more intense flavor. Rub the chicken with 1 teaspoon of salt and a tablespoon of lemon juice and set aside for 15 minutes. (This pre-seasoning tenderizes the meat and adds a layer of citrus flavor.)


2. Make the Cafreal Masala: In a pan over low heat, dry roast the whole spices – cumin, coriander seeds, cinnamon, cloves, peppercorns (and cardamom, if using) – for about 1 minute until fragrant. Let them cool. Add these roasted spices to a blender along with the cilantro leaves, green chilies, garlic, ginger, poppy seeds, turmeric, 2 tablespoons of vinegar (reserve the remaining 1 tbsp), and the optional sugar/jaggery. Grind everything into a smooth paste, adding a splash of water or vinegar only as needed to help it blend. The paste should be thick and coat the back of a spoon (avoid adding too much liquid). Tip: Grinding the spices with vinegar (instead of water) not only adds tang but also acts as a preservative, so extra marinade can be stored refrigerated for up to a month.


3. Marinate the Chicken: Rub the chicken pieces thoroughly with the green masala paste, pushing it into the slits and all around each piece until well coated. You may reserve a couple of tablespoons of the masala for basting or an optional pan sauce later. Place the marinated chicken in a non-reactive bowl or ziplock bag. Marination Tip: For best results, marinate for at least 2–3 hours or, even better, overnight in the refrigerator. The longer marination allows the chicken to absorb all the aromatic spices and herbs, yielding juicier, deeply flavored meat. If short on time, even 30 minutes will impart some flavor, but longer is highly recommended. (Authentic chicken cafreal recipes often use a splash of dark rum or local feni liquor in the marinade for extra aroma. You can add 1–2 tablespoons of dark rum to the marinade at this stage – this is optional, but it echoes the dish’s Portuguese influence and gives a richer flavor.)


4. Sear the Chicken: When ready to cook, let the marinated chicken come to room temperature for 15–20 minutes (this ensures even cooking). Heat 2 tablespoons of oil or ghee in a wide, heavy-bottomed skillet or pan over medium-high heat. Once the oil is hot, scrape off excess marinade from the chicken (you can keep this excess marinade aside) and carefully place the chicken pieces in the pan in a single layer. Sear them for about 2–3 minutes per side until they develop a nice brown crust. The high heat sears the masala onto the chicken, locking in juices and flavor. Do not crowd the pan – if necessary, sear in batches. Add a little more oil between batches if the pan gets too dry or the masala starts to stick and burn.


5. Cook through (Braise & Roast): After searing, reduce the heat to medium-low. If you removed excess marinade earlier, return it to the pan now. Add about 1/4 cup of water to the pan and the remaining 1 tablespoon of vinegar (this creates a bit of steam and prevents sticking). Cover the pan with a lid and braise the chicken for about 15 minutes, turning the pieces halfway through. The chicken will release juices; the covered cooking helps it cook through gently and lets the green masala infuse the meat. After 15 minutes, check the chicken – it should be almost cooked (juices run clear or internal temperature around 74 °C/165 °F in the thickest part). Now uncover the pan and turn up the heat to medium-high again. Roast the chicken in the pan until all the excess liquid evaporates and the masala paste dries out and clings to the chicken pieces, about 5 more minutes. You’ll see the oil separating from the masala and the chicken getting a lovely dark green-brown char in spots. This dry-roasting step is crucial for authentic cafreal – traditionally, the dish is served almost dry with just the masala coating, not as a curry gravy. (If you prefer a bit of gravy, you can leave a few spoonfuls of the masala sauce in the pan. Some Goan cooks even stir in a tablespoon of tomato ketchup or puree at the end for a touch of sweetness and color in the gravy – a modern twist.)


6. Alternate Cooking Methods: You can also finish cooking the chicken in an oven if desired. After searing in the pan, transfer the chicken (along with any remaining marinade from the pan) to a preheated oven at 180°C (350°F). Roast for about 15–20 minutes until cooked through, then use the oven’s broiler/grill for a couple of minutes to get a slight char on top. Baste once with pan juices halfway through. Grilling is another option – grill the marinated chicken on a barbecue or grill pan, turning until nicely charred and cooked. However, the stovetop method above, which sears then simmers, ensures the chicken stays moist and the masala is well caramelized onto the meat.


7. Rest and Finish: Once the chicken is fully cooked and dry-roasted, turn off the heat. Squeeze some fresh lemon juice over the chicken pieces while they’re hot for an extra burst of freshness. Then let the chicken rest for 5 minutes in the pan – this helps the juices redistribute. Garnish the dish with fresh coriander leaves on top for a pop of color.


Serving Suggestions

Plate it up: Arrange the Chicken Cafreal on a serving platter. Garnish with onion rings and lemon wedges on the side – this is the Goan way to serve it, adding crunch and tang just before eating. You can also spoon any residual pan masala (if you left a little gravy) over the chicken.

Side Accompaniments: The classic accompaniment is potato wedges or chips (fries) which pair perfectly with the spicy chicken. A simple fresh salad (like sliced carrots, radish, and green beans lightly pickled in salt and vinegar) is often served alongside to balance the richness.

Bread or Rice: In Goa, Chicken Cafreal is often enjoyed with local pão or poee bread – a soft yeasted bread with a crusty exterior – perfect for mopping up any masala. If you can’t find Goan bread, serve it with warm dinner rolls, naan, or even roti. It also goes well with plain steamed rice or Goan coconut rice as a hearty meal.

Beverage Pairing: Given its Portuguese origins, Chicken Cafreal can be delightfully paired with a chilled beer or a glass of port wine. For a non-alcoholic option, a tart lime soda or kokum sherbet would complement the spicy, herbal notes.


Enjoy your homemade Chicken Cafreal! With its blend of Portuguese-African history and Goan spice, this dish tells a story of cultural fusion on your plate. Each bite – coated in that green masala and spritzed with lemon – will transport you to a susegad evening in Goa, where the food is as soulful as the scenery. Happy cooking!

Lunch & Dinner

Kalonji Baingan (Stuffed Baby Brinjal) Recipe

This classic Banarasi dish, Kalonji Baingan, evokes warm memories of family meals in the narrow lanes of Varanasi. My mother‑in‑law, a native of Banaras, calls it “baingan ka achar” (brinjal pickle) for its tangy, spiced flavor.  The tiny aubergines are slit and stuffed with a coarse mix of roasted coriander, cumin, nigella (kalonji), fennel and other pickling spices, then sautéed in mustard oil until tender. Each bite bursts with the earthy aroma of nigella and the sharp tang of amchur (dried mango) powder. Served hot with fresh chapatis or rice, this dry curry is a beloved North Indian side that brings the taste of traditional Banaras to any meal.

Ingredients

500 g baby brinjals (baby eggplants), washed and dried

3 tbsp mustard oil (or vegetable oil)

½ tsp panch phoron (Bengal five‑spice mix)

For the spice stuffing:

2 dried red chilies

1½ tbsp coriander seeds

1 tsp mustard seeds

1 tsp cumin seeds

1½ tsp nigella (kalonji) seeds

1 tsp fennel (saunf) seeds

½ tsp fenugreek (methi) seeds

¼ tsp ajwain (carom) seeds

½ tsp turmeric powder

1½ tsp amchur (dry mango) powder or 1 tbsp lemon juice

1 tsp Kashmiri red chili powder

½ tsp sugar

Salt, to taste

2 tbsp chopped fresh coriander leaves


Instructions

1. Roast the whole spices: Heat a dry skillet over medium heat. Add the dried red chilies, coriander seeds, mustard seeds, cumin seeds, nigella, fenugreek, ajwain and fennel seeds. Roast, stirring constantly, until the spices are golden and fragrant (about 2–3 minutes). Be careful not to burn them. Transfer to a bowl and let cool.


2. Grind and season the masala: Grind the cooled spices in a blender or mortar into a coarse powder. Mix in turmeric, amchur (or lemon juice), chili powder, sugar and salt. Set aside 1 tablespoon of this spice mix for later. Add 1–2 tbsp water to the remaining spice powder and stir into a thick paste that will bind well.


3. Stuff the brinjals: Slit each brinjal from top to bottom in a crisscross pattern, keeping the stem intact so it holds together. Gently open the slits and spoon the spiced paste into each eggplant, pressing it in firmly on all sides. Leave any extra paste for the end.


4. Temper the oil: In a wide, heavy-bottomed pan or kadai, heat the mustard oil until it just starts to smoke. Turn off the heat briefly, then reduce to medium-low and add the panch phoron (cumin, fennel, mustard, nigella, fenugreek seed mix). Let it splutter for a few seconds to release its aroma.


5. Pan-fry the stuffed brinjals: Carefully arrange the stuffed brinjals in the pan. Cover with a tight lid and cook on low flame for about 10–12 minutes. Turn the brinjals gently every few minutes so they brown evenly and don’t break apart. The covering steam‑cooks them through. (If the pan gets too dry, splash a little water under the lid to prevent burning.)


6. Finish with the masala: Once the brinjals are nearly tender, sprinkle the reserved 1 tablespoon of spice mix and a little extra salt over them. Gently toss or stir to coat, then cover again and cook 2–3 more minutes. Add the chopped coriander, mix lightly, and remove from heat.


7. Garnish and serve: Transfer the Kalonji Baingan to a serving dish. Garnish with a little more fresh cilantro if you like. This dish is best enjoyed hot, served with steamed rice or warm rotis.


Tips and Serving Suggestions

Choose tender brinjals: Small, firm baby eggplants work best. Slitting them without cutting through the stems ensures they hold the stuffing well. If large brinjals are used, you can score the sides more deeply to help the spices seep in.

Oil and spice: Mustard oil gives an authentic sharp flavor, but any neutral oil will do in a pinch. If you skip panch phoron, add a pinch more ajwain and nigella for complexity. Always cook on medium-low heat and keep the lid on so the brinjals steam and soften evenly.

Don’t crowd the pan: Give each stuffed brinjal space to fry slightly before covering. Overcrowding can make them mushy. A heavy pan distributes heat well and prevents burning.

Serving: Kalonji Baingan shines as part of a North Indian meal. It pairs beautifully with simple dal and warm flatbreads or rice. The tangy, pickle-like spices also go well with plain yogurt or a raita on the side. Leftovers store well; the flavors deepen if you reheat it gently the next day.


This Kalonji Baingan recipe brings a touch of Banaras home, weaving tradition into a humble vegetable. With every tangy, spiced bite of these stuffed baby brinjals, you taste the legacy of a family recipe that’s been lovingly passed down. Enjoy this warm, aromatic dish as part of your everyday feast – it’s sure to become a favorite in your kitchen too.

Lunch & Dinner

Chettinad Chicken Curry (Chettinad Chicken Gravy)

My introduction to Chettinad Chicken Curry happened on a warm evening in Tamil Nadu. I wandered into a local eatery in Chennai, lured by the irresistible aroma of curry leaves crackling in hot oil and spices roasting. One bite of the fiery, coconut-infused gravy was enough to hook me – the chicken was tender, and the masala was bursting with flavor. This recipe, passed down and perfected over time, reminds me of that first taste and the rich culinary heritage of the Chettinad region.

Chettinad Chicken Curry is a beloved dish from Tamil Nadu, known for its bold heat and aromatic gravy. The curry is enriched with a freshly ground spice paste (Chettinad masala) made of whole spices and coconut, giving it a distinctive depth of flavor. Chettinad cuisine is considered one of the spiciest and most aromatic in India, and this chicken curry showcases that reputation with a robust blend of spices like coriander, fennel, star anise, and a unique ingredient called kalpasi (black stone flower). Served in a hearty gravy style, this authentic Chettinad chicken pairs beautifully with rice, dosa, or appam for a comforting South Indian meal.

Ingredients

To Marinate the Chicken

Chicken – 500 g curry-cut pieces (bone-in recommended for more flavor)

Turmeric powder – 1 teaspoon

Salt – 1 teaspoon (or to taste)

Lemon juice – 2 tablespoons (from about 1 lemon)

Ginger-garlic paste – 1 tablespoon (optional, for deeper flavor)


(Marinating the chicken with turmeric, salt, and lemon tenderizes it and layers flavor into the meat.)

To Make the Chettinad Masala Paste (fresh spice blend)

Coriander seeds – 3 tablespoons

Dry red chilies – 5 (use a mix of spicy and mild Kashmiri chilies for heat and color)

Fennel seeds – 1 teaspoon

Cumin seeds – 1 teaspoon

Black peppercorns – 2 teaspoons

Green cardamom – 5 pods

Cloves – 4

Cinnamon – 1-inch stick

Star anise – 1

Black stone flower (kalpasi) – 1–2 pieces (a key Chettinad spice)

Fresh coconut – 1/4 cup, grated (or use unsweetened desiccated coconut)


(This aromatic blend of whole spices and coconut will be dry-roasted and ground to a paste. It is the heart of an authentic Chettinad curry, bringing magical flavor and thickness to the gravy.)

For the Curry

Oil – 3 tablespoons (traditionally gingelly (sesame) oil or coconut oil for authentic flavor)

Onions – 2 large, thinly sliced

Curry leaves – 2 sprigs (fresh if available)

Ginger-garlic paste – 2 tablespoons

Tomatoes – 2 medium, chopped

Turmeric powder – 1/2 teaspoon (for the curry base, in addition to marinade)

Water – ~1 to 1½ cups (as needed for gravy consistency)

Salt – to taste (about 1/2 teaspoon, adjust since chicken was marinated with salt)

Fresh coriander leaves – a handful, chopped (for garnish)


(Onion, tomato, curry leaves, and ginger-garlic form the flavorful base of the gravy, while a bit of turmeric adds color and health benefits. Use coconut oil or sesame oil for an extra layer of authentic aroma.)

Instructions

1. Marinate the Chicken: In a bowl, combine the cleaned chicken pieces with turmeric, salt, lemon juice, and ginger-garlic paste (if using). Rub this marinade into the chicken. Cover and set aside for at least 20–30 minutes while you prepare the masala. *(Marination infuses the meat with flavor and yields juicier chicken.)*


2. Prepare Chettinad Masala: Heat a dry heavy-bottomed pan or kadai on low-medium heat. Add all the whole spices for the masala (coriander seeds, dried red chilies, fennel, cumin, pepper, cardamom, cloves, cinnamon, star anise, kalpasi) except the coconut. Dry roast these spices, stirring frequently, until they become aromatic and lightly golden. Now add the grated coconut to the same pan and roast for another 2 minutes, stirring constantly, until the coconut turns light golden brown. Turn off the heat and transfer the roasted spices and coconut to a plate to cool. Once cool, grind them in a mixer or spice grinder with a few tablespoons of water to make a smooth Chettinad masala paste. *(Roasting on low heat is crucial to avoid burning the spices; you want a deep toasty aroma. The freshly ground paste will have a nutty, spicy fragrance.)*


3. Sauté Onions and Aromatics: Heat the oil in a large pot or deep pan over medium heat. Add the sliced onions and sauté until they turn translucent and light golden brown. This may take about 8–10 minutes; stir regularly so they cook evenly. Tip: Properly browned onions impart sweetness and depth to the gravy.


4. Add Curry Leaves and Ginger-Garlic: Toss in the fresh curry leaves and stir for a few seconds until they crackle and release their aroma. Then add the 2 tablespoons of ginger-garlic paste. Sauté this mixture for 1–2 minutes until the raw smell of ginger and garlic disappears. (Frying these aromatics in oil releases their flavors into the base of the curry.)


5. Cook Chicken: Add the marinated chicken pieces to the pan. Increase the heat to medium-high and sauté the chicken for about 5 minutes, stirring occasionally, until the exterior of the chicken turns opaque and lightly browned. This seals the juices and adds a nice flavor to the meat.


6. Tomatoes and Simmer: Add the chopped tomatoes to the pan and sprinkle in the 1/2 teaspoon of turmeric (if you didn’t use ginger-garlic in the marinade, you could also add a pinch of red chili powder for extra heat at this stage). Cook the tomatoes with the chicken for about 3–5 minutes, stirring often, until the tomatoes break down and become soft. The mixture will start to form a thick base. Pour in about 1 cup of water and stir well, scraping up any browned bits at the bottom of the pan. Bring the curry to a boil, then reduce the heat to low, cover with a lid, and let it simmer. Cook for about 20 minutes (or until the chicken is nearly tender), stirring occasionally. (Simmering gently allows the chicken to cook through and the flavors to meld. Add a bit more water if it starts looking too dry, but remember the masala paste will also thicken the gravy.)


7. Add Chettinad Masala Paste: Once the chicken is cooked and the gravy has reduced slightly, stir in the prepared Chettinad spice-coconut paste. Mix it thoroughly into the curry. If the gravy is very thick, add a splash of water to help blend the paste. Simmer the curry uncovered on low heat for another 10 minutes, stirring occasionally. You will see the gravy deepen in color and aroma, and a bit of oil may begin to surface on top. Tip: Check seasoning at this stage and add salt if needed. The roasted spice paste is what truly defines this Chettinad curry, so let it cook in the gravy for several minutes to infuse the chicken with its rich flavor.


8. Garnish and Serve: Turn off the heat. Sprinkle the chopped fresh coriander leaves over the curry and give it a final stir. Let the Chettinad Chicken Curry rest for 5 minutes before serving – this brief rest helps all the flavors settle. Serve hot and enjoy the explosion of spicy, savory goodness in each bite!


Tips & Tricks

Adjust Spice: Chettinad cuisine is famously spicy, but you can adjust the heat to your liking. Reduce the number of dry red chilies and peppercorns for a milder curry, or add an extra chili for more kick. Remember, you can also swap in Kashmiri red chilies for a vibrant red color with less heat.

Chicken Cut: You can use any cut of chicken, but curry-cut pieces with bone (like drumsticks, thighs, etc.) yield the best flavor in the gravy. The bones release juices that enrich the sauce. If using boneless chicken, opt for thighs over breast meat to avoid drying out during the simmer.

Fresh Ingredients: Wherever possible, use fresh ingredients – especially the curry leaves, ginger, garlic, and coconut. Fresh curry leaves and coconut give an authentic aroma and texture that really make a difference. If fresh coconut isn’t available, use unsweetened desiccated coconut, but do include it because it thickens the gravy and adds a subtle sweetness.

Cooking Vessel: If you don’t have a heavy pan or if you’re in a hurry, this curry can be made in a pressure cooker or Instant Pot (see Variations below). However, using a traditional pot and slow simmer allows greater control to develop the flavors and avoid overcooking the spices.


Variations

Chettinad Chicken Dry (Masala Fry): For a drier version of Chettinad chicken (often called Chicken Chettinad Varuval or Pepper Chicken), skip the extra water and cook the dish until the liquid evaporates and clings to the chicken. In this style, the masala becomes a thick coating on the chicken pieces rather than a pourable gravy. You can increase the black pepper and fennel for a sharper flavor, as Chettinad pepper chicken is a popular dry preparation. This makes an excellent appetizer or side dish – just be sure to stir frequently towards the end to prevent sticking or burning as the masala reduces.

Pressure Cooker Method: To speed things up, follow the recipe through step 4 (sautéing onions, curry leaves, ginger-garlic). After adding the marinated chicken and tomatoes, pour in only about 1/2 cup of water. Lock the pressure cooker lid and cook for about 2 whistles on medium heat (approximately 8–10 minutes). Allow the pressure to release naturally. Open the cooker, then stir in the ground Chettinad masala paste. Simmer the curry without the lid for 5–10 minutes to thicken the gravy and finish cooking the spices. (In an Instant Pot, use Pressure Cook on high for ~10 minutes, then natural release, and then sauté mode to simmer the masala paste.) The result is a quick yet authentic Chettinad chicken gravy with the same depth of flavor.


Serving Suggestions

Chettinad Chicken Curry is best enjoyed piping hot. It tastes wonderful with steamed rice – the gravy soaks into the rice, making each bite flavorful. For a special South Indian spread, serve it with soft dosas, fluffy appams (rice hoppers), or idlis. The curry’s spiciness also pairs well with plain biryani or ghee rice (buttery rice). If you prefer breads, try it with warm naan or chapati – they will scoop up the gravy nicely. On the side, include a cooling raita (yogurt dip) or simple cucumber salad to balance the heat. And don’t forget some fresh sliced onions and lemon wedges for an authentic touch – a squeeze of lemon and bite of onion can really elevate the enjoyment of this spicy, rich Chettinad chicken gravy.

Enjoy this Chettinad Chicken Curry with family and friends, and savor the warm, fiery flavors of Tamil Nadu in every mouthful. Happy cooking! 😋

Lunch & Dinner

Bharwa Shimla Mirch (Stuffed Capsicum with Spiced Potatoes)

Growing up, the tantalizing aroma of Bharwa Shimla Mirch roasting in my mother’s kitchen was enough to draw everyone to the table. There’s something magical about the smell of bell peppers (capsicums) charring slightly on a pan, filled with a warmly spiced potato mixture. This dish takes me back to cozy family dinners on rainy evenings, when a platter of these stuffed peppers and hot rotis made the perfect comfort food.

Bharwa Shimla Mirch (North Indian stuffed capsicum) loaded with spiced potato filling, roasted to perfection. Pictured above is a batch I made recently – tender green capsicums generously filled with masala aloo (spiced potatoes) and lightly charred on the edges for extra flavor. Bharwa means “stuffed,” and Shimla Mirch means “capsicum,” so the name literally translates to stuffed capsicum. This colorful dish is as appealing to the eyes as it is to the taste buds, bursting with the aroma of roasted spices and fresh herbs.

For me, Bharwa Shimla Mirch isn’t just about the taste – it’s about nostalgia and home-style cooking. It’s a dry sabzi (vegetable dish) that packs a punch of flavor without needing heavy gravy. Each pepper is like a little package of comfort: the natural sweetness of roasted bell pepper, the savory spiced potato filling, and the hit of cilantro and garam masala in every bite. Let’s dive into how to make this simple yet delightful North Indian classic at home!

Ingredients

4 medium green capsicums (bell peppers) – try to use equal-sized peppers for even cooking

3 medium potatoes (about 250 g total), boiled, peeled, and lightly mashed

2 tablespoons oil (vegetable or mustard oil for authentic flavor)

1 teaspoon cumin seeds (jeera)

1 medium onion, finely chopped (optional, for filling)

1 teaspoon ginger-garlic paste (or 1-inch ginger & 3 garlic cloves, minced)

1–2 green chilies, finely chopped (adjust to taste)

Spice powders: ½ teaspoon turmeric powder, 1 teaspoon coriander powder, ½ teaspoon cumin powder, 1 teaspoon red chili powder (adjust to taste)

½ teaspoon garam masala (Indian spice blend)

½ teaspoon amchur (dry mango powder) – for tang (or use 1 tablespoon lemon juice)

Salt, to taste

2 tablespoons fresh coriander leaves (cilantro), chopped (to mix in and for garnish)

(Optional) ¼ cup boiled green peas – to mix into the potato filling for extra texture and nutrition


Step-by-Step Instructions

1. Prep the Bell Peppers: Wash the capsicums and pat them dry. Slice off the top “lid” of each pepper (the stem end) and scoop out the seeds and membranes inside to hollow them out. Pro Tip: If a pepper doesn’t sit flat, slice a thin bit off the bottom (without cutting a hole) to help it stand upright while cooking, so the stuffing won’t spill out.


2. Make the Potato Filling: Heat 2 tablespoons of oil in a pan on medium heat. Add the cumin seeds and let them sizzle for a few seconds until fragrant. Next, add the chopped onion (if using) and sauté until it turns golden brown. Stir in the ginger-garlic paste and green chilies, cooking for another minute until the raw smell disappears. Now add the boiled potatoes, crumbling them into the pan. Mix well and toss in all the spice powders: turmeric, coriander, cumin, red chili, and garam masala. Add the amchur (if using lemon juice instead, add it at the end) and salt. Cook this potato masala for about 3–4 minutes, stirring so that the spices cook through and the mixture is fairly dry. Finally, turn off the heat and mix in the chopped fresh coriander leaves. Pro Tip: Taste the potato mixture and adjust salt or chili to your liking – the filling should be well-seasoned on its own, since the capsicum will be unseasoned.


3. Stuff the Peppers:  Take each hollowed capsicum and spoon the warm potato filling into it. Press down gently to fill the pepper completely. You can fill them to the top (even form a little mound) as the filling will settle a bit on cooking. If you kept the tops, place the cap of each pepper back on like a lid (this is optional, purely for presentation). Pro Tip: Don’t press the filling in too tightly; a loosely packed filling allows heat to penetrate evenly and prevents the pepper from splitting during cooking.


4. Cook the Stuffed Capsicums (Stovetop Method): Heat 1–2 more tablespoons of oil in a wide pan or skillet over low heat. Gently place the stuffed capsicums in the pan in a single layer. Cover the pan with a lid and let them cook on low flame for about 10–15 minutes. Every few minutes, uncover and carefully turn each pepper a quarter turn, then cover again. This helps all sides get lightly browned and the pepper cooks evenly. Continue slow-roasting until the capsicums are tender (you can poke with a knife to check – it should glide in easily) and the skins are a bit blistered/charred. Pro Tip: Keep the heat low – the goal is to slowly soften the peppers. If you notice the peppers are charring too quickly or sticking, sprinkle a few drops of water in the pan and cover; the steam will help cook them gently. (For oven or air-fryer methods, see Variations below.)


5. Serve and Enjoy: Once cooked, turn off the heat and let the stuffed peppers rest for 5 minutes. To serve, gently lift them out with a spatula (be careful, they are delicate) and place on a serving dish. You can serve the capsicums whole or cut in half. Enjoy Bharwa Shimla Mirch hot with your favorite Indian flatbread or as a side with a larger meal. Squeezing a little fresh lemon juice on top right before eating really brings out the flavors of the spices and peppers!


Variations

Paneer Stuffing: For a protein boost and a slightly richer filling, replace half (or all) of the boiled potato with paneer (Indian cottage cheese). Simply crumble the paneer and mix it with the same spices (you can follow the filling steps above, adding paneer in with or instead of potato). Paneer gives a lovely soft texture and mild flavor that pairs well with capsicum. You can even add some peas or grated carrot into a paneer stuffing for extra variety. Stuff and cook the peppers the same way. This paneer bharwa shimla mirch turns out delicious and creamy inside.

Besan Masala Stuffing (Rajasthani Style): Another popular variation is a gram flour (besan) based stuffing, which is especially common in Rajasthan. Instead of potatoes, you make a spiced besan filling that has a unique nutty taste. Dry roast about ½ cup besan in a pan until it turns aromatic and light golden. In a bit of oil, crackle 1 teaspoon cumin seeds (and optionally a pinch of fennel seeds), then add the roasted besan along with turmeric, red chili powder, salt, and a pinch of sugar. Squeeze a little lemon or add a pinch of amchur for tang, and cook this mixture for a couple of minutes. It will be a dry, crumbly stuffing. Fill this into the prepared capsicums and cook on low heat (or bake) as usual. The result is a besan-stuffed shimla mirch with a nutty, spiced filling – a great gluten-free alternative to the potato stuffing.

Air-Fryer or Baked Version: Want to skip babysitting the stove? You can bake or air-fry the stuffed capsicum too! For baking, preheat your oven to about 180°C (350°F). Brush the stuffed peppers lightly with oil and place them upright in a baking dish or on a tray. Bake for roughly 20–25 minutes until the peppers are cooked and slightly charred on top. For an air-fryer, preheat to 180°C and arrange the stuffed peppers in the basket (you may need to cook in batches). Air-fry for about 12–15 minutes, turning them once halfway through, until they are tender and starting to brown. The advantage of these methods is convenience – no need to turn them frequently – and you might get a slightly more roasted flavor. Pro Tip: In the oven, if the peppers start drying out, you can cover them loosely with foil for the first half of the bake, then remove it to let them brown in the second half.


Serving Suggestions

With Roti or Paratha: Bharwa Shimla Mirch is traditionally enjoyed with Indian breads. Serve these stuffed capsicums with warm rotis, chapatis or parathas. Tear a piece of bread and scoop up some of the spiced potato filling and tender pepper – it’s a perfect bite! A little mango pickle on the side wouldn’t hurt either for a tangy kick.

Alongside Dal & Rice: Make it a complete North Indian meal by pairing the stuffed capsicum with a comforting dal and rice. For example, serve them with dal tadka (tempered lentils) and steamed basmati or jeera rice. The mellow, spiced flavors of the potato stuffing complement the dal, and the capsicum adds a nice veggie component to the plate.

With Other Curries: You can also serve these as a side alongside rich curries like chole (spiced chickpeas), rajma (kidney bean curry), or a paneer gravy. The dry nature of Bharwa Shimla Mirch balances well with saucy dishes and adds variety to your menu.

As a Party Appetizer: If you can find smaller bell peppers or baby capsicums, you can stuff those and turn this recipe into a fun appetizer or party snack. Mini stuffed peppers look cute and are easy to handle as finger food. Just reduce the cooking time a bit since they’ll cook faster than big ones.

Accompaniments: A spoon of cool yogurt raita on the side can be a great accompaniment, as it complements the spices and also cools the palate. You might try a cucumber raita or mint yogurt. Additionally, a fresh salad or simply some onion rings and lemon wedges go well on the side – a squeeze of lemon on the hot stuffed pepper just before eating livens up all the flavors!


Enjoy the colorful, flavorful goodness of Bharwa Shimla Mirch! This home-style stuffed capsicum recipe is sure to bring a touch of North Indian comfort to your kitchen. Happy cooking and happy eating!